Archway MESS - Please Help Me!

Joined
6 May 2006
Messages
463
Reaction score
7
Country
United Kingdom
Hi chaps,

I've got a right job to tackle here and could really do with some expert advice on where to start and finish.

WARNING: THE IMAGES YOU ARE ABOUT TO VIEW ARE NOT FOR THE FAINT-HEARTED!!
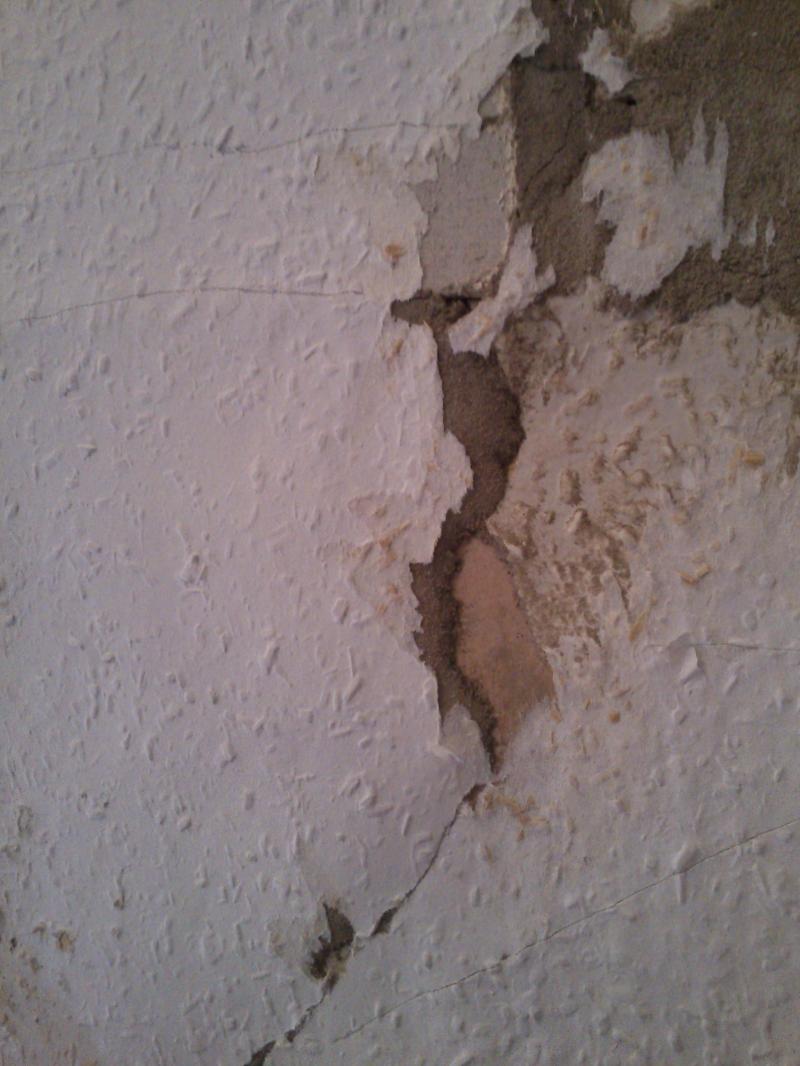
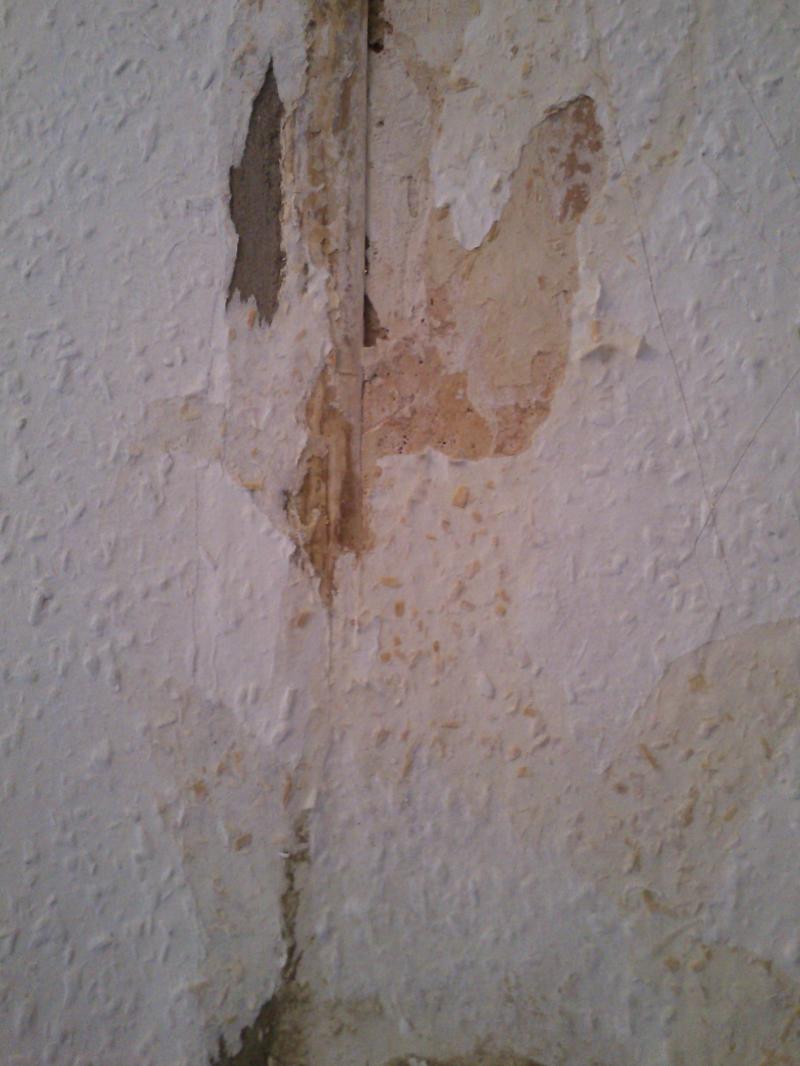

Some close-ups:

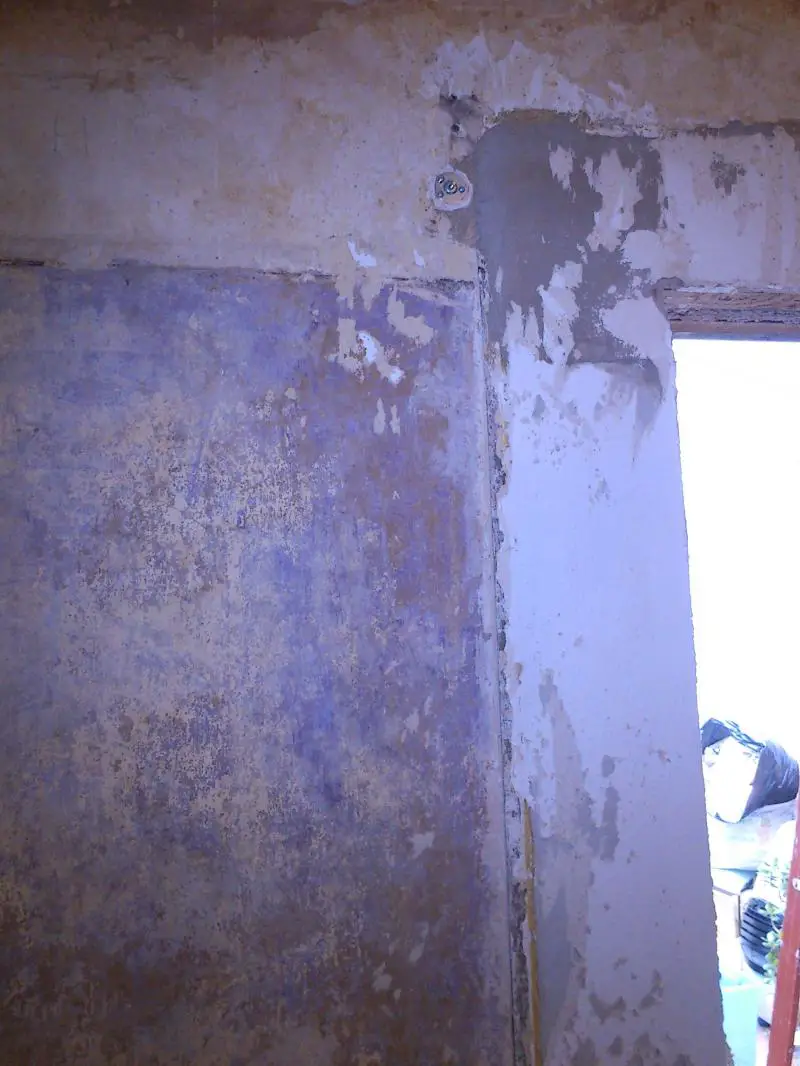
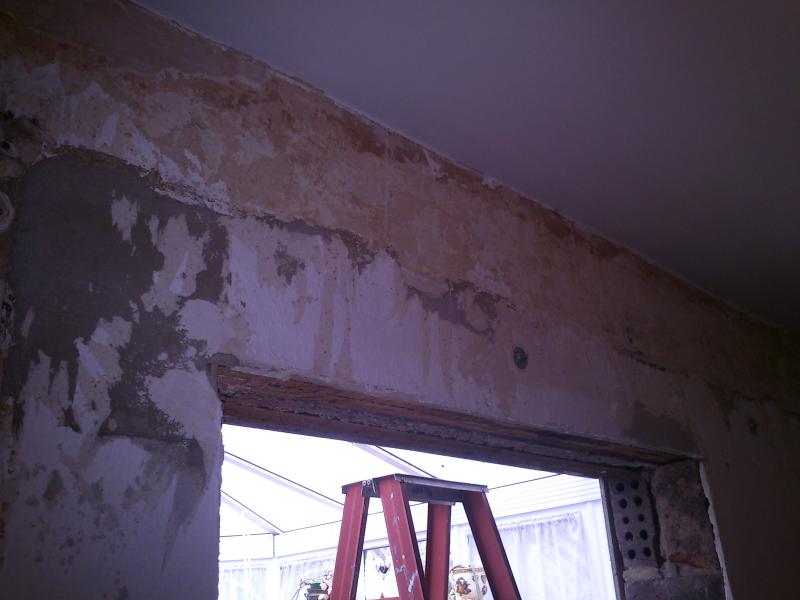
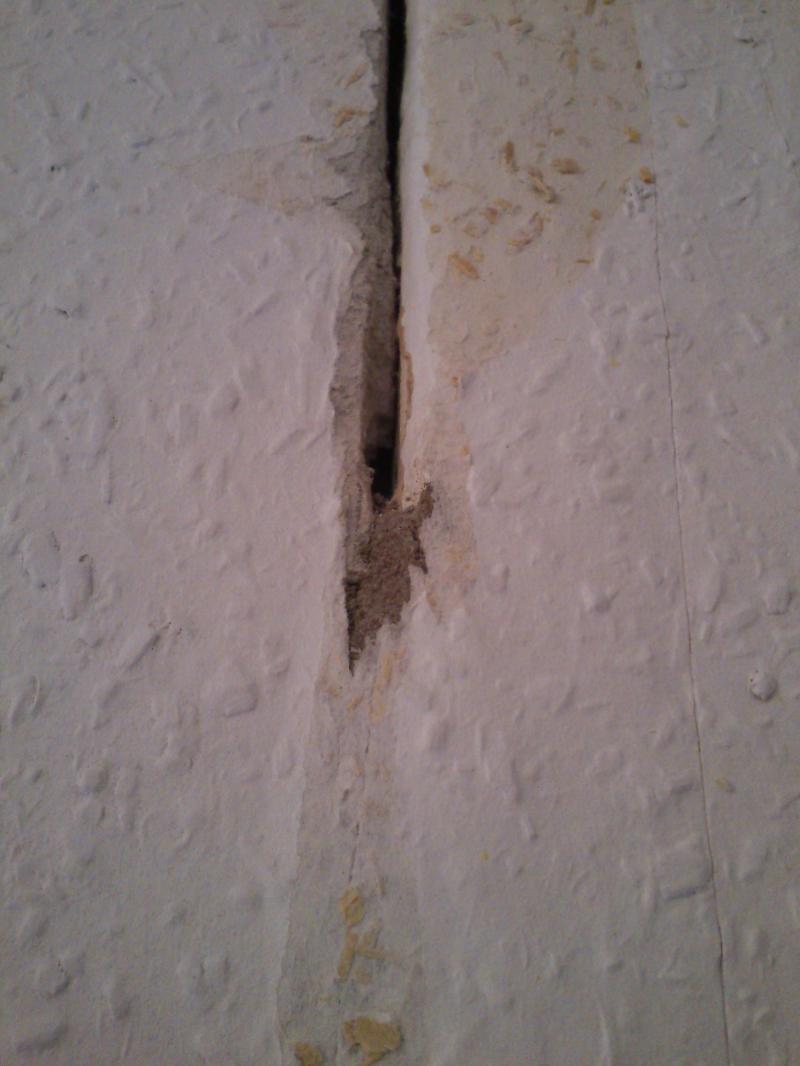
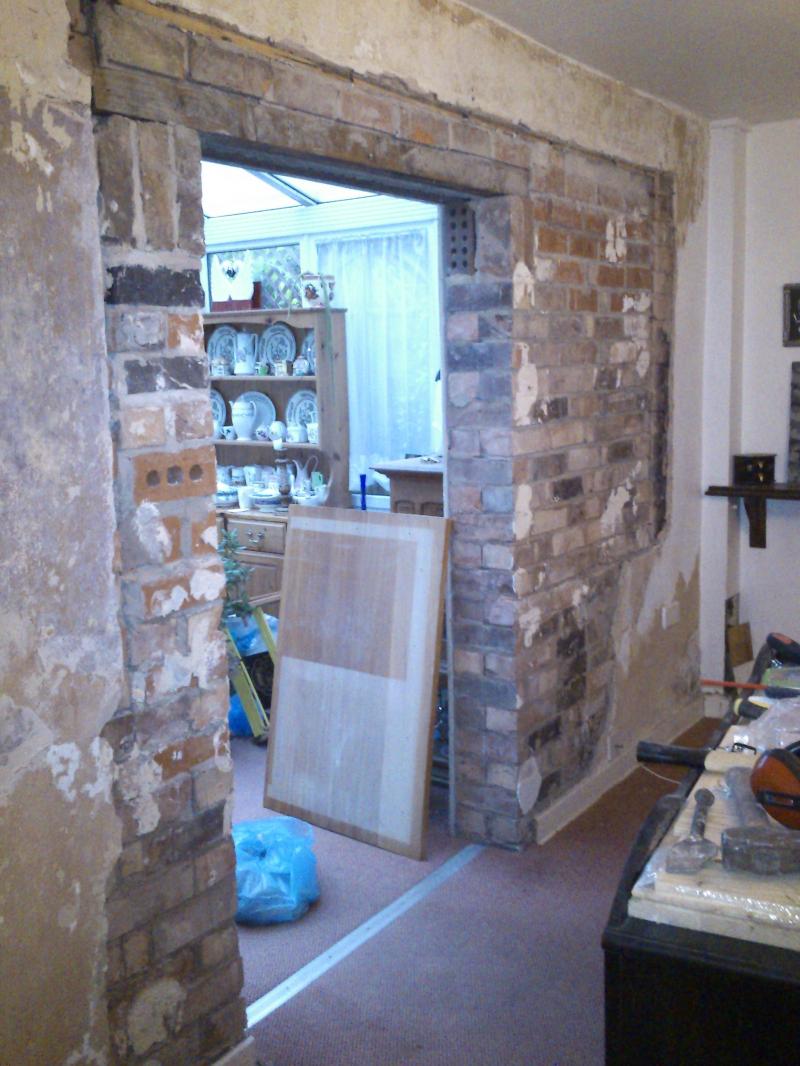
This was done about 13 years ago. Basically, our old brickie buddy removed the window so we could have a doorway running through to our new conservatory. I can no longer live with the mess he made. All the mistakes were showing through the wallapaper - splodges of cement where he'd sealed the gap between original plaster and his uneven plasterboard. Some gaps were just left as gaping. He's even left in the old wooden corner beads from near where the original window was!

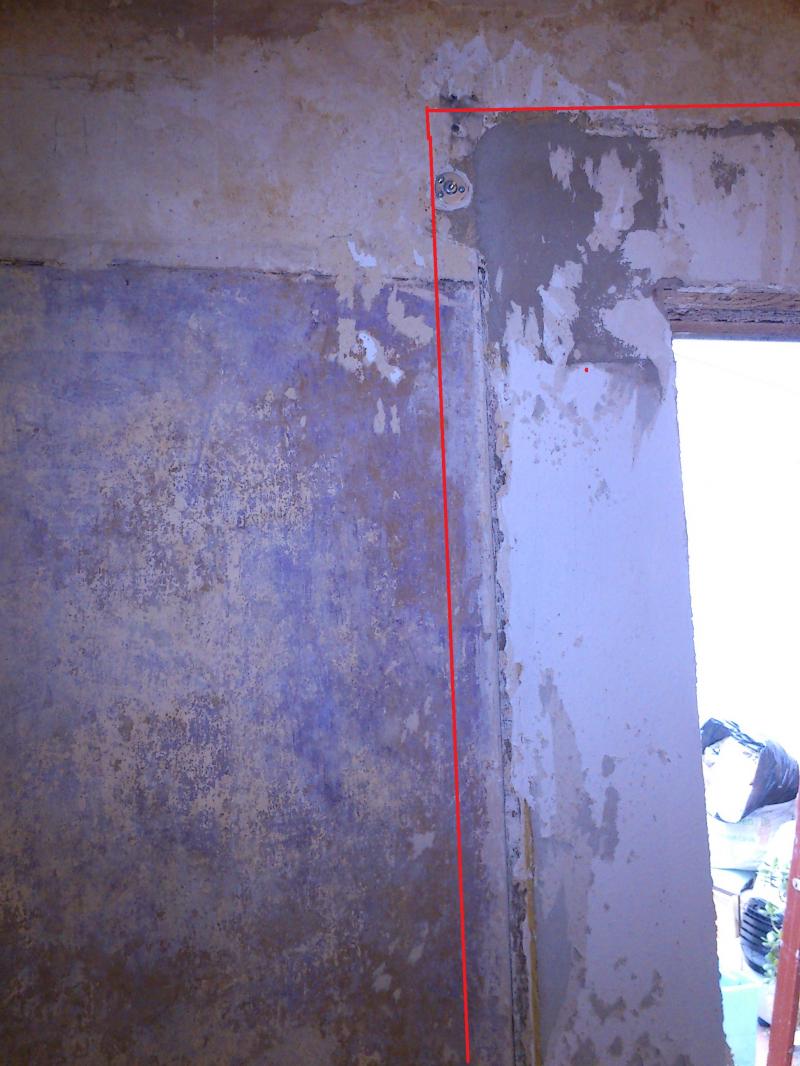
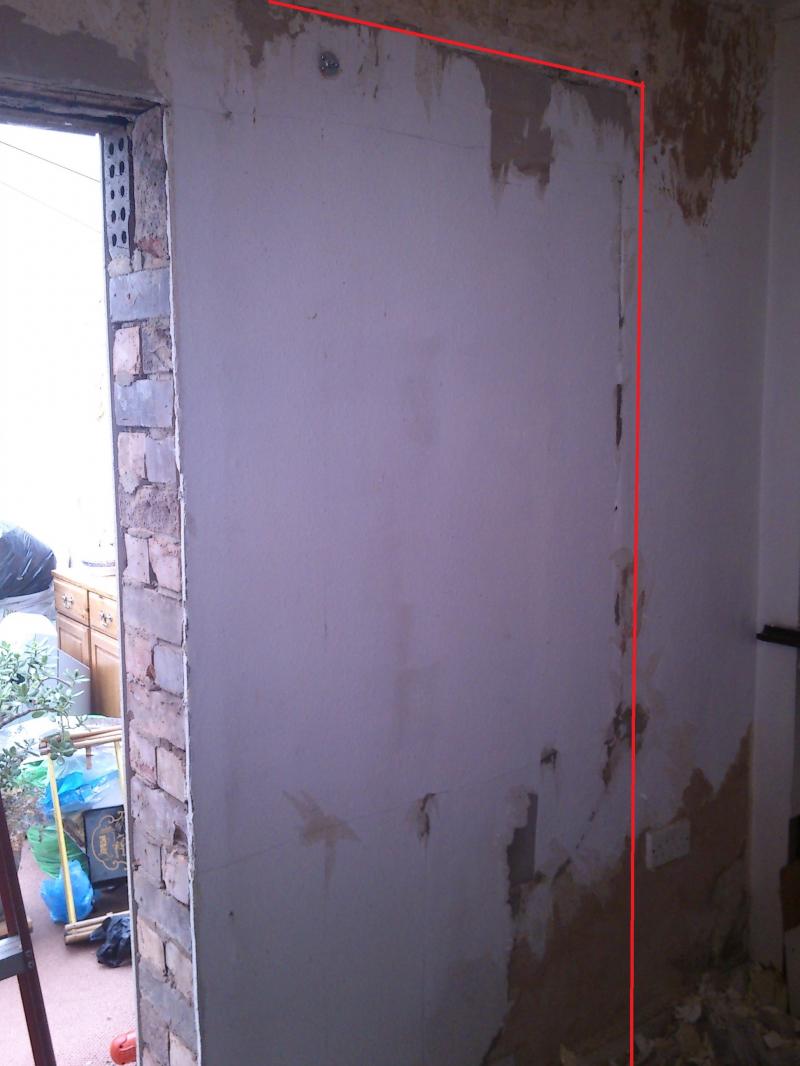
I intend to cut around where he's patched around the archway to expose the brickwork (Like so in red):


Do I then have to set corner beads? I want a nice solid wall so is ok to go for the plastered approach (render coat, then two skim coats if that's right)? I don't really want that hollow sound which you get with plasterboard so I prefer to avoid using it.
I assume that once I'm down to the brick, I set the angle beads at the corners of the brickwork allowing for the thickness of the new plaster? Can someone please give me a simple, yet concise step by step approach?
I do have some plastering experience and funnily enough I've done exactly the same sort of work before, but can't really remember how I did it. I don't remember it being too difficult though.
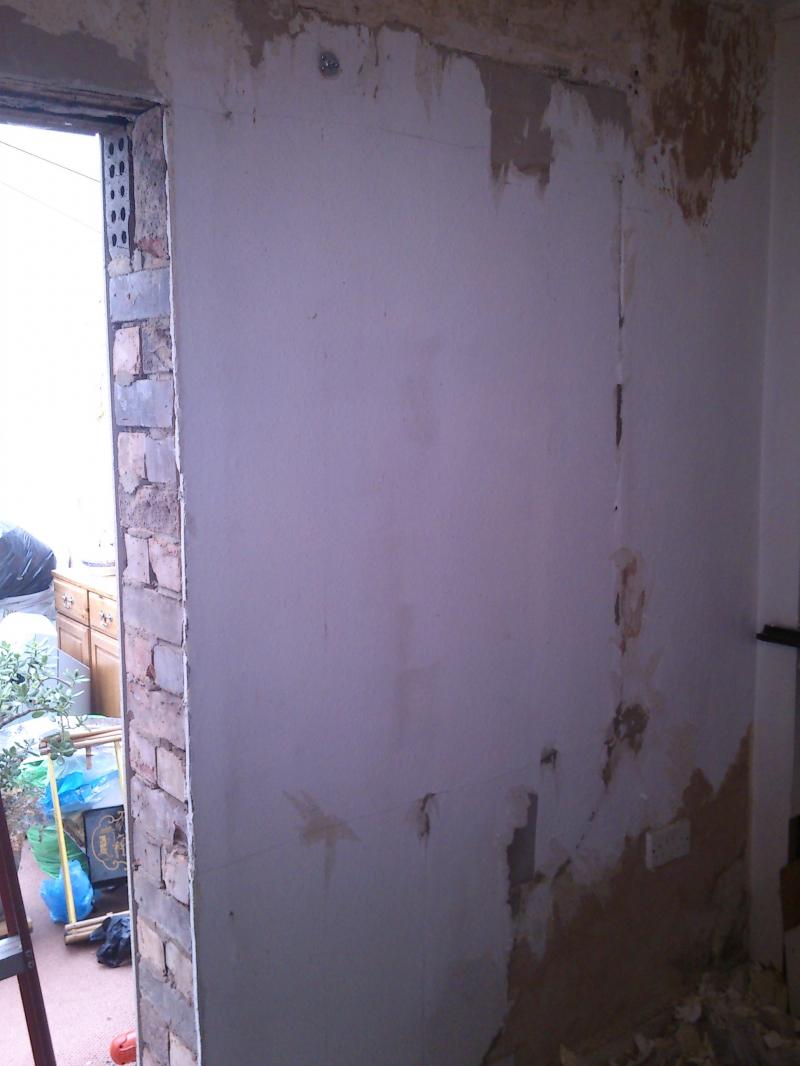
The plaster has to go round the corner to the other room, but only up to where I will install the new door frame. Yes I had to remove his old 'doorframe' too which was constructed with flimsy thin planks!!
The problem I'm going to have is when i come to plastering the wooden lintel, plaster won't stick to wood so how do I prepare that surface so that I can plaster over it? Mesh? Nails?
Final surface will be wallpapered so it doesn't have to be super smooth, just as long as it's flat and level I'm happy.

By the way the same guy did the conservatory :mrgreen: I highly recommend him!!

Thank you!
 
Sponsored Links
Do you mean just to remove the plaster in the red area, or extend the opening?

What is supporting it across the opening at the moment ?
 
Hi, yes I'm removing plaster today around opening. I'm not extending opening but I will be plastering around the corner. The opening is supported by timber lintel. After I remove the plaster around the opening, I assume I set 3 angle beads around the opening (at corners of brickwork) but I'm unsure of what depth the beads just be at. What plaster do I use for this? Bonding and 2 coats of finishing? If so what depths for each? I need to know before I place my order. How do I get bonding level with the original plaster? Feather edge? I will upload more pics tonight.
 
The problem I'm going to have is when i come to plastering the wooden lintel, plaster won't stick to wood so how do I prepare that surface so that I can plaster over it? Mesh? Nails?
!
if this was me doing that job i would take the lot off then cover the top of the archway "which is wood" and the 2 sides with plasterboard screwing the plasterboard into the wooden lintel and then dot and dabbing the 2 sides leaving about 11mm edge so i can float off and float the rest of the walls in with hardwall bead the archway up and skim, only the inside of the arch will be plasterboard and is the best way to cover the wood the rest of the walls will be solid
 
Sponsored Links

Got a bit more confidence in what I'm doing now that the old plaster is off.
Only thing I'm not sure of is how to apply the bonding (hardwall) coat. Do I have to use a straight edge/ feather edge to get it level with the beads and original plaster or do I do it by eye? Do I have to scrape back the bonding at the beads to allow for the finish coats?

If all goes well, maybe I can post my results and a step by step in pictures of what I did incase anyone else has to undertake such a project.

If all doesn't go well, this thread will end up in the DIY Disasters forum section!
 
whats the thickness of the strip of render running along the top?

Hi Steve, it seems to be consistently 10mm, but the bricks below are rather uneven in parts so that means the bonding coat is going to be 20mm, but that will ok right? I recall that bonding can be used at such thicknesses.
I'm still not sure whether I use the feather edge?
 
yes use a feather edge or it wont be straight ,now you uncovered the wooden lintel from the side i would still use my method i would cut the plasterboard so its flush with the render and then on the side of the wood lintel i would put eml over it b4 i float,make sure your feather edge is long enough to reach the plaster on the wall and rule off, what are u going to do use board or bead? if beading use eml but thats not what i would do
 
yes use a feather edge or it wont be straight ,now you uncovered the wooden lintel from the side i would still use my method i would cut the plasterboard so its flush with the render and then on the side of the wood lintel i would put eml over it b4 i float,make sure your feather edge is long enough to reach the plaster on the wall and rule off, what are u going to do use board or bead? if beading use eml but thats not what i would do
just incase u have trouble understanding my method ill try to simplify it best way to do that wood lintel in my opinion is to cover it with board around the face "make sure board is level with plaster" and put a strip of eml on the side of the lintel to cover the side and then float

Yeah I know what you mean, but I don't know exactly what you mean if you know what I mean :mrgreen: Let me read it again
 
Yeah I know what you mean, but I don't know exactly what you mean if you know what I mean :mrgreen: Let me read it again
cut the plasterboard the width of the bricks + the thickness of the strip of render at the top now screw it to underside of the lintel now cut 2 matching strips of board and dot and dab them to right and left hand side now u have a frame to float off but b4 u do run a strip of eml along the side of the wood lintel to minimize cracking then float in

Ok I'll likely ditch the EML for screws. It will be less costly than EML. EML is like a fiver a meter.

Ah and then add the angles beads on surface of the bonding coat in prep for my skims?
 
That fiver would buy me the corner beads! But for this job, we're going to do it properly this time. I'll buy the EML then ;).

Many many thanks for the help and I'll post the results in this same thread when I've finished (probably will be in 6 months lol)
 

DIYnot Local

Staff member

If you need to find a tradesperson to get your job done, please try our local search below, or if you are doing it yourself you can find suppliers local to you.

Select the supplier or trade you require, enter your location to begin your search.


Are you a trade or supplier? You can create your listing free at DIYnot Local

 
Sponsored Links
Back
Top