If you need to bend timber soaking simply doesn't work unless it is thin material which will end up being heavily fixed in place, e.g. curved skirting which gets nailed or screwed to a wall. In order to bend thicker wood the species must be suitable - which means specific hardwoods such as beech as softwood doesn't steam bend. What the steaming does is to plasticise the ligninin the wood allowing it to be bent - providing you have an appropriate steam bending rig which requires a steel strap. And even then you need to deal with spring back (where in order to get a required radius a bending rig of a slightly tighter radius is required) and there is no guarantee that the wood fibres will fail (even in firms which are experts at steam bending, such as Ercol, have a percentage of failures). So unless you are a really keen woodworker and don't mind getting the odd blister or scald (really) it's maybe best left alone.
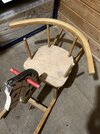
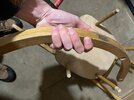
Lamination, on the other hand is somewhat easier, but still requires tools. You start by building an accurate female form from something like stacked layers of MDF. The face of the form is coated with a release agent, such as wax and a layer of material is wrapped round it and the visible face of the material is liberally coated in glue before another layer is planted on top and thectwo pieces are clamped together. Clamping starts from the middle and extends to the outer ends with a G-clamp or F-clamp every few inches, pulled up tightly. Once the glue has set another layer is added, then another which is left to cure, and then another, and so on. This requires a LOT of clamps and can take a few days (I've made laminated hardwood lippings for curved NHS reception desks this way using 2mm thick rips of oak which were produced on a bandsaw and then surface sanded). Finally, once you have a laminated piece, the ends will need to be trimmed with a mitre saw or the like (the ends will be a bit ropey - so the piece has to be made oversize then trimmed back).
If you are looking for material to laminate with, some veneer merchants carry thick veneer specially for the purpose. Also, for a DIY job, providing a painted finish is acceptable, you might want to consider bendy plywood (although that does require a LOT of glue)