Cladding with Redland vertical tiles

Joined
6 Aug 2009
Messages
387
Reaction score
26
Location
Warwickshire
Country
United Kingdom
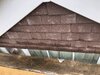
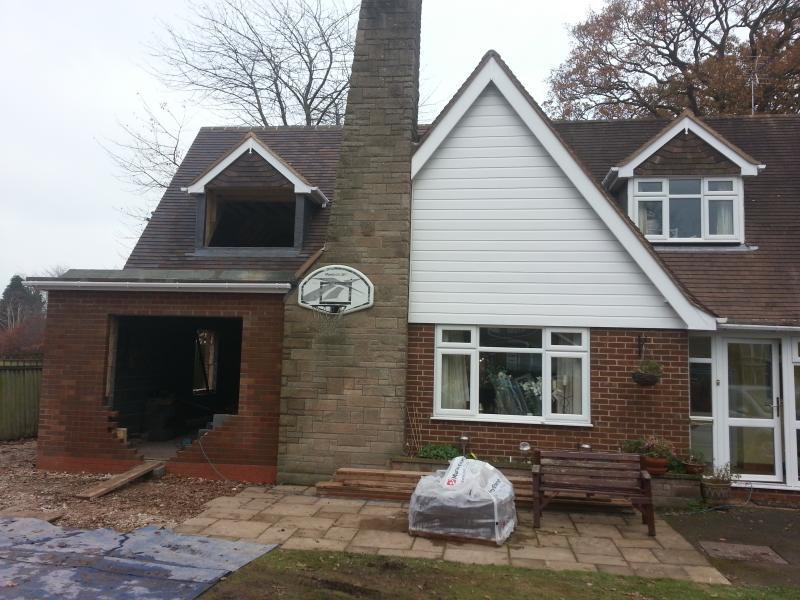
I recently had some cladding work done on the pitched roofs on my house using Brown Redland vertical tiles. As soon as they were installed I noticed unsightly marks on many of the tiles. I assumed that this was just dust until I washed them down with water and found that the surfaces of many of the tiles were in fact marked and scratched.....

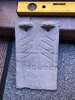
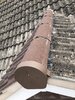
I brought this to the attention of the builder. His response was " I know - They always arrive from like that because Redland don't pack them properly and the ridge on the underside of one tile moves and damages the surface of the tile packed underneath it ". Is this true ? Surely Redland could put some packing between tiles to prevent this kind of damage ? I'm really fed up that my very expensive new cladding looks like this - Not acceptable. Photo below is a typical example.

Not sure if this surface damage will become less obvious with a bit of weathering or not.... The darker colour on the bottom tiles is just because they hadn't dried off yet after my attempt at washing the tiles with water...
 
Last edited:
Sponsored Links
Photo:
 

Attachments

  • IMG_5991.JPG
    IMG_5991.JPG
    481.6 KB · Views: 267
Had the same tiles here and I didn't notice any damage. Whats going on with the top right tile?
 
Had the same tiles here and I didn't notice any damage. Whats going on with the top right tile?

I hadn't really looked too closely at that until you mentioned it.... It looks very much to me like someone has fitted a vertical tile sideways. :(
 
Last edited:
Sponsored Links
I was more wondering why it hangs lower.

I'm not a roofer, but I think that's a trick to avoid slithers and is fine. Some of the other tiles are cut I guess to again avoid slithers which makes the bond pattern a bit off.
 
no there is not packing between these tiles ever apart from ridge.
the scuffs are common and fade
ref cuts its to keep the bond but in this case he lost it.
looks like tile and half used fr the rake cuts. thats fine

Redland produce good tiles
 
no there is not packing between these tiles ever apart from ridge.
the scuffs are common and fade
ref cuts its to keep the bond but in this case he lost it.
looks like tile and half used fr the rake cuts. thats fine

Redland produce good tiles

Thanks very much for your reply Datarebal - I feel a bit better about this now. I had thought that the scuffs would become a lot less noticeable once the tiles get a bit of weathering.

What concerns me about the top tiles is how he's supported them : I know that if they're hung as normal "downwards" the ridge on the tile sits above a lathe and you also have two screws through the tiles to secure them. I hope that he hasn't just cantilevered the tiles that are "on their sides" off two screws at the side....
 
We always finish our gable tile hanging with the Winchester cut....

Thanks for the post Noseall - Dormers looks good. I'm not a big fan of the uPVC shiplap, but that's personal preference I suppose.

What is that tile cladding on the dormers called ? I saw similar on a house near mine and told my builder that was what I wanted but he couldn't identify what the tiles were - So I've ended up with 02 Brown concrete vertical tiles at great expense ! I think what I have will look fine once it weathers in a bit.

I was also given a crash course in the new requirements of BS5534 and was told that on the new sections of roof I had to have a dry ridge system whether I liked it or not...
 
Last edited:
the tiles you refer to are tile and half. wider than a standard tile by half a tile.

Winchester cut is the norm , but not when the actual roof pitch is low

you can mortar bed but need to mechanically fix too. Even then there are times where its ok not to
 
the tiles you refer to are tile and half. wider than a standard tile by half a tile.

Winchester cut is the norm , but not when the actual roof pitch is low

you can mortar bed but need to mechanically fix too. Even then there are times where its ok not to

Thanks Datarebel. I understand now - I thought that all the tiles were 160mm wide. I think the other tiled gables that I looked at in my area had Winchester cut construction - Not sure what kind of vertical tiles they used, they look thinner than my Redland tiles.

I had to decide between dry ridge end caps or mortar sealing on the ends of the dry ridges. I think mortar might have looked better, but I went with end caps to maintain the integrity of the dry ridge system as much as possible. The end caps are really just to stop wind from getting under the end ridge tile. Apart from the dry ridge fitting at one end the end ridge tile is also bedded in mortar for security.
 

Attachments

  • IMG_5992.JPG
    IMG_5992.JPG
    578.5 KB · Views: 228
Last edited:
the plastic cap is used to finish plastic dry verge . I would have bedded the last ridge pointed it and screw fixed as is looks weak.
I note the ridge at the valley end is bedded and does not appear screwed.
 
the plastic cap is used to finish plastic dry verge . I would have bedded the last ridge pointed it and screw fixed as is looks weak.
I note the ridge at the valley end is bedded and does not appear screwed.

Thanks for your post. I'm told that the plastic cap is the correct end fitting for the dry ridge system. Internally it has a spigot that the end of the ridge board slots into and the cap thereby holds the end of the tile down as well as stopping the wind from getting under the tile. I'm also told that if I wanted to put mortar in place of the cap then the ridge board would need to be shortened. I will see how it goes in service, but I'm assured that the last ridge tile is very secure. I agree that the ridge tile at the valley end is bedded (not sure what else you could do where tile end meets the valley to be honest). They could have drilled the tile and put a screw through as well as bedding it, but it's a very short tile so hopefully the mortar bedding will be enough.
 
Last edited:

DIYnot Local

Staff member

If you need to find a tradesperson to get your job done, please try our local search below, or if you are doing it yourself you can find suppliers local to you.

Select the supplier or trade you require, enter your location to begin your search.


Are you a trade or supplier? You can create your listing free at DIYnot Local

 
Sponsored Links
Back
Top