Double light swich being replaced with a double dimmer.

Joined
10 Oct 2014
Messages
236
Reaction score
3
Location
Liverpool
Country
United Kingdom
HELP !

I'm no spark, and I'm changing all my sockets, and switches in the living room, which seems simple enough.

But I have a double light switch which operates the two ceiling lights, I want to change this to a dimmer.

I have opened up and looed at the wiring and I'm baffled! There is another switch on the other side of the room which also operates one of the ceiling lights.

Can you help ! I've attached Pictures.. please try and speak in layman terms ! ha ha..

Thanks in advance !
 
Sponsored Links
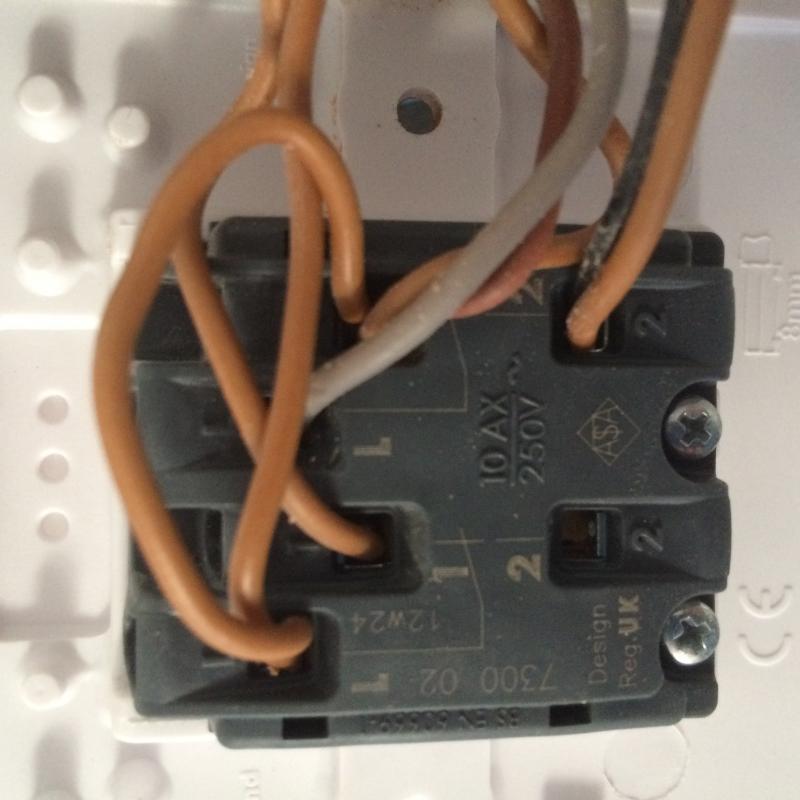
If you simply transfer the conductors to the new switch:

L -> C
1 -> L1
2 -> L2

then it will work as it currently does.

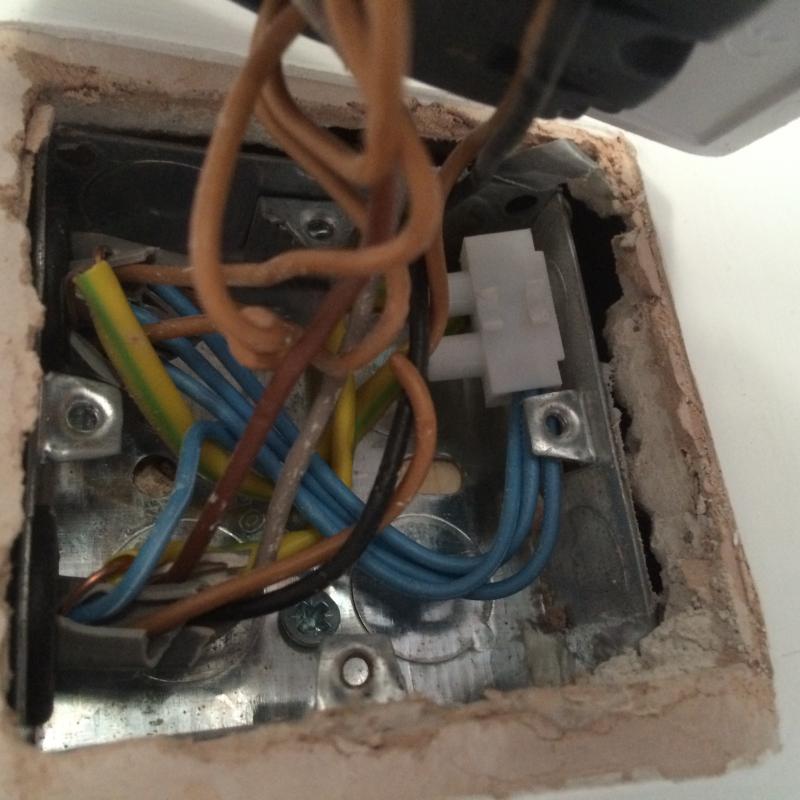
It is very important that you label the conductors before you remove them - if you lose track of what goes where you will be in a world of pain from which will take a lot of effort to extricate yourself.

For now I would strongly advise putting the switch back and spending a bit of time learning how lighting circuits work before trying to fiddle with them. That will give you the comfort and confidence that you understand what's going on. Trying to do it by putting-this-wire-in-that-hole without actually understanding why is a bad idea.

//www.diynot.com/wiki/electrics:lighting

Unfortunately the articles there are a bit lacking in drawings of loop-at-the-switch layouts, but once you know how that works in general, the 2-way drawings will make sense, even if they don't show the loop.

A few points.

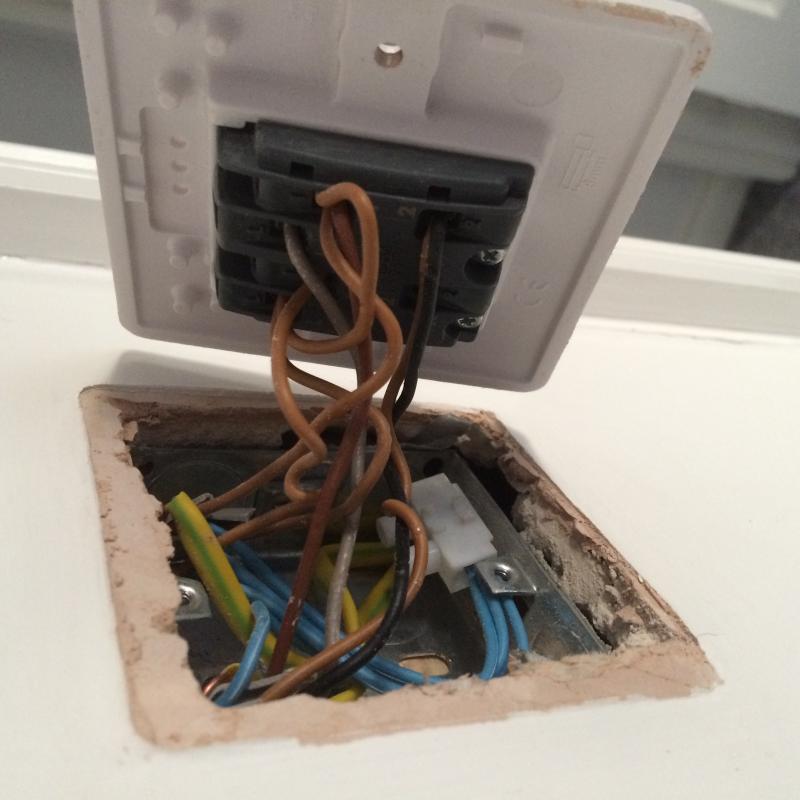
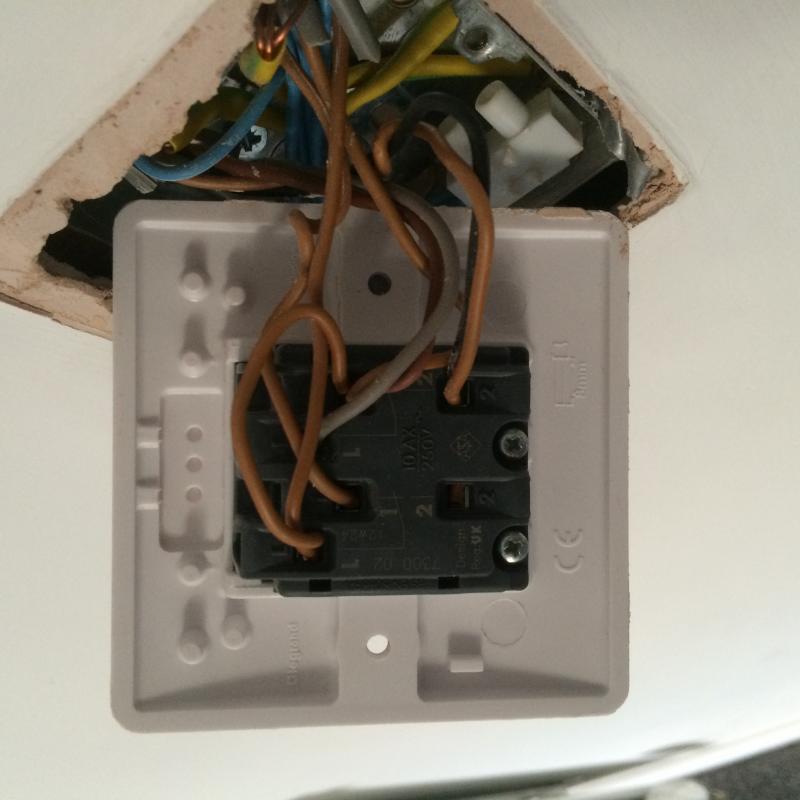
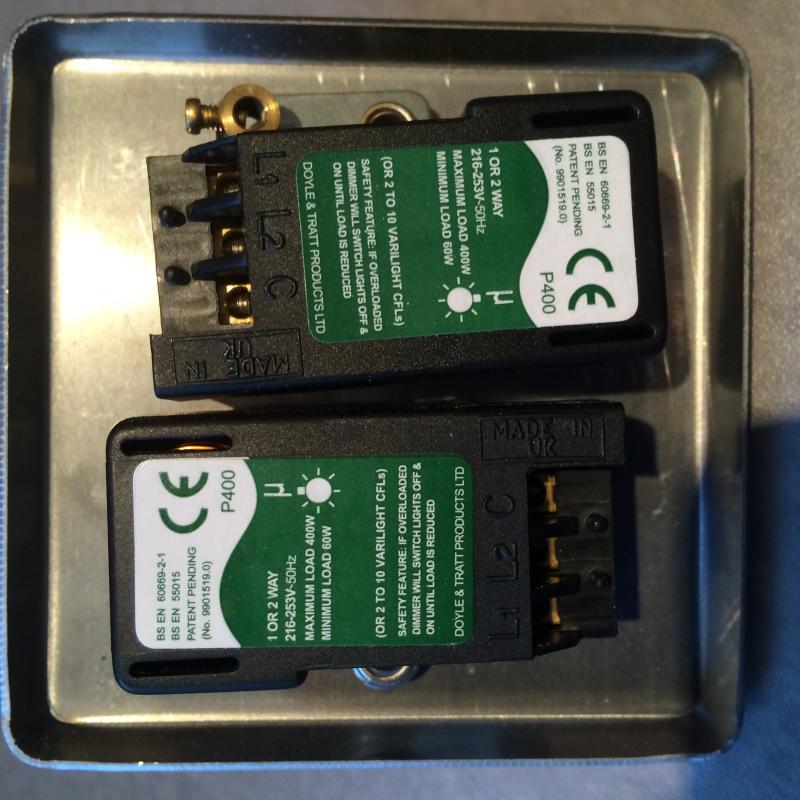
1) I think it will be a real struggle, possibly an impossible one, to get that dimmer switch to fit - a deeper back-box may well be required.

2) Are you aware that if you have a dimmer there, then when you turn the lights on at the other location, they will come on at whatever brightness the dimmer is set to, and you'll have to walk over to it to adjust it if it's not right?
If you want to control the dimming from both locations you'll need a different sort of dimmer, one which comes as a master-slave pair. They are wired differently, so you'd need to pay close attention to make sure you identify which conductor is which in the cables linking the two switches.
Again, if you understand how it all works this will not be scary. Getting a multimeter so that you can do continuity testing would be a good idea.

3) The earth conductors should be connected to the switch faceplate, not to the back-box, although a link between the two is recommended. This applies to all the switches you are replacing with metal ones.

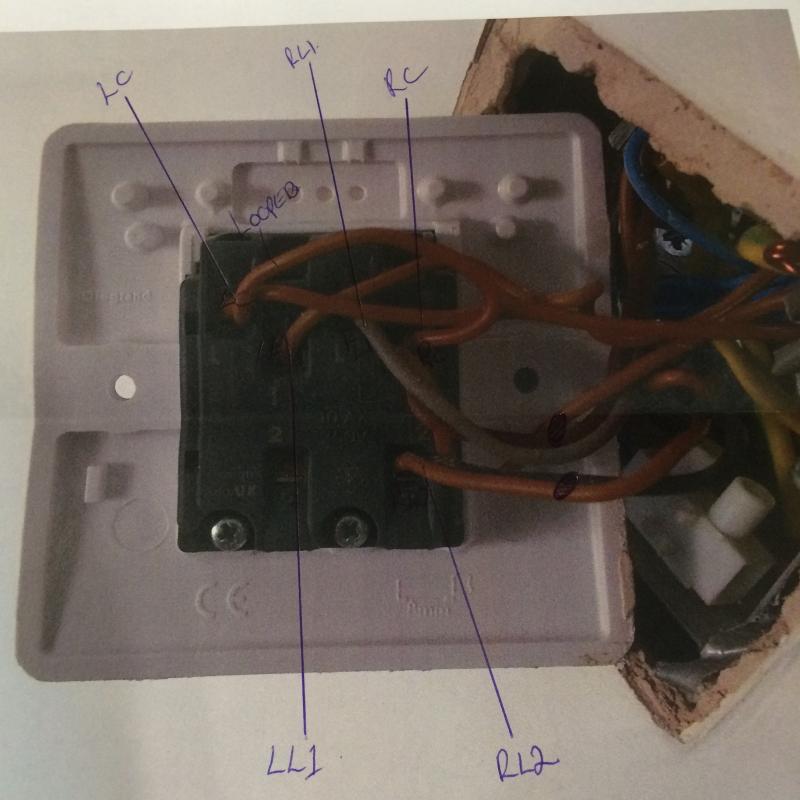
4) The wiring looks odd for both gangs to work as 2-way, one of them has no conductors in L2:


Do they all work properly?
 
Thanks BAS.

Only one of the gangs is 2 way hence nothing in L2 ..

if I left the earth conductors where they are and didn't touch them is that ok ?

Also you say the dimmer switch wont fit, I'm nit sure I know what you mean, its the same size as the current switch ?
 
Sponsored Links
Only one of the gangs is 2 way hence nothing in L2 ..
OK.


if I left the earth conductors where they are and didn't touch them is that ok ?
No - they must be connected directly to the earth terminal on the switch faceplate.


Also you say the dimmer switch wont fit, I'm nit sure I know what you mean, its the same size as the current switch ?
It's deeper.

Thank you !

To be honest I think we will just do a straight swap from plastic swiches to chrome.. and forget the dimmers.. she isn't that bothered now!!

But I will use the same principle.. and make sure the Earth is connected to the faceplate.. I also shouldn't need to change the backbox?
 
Will I need earthing fly leads with this?
Yes, given that the earth conductors need to be connected to both the metal faceplate and the back box - you will hence need a length of wire ('fly lead') between the two. Ideally, you would take the earth conductors from the cables directly to the faceplate, and then have a lead from there to the back box terminal. However, if the conductors will not reach, you could do it the other way around. That connection between faceplate and back box needs to be either a green/yellow-insulated wir, or a bit of bare conductor in a bit of G/Y sleeving.

Kind Regards, John

Thanks John !

I have only just found this site.. and it is amazing ! I love DIY but I'm not the best,, Its nice to know I can ask questions without getting ridiculed..

Thanks again guys
 
Thanks John ! ... I have only just found this site.. and it is amazing ! I love DIY but I'm not the best,
You're welcome.
Its nice to know I can ask questions without getting ridiculed.
Unfortunately, as is the case with all such internet sites, that's not invariably the case, but I'm pleased that your initial experience has been a happy and useful one!

Kind Regards, John
 
Bear in mind that the dimmer will almost certainly not work with energy saving lamps, unless you have bought special lamps and special dimmers designed to work together.

I see your dimmer is labelled to work with Varilight CFLs
 
Will I need earthing fly leads with this?
Yes, given that the earth conductors need to be connected to both the metal faceplate and the back box - you will hence need a length of wire ('fly lead') between the two. Ideally, you would take the earth conductors from the cables directly to the faceplate, and then have a lead from there to the back box terminal. However, if the conductors will not reach, you could do it the other way around. That connection between faceplate and back box needs to be either a green/yellow-insulated wir, or a bit of bare conductor in a bit of G/Y sleeving.

Kind Regards, John

John I'm not at home at the min, but where would I connect the earth in the backbox?

Probably a really silly question
 
Bear in mind that the dimmer will almost certainly not work with energy saving lamps, unless you have bought special lamps and special dimmers designed to work together.
Indeed, although I think that may now have become moot ...
To be honest I think we will just do a straight swap from plastic swiches to chrome.. and forget the dimmers.. she isn't that bothered now!!

Kind Regards, John
 
Bear in mind that the dimmer will almost certainly not work with energy saving lamps, unless you have bought special lamps and special dimmers designed to work together.

I see your dimmer is labelled to work with Varilight CFLs

Cheers John D, I'm going to stick with switches.... if she wants ambient lighting I will put the torch on my Iphone on :D
 
John I'm not at home at the min, but where would I connect the earth in the backbox? ... Probably a really silly question
That back box is so crowded that it's quite difficult to see what's going on - but aren't those green/yellow-sleeved conductors connected to an earth terminal at the back of the box?

Kind Regards, John
 

DIYnot Local

Staff member

If you need to find a tradesperson to get your job done, please try our local search below, or if you are doing it yourself you can find suppliers local to you.

Select the supplier or trade you require, enter your location to begin your search.


Are you a trade or supplier? You can create your listing free at DIYnot Local

 
Sponsored Links
Back
Top