Downlight Conundrum

Can you pull one out and take a photo? They need a longer length of exposed copper than you might expect, hence not being retained properly. You shouldnt be able to pull them out easily.It may be that you need to strip a little more.

You also need to sleeve the earth:
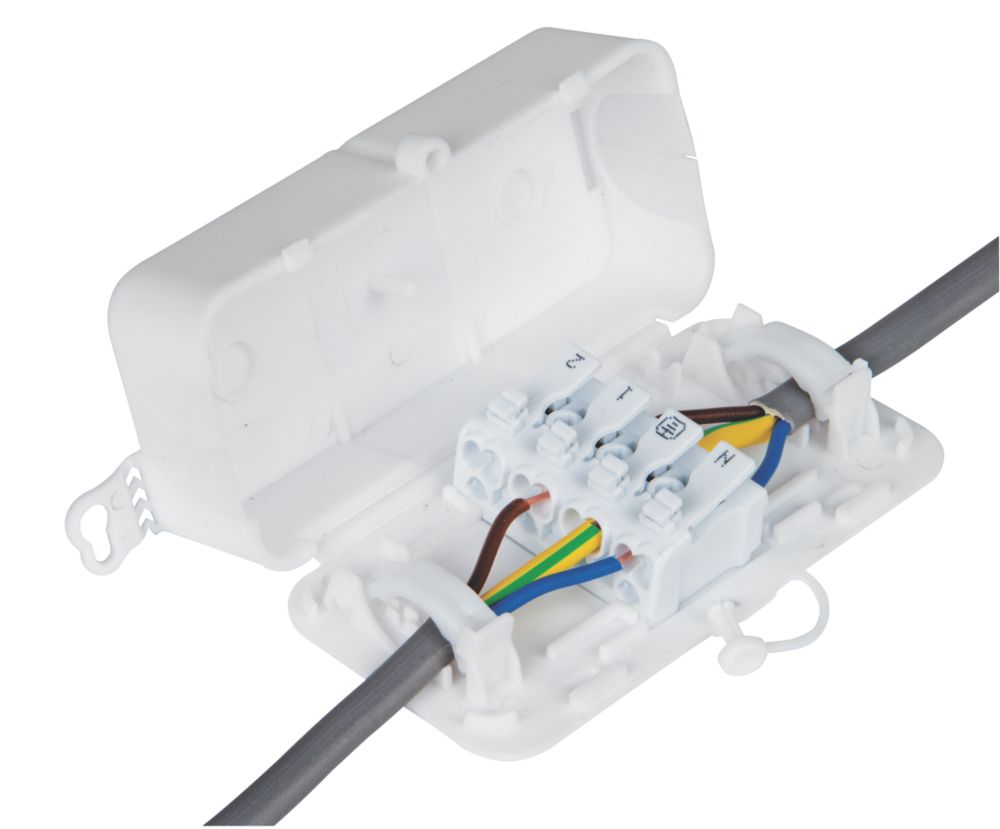
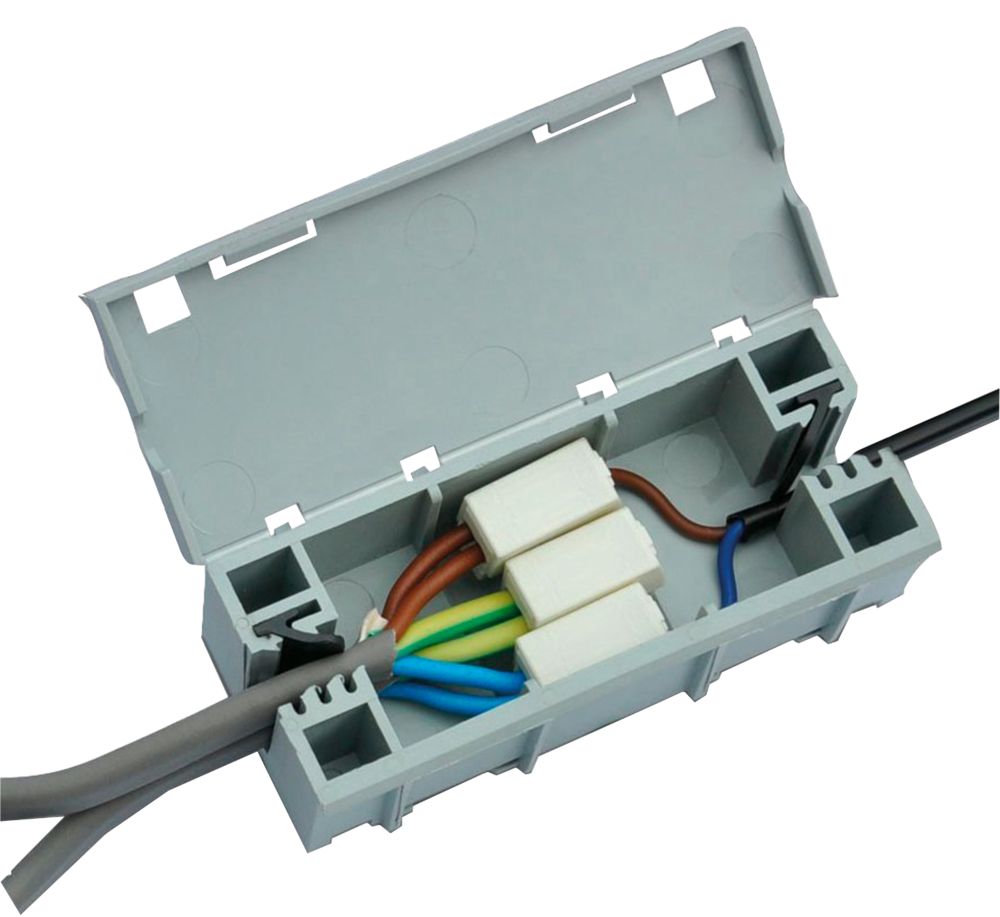
Yeh sure I’ll take it back apart and post a picture shortly; better to be safe than sorry.

Is there a junction box that’s very similar but you have 6 screws for the 6 wires instead of three levers? Would be so much easier if you could secure each wire as you go along. With one lever controlling both openings makes it very fiddly.

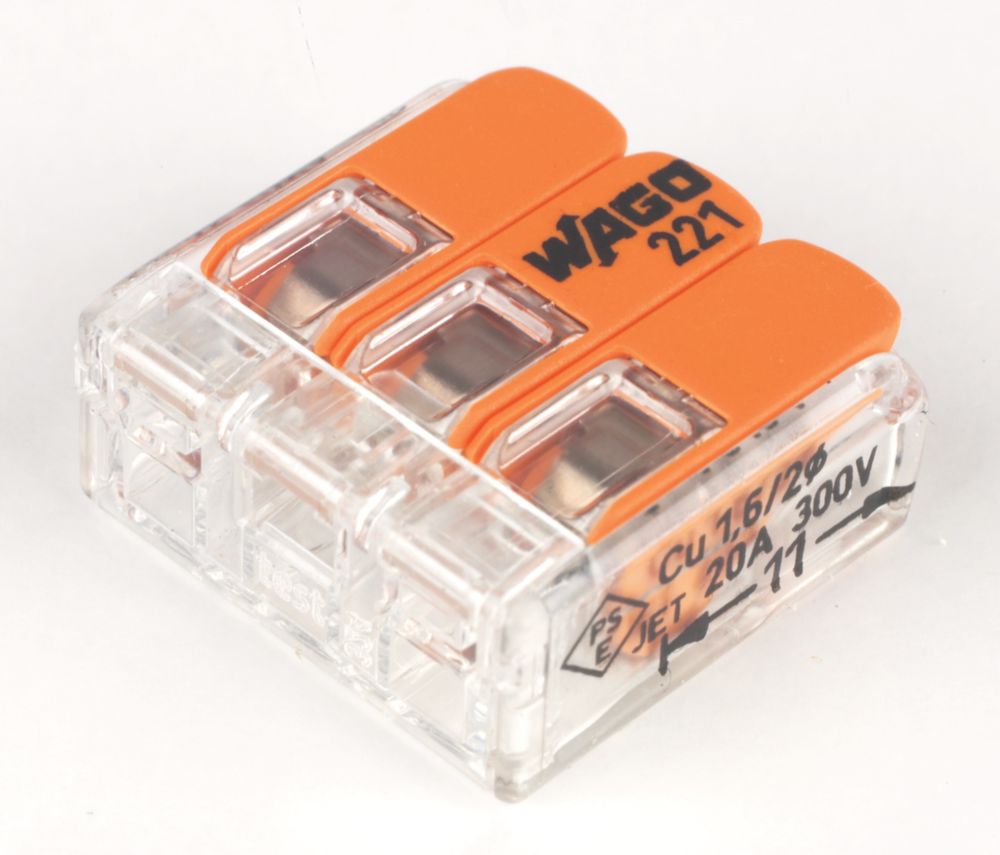
Any tips on using the one in the link would be appreciated. For instance, is it better to put two of the same type in or is it better to secure each 3 core in turn?

Thanks
 
Links in this post may contain affiliate links for which DIYnot may be compensated.
Sponsored Links
I use these:

If you want separate levers per wire then you'll need to buy boxes and connectors separately:

 
I might be wrong here, but aren't the levers for releasing the wire? As in the connectors are just push fit. Make sure there's enough exposed copper on the cable, then push it all the way into the terminal without pressing the lever. The cable should then be gripped and you can do the next one. Make sure there's no copper showing once it's all the way in. I think by the sounds of it you're putting in one wire and pressing the release lever when putting in the next, which is why it's coming out easily. Again, I could be wrong but that's my understanding of how the work.
 
Sponsored Links
Does that all look ok?
Wires have been cut far too long - the grey outer insulation is supposed to be what's clamped onto, so no blue/brown is visible outside of the green enclosure.
Same applies to the white flex.

For solid wires they just push into the connector, the lever is only used to release them or for where stranded wire is used.
 
Can you pull one out and take a photo?

IMG_9063.jpeg


I measured the exposed blue lengths around 10mm for a reference so maybe the brown ones need stripping back a bit?

Ah yes they are push fit! Much easier now! I thought they were inserted when the lever was pressed down. The only junction boxes I have used are the wago ones that have individual clips you lever up and down.

Wires have been cut far too long - the grey outer insulation is supposed to be what's clamped onto, so no blue/brown is visible outside of the green enclosure.
Same applies to the white flex.

For solid wires they just push into the connector, the lever is only used to release them or for where stranded wire is used.

Thanks flameport I will put the ceiling ones shorter so the grey cable is in the clamps and the same for the two core flex.

Is it ideal to put earth sleeves on the earth wire or would you say it is essential?

Thanks to all for the helpful advice and links!
 
After I have finished the down-lights I have a wall light to change in the same room and would appreciate some advice. The current wall light has a large recess to house the junction box. Unfortunately the new one doesn’t and it’s going against a brick wall:

IMG_9065.jpeg


This recess is only 3-4mm on this new one. I remember installing the current wall light years ago and it has a double insulated junction box (so no earth wire).

I was going to drill a series of masonry holes and use a bolster chisel to accommodate the wiring and the same junction box. Or should I get a new low profile junction box with an earth? Thanks

I also find it a bit weird that for such a heavy light fitting (1kg) made of solid brass they supply just a 30mm screw to hang it from at the top as per the picture?
 
Deleted, point already answered.
 
Last edited:

DIYnot Local

Staff member

If you need to find a tradesperson to get your job done, please try our local search below, or if you are doing it yourself you can find suppliers local to you.

Select the supplier or trade you require, enter your location to begin your search.


Are you a trade or supplier? You can create your listing free at DIYnot Local

 
Sponsored Links
Back
Top