Spraying with the Earlex Pro HV5000
I have had now 2 days of spraying with the Earlex Pro HV 5000, in total around 4 hours
2 hour base coat
2 hours finish coat
This includes spraying / mixing and setting up time
Last week I bought the Earlex Pro HV 5000 to help me speed things up with finishing the amount of door trims and skirting boards
100m of skirting
110m of door trim
So far I have sprayed around 50m of door trim
First impression
This thing should come with an age restriction, why because it makes spraying a child’s play, and spraying is not for children
Honestly, it’s simple; there is only one button to be uses which regulates how much paint you spray.
I left Friday a bit earlier from work to start using the sprayer; this is the first time ever for me so I had a bit of a learning curve. I set everything up in my temporarily spray booth and brought the tin of undercoat out
What this coat is oil-based!!! – I was hoping for the simple water based paint.
Well if this is the paint the wife wants, she will get it. So out with the thinner and the measure cup and just count the seconds till you got it right – between 45 and 50 seconds it says
Little tip 1) when pouring in the thinner – pour it through the measuring cup so it cleans it out to make sure you have an accurate reading
Little tip 2) when mixing up the paint, use a small bucket or something as to not mix it up in the spray paint can, as the opening is a bit on the small side to get the measuring cup in it
Pour the paint in the spray cup and you are ready to spray, take a bit of cardboard to set up the amount of paint you want to spray the only knob on the unit
Little tip 3) the less paint you spray the nicer it goes
Little tip 4) On more professional units you can adjust the spray cone to limit the amount of overspray – on this unit you cannot do that – so make sure everything is well covered up, as there is a HUDGE amount of overspray – or I just did it wrong
Little tip 5) the machine is not noisy, but It is just like sitting next to the Hoover. So if you are like me and do not like the sound of the Hoover, where hearing protection
I noticed because of the paint intake in the can you can hold the unit almost horizontal. So you can spray in almost any position or direction
Little tip 6) set the work up so its comfortable to work, the unit is not heavy when the paint is in it, but if you like me have to paint a lot, its sill a strain on your back, so get the work on a good working height
Little tip 7) you need to use a respirator, the paint is to thin and floats in the air, you will breath it – so no shortcuts here – a respirator is a must
Little tip it’s still messy. If you spray a lot there is a lot of overspray you have a lot of paint on your set-up, so where gloves – I recommend the gloves from Costco – they are very comfortable – almost like second skin
It goes fast – really fast – no you cannot compare it with a paint brush – the finish is superb – and you get in all little corners or grooves – but you can see also all imperfections, so you need to prepare the wood much better then you would do with a brush
Its simple – if you mix the paint perfectly – which is simple – your result will be good – there is no chance of getting it wrong – its not possible – it simple
It makes spraying so simple –you wonder why you have not done it sooner
The clean up
Little tip 9) if you are finished put some thinner in the cup and spray it to clean the inside (makes cleaning simple)
Oil based paints are not simple to clean, so you spend most of the time cleaning the equipment, that took me in both cases around 40 minutes – this is probably less if you spray water based paints as you can used put the unit in the dishwasher - if only
The unit
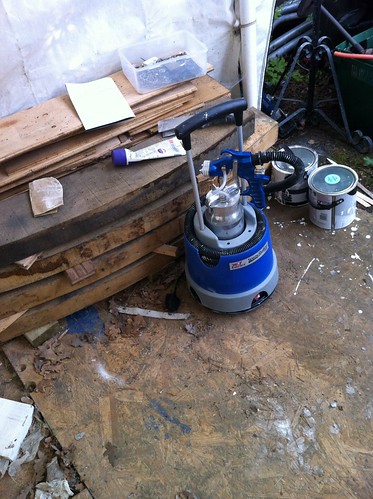
The Earlex 5000
Untitled by mcluma, on Flickr
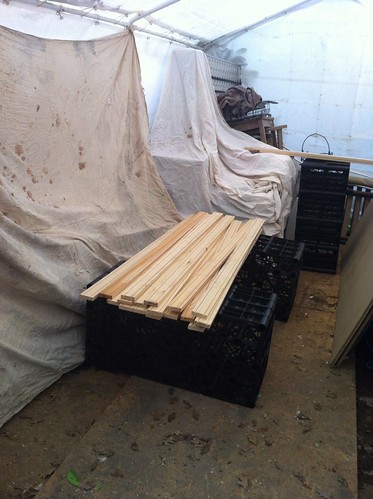
Here some stuff that needs to be painted
Untitled by mcluma, on Flickr
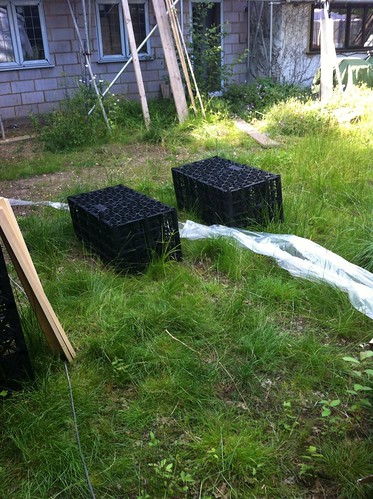
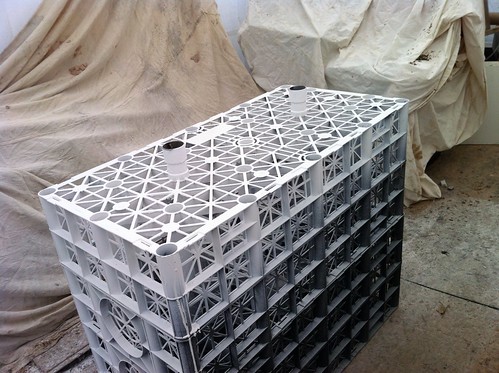
I use the soak away trays as my temporary workbench, as well for drying as well as for spraying
Untitled by mcluma, on Flickr
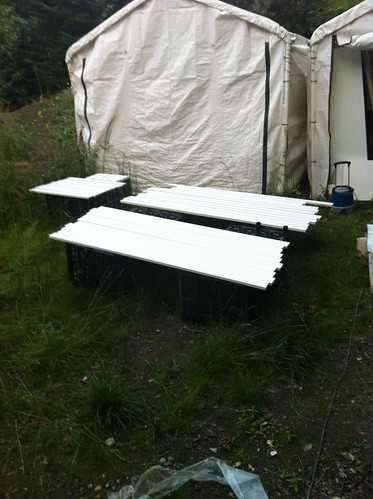
The result after putting on the base coat
Untitled by mcluma, on Flickr
And stored overnight
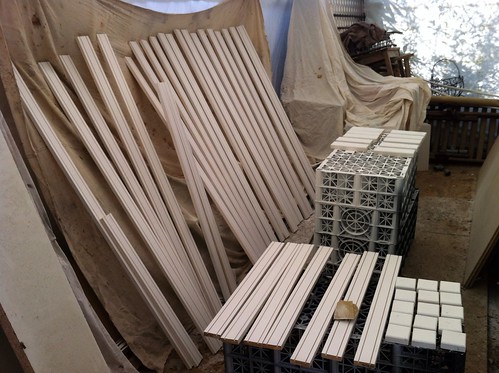
Untitled by mcluma, on Flickr
Quick sand down in the morning and ready for the finish coat
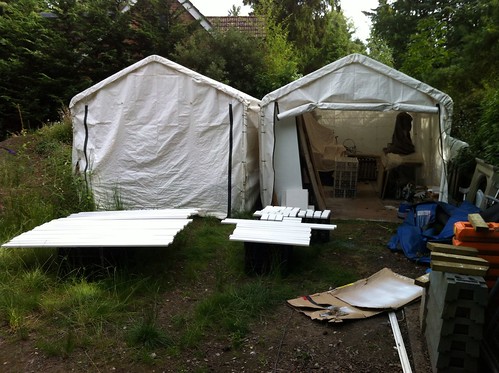
Untitled by mcluma, on Flickr
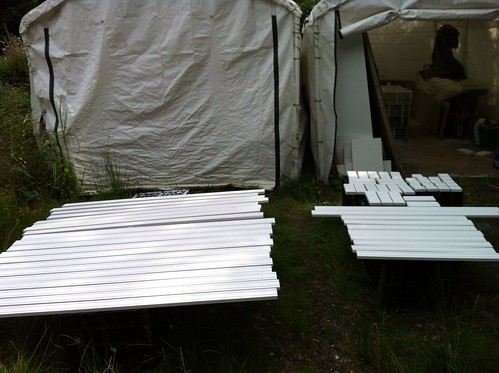
Untitled by mcluma, on Flickr
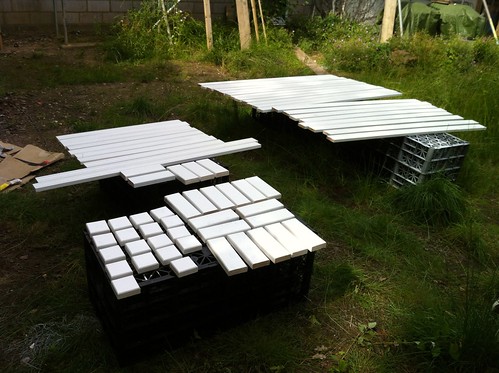
Untitled by mcluma, on Flickr
And the mess after the job was done – just make sure you have everything covered, as there is a lot of overspray
Untitled by mcluma, on Flickr
I hope this is helpful to anybody
I have had now 2 days of spraying with the Earlex Pro HV 5000, in total around 4 hours
2 hour base coat
2 hours finish coat
This includes spraying / mixing and setting up time
Last week I bought the Earlex Pro HV 5000 to help me speed things up with finishing the amount of door trims and skirting boards
100m of skirting
110m of door trim
So far I have sprayed around 50m of door trim
First impression
This thing should come with an age restriction, why because it makes spraying a child’s play, and spraying is not for children
Honestly, it’s simple; there is only one button to be uses which regulates how much paint you spray.
I left Friday a bit earlier from work to start using the sprayer; this is the first time ever for me so I had a bit of a learning curve. I set everything up in my temporarily spray booth and brought the tin of undercoat out
What this coat is oil-based!!! – I was hoping for the simple water based paint.
Well if this is the paint the wife wants, she will get it. So out with the thinner and the measure cup and just count the seconds till you got it right – between 45 and 50 seconds it says
Little tip 1) when pouring in the thinner – pour it through the measuring cup so it cleans it out to make sure you have an accurate reading
Little tip 2) when mixing up the paint, use a small bucket or something as to not mix it up in the spray paint can, as the opening is a bit on the small side to get the measuring cup in it
Pour the paint in the spray cup and you are ready to spray, take a bit of cardboard to set up the amount of paint you want to spray the only knob on the unit
Little tip 3) the less paint you spray the nicer it goes
Little tip 4) On more professional units you can adjust the spray cone to limit the amount of overspray – on this unit you cannot do that – so make sure everything is well covered up, as there is a HUDGE amount of overspray – or I just did it wrong
Little tip 5) the machine is not noisy, but It is just like sitting next to the Hoover. So if you are like me and do not like the sound of the Hoover, where hearing protection
I noticed because of the paint intake in the can you can hold the unit almost horizontal. So you can spray in almost any position or direction
Little tip 6) set the work up so its comfortable to work, the unit is not heavy when the paint is in it, but if you like me have to paint a lot, its sill a strain on your back, so get the work on a good working height
Little tip 7) you need to use a respirator, the paint is to thin and floats in the air, you will breath it – so no shortcuts here – a respirator is a must
Little tip
It goes fast – really fast – no you cannot compare it with a paint brush – the finish is superb – and you get in all little corners or grooves – but you can see also all imperfections, so you need to prepare the wood much better then you would do with a brush
Its simple – if you mix the paint perfectly – which is simple – your result will be good – there is no chance of getting it wrong – its not possible – it simple
It makes spraying so simple –you wonder why you have not done it sooner
The clean up
Little tip 9) if you are finished put some thinner in the cup and spray it to clean the inside (makes cleaning simple)
Oil based paints are not simple to clean, so you spend most of the time cleaning the equipment, that took me in both cases around 40 minutes – this is probably less if you spray water based paints as you can used put the unit in the dishwasher - if only
The unit
The Earlex 5000

Untitled by mcluma, on Flickr
Here some stuff that needs to be painted

Untitled by mcluma, on Flickr
I use the soak away trays as my temporary workbench, as well for drying as well as for spraying

Untitled by mcluma, on Flickr
The result after putting on the base coat

Untitled by mcluma, on Flickr
And stored overnight

Untitled by mcluma, on Flickr
Quick sand down in the morning and ready for the finish coat

Untitled by mcluma, on Flickr

Untitled by mcluma, on Flickr

Untitled by mcluma, on Flickr
And the mess after the job was done – just make sure you have everything covered, as there is a lot of overspray

Untitled by mcluma, on Flickr
I hope this is helpful to anybody

