How to replace a leaky WC Cistern syphon

Joined
28 Nov 2023
Messages
34
Reaction score
1
Country
United Kingdom
Hello all,

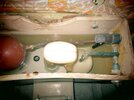
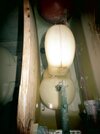
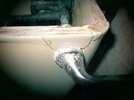
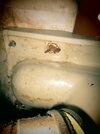
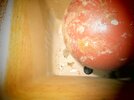
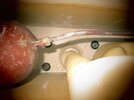
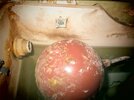
I have an ancient Cistern syphon (see attached photos IMG_9460, IMG_9461), which was seen by a plumber 4 years ago, because the WC handle became difficult to turn. I had wanted a new syphon but the plumber took a look at the crack on top of the handle (IMG_9462) and declined to replace the syphon. Instead, he squirted some WD-40 around the handle, and this solved the handle turning problem.

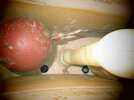
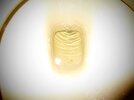
For the last year or so, the syphon has started to leak appreciable amounts of water into the commode (see IMG_9459). This problem now causes my water bill to be 60% higher than before and I am keen to replace the syphon with a new one to stop this leak.

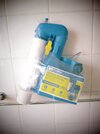
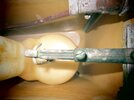
Please advise me on how to remove this faulty syphon and replace it with a new one. I already have a Dudley Turbo 88 syphon (IMG_9464) which I bought 4 years ago, just before calling in the plumber, if this is suitable. IMG_9466 is my best shot of the cistern base.

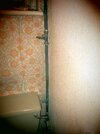
Incidentally, the photo IMG_9467 shows that there is a gate valve between the loft water reservoir tank and the WC. The top of the pipe containing the valve, goes to the loft water tank, then moving down this pipe we reach the gate valve, then the connection to the WC, and finally it (the white PVC tubing at the lowermost end of this pipe) goes to the bathroom adjacent to the Loo.

Many thanks in advance!
 

Attachments
  • IMG_9459.JPG
    IMG_9459.JPG
    192.6 KB · Views: 37
  • IMG_9460.JPG
    IMG_9460.JPG
    427.6 KB · Views: 36
  • IMG_9461.JPG
    IMG_9461.JPG
    343.5 KB · Views: 38
  • IMG_9462.JPG
    IMG_9462.JPG
    327.8 KB · Views: 37
  • IMG_9464.JPG
    IMG_9464.JPG
    321 KB · Views: 36
  • IMG_9466.JPG
    IMG_9466.JPG
    355.3 KB · Views: 36
  • IMG_9467.JPG
    IMG_9467.JPG
    510.9 KB · Views: 35
Last edited:
Ime, it’s usually the float valve passing water via the internal overflow, not the actual syphons.
 
Thanks CountryFan. What do I do to check if it is the float valve which is faulty? Remove the cistern cover and hold the float ball up, and see if the water is still forming the ripples?
To Herts P&D, if you mean the orange colour of the first photo, then its a trick of the camera flash used to get a clear photo of the water ripples. The toilet bowl is clean. It took me 5 attempts to get a reasonable image of the water ripples.

UPDATE: I held the float ball up for 3 minutes. It made no difference to the water ripples. That rules out the float valve as being faulty.
 
@dilalio No its not a throne. Its a thinking seat, upon which many a penny has dropped (amongst other things). And I AM asking you gentlemen for advice on its maintenance. I did not realise that it would be such a difficult task.
 
8 hours after shutting the gate valve, I opened the cistern this morning. As you can see from the attached photos, the cistern was bone dry inside.
 

Attachments

  • IMG_9468.JPG
    IMG_9468.JPG
    364.9 KB · Views: 11
  • IMG_9469.JPG
    IMG_9469.JPG
    334.6 KB · Views: 11
  • IMG_9470.JPG
    IMG_9470.JPG
    449.9 KB · Views: 10
  • IMG_9471.JPG
    IMG_9471.JPG
    347.1 KB · Views: 11
Disconnect the supply, loosen (or cut off) the bolts holding the cistern to the pan and remove any fixings holding it to the wall, then lift the cistern off.
 
Disconnect the supply, loosen (or cut off) the bolts holding the cistern to the pan and remove any fixings holding it to the wall, then lift the cistern off.
Thank you Denso. I shall turn off the gate valve and flush the cistern to speed up its emptying. Then wait for the syphon leak to complete the draining.

(a) Wall fixings: there are two of these, one on each side of the cistern, near its top (see attached photo IMG_9472) which shows one of these. Each one is made up of a M4 or M5 screw with a large square (15mm or 20mm) washer. Both of the screws are loose and should be easy to remove. I presume there is a rawlplug type lined hole in the wall to receive these screws.

(b) Cistern to Pan fixings: There are 4 of these. Inside the cistern each fixing is comprised of a M4 or M5 screw with two washers. A large metal penny washer atop an equal sized black neoprene washer (presumably for a water tight seal when the neoprene washer is squeezed between the metal washer and the cistern base) . These 4 screws are on the base of the cistern. The screws pass though holes in the pan, and are held in place by Butterfly nuts. The nuts are quite rusty.
Two of these fixings are obstructed inside the cistern, by the syphon, making them had to reach. I will need a long screwdriver to hold the screws stationary while I undo the butterfly nuts on the underside of the pan.

(c) Inlets & outlets: There is a compression jointed water inlet tube which mates with the float ball valve inside the cistern.
This will have to be loosened before the cistern is removed.

I HAVE NO IDEA ABOUT THE WATER EXIT CONNECTION OF THE SYPHON AND WOULD LIKE YOU TO ADVISE ME ON THIS.

I presume that a plumber's merchant would stock the pan and wall fixings which I can use to replace the present corroded ones.
 

Attachments

  • IMG_9472.JPG
    IMG_9472.JPG
    427.2 KB · Views: 5

If you need to find a tradesperson to get your job done, please try our local search below, or if you are doing it yourself you can find suppliers local to you.

Select the supplier or trade you require, enter your location to begin your search.


Are you a trade or supplier? You can create your listing free at DIYnot Local

 
Back
Top