Insulating Over Spotlights

Joined
14 Oct 2005
Messages
101
Reaction score
0
Location
Glasgow
Country
United Kingdom
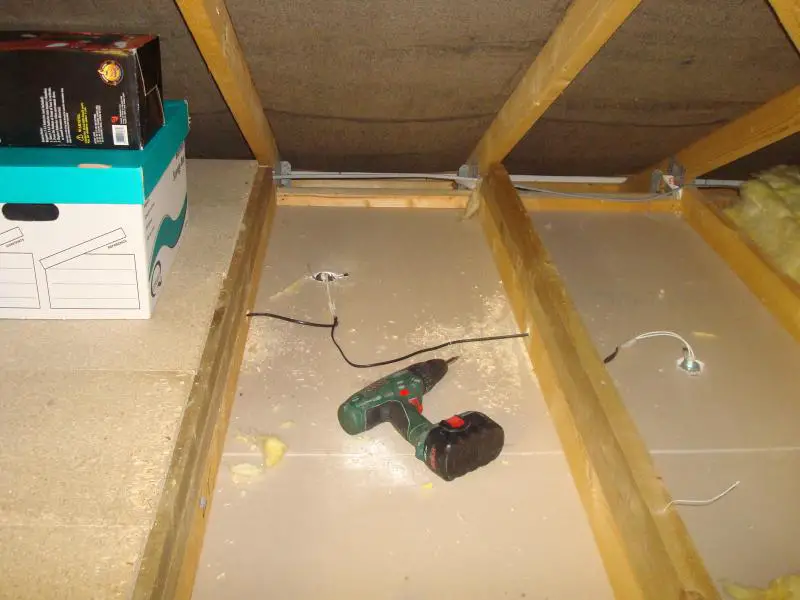
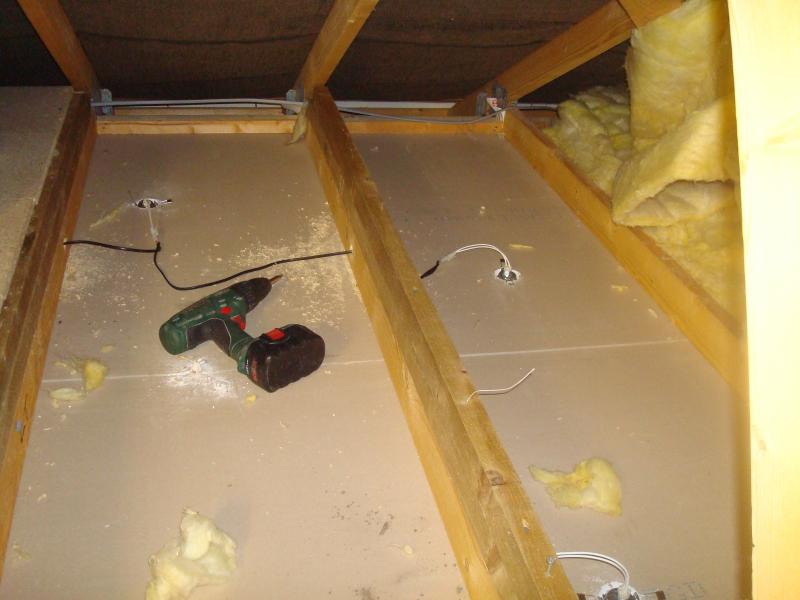
I have recently installed ceilling spotlights into the spare room. Did a search regarding the insullation in the lot and covering the spotlight. Several options one being the fire covers (a bit costly) and another option is to use ground pipe and cut to size then spread the insulation around. The second option is what i'm intending to do. Question is, when I lay boards across the joists would it be beneficial to drill small holes in the boards for heat disapation from the lights

Thanks in advance

Pictures included

zooming
 
Sponsored Links
What is ground pipe?

Fire hoods will do absoloutly nothing at all for you in this situation.

They are designed purely to stop flames passing through your ceiling.

They do not prevent fires, and they do not allow you to cover your spotlights with insulation.

In the manufacturers literature, what is the recommended minimum safe mounting distance from flammable surfaces?
 
I can't see properly, are they GU10 230v fittings? Probably 'F' rated (not fire rated) if they are.

What cable have you used? It looks like black 2 core flex though TFT monitors play havoc with smaller images.

F.jpg
 
RFL

What I mean is drainaige pipe, I was intending to cut to size and place over the lights.

After reading further posts I now understand the principle behind the fire hoods, I think a common misunderstanding in my case.

The instruction say "ensure a minimum ceiling void depth of 110mm is available" also "Remove at least 100mm of roof void insulation from around transformer and light fittings to ensure free movement of air.

I considered the pipe because of the movement of the insulation and just wanted to make sure it didn't come into contact with the lights.

Cheers

Z00ming
 
Sponsored Links
GM

B&Q Recessed Low Voltage Halogen downlight Tilt MR11 Halogen 5 Pack.

The wiring looms come with the lights as do the lampholder connectors.

The instructions state that "this product has been marked with (a crossed out F) and is only suitable for installation on plasterboard and masonary.

Cheers

Z00ming
 
Can you get that pipe with a diameter of at least 250mm?

How deep are your ceiling joists? It's hard to see in the photo, but they don't look >110mm deep to me.

Gary, the fittings are MR11/MR16. It'll be one of those kits with a big naff off 100VA torroidal tranny running all 5no. 20W max lamps.
 
RF

I will get a hold of the pipe to suit, now that I have read the instructions stating that they have to have 100mm clearence.

The original joists are not 110mm because it's crap new builds with the minimum requirements, so I have built on top of the existing joists to allow the void depth to be achieved but also to allow me to insert more insulation before the boards go on.

Yes you are correct regarding the tranny and the five 20 watt lamps, it's a small room below and the amount of light is more than sufficient.

So if the depth is ok and the clearence is OK the question is

1: Is it worth drilling some holes for above the light to allow the heat to escape.

2: Why is the tranny naff, is there issues with this product or is it because it's inferior to the typical electricians choice (please not this is not an insult)

Cheers

Z00ming
 
Personally I would get as much ventilation to the lights as you can. Downlighter lamps produce huge amounts of heat, which can damage the ceramic lampholder if there is not sufficient ventilation.

There is nothing actually wrong with the tranny.

It is just those kits are built to a price, and torroidal (which is an old type of transformer made by wrapping copper wire round a laminated iron core) transformers are very bulky. Most electricians would fit a much smaller, lighter but more expensive electronic transformer.

Also normal practice is to fit one tranny per lamp, so if one tranny fails you are not left in the dark, and it also allows you to use upto a maximum of 50W lamps in each fitting.

Oh, one more thing, with the above method the transformer does not need to be located somewhere accessible, as if it were to go faulty the downlighter fitting can be removed and the transfromer accessed through the downlighter cutout in the ceiling, whereas with a huge torroidal tranny you can't.
 
2. Yes, these transformers fail frequently. Replace it now with an electronic one, or at least make it accessible for replacement in future. And do not put it anywhere near insulation. Feel a laptop transformer, how hot it is. This is the sort of temperature we're talking about.
 
Sorry, RF, in my experience of these TX's from B&Q, they are cack. I had two, both split open, looked like heat damage - cracked the casing.
 
RF

Understand and agree regarding the fitting of 1 tranny per lights and accesability. I only need the 100 watts maximum and the 5 do well.

I will use the pipe and drill small holes in the boards to allow ventillation etc.

RF & GM, thanks for your time and help. I wanted to cover the angles on this because it's above my daughters bedroom

Cheers

Z00ming
 
Steve

Thanks for the input. I will ensure that it's not buried under the boards and next to the insullation. I will ensure it's fully accesablile and monitor the tranny for cracks

Cheers

Z
 
If you must use these lights I have seen clay flower pots used for the purpose you wish.

I usually remove insulation from around the lights and the transformers

I can not see the size of the joists, but if the house is new build they may be of the prestressed type. This could be the case as the existing wiring seems to be ran in the eaves.
If this is the case I would strongly advise against further drilling.
 
This is a new build house - do the Scottish Building Regulations have nothing to say about making things less compliant than they were?

Also I've only just clicked on the photos and seen them full size - zooming, those holes you've drilled in the joists look too close to the ends to me... :(
 

DIYnot Local

Staff member

If you need to find a tradesperson to get your job done, please try our local search below, or if you are doing it yourself you can find suppliers local to you.

Select the supplier or trade you require, enter your location to begin your search.


Are you a trade or supplier? You can create your listing free at DIYnot Local

 
Sponsored Links
Back
Top