Nest - can I self install in my setup ?

Joined
26 Jan 2016
Messages
7
Reaction score
0
Country
United Kingdom
hi all,
Id like to do a self install of a 3rd gen Nest thermostat.

Currently have a programmer for independent HW and Heating. The temperature in the main house is set by a Salus wireless thermostat which is too dumb for my liking. We also have an extension which has UF heating (mixer/pump and wiring in the garage) which works off the same boiler but controlled independently of the main programmer/salus thermostat as has its own programmable thermostat. So basically the CH, HW and UF heating can all operate independently if necessary in terms of what is on and what is off at any one time. In the attic is a honeywell wiring centre and 2 valves (CH and HW). The wiring inside looks pretty complex so Id rather not meddle with that. However, attached to this spaghetti is the 'receiver' unit for the Salus wireless stat. Im hoping to be able to simply swap the Salus receiver unit for the Nest Heatlink and leave the rest in place and with the existing programmer handling the HW as now, put the CH ON permanently and let the Nest take care of regulating the temp for different times of day.

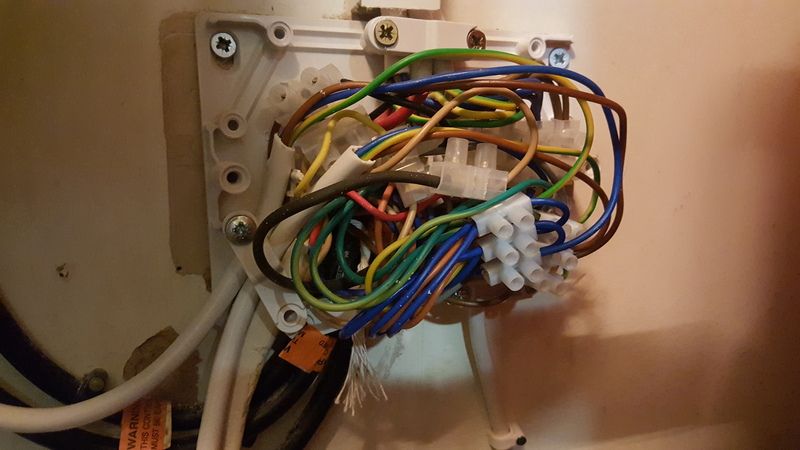
Attached a pic of the Salus receiver with 4 wires. Looks like the following are wired in (4 core cable to wiring centre):
brown = 240v L
black = 240v N
green = SL (off) (switched live when off??)
grey = SL (on) (switched live when on??)
dark brown = link wire between 240v L and COM

IMG_3496.JPG


these all connect at the other end into various terminals in the wiring centre but I get really lost at that point so hoping its possible just to make a straight swap of the above with the Heatlink and not have to worry about the wiring centre at all ?

can anyone advise ?

thanks in advance !
 
Sponsored Links
Bit of a waste buying a 3rd Gen Nest if you're not going to use the hot water control, may as well have just bought a 2nd Gen and saved yourself £60

In the Heat Link...
L - L & 2
N - N
SL - 3
Make safe on the green wire (which is an earth and shouldn't have been used for carrying current in the first place)
 
I dont really have an issue with the HW control currently so happy to leave that on the old programmer.

... the following image is from the Nest manual:

heatlink.png


Looks like I would attach:

brown = 240v L => Nest L
black = 240v N => Nest N
green = SL (off) => Nest 1 (Satisfied)
grey = SL (on) => Nest 3 (Call for Heat)
dark brown = link wire between Nest L and Nest 2

is this correct for CH heat control only in place of the existing stat which is also CH heat control only ?
 
Sorry, edited my post after I re-read your original one, see above
 
Sponsored Links
If you did want to add hot water control then you need to alter the wiring centre. It's quite simple to do. Connections as above for the heating (trace back the Salus wires and swap them out for the correct Nest terminals) but also link 5 to 2, then on the hot water side link the hot water demand from your existing programmer to Nest 3
 
thanks Andrew - I havent bought anything yet so Ill go with the Gen 2 in that case !
However, Im reasonably confident that the green cable is not earth in this setup from what I recall of the wiring centre. As it is now suggests something remains powered even when no call for heat ?
 
now got a clear-ish image of the wiring centre. As you can see its a bit of a mess so I didnt want to meddle with it but I can if necessary ! Seems like the sparky (or plumber?) used any old 4 core cable he could find hence the use of earth cable for live feeds !

wire centre.png


The Salus cable is white one 2nd from the right at the top (with my screwdriver pointing on it).
brown = 240v L => #9
black = 240v N => is hidden in the pic but goes to the central block, 4th connection down (from the top).
green = SL (off) => #3
grey = SL (on) => #4

#3 SL (off) and #9 (240v L) seem to be connected together via a red link - I cant see the reason for this.

from left to right the top cables are (I think)

HW cylinder thermostat
Boiler & pump
HW/CH programmer/timer
HW valve
CH valve
room stat
power

The green cable on 9 (then going to 240v L on the receiver) is actually a switched live when the CH is 'on' on the programmer. This means when the CH prog is off, the receiver is powered down so needs to pair again with the wireless sender each tie it comes on - this explains the 10 minute delay currently when the CH first comes on! I guess if I leave the CH permanently on then Nest can stay like this also so doesnt power down.

per Andrew's recommendation
#9, brown cable = L => Nest L & 2
middle block, black cable = N => N on Nest
# 4 grey cable = SL (on) => 3 on Nest

is this correct ? what is the purpose of the link between 3 (SL Off) and 9 (240 L) and would it be ok to remove it ?

the UF heating wiring seems to go direct to the boiler and not part of the wiring centre.
 
That's not a mess, THIS is a mess...
20151125_084040_zpstmvh85y4.jpg

Having said that, they have mixed colours in yours without marking them which is not great (some greys are live, some are neutral)

For wiring a 3rd Gen Nest with hot water into your wiring centre (may as well go for it now!)...
POWER OFF
CHECK POWER IS OFF!!!
Remove all four programmer wires, one at a time making sure that you put back any other wires that get pulled out at the same time. Use a process of undoing a terminal, removing the required wire, then tightening the terminal up again before you move on to the next one

Repeat the above with the thermostat wires. You can re-use the two bits of flex you now have to wire in your Heat Link


Nest L, 2 & 5 => WC 7 or 11. You can link L, 2 & 5 at the Heat Link end if it's easier, then just connect Nest L to WC 7 or 11
Nest N => Any of the bottom three terminals of the vertical block of the WC
Nest 3 => WC 4
Nest 6 => WC 10
Nest Earth => Any of the top three terminals of the vertical block of the WC

Power on and away you go
 
thanks Andrew - very helpful. Like you say, I may as well bite the bullet and swap out both the programmer and the wireless stat/receiver for the 3rd gen. bit more effort in cabling/wiring but better in the long run (assuming I dont c**k it up). So just to confirm,the red link between the #3 (SL (off)) and #9 (240v L) is surplus to requirements / pointless ? why would the previous installer have done this ?

Can I keep the heatlink in the attic by the wiring centre or does it need to be nearer the nest stat ?
 
The red link is unneccessary, but once you've removed the old stat wires it won't be connected to anything anyway so you don't really need to remove it. The minds of installers are for them and them alone to know! The Heat Link will be fine in the attic, assuming your house isn't a mansion. It's good for 30m range
 
So just to confirm,the red link between the #3 (SL (off)) and #9 (240v L) is surplus to requirements / pointless ? why would the previous installer have done this ?
Because they were incompetent and didn't have a clue what they were doing.
This means when the CH prog is off, the receiver is powered down so needs to pair again with the wireless sender each tie it comes on - this explains the 10 minute delay currently when the CH first comes on!
Because they were incompetent and didn't have a clue what they were doing.
Seems like the plumber used any old 4 core cable he could find hence the use of earth cable for live feeds !
Because they were incompetent and didn't have a clue what they were doing.

Those wiring centres are designed for 'easy' wiring you simply add the links matching the type of system you have and then wire each part in. There is no reason to have wires joined in on the link side of the connectors.

I'm adding this installation to my list of terrible central heating wiring.

Why not spend a bit of time learning how S plan heating systems are wired and wire your system so it works properly and safely? That way future repairs and alterations will be much easier and safer. You already seem to have a good basic understanding, and are able to follow the wires around.

If I was asked to connect Nest to your wiring I would not be able to leave it wired as it currently is.
 
hi all,
quick update. Nest is now purchased and installed - thanks for all your advice. It took quite a while to get it all wired up and ensure everything connected where it was supposed to. Whilst I could have rewired everything to ensure consistent use of colours etc (per freddo) this would have been a much bigger job so I just removed the programmer and stat wiring and replaced with the Nest wiring and left it at that ! I did label a lot of previous unlabelled wires though. Thing that took the longest was pulling through a new cable for the 12v feed to go from the nest heatlink to the position of the original wireless stat downstairs. In the end I opted to put the heatlink next to the boiler since thats where the old programmer was. I found some nice stiff garden wire in the garage which worked very well in place of those rods that electricians use !

Main gripe was that the cable holes in the heatlink are very small and close together. There must be about 1mm between them which I was quite surprised about as any stray copper could cause a short ! I had to be very thorough in stripping and twisting etc and cable lengths etc !

2 nights after installation I noticed the boiler firing late at night (~midnight) even though both heating and hot water were off on the nest and app. I checked with my multimeter and the Nest was calling for the hot water even though it said it wasn't. There was also a yellow drop icon on the Nest which there was no mention of in the manual and didnt come up with anything during a quick google. Whatever I tried I couldnt turn it off but nor did I want to wake up freezing in the morning so in the end I pulled the #6 cable out and went back to bed ! A bit more digging in the morning and I found out there is a 'feature' called 'Bacteria prevention mode' which turns the hot water on for 2 hours if it hasnt previously done so in the prior 48 hours. This is apparently to prevent the risk of Legionella growth in the tank but I never heat my hot water for 2 hours straight so its now disabled. Is Legionella really a risk in a domestic situation ? Bit daft that this is enabled as standard in a supposedly 'energy saving' product and there is no mention of it in the provided instructions !

The instructions suggest that you operate the nest totally manually for the 1st week for it to 'learn' your requirements. However in a 1950s 4 bed detached house Im not willing to only turn the heating on when I wake up or get home from work and wait 2 hours to be warm up so I opted to set a schedule from the start ! Hopefully it will still learn and adapt around this e.g. taking into account how long it takes to heat up/cool down with different outdoor temps and adjust accordingly - time will tell ! The convenience of viewing/controlling from a phone is great and the energy history is interesting. I was hoping you could see more details / graphs in the history (like the Netatmo one) such as the inside temp, outside temp, heat-up times etc on a specific day. Maybe that will be improved over time.

Otherwise its a nice solid piece of kit but my wife doesnt like the wall plate / trim and I have to agree - why is it oblong ? should be just a square plate the same size as the typical UK square wall socket ! Anyone know if you can get a replacement square one ?

thanks, Nick
 
Glad you got on well with the wiring. I agree, the terminals are a bit of a fiddle, they're only really designed for one wire each which is a pain when you want to get two in there! Legionella is a concern in domestic situations - that's why cylinder thermostats should be set to 55°C.

Yep, the wall trim is ugly. I do everything I can to avoid using it - it's not mandatory. It is the only size available from Nest, but there are round ones available on eBay, or you could find a local sheet metal working company or furniture shop to make you a stainless or wooden one in any shape and size you choose
 

DIYnot Local

Staff member

If you need to find a tradesperson to get your job done, please try our local search below, or if you are doing it yourself you can find suppliers local to you.

Select the supplier or trade you require, enter your location to begin your search.


Are you a trade or supplier? You can create your listing free at DIYnot Local

 
Sponsored Links
Back
Top