Old Honeywell to New Thermostat wiring...

Joined
16 Sep 2014
Messages
141
Reaction score
5
Location
Essex
Country
United Kingdom
Hello

I have a combi boiler used for hot water and central heating.

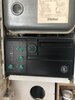
I currently have a very old Honeywell thermostat (attached) which has stopped working and want to replace it with a newer one I've just bought.

full


The wires from the wall are as follows:

Brown wire
Black wire
a wire that has red tape over it. which I am guessing is the switch live...

full


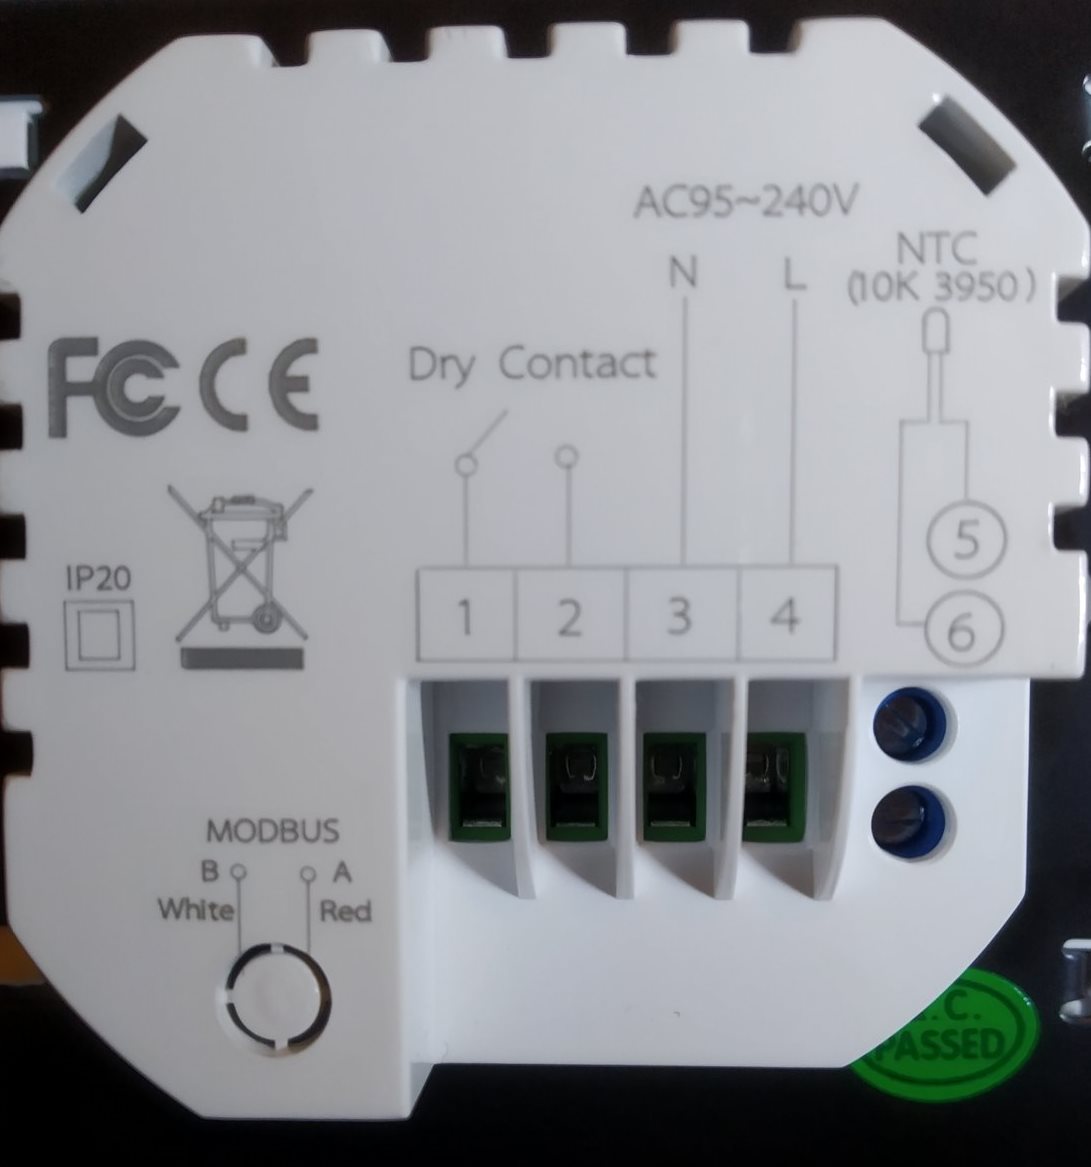
the new thermostat has
4 PORTS. 1 AND 2 are dry contact and 3 and 4 is live and neutral..

For my setup is this correct:

Connect the brown wire to Terminal 4 (Live)
Connect the black wire to Terminal 3 (neutral)
The wire with the red tape (switch live) to Terminal 2

Then used a jumper wire to connect from Terminal 4 to Terminal 1.

Let me know please. Need to turn this heating on...

Thanks
 

Attachments

  • IMG_7801.JPG
    IMG_7801.JPG
    182 KB · Views: 394
  • 15743699100817916200797039582658.jpg
    15743699100817916200797039582658.jpg
    79.4 KB · Views: 298
Sponsored Links
There should be a diagram inside the lid of your old Honeywell T6060 showing what each of the terminals does. From this the function of each wire (if it has been correctly installed to start with) can be identified. I believe that the diagram will look like this.

6060.jpg


If it is the same as the above, then the connections are:

1 = Live
2 = Neutral
3 = Switched Live / CH ON

Note: the terminal numbers are not actually in numerical order. So check them carefully they have little arrows from the numbers to identify them.

If the diagram inside the lid of your thermostat is different from the above post back a photo of it, and don't proceed. If it is the same, then:

Live = Honeywell 1...Goes to new stat 4

Neutral = Honeywell 2...Goes to new stat 3

Switched Live = Honeywell 3...Goes to new stat 2

You will also need to add a link wire between the new stat terminals L and 1

Finally assuming that the new thermostat is programmable [has both time and temperature control functions built in] any existing timeswitch / programmer will need to be set to be permanently on.

EDIT. The green / yellow wire (normally used as a earth wire) has been used as a live wire. This is bad practice and should at least have had a brown sleeve over it to identify it as such. The red insulation tape that has been used is not a suitable substitute.
 
Last edited:
The wiring is exact how it suppose to be and the thermostat does not turn on. think its faulty?
IMG_7818.JPG


This is what's at the back of the Honeywell stat.


IMG_7819.JPG
 
Thanks for the diagram, it corresponds with the one I posted. So far, so good.

I assume that you have set any existing timeswitch / programmer to be permanently 'on' 24/7

If you have, and assuming the thermostat is set up properly but still isn't switching the heating 'on' when it should do, you can test the wiring by moving the wire with the red tape on from terminal 2 and putting it into terminal 1 with the brown wire. If the heating comes on after doing that, the wiring is OK but the thermostat is not.
 
  • Thanks
Reactions: CBW
Sponsored Links
Thanks for the diagram, it corresponds with the one I posted. So far, so good.

I assume that you have set any existing timeswitch / programmer to be permanently 'on' 24/7

If you have, and assuming the thermostat is set up properly but still isn't switching the heating 'on' when it should do, you can test the wiring by moving the wire with the red tape on from terminal 2 and putting it into terminal 1 with the brown wire. If the heating comes on after doing that, the wiring is OK but the thermostat is not.


I assume that you have set any existing timeswitch / programmer to be permanently 'on' 24/7 - yes all on

Thanks for your response. Will try this. Also, the thermostat suppose to have started up at least as the L and N should have been able to power it but didn't... so looks like its faulty...
 
Last edited:
If the thermostat doesn't seem to be powered up, then you need to check the N & L with a multimeter to make sure that a 230V supply is present.

If there is a timeswitch as I said in my original post, it need to be set to be permanently on. If not there won't be power supplied to the new thermostat.

It may also be that the blue neutral wire isn't connected to a neutral at its other end.

So is there 230V present between L(4) and N(3) ?
 
I am going to get a multimeter from my brother's house. In the meantime, i have taken photos of my boiler.
It doesnt look like its connected... i am assuming 3 for 4 is the cable connected to the stat...... but the earth wire which was supoose to be the switch live, is not connected...


IMG_7833.JPG
 

Attachments

  • IMG_7834.JPG
    IMG_7834.JPG
    250.4 KB · Views: 221
If that cable is the one that went to the thermostat, it looks like you have solved the lack of a 230V supply.

Although the connections at the thermostat don't correspond with how its connected to the boiler at the other end, which would mean if you followed, my thermostat wiring exchange table, the connections would remain incorrect. I don't see how the old stat would ever have worked, unless there is a junction box somewhere and the wiring changes en-route.

Probably best to rip it out and start again from scratch.
 
Last edited:
Hi

just checked the voltage using the multi meter ...

when I connect my meter to brown and switch live, it shows 200v. When I test brown and blue, it’s 0

yep, the honey well did work slightly in the sense that once it turned higher than 0 , it clicks and the boiler did turn on...
 
If that Turbomax is anything like the other Vaillant’s, then 3 will be a permanent live and 4 will be switched, 5 is a spare neutral.
 
.....indeed and there's the conundrum I was referring to earlier. If the photos are of the opposite ends of the same cable, it doesn't make sense.

First, as per @Chris_W says: boiler terminal 3 (Blue wire) and boiler terminal 4 (brown wire) are both lives. But at the thermostat end the blue wire is connected to the neutral terminal!

Secondly the green and yellow wire (with red tape) which is connected to thermostat's terminal 3 which is the 'switched live' but at the boiler, it doesn't go anywhere!...yet the OP tells us the old thermostat worked....I know it was Halloween yesterday but come on, an unconnected wire turning the heating on and off :eek:
 
i gave up. i just put back the Honeywell back in.. and when i turn it, it clicks then i can hear the boiler turn on... i think the honeywell just makes both brown and switch wires connect to join terminals 3 and 4 which turns on the boiler.....
 
  • Thanks
Reactions: CBW
I can only assume then there must be a junction box or something somewhere and the wire colours change there. Has the room thermostat been moved at some point, or the cable extended?

The Thermostat switching terminals are 1 and 3 as per the diagram in the lid.

lid.JPG


Which have the brown wire and the green/yellow wire (with red tape on) connected to them

stat2.JPG


If it was the other end of the same cable in you photo that means the thermostat wires are:

boiler.JPG


So you see the problem :confused:
 
I’ve put the honey well back in. when I turn the temperature above 10, I hear a slight click then the boiler turns on. So something must be contacting the boiler to turn on. I’ve left it as it is because it works.

Yes, think this is connected to a conjunction box somewhere.

As 3 is live,4 is Switch Live and 5 is Neutral.
so all the honey well is doing, once turned, it makes 3 and 4 connect... which turns the heating on... So for the whole time, the honey well wasn't doing its job as a thermostat but was actually being a switch instead.
 
Last edited:
So in fact, if i powered the new stat using the mains, then use 3 and 4 to 1 and 2 of the dry contacts on the new stat, this should work.... as the new stat should close the switch when temperature is set...
 
Last edited:

DIYnot Local

Staff member

If you need to find a tradesperson to get your job done, please try our local search below, or if you are doing it yourself you can find suppliers local to you.

Select the supplier or trade you require, enter your location to begin your search.


Are you a trade or supplier? You can create your listing free at DIYnot Local

 
Sponsored Links
Back
Top