Remove Old Thermostat

Joined
30 Oct 2007
Messages
13
Reaction score
0
Country
United Kingdom
I am going to replace my existing heating system controls with a wireless smart heating system (probably Drayton Wiser). In doing so I want to remove the two existing room thermostats I have (I have two zones for my central heating). They both have three wires (as well as the earth)

  1. black (sheathed in blue) - I believe this neutral
  2. brown
  3. grey
I believe 2 and 3 are the live and the switched live.


What do I need to do to remove this room thermostat?
 

Attachments

  • IMG_3474.jpeg
    IMG_3474.jpeg
    226.2 KB · Views: 182
Sponsored Links
The two live switching wires in (L) 'Live' and (SL) 'Switched Live' need to be permanently connected together and the other wires isolated separately.

In this case the best way to do it would be to find the other end (ie the origin) of the cable. Note where the brown and grey wires are connected and remove the cable and all of the wires. Then insert a wire link between the two terminals you have just removed the brown and grey wires from so that they are electrically connected.
 
  • Thanks
Reactions: CBW
That is what I thought you might say! I have seen people talk about a "wiring centre" where I guess the other end of the cable will be. For my system I do not know where this might be. All I think I have is the existing programmer (which is a ChannelPlus H37XL). Where will the other end of the cable likely come out?
 
That will change from system to system and will depend upon the personal preferences of the original installer, the materials he was provided with or had to hand at the time of installation and well as the layout of the various heating system components to each other in your home.

There is usually a wiring centre somewhere, (but not always). Often it's located close to the hot water cylinder in the airing cupboard, if you have one. It might look something like below and usually the motorised valves are close by and wired directly to it.

Capture.JPG


The other alternative is to leave the existing thermostats in position and put the grey and brown wires in the same terminal, either S or SL, it doesn't matter which one.
 
Sponsored Links
Found it in the airing cupboard. It is marked Danfoss - will open it up to take a look tomorrow. I take it I need to work out which is the live and switched live to the two thermostats and join them in the Danfoss box. Can I then safely remove the thermostats and 'bury' the cables in the wall? [as they will be dead]
 
I take it I need to work out which is the live and switched live to the two thermostats and join them in the Danfoss box.
If you’re unsure, post a photo on here, and someone might be able to confirm for you. Yes if you remove the wires so they’re dead, yes bury in the wall and plaster over. Might be best to snip them though.
 
Here is the wiring centre (and a photo of what is printed on the lid). Anyone know which will likely be the ones that go to the 2 room thermostats?

It would seem to be 2 and 3 according to the diagram yet 3 has nothing going to it. Also 2 has a brown and grey going to it (like brown and grey at the thermostat as per my earlier picture) - so these are effectively joined together?!

 
Last edited:
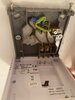
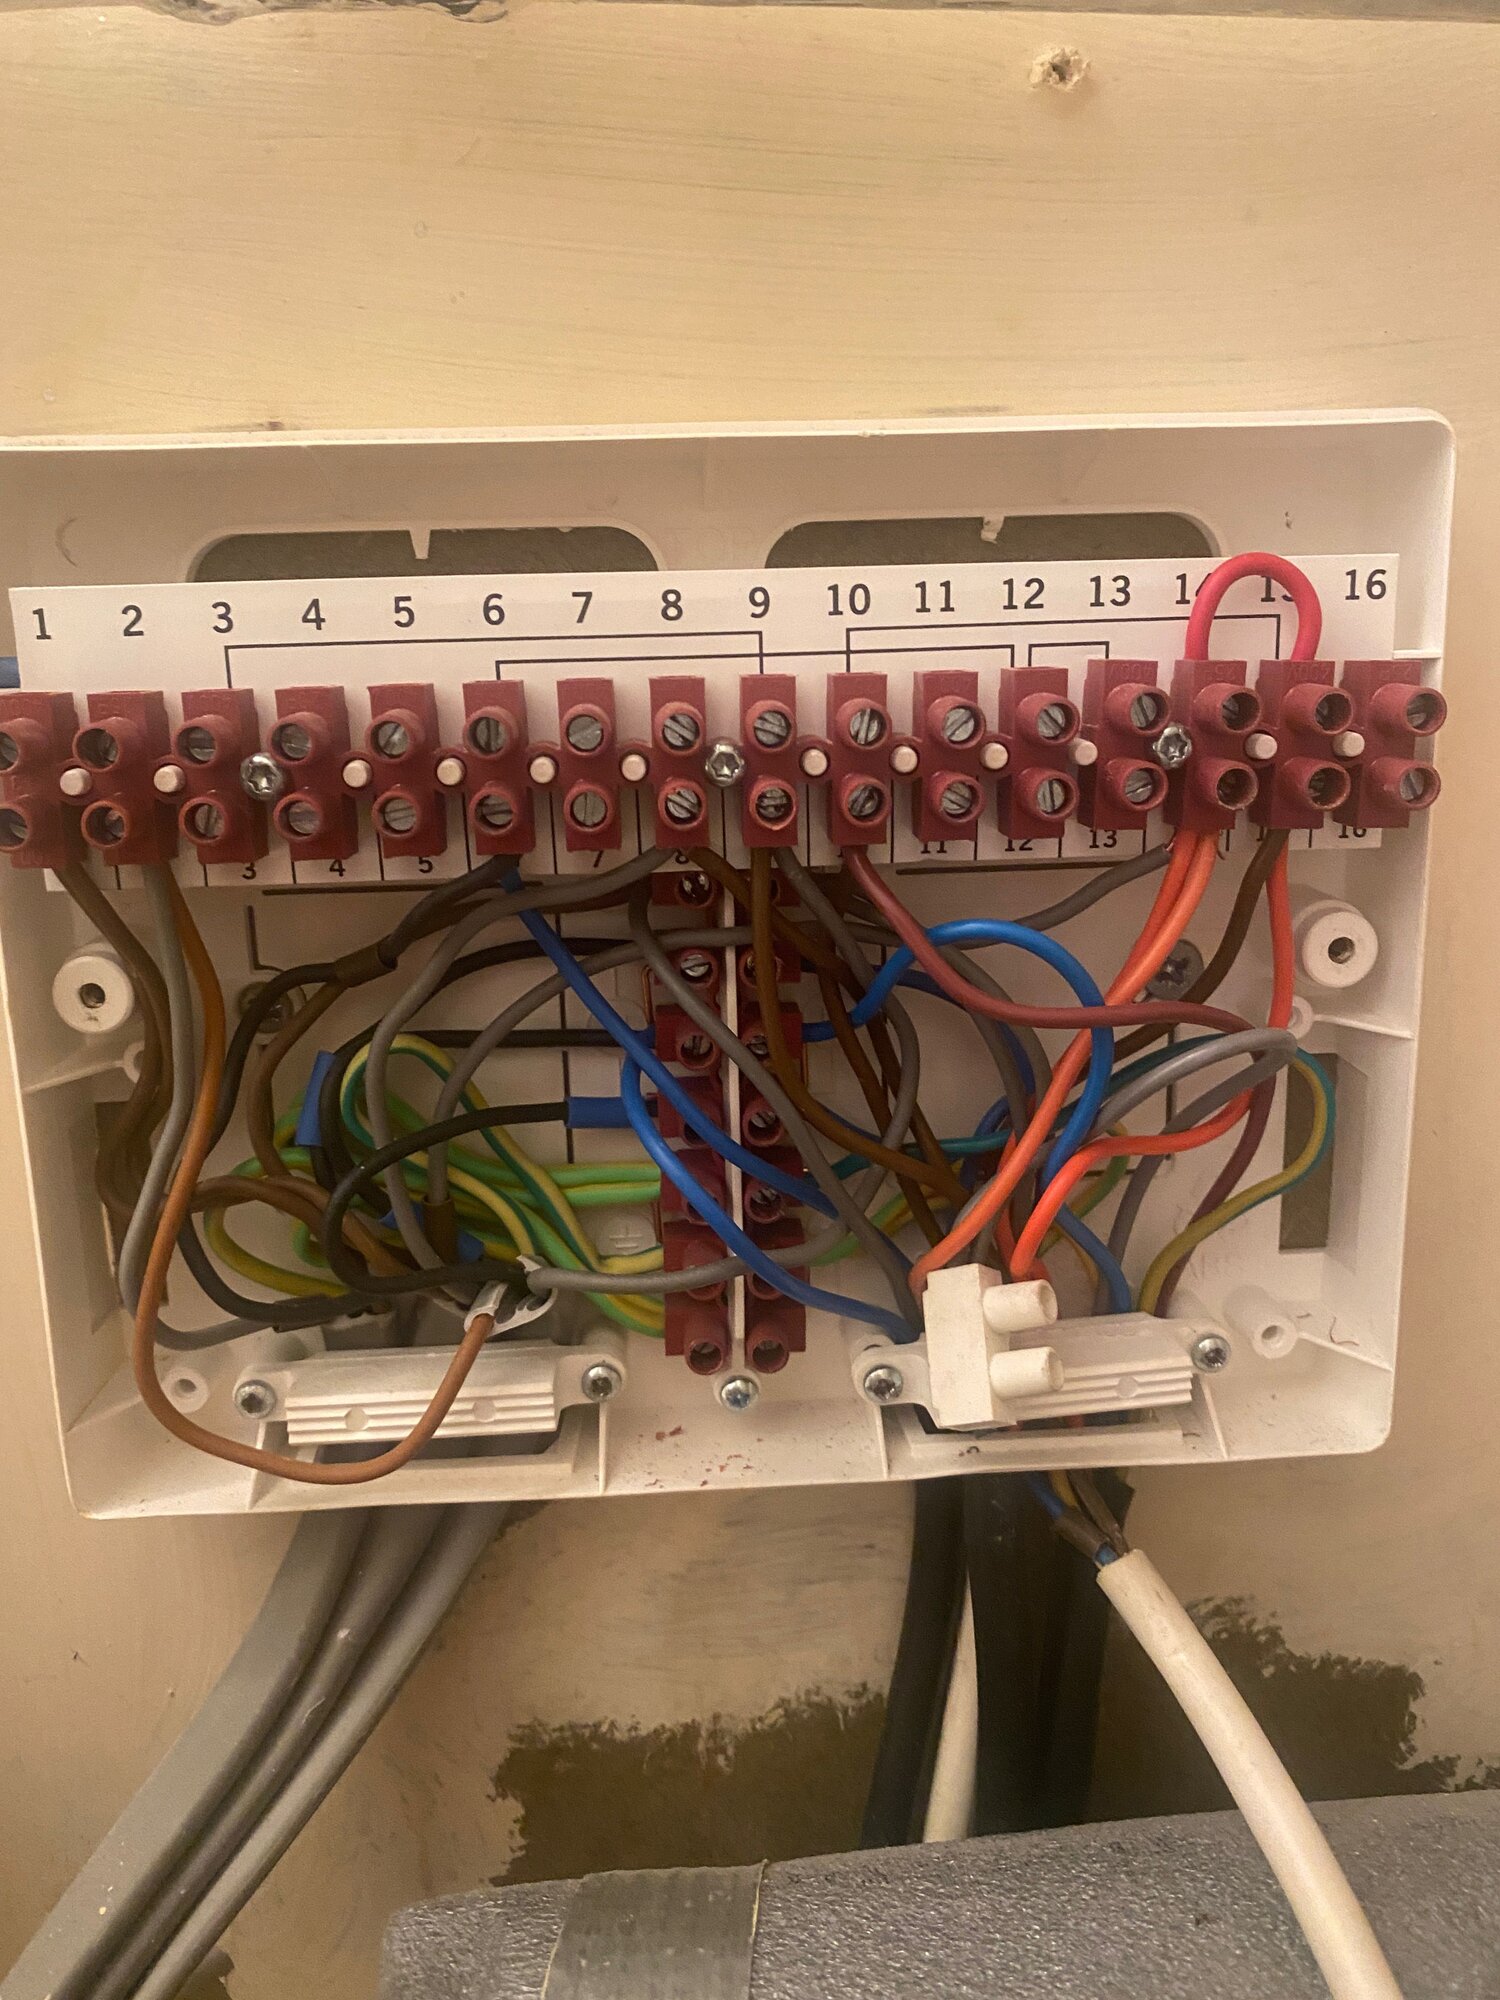
First of all the nomenclature in the lid is for a single heating zone, so not all is applicable to your system.

The actual wiring is a bit of a rats nest....and difficult to see clearly what goes where. However there are two motorised valves controlling your two heating zones (and it looks like a 3rd motorisde valve for the hot water).

If you can identify the black cable coming from one of the heating motorised valves, then the brown wire from that, will likely be connected to one of the wires going to its room thermostat. Once you have identified the suspect wire, the other wire of course will be in the same sheath. I normally disconnect the suspect cable at both ends and then test it with a multimeter to make sure that it does indeed go to the room thermostat.

The process can then be repeated for the other room thermostat and its associated motorised valve.

Having said the above, there is the important matter with regard to the existing time control for your heating:
1. Do the existing room thermostats include time control. (i.e. are they programable thermostats that allow you to set both time and temperature) or...
2. Only thermostats and there is there separate time control elsewhere?

In the case of 1. the wiring centre will need major rewiring to connect the Drayton wiser to it. In the case of 2. Depending on its current configuration, you may be able to replace the existing time control with a 3 channel Wiser, then again if you don't have an existing 3 channel programmer some additional wiring and modification will still be required. This is often far more complicated that expected. You can read a previous thread about it:

https://www.diynot.com/diy/threads/help-with-drayton-wiser-install.513829/
 
  • Thanks
Reactions: CBW
Wow. Thank you so much for looking at this for me. The thermostats are not programmable - there is a separate programmer (ChannelPlus H37XL). I was expecting to simply change this for the 3 channel Wiser hub. I could, of course just join the live and switched live wires at the thermostats and leave them on the wall. I will then find somewhere to put the 2 new (wireless) Wiser thermostats. Rather get them off the wall though! Will take a look at your other post. Wondering if I am going to need to resort to getting an electrician in!
 
Looks like you are fortunate. Once the thermostats are sorted, provided that you have the 3 channel version of the Horstmann, then a 3 channel Wiser receiver could simply replace it.
 
  • Thanks
Reactions: CBW

DIYnot Local

Staff member

If you need to find a tradesperson to get your job done, please try our local search below, or if you are doing it yourself you can find suppliers local to you.

Select the supplier or trade you require, enter your location to begin your search.


Are you a trade or supplier? You can create your listing free at DIYnot Local

 
Sponsored Links
Back
Top