Hi guys,
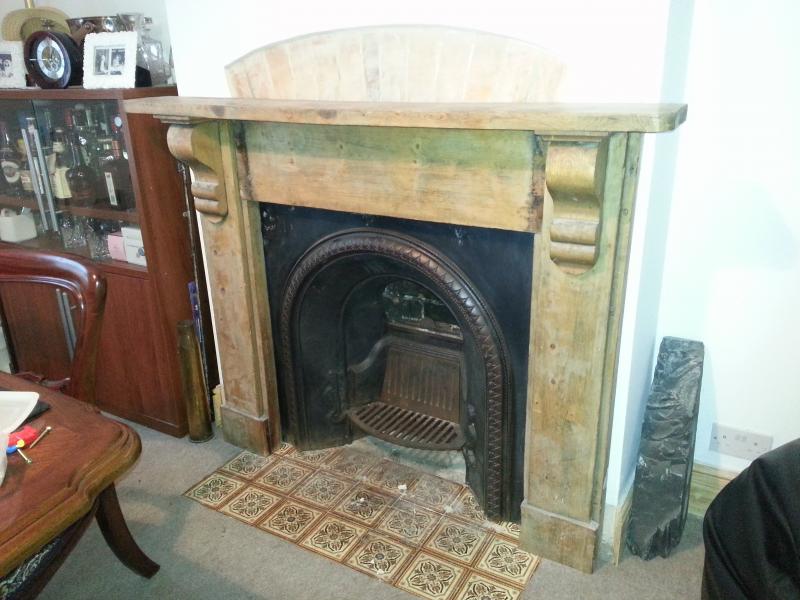
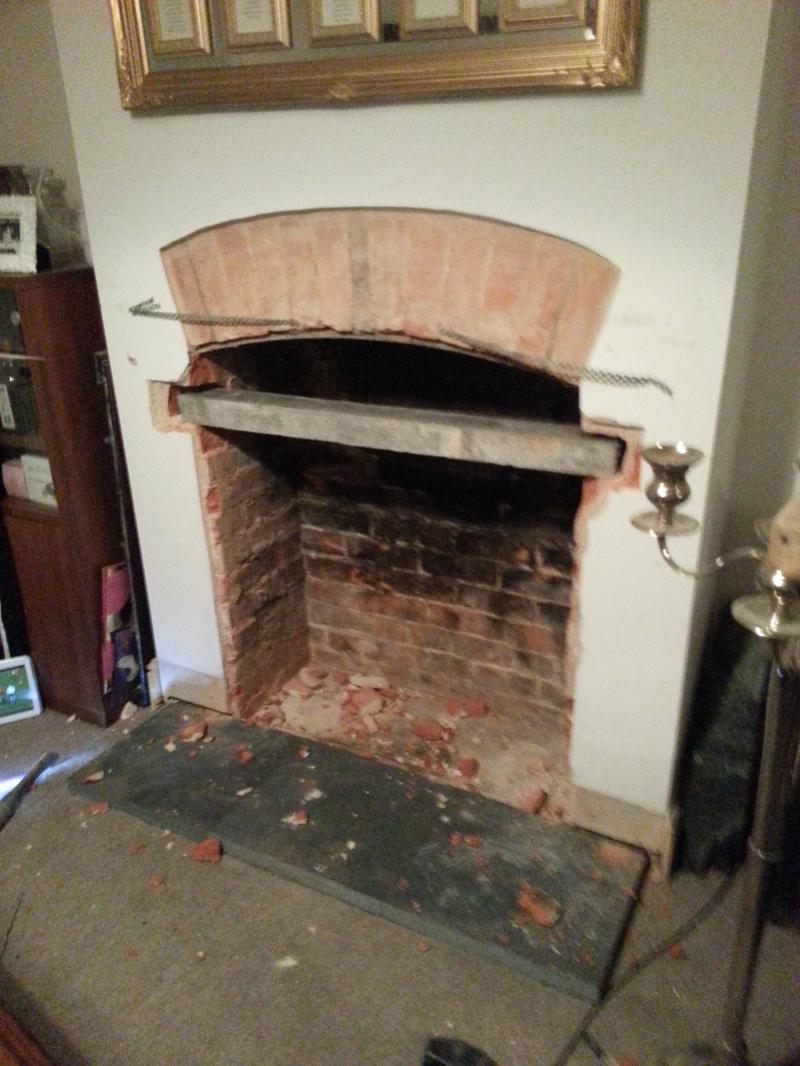
When renovating our lounge (house is vc.1900, red brick), we opened the chimney breast up intending on putting in a wood burner. The cost of the flue liner etc precludes us doing that so we initially settled on sourcing a cast iron fireplace and wooden surround off ebay - which we've done (for £70 for the lot!!). However, we are considering moving abroad for a few years and are concerned that if we rent the house, someone may light a fire in it and, secondly, we'd love an open fire anyway!
We had a few HETAS people round to look (the only three within 25 miles of us in the HETAS website). The first two kinda shrugged and said "I only do woodburners", whilst the third guy wanted £1,500 as he wanted to erect scaffolding to "check the chimney stack". The chimney stack was rebuilt from the roof up 12 months ago, so I know is perfect - he also ran a smoke test and visually inspected the chimney both inside and out and commented it was in very good condition, unobstructed and with good updraught. I rang him back to see if he'd come down on price but he said he'd do it for £1000 but that's his bottom price as he's so busy - but said it would only take him two days!
I'm certain I can do this myself. I've done as much research as I can and feel I'm 90% there, but I'm stumped on the last 10%.
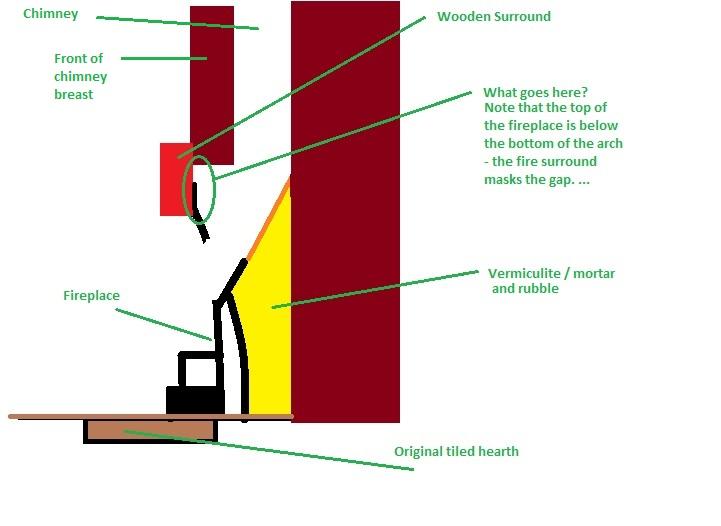
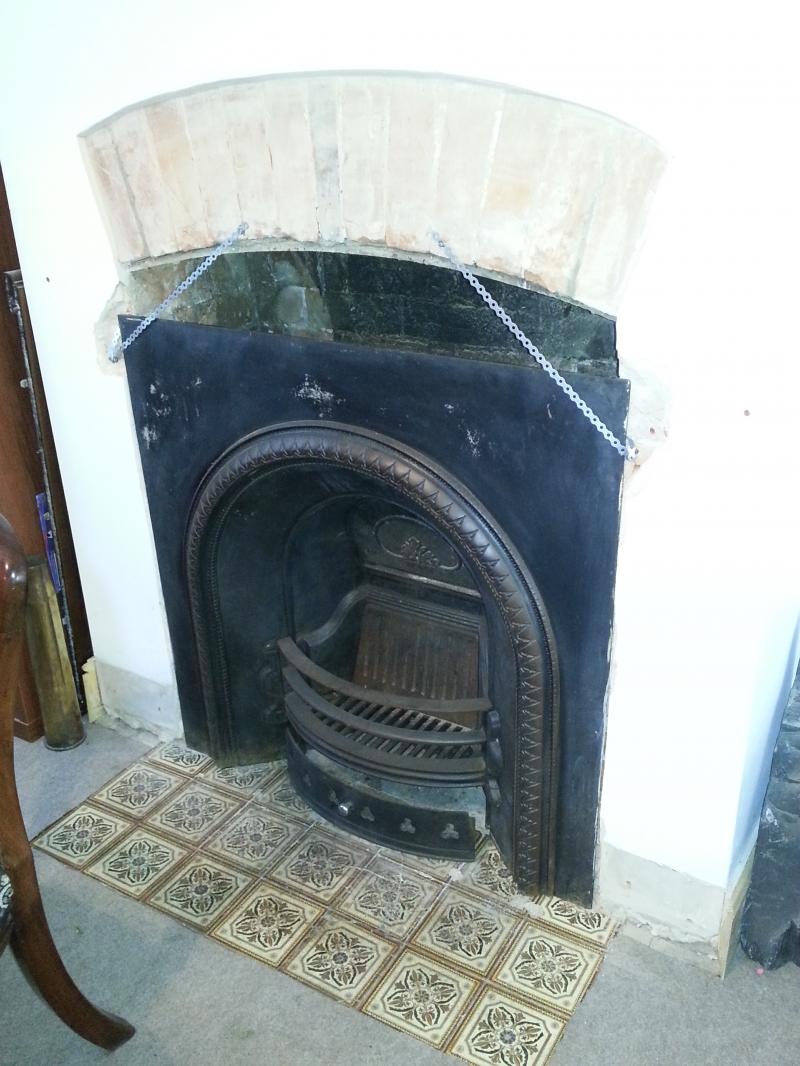
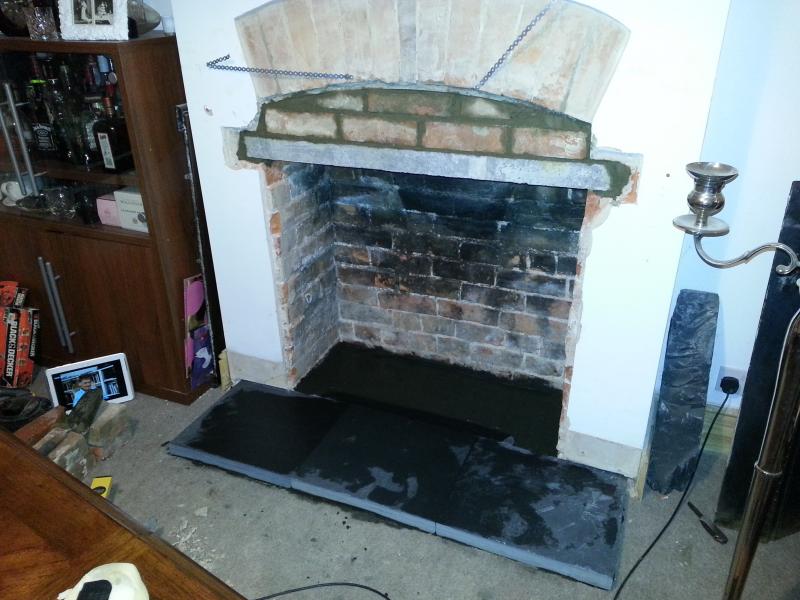
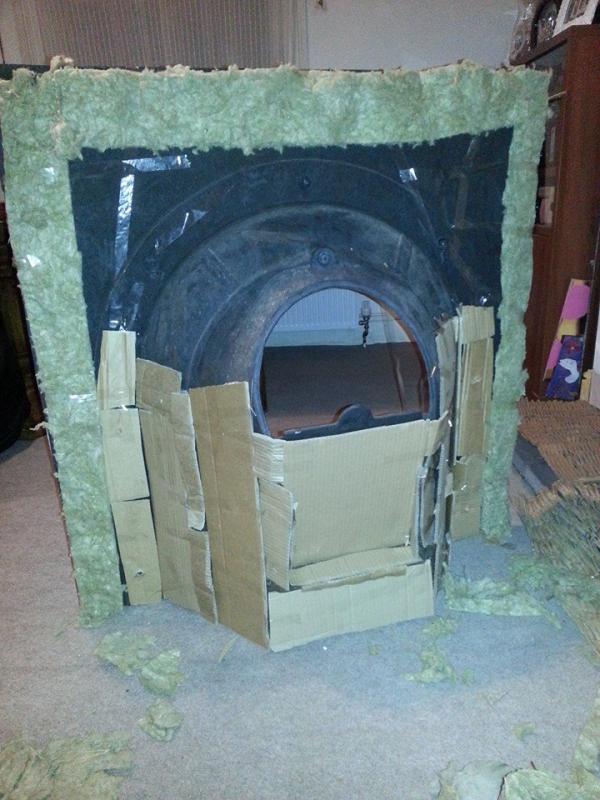
As this is a cast iron fire, I recognise I in effect create my own fire-back by filling behind the fire with rubble, then closer to the fire vermiculite and mortar. I know to slop the vermiculite mix up to form a throat to the chimney and cover this with a thin layer of mortar to provide a smooth surface.
The issues I have is with the top of the fireplace;
1. On all the example I've seen on the internet, there appears to be a 'gathering' or throat forming lintel that sits on top of the fabricated fire-back to guide smoke backwards into the throat of the chimney. As no fabricated fire-back will be used here, what am I supposed to do.. nothing?
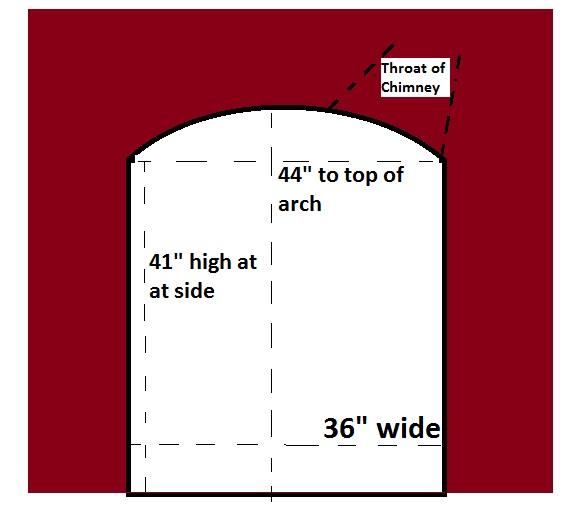
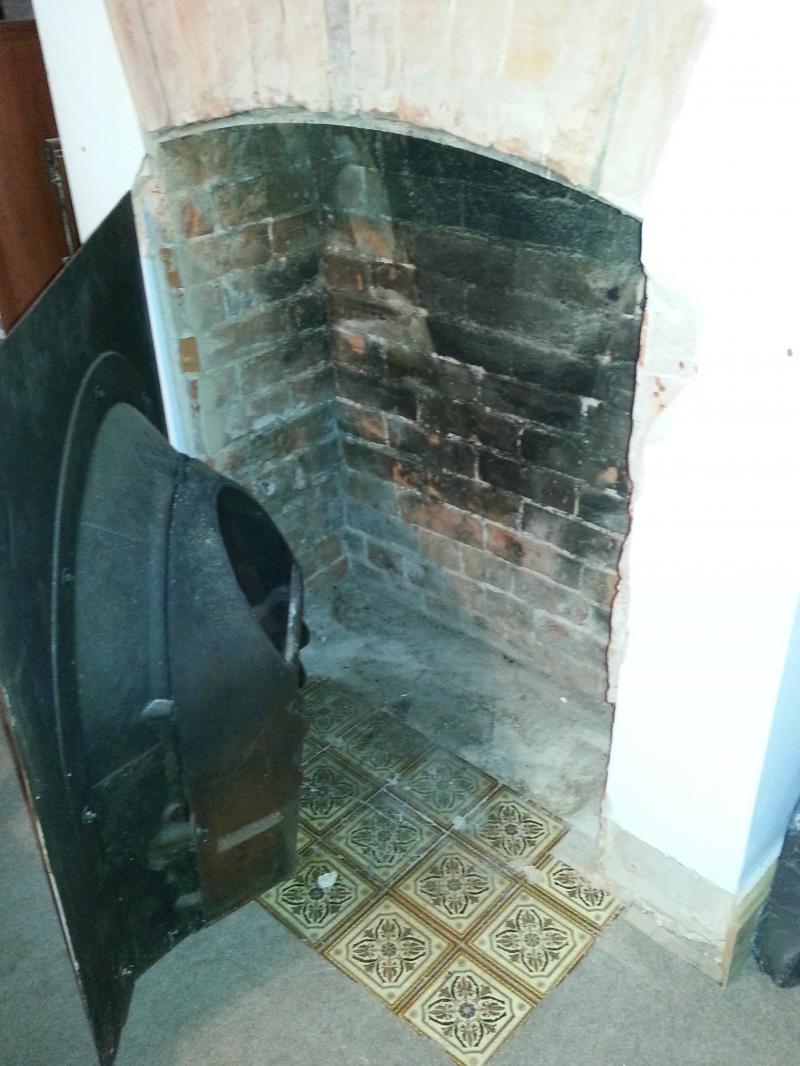
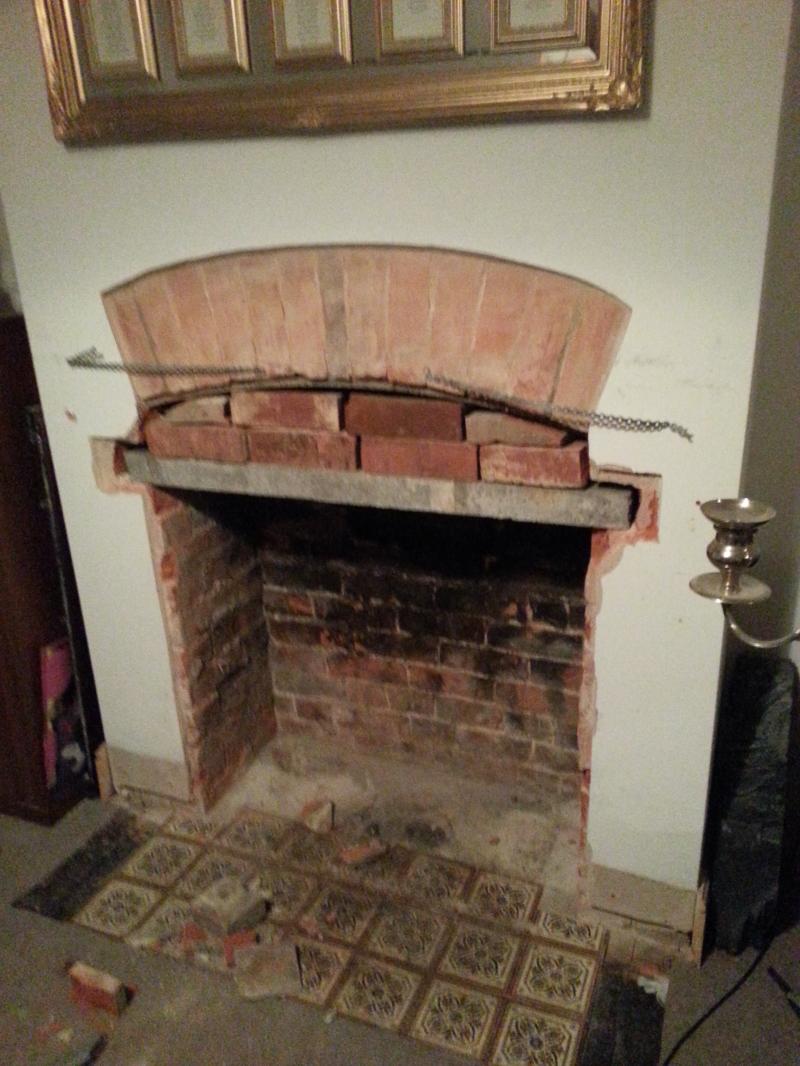
2. Secondly, the builders opening is big - 36" wide and 44" tall at the top of the arch. The biggest fireplace we could find without appearing wrongly proportioned is only about 40", leaving a gap of about 1" at the sdei / 4" at the centre between the top of the fireplace and the bottom of the chimney breast. The surround we've bought covers this gap which is fine if we're doing this for aesthetic purposes - but what am I supposed to do if we want to return this to use? Is the fireplace too small (I don't see how though), is it the wrong design of fire, do I fill the void with fire board or similar, or do I just use fire ropes to seal it? Any advice or thoughts would be appreciated.
I realise this is a bit hard to visualise so I've taken photo and tried drawing the challenge I face...
Thanks for getting this far - would love to hear your thoughts!
When renovating our lounge (house is vc.1900, red brick), we opened the chimney breast up intending on putting in a wood burner. The cost of the flue liner etc precludes us doing that so we initially settled on sourcing a cast iron fireplace and wooden surround off ebay - which we've done (for £70 for the lot!!). However, we are considering moving abroad for a few years and are concerned that if we rent the house, someone may light a fire in it and, secondly, we'd love an open fire anyway!
We had a few HETAS people round to look (the only three within 25 miles of us in the HETAS website). The first two kinda shrugged and said "I only do woodburners", whilst the third guy wanted £1,500 as he wanted to erect scaffolding to "check the chimney stack". The chimney stack was rebuilt from the roof up 12 months ago, so I know is perfect - he also ran a smoke test and visually inspected the chimney both inside and out and commented it was in very good condition, unobstructed and with good updraught. I rang him back to see if he'd come down on price but he said he'd do it for £1000 but that's his bottom price as he's so busy - but said it would only take him two days!
I'm certain I can do this myself. I've done as much research as I can and feel I'm 90% there, but I'm stumped on the last 10%.
As this is a cast iron fire, I recognise I in effect create my own fire-back by filling behind the fire with rubble, then closer to the fire vermiculite and mortar. I know to slop the vermiculite mix up to form a throat to the chimney and cover this with a thin layer of mortar to provide a smooth surface.
The issues I have is with the top of the fireplace;
1. On all the example I've seen on the internet, there appears to be a 'gathering' or throat forming lintel that sits on top of the fabricated fire-back to guide smoke backwards into the throat of the chimney. As no fabricated fire-back will be used here, what am I supposed to do.. nothing?
2. Secondly, the builders opening is big - 36" wide and 44" tall at the top of the arch. The biggest fireplace we could find without appearing wrongly proportioned is only about 40", leaving a gap of about 1" at the sdei / 4" at the centre between the top of the fireplace and the bottom of the chimney breast. The surround we've bought covers this gap which is fine if we're doing this for aesthetic purposes - but what am I supposed to do if we want to return this to use? Is the fireplace too small (I don't see how though), is it the wrong design of fire, do I fill the void with fire board or similar, or do I just use fire ropes to seal it? Any advice or thoughts would be appreciated.
I realise this is a bit hard to visualise so I've taken photo and tried drawing the challenge I face...
Thanks for getting this far - would love to hear your thoughts!