So I Made a Fence
But Only a Little One
At the side of Lottie’s house they have a gravel drive section, which was starting to look a bit messy and uncared for. Quite a big area, roughly 30 x 13 Feet with a nice hedge blocking out the neighbours on one side, overgrown shrubs and a broken fence at the back. This area is just a waste being a like this so I offered to make the area a bit more tidy, make it nicer to look at and to make a nice new fence at the back.
So if I haven’t put you off already, I hope you will continue reading and I hope to show you the construction and general tidying up of the area. However I don’t have any before photos, as I just wanted to get stuck in with the jobs in hand and I also don’t have many photos of the making of the components for the fence. This is because I didn’t want my camera in the dusty and dirty environment while I was working.
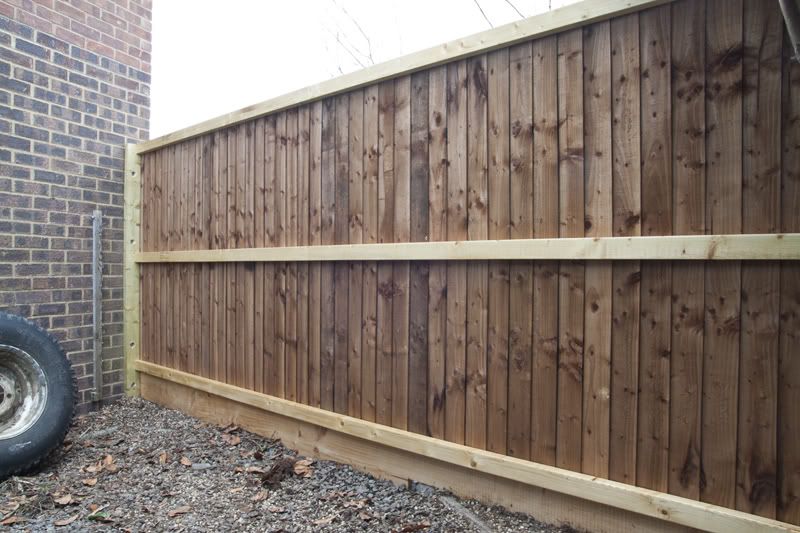
The basic plan for the fence was just to span from the side of the house to the edge of the hedge using one span. The span is approx 13 feet so a custom fence was in order. One post attached to the house and the other attached to a new concrete footer with three rails to support 1.5m Feather edging.
Concrete;
The first job on the fence was to get the concrete sorted so it could set, but before getting that far I needed to clear an access route to where I needed to have the concrete footer. The concrete footer is located just behind the hedge as close to the tarmac pavement as possible. Once I had cleared the area I needed to dig a hole roughly 1 foot square and about 2 feet deep. On first little inspection it looked an easy task but was made a little harder when the first 8 inches or so was gravel then a root infested clay. But with the help of a pick axe, shovel and a sledgehammer I soon had the hole I was after.
I decided to go down about 3 foot from the surface, which was about 2 foot of clay then remaining gravel on top. I smashed a few bricks up and placed these at the bottom of the hole as a small layer of hardcore.
With the hole prepped I moved on to making a 1-foot square shuttering using 12mm plywood. Once I had this made I secured it in place and made sure it was level as this was the guide to make the top of the concrete level when I will be pouring it.
The concrete was made using 1 part cement to 4 parts Ballast with water added to make the required consistent see. I used a B&Q mixing tray to mix the concrete and a shovel. Starting by mixing the cement with the Ballast then making a volcano like shape with a hole in the middle and adding water little by little.
Once I had enough mixed I shovelled the mixture in the hole using my shovel. After every shovel load I used a length of wood to plunge into the concrete to remove air and to force the concrete down. I continued doing this to I had reached the top of the shuttering where I smoothed of the top using a trowel.

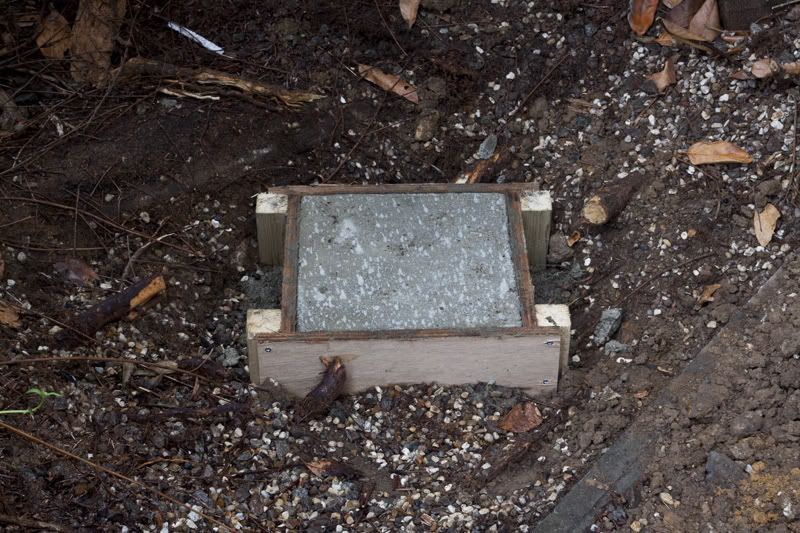
The concreting was done on Friday afternoon after I got home from work so it had a few days to set while I got the rest of the fence bits together.
Metal Post Bracket;
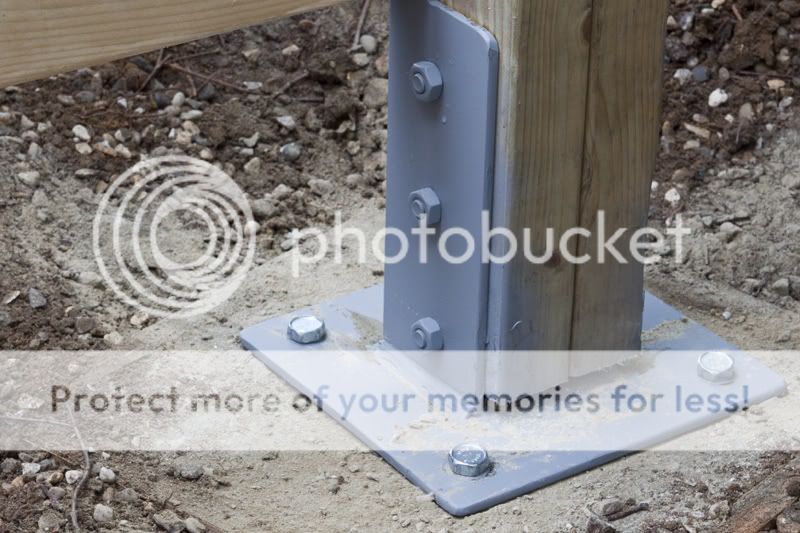
As I like to build things to last longer than normal things I will be using a metal bracket bolted to the top of the concrete instead of concerting the post into the concrete. I have chosen this way for a few reasons. First if you concrete a post into concrete, water will run down the post and rot the bottom of the post. This destroys the post and can make them the fence weak within 5 years. With the bracket the post can be changed without needing to dig up the concrete and re concrete in a new post.
Secondly the fence will run a slight angle, so I am able to rest the post in the bracket and move the whole framing assembly to suit the required angle. If you continue to read on I will explain show what I mean.
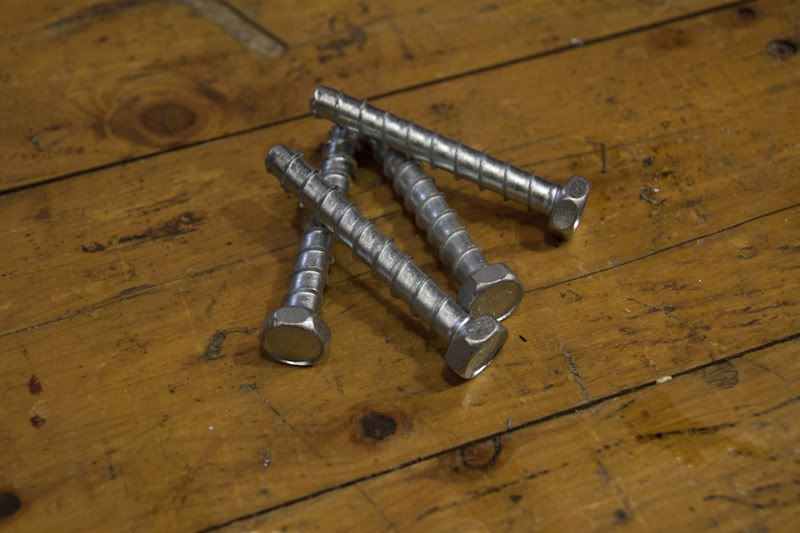
The bracket is very simple and was made using 6mm thick steel to keep it strong. It is made out of 3 sections, A base measuring 8 x 8 Inches and 2 upright supports measuring 3 ½ x 8 Inches. The base has a 11mm Hole drilled in each corner, which is 4 in total; these holes will be used to secure the bracket to the concrete using multi monti bolts. The two uprights are welded to the base and have 3 10mm holes, which are for securing the post to the bracket with 3 m10 nut and bolts.
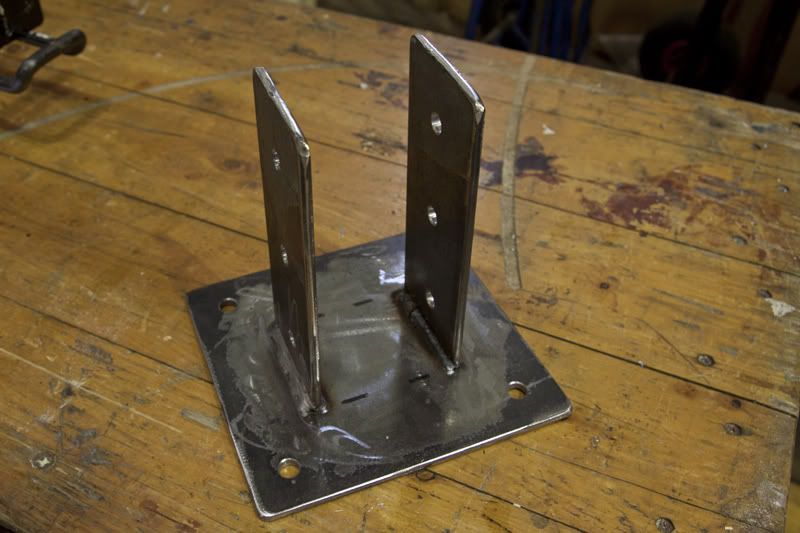

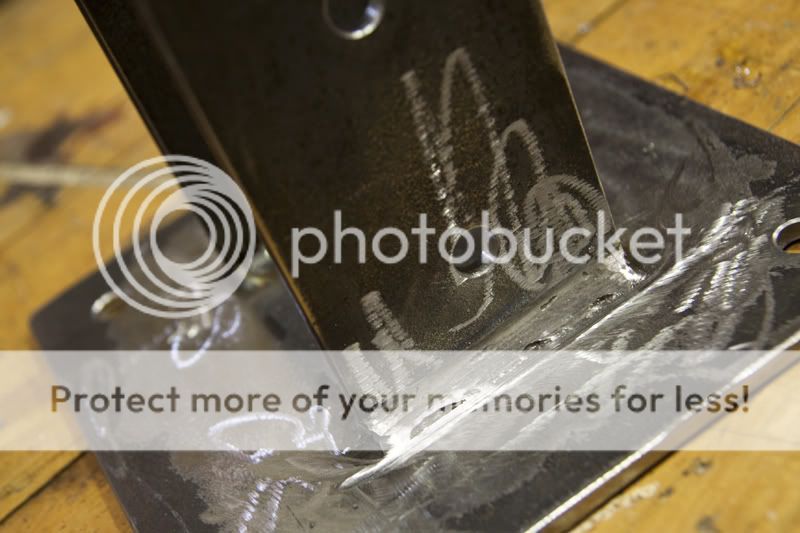
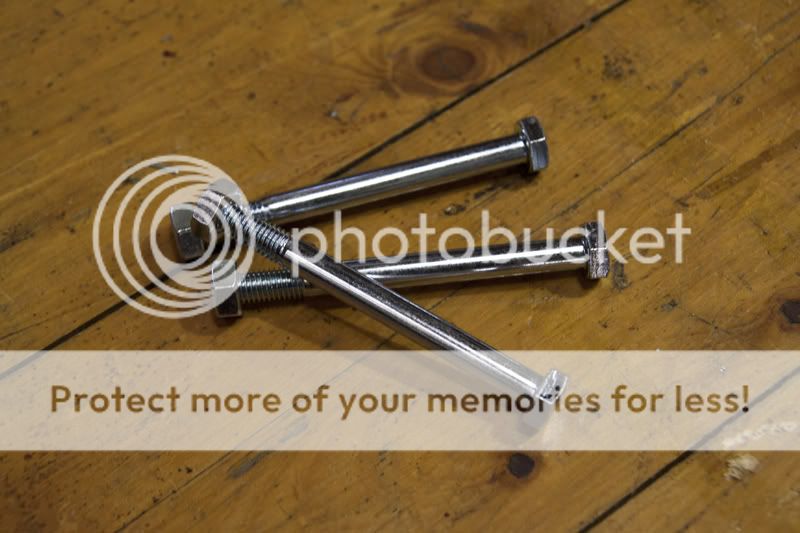

The bracket was sprayed using a cold zinc galvanizing spray, it’s not the best of things but I had a few can left from a previous job so there was used up on the bracket.
Fence Framework;
I made the fence framework at work where I have plenty of space to take advantage off. Then carefully loading it into the back of a van to its final location. The fence frame is made of 4x2 CLS, 3x2 CLS, 1.5m feather edging and an 8x1 Planned gravel board.
I started by cutting three 4x2 sections into 3 equal lengths, these will become the posts and they are 1700mm tall. I cut these using my Rexan sliding mitre saw, which made the task very quick.
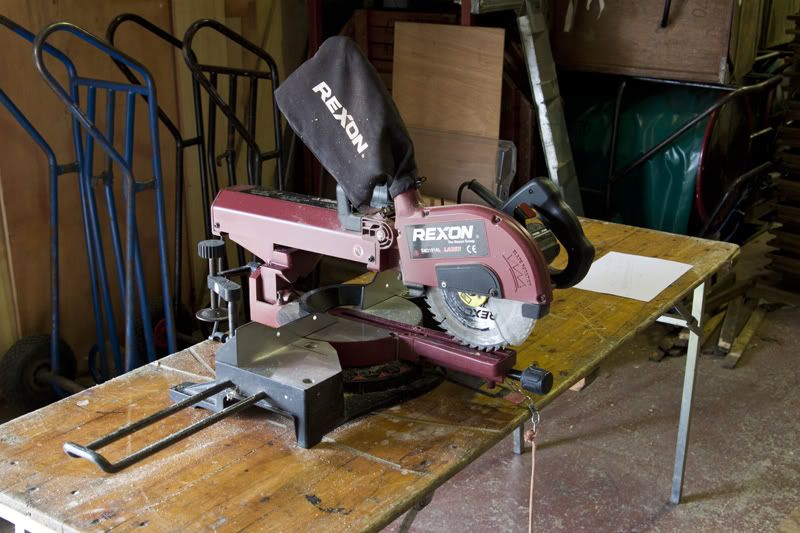
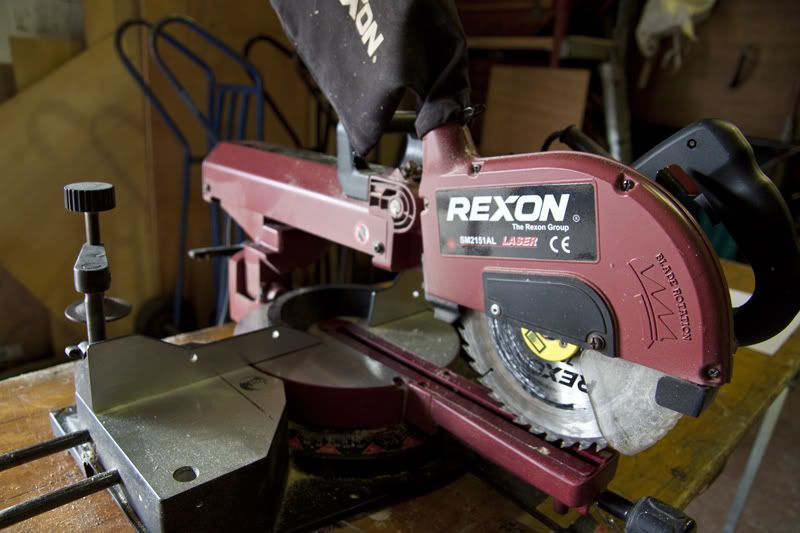
Once I had three 4x2 posts all the same length I needed to cut slots to accept the 3x2 rails. There are three slots on each post, which was cut one at a time also using the Rexan mitre saw. Using the depth stop I could control the amount of material being removed and also helped to ensure every slot was the same depth. Using the saw isn’t the best of tools for the job as a router would have been better, however I don’t have one of them at my disposal so the saw did the job.
One of the posts, the one which well be held by the metal bracket will be two 4x2 screwed together, essentially making a 4x4 post. I clamped two of the 4x2 together when I was screwing together to make sure there was properly aligned to each over. I pre drilled and counter sunk before screwing to ensure an even pressure and not to crack the wood. The holes was predrilled every 100mm in a diagonal pattern and I used 6x8 quicksilver screws from Screwfix to screw the two pieces of 4x2 together.
The posts were left to one side while I cut the three rails to size. The 3x2 was bought in 4.8m lengths and I needed the rails to be 4m (4000mm) so I quickly cut the excess 800mm off using the mitre saw. I pre drilled and countersunk two hole at each end of the rails; these will be used to screw the rails into the slots on the post.
I stated to assemble the frame once I had cut the rails, laying the post s down first, and then slotting the rails into the slots. I slotted in the bottom rail first then using my tape measure I took measurements of the diagonals so I could square the frame up. The middle rail was slotted in next followed by the last rail at the top.
With all the rails in place I secured the rails using 6x8 screws though the pilot holes.
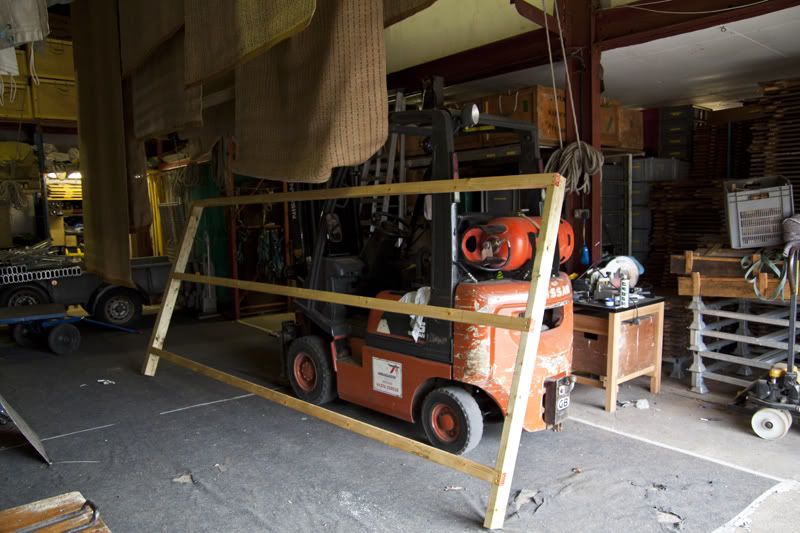
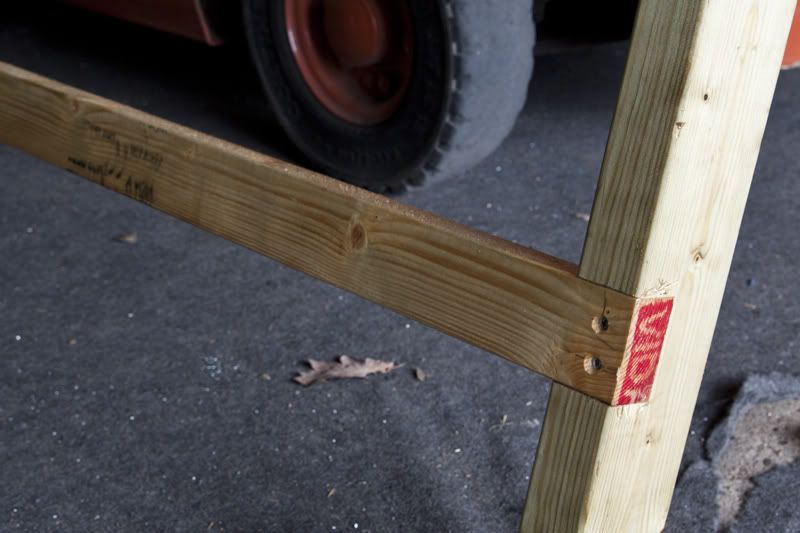
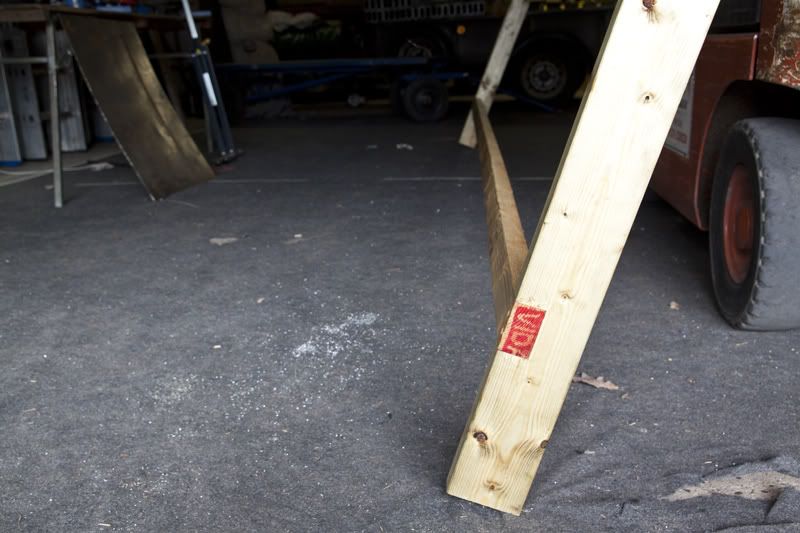
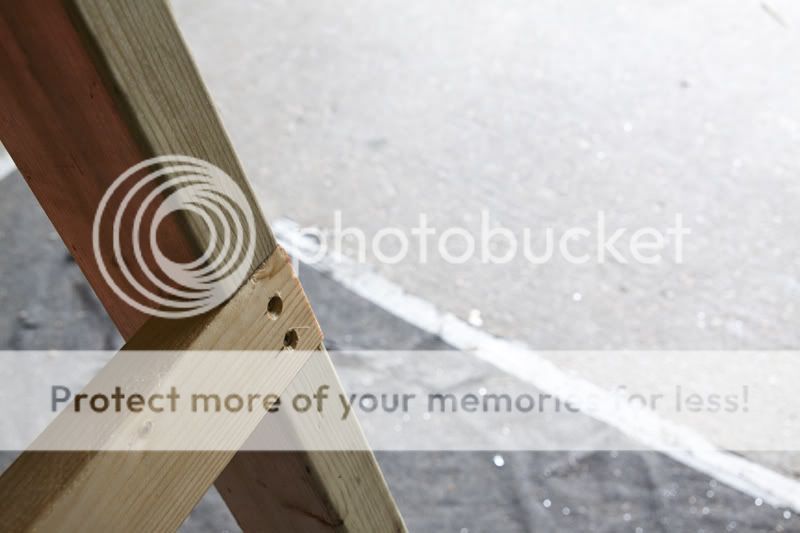
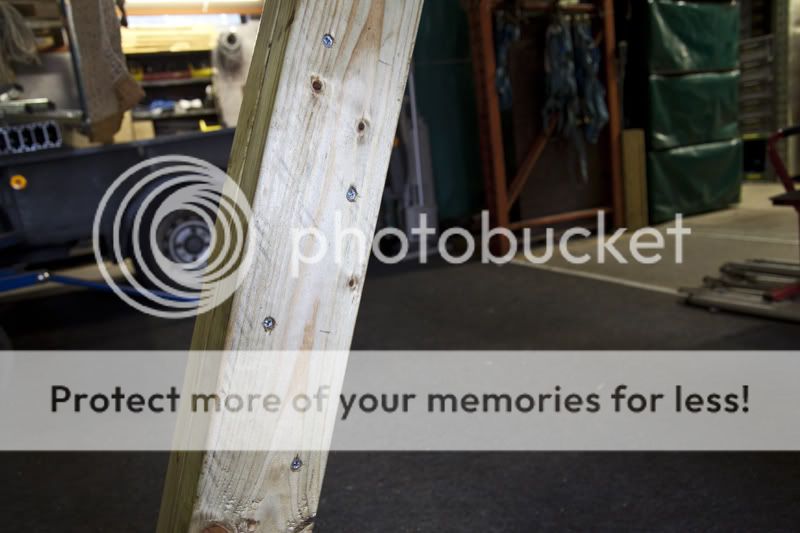
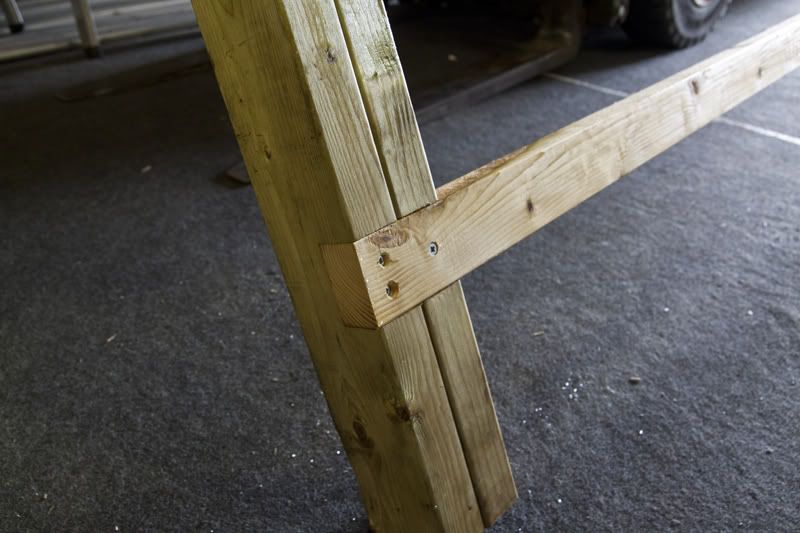
With all the frame built up and secured together I moved on to giving the frame three coats of a cheap varnish we have at work; Oleo Floor Resin from Evans. This will keep the water out for a few years and eventually the whole fence will be stained and sealed, but that’s a job for another day.

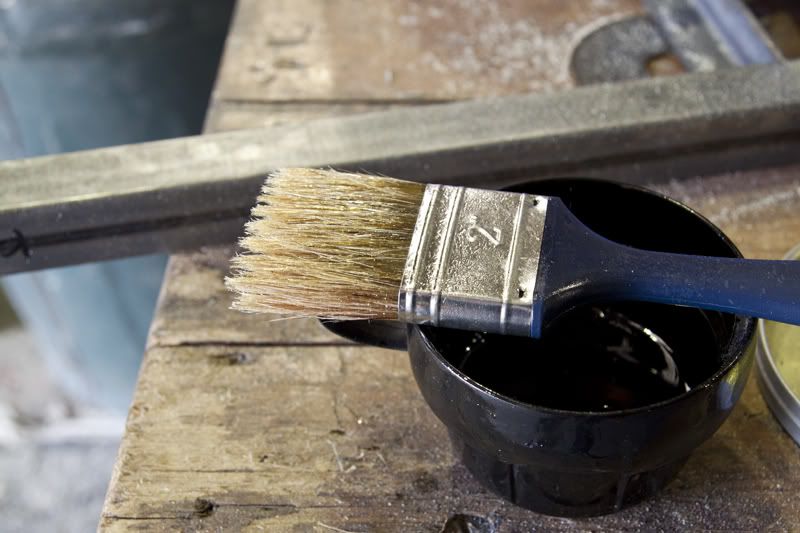
I left the varnish overnight to harden and when returned in the morning I attached the metal bracket to the 4x4 post using the three m10 bolts.
Securing the Frame;
Once I was happy with everything I transported the frame back to Lottie’s house using one of the work vans, it was a tight fit with only a few inches left around the frame.
When I arrived I walked the frame into the position, resting the bracket on the concrete footer. I then raised the house end and placed some bricks under the post to make it higher. I used a spirit level at this point to level up the frame ready for securing the frame to the house and the concrete footer.
I carefully drilled four holes in the concrete first, and then bolted the bracket down using the multi monti’s. The DeWalt impact driver made light work of bolting the bracket down and once I was happy I moved on to doing the same at the house end.
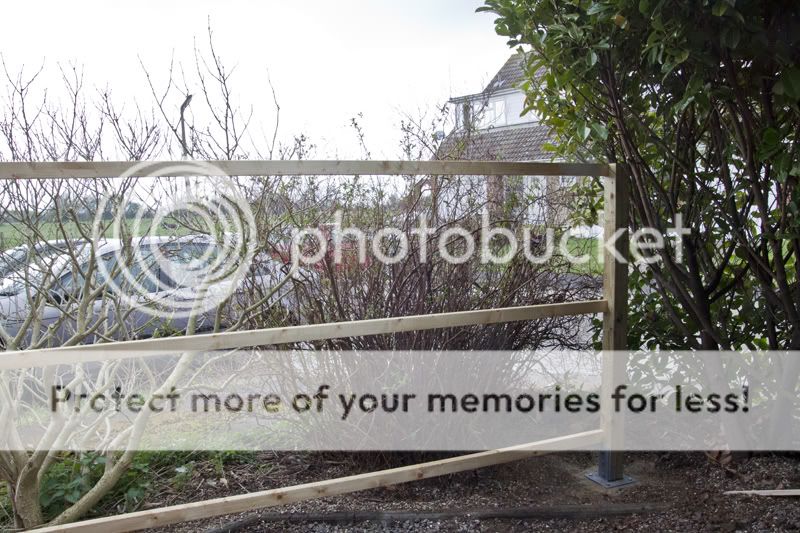
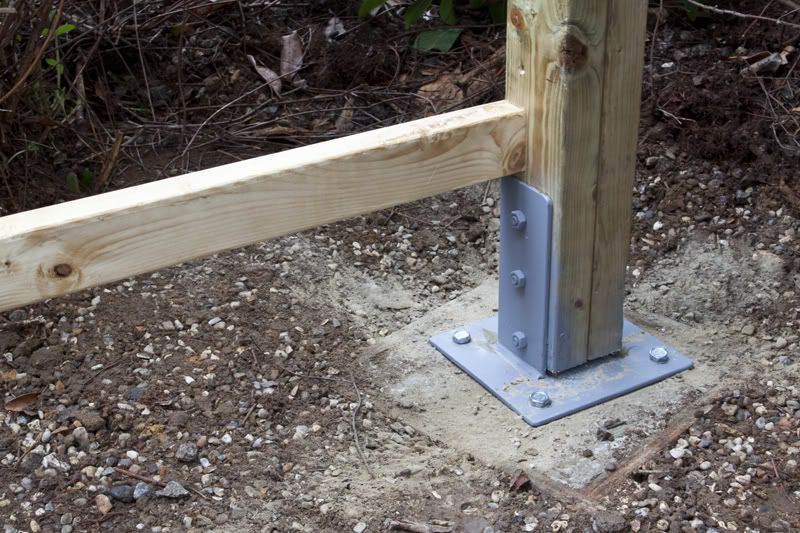
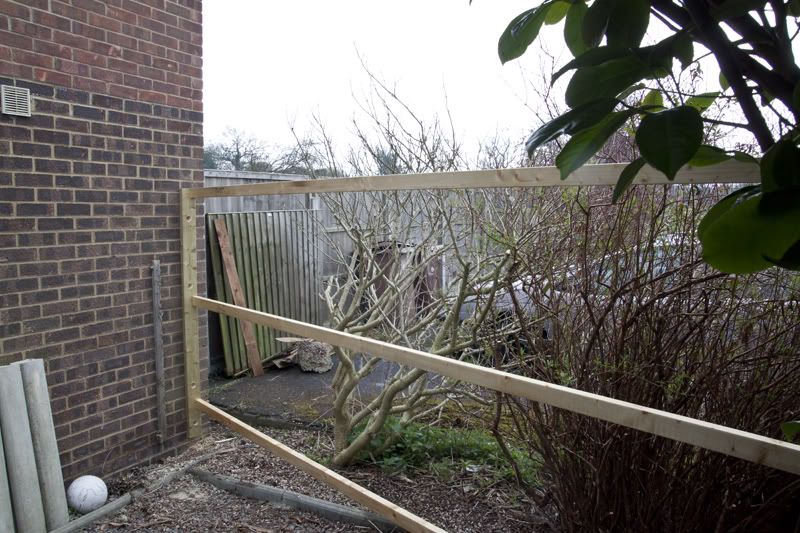
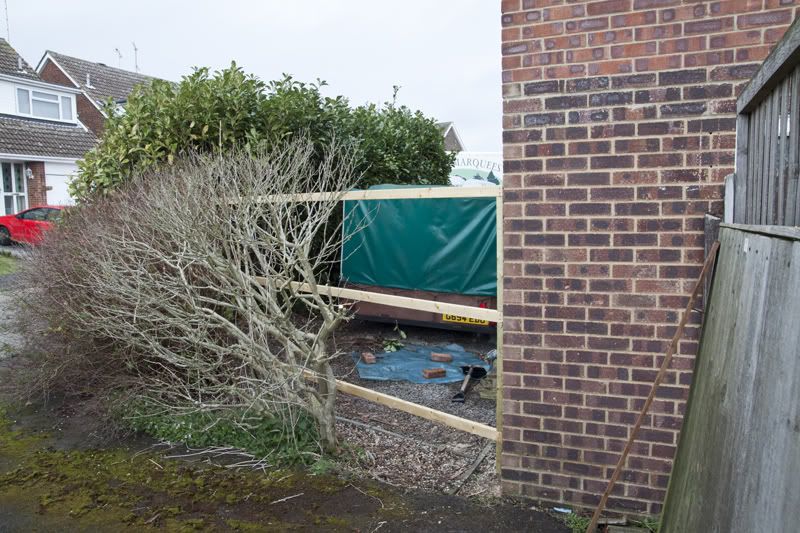
With the frame in place you can start to see the size of the fence and the line it will take.
Feather Edging;
With the frame in place I continued to progress by attaching the feather edging to the frame. I started at the house end and worked my way to the other side. I made 100mm blocks, which I used as spacers to measure the gap for the overlap to make sure I had a consistent overlap across the entire fence. The feather edging was attached using 40mm round wire nails and took around 2 hours to attach the 45 panels.
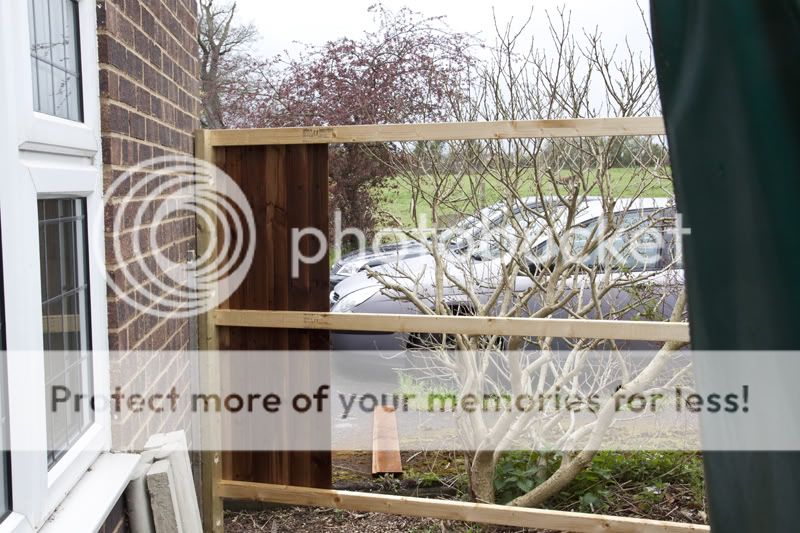
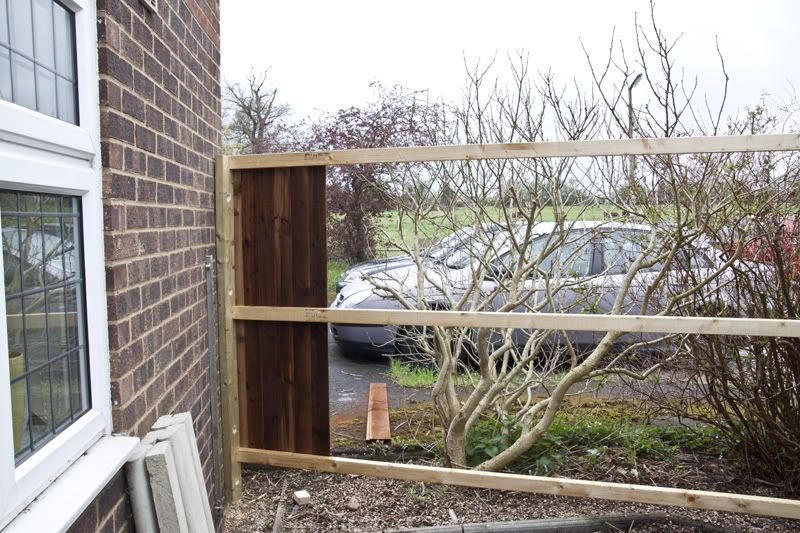
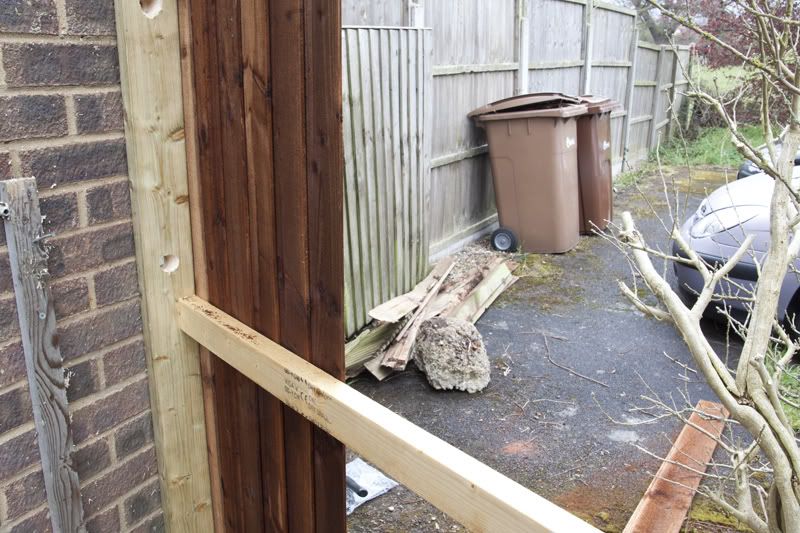
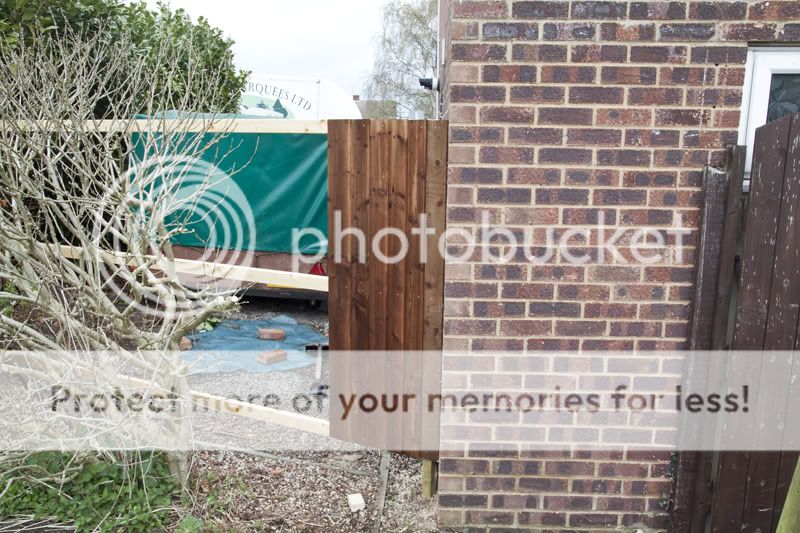
Finishing Up;
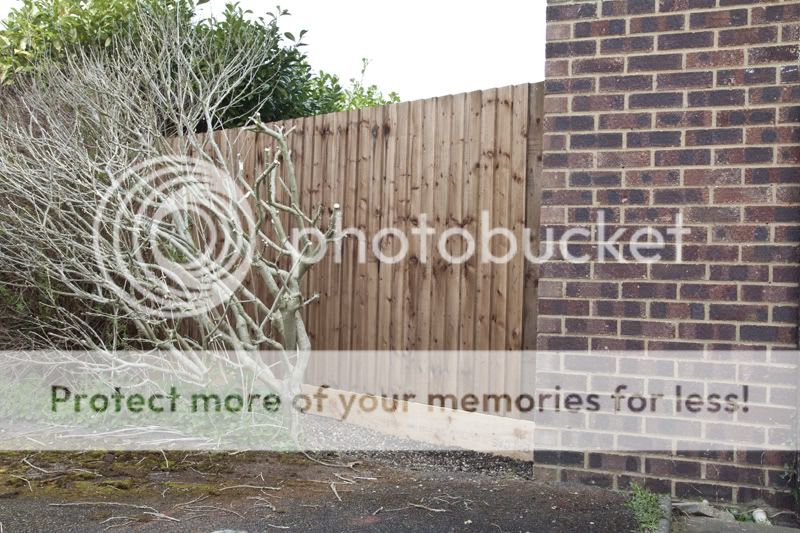
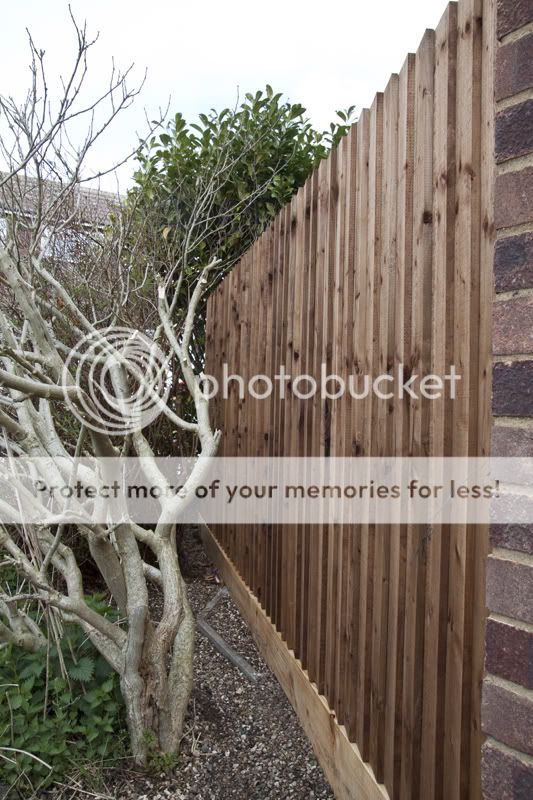
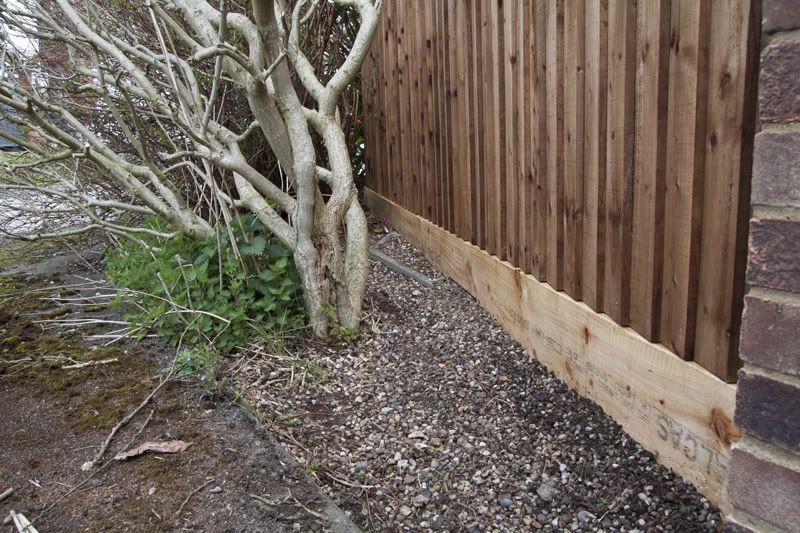
Once I had all 45 1.5m Feather edging nailed in place, I measured and cut a length of 8x1 Car casing for the gravel board. I had to cut 2 slots at the bottom for the concrete edging which was sticking up. I did this using a Bosch jigsaw and a fine wood blade. You can see this in the completed photos below. Thank you for Reading.
Tools Used;
• 14lb Sledgehammer
• Shovel
• Spade
• Post Hole Digger
• Pick Axe
• Trowel
• Concrete Mixing Tray
• Rexan Sliding Mitre Saw
• Spirit Level
• DeWalt 18v Impact Driver with 18mm Impact Socket
• DeWalt Hammer Drill With 10mm SDS Drill Bit
• DeWalt 12v Drill/Driver
• Bosch Jigsaw
• 3mm Pilot Drill Bit
• Countersinking Bit
• Claw Hammer
• Paint Brush
• 17mm Spanners
Products Used;
• Evans Oleo Floor Resin
• 220mm m10 Bolts
• 6x8 Quicksilver Screws
• 2x8 Quicksliver Screws
• 12 x 60mm Multi Monti’s
• 40mm Round Wire Nails
Wood Used;
• 4x2 CLS
• 3x2 CLS
• 8x1 Carcassing
• 1.5m Feather Edging
Completed Photos;
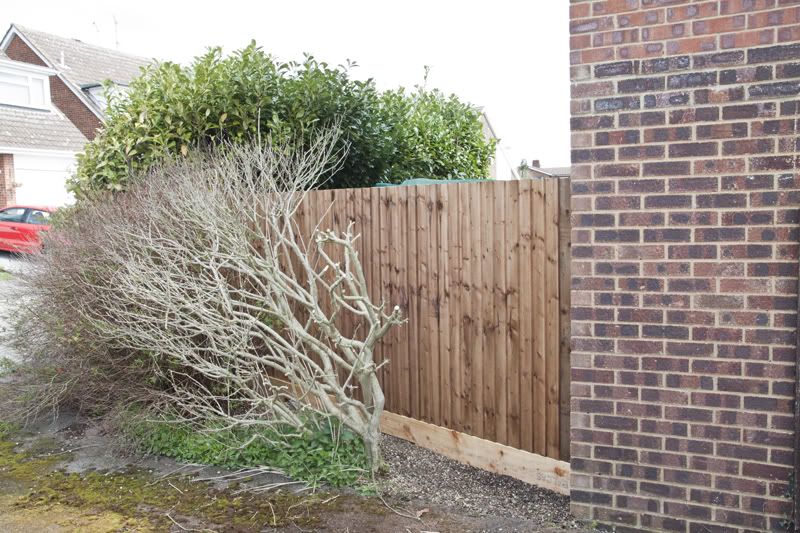

But Only a Little One
At the side of Lottie’s house they have a gravel drive section, which was starting to look a bit messy and uncared for. Quite a big area, roughly 30 x 13 Feet with a nice hedge blocking out the neighbours on one side, overgrown shrubs and a broken fence at the back. This area is just a waste being a like this so I offered to make the area a bit more tidy, make it nicer to look at and to make a nice new fence at the back.
So if I haven’t put you off already, I hope you will continue reading and I hope to show you the construction and general tidying up of the area. However I don’t have any before photos, as I just wanted to get stuck in with the jobs in hand and I also don’t have many photos of the making of the components for the fence. This is because I didn’t want my camera in the dusty and dirty environment while I was working.
The basic plan for the fence was just to span from the side of the house to the edge of the hedge using one span. The span is approx 13 feet so a custom fence was in order. One post attached to the house and the other attached to a new concrete footer with three rails to support 1.5m Feather edging.
Concrete;
The first job on the fence was to get the concrete sorted so it could set, but before getting that far I needed to clear an access route to where I needed to have the concrete footer. The concrete footer is located just behind the hedge as close to the tarmac pavement as possible. Once I had cleared the area I needed to dig a hole roughly 1 foot square and about 2 feet deep. On first little inspection it looked an easy task but was made a little harder when the first 8 inches or so was gravel then a root infested clay. But with the help of a pick axe, shovel and a sledgehammer I soon had the hole I was after.
I decided to go down about 3 foot from the surface, which was about 2 foot of clay then remaining gravel on top. I smashed a few bricks up and placed these at the bottom of the hole as a small layer of hardcore.
With the hole prepped I moved on to making a 1-foot square shuttering using 12mm plywood. Once I had this made I secured it in place and made sure it was level as this was the guide to make the top of the concrete level when I will be pouring it.
The concrete was made using 1 part cement to 4 parts Ballast with water added to make the required consistent see. I used a B&Q mixing tray to mix the concrete and a shovel. Starting by mixing the cement with the Ballast then making a volcano like shape with a hole in the middle and adding water little by little.
Once I had enough mixed I shovelled the mixture in the hole using my shovel. After every shovel load I used a length of wood to plunge into the concrete to remove air and to force the concrete down. I continued doing this to I had reached the top of the shuttering where I smoothed of the top using a trowel.


The concreting was done on Friday afternoon after I got home from work so it had a few days to set while I got the rest of the fence bits together.
Metal Post Bracket;
As I like to build things to last longer than normal things I will be using a metal bracket bolted to the top of the concrete instead of concerting the post into the concrete. I have chosen this way for a few reasons. First if you concrete a post into concrete, water will run down the post and rot the bottom of the post. This destroys the post and can make them the fence weak within 5 years. With the bracket the post can be changed without needing to dig up the concrete and re concrete in a new post.
Secondly the fence will run a slight angle, so I am able to rest the post in the bracket and move the whole framing assembly to suit the required angle. If you continue to read on I will explain show what I mean.
The bracket is very simple and was made using 6mm thick steel to keep it strong. It is made out of 3 sections, A base measuring 8 x 8 Inches and 2 upright supports measuring 3 ½ x 8 Inches. The base has a 11mm Hole drilled in each corner, which is 4 in total; these holes will be used to secure the bracket to the concrete using multi monti bolts. The two uprights are welded to the base and have 3 10mm holes, which are for securing the post to the bracket with 3 m10 nut and bolts.


The bracket was sprayed using a cold zinc galvanizing spray, it’s not the best of things but I had a few can left from a previous job so there was used up on the bracket.
Fence Framework;
I made the fence framework at work where I have plenty of space to take advantage off. Then carefully loading it into the back of a van to its final location. The fence frame is made of 4x2 CLS, 3x2 CLS, 1.5m feather edging and an 8x1 Planned gravel board.
I started by cutting three 4x2 sections into 3 equal lengths, these will become the posts and they are 1700mm tall. I cut these using my Rexan sliding mitre saw, which made the task very quick.


Once I had three 4x2 posts all the same length I needed to cut slots to accept the 3x2 rails. There are three slots on each post, which was cut one at a time also using the Rexan mitre saw. Using the depth stop I could control the amount of material being removed and also helped to ensure every slot was the same depth. Using the saw isn’t the best of tools for the job as a router would have been better, however I don’t have one of them at my disposal so the saw did the job.
One of the posts, the one which well be held by the metal bracket will be two 4x2 screwed together, essentially making a 4x4 post. I clamped two of the 4x2 together when I was screwing together to make sure there was properly aligned to each over. I pre drilled and counter sunk before screwing to ensure an even pressure and not to crack the wood. The holes was predrilled every 100mm in a diagonal pattern and I used 6x8 quicksilver screws from Screwfix to screw the two pieces of 4x2 together.
The posts were left to one side while I cut the three rails to size. The 3x2 was bought in 4.8m lengths and I needed the rails to be 4m (4000mm) so I quickly cut the excess 800mm off using the mitre saw. I pre drilled and countersunk two hole at each end of the rails; these will be used to screw the rails into the slots on the post.
I stated to assemble the frame once I had cut the rails, laying the post s down first, and then slotting the rails into the slots. I slotted in the bottom rail first then using my tape measure I took measurements of the diagonals so I could square the frame up. The middle rail was slotted in next followed by the last rail at the top.
With all the rails in place I secured the rails using 6x8 screws though the pilot holes.


With all the frame built up and secured together I moved on to giving the frame three coats of a cheap varnish we have at work; Oleo Floor Resin from Evans. This will keep the water out for a few years and eventually the whole fence will be stained and sealed, but that’s a job for another day.


I left the varnish overnight to harden and when returned in the morning I attached the metal bracket to the 4x4 post using the three m10 bolts.
Securing the Frame;
Once I was happy with everything I transported the frame back to Lottie’s house using one of the work vans, it was a tight fit with only a few inches left around the frame.
When I arrived I walked the frame into the position, resting the bracket on the concrete footer. I then raised the house end and placed some bricks under the post to make it higher. I used a spirit level at this point to level up the frame ready for securing the frame to the house and the concrete footer.
I carefully drilled four holes in the concrete first, and then bolted the bracket down using the multi monti’s. The DeWalt impact driver made light work of bolting the bracket down and once I was happy I moved on to doing the same at the house end.


With the frame in place you can start to see the size of the fence and the line it will take.
Feather Edging;
With the frame in place I continued to progress by attaching the feather edging to the frame. I started at the house end and worked my way to the other side. I made 100mm blocks, which I used as spacers to measure the gap for the overlap to make sure I had a consistent overlap across the entire fence. The feather edging was attached using 40mm round wire nails and took around 2 hours to attach the 45 panels.


Finishing Up;
Once I had all 45 1.5m Feather edging nailed in place, I measured and cut a length of 8x1 Car casing for the gravel board. I had to cut 2 slots at the bottom for the concrete edging which was sticking up. I did this using a Bosch jigsaw and a fine wood blade. You can see this in the completed photos below. Thank you for Reading.
Tools Used;
• 14lb Sledgehammer
• Shovel
• Spade
• Post Hole Digger
• Pick Axe
• Trowel
• Concrete Mixing Tray
• Rexan Sliding Mitre Saw
• Spirit Level
• DeWalt 18v Impact Driver with 18mm Impact Socket
• DeWalt Hammer Drill With 10mm SDS Drill Bit
• DeWalt 12v Drill/Driver
• Bosch Jigsaw
• 3mm Pilot Drill Bit
• Countersinking Bit
• Claw Hammer
• Paint Brush
• 17mm Spanners
Products Used;
• Evans Oleo Floor Resin
• 220mm m10 Bolts
• 6x8 Quicksilver Screws
• 2x8 Quicksliver Screws
• 12 x 60mm Multi Monti’s
• 40mm Round Wire Nails
Wood Used;
• 4x2 CLS
• 3x2 CLS
• 8x1 Carcassing
• 1.5m Feather Edging
Completed Photos;


