

Hi,
I have received some excellent advice on here so far, and with that encouragement I have decided to have a go at replacing the soil pipe that joins the cast iron soil stack.
I just wanted to check everything I have picked up on so far.
I intend to first Remove the existing lead 3.25" soil pipe, by sawing it in small sections(I am guessing it is heavy!).
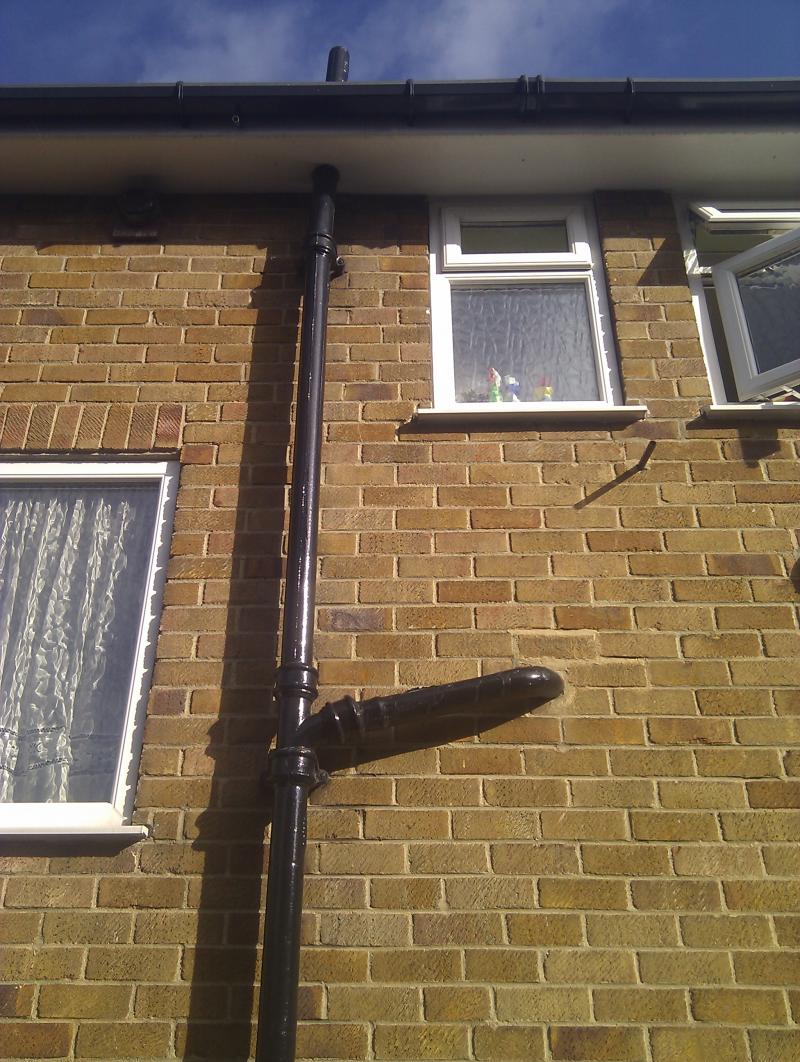
Then make good the joint into the cast iron soil stack, people have mentioned about there being to a brass thimble that`s caulked into the branch of the stack - see the "lump " on the pipe
Read more: http://www.diynot.com/forums/plumbing/replace-soil-pipe.341632/#2551296#ixzz2AmjOJz6n
Can I just double check is this the small lump in the pipe here?
Will this require heating to free? Or can I simply just saw it and remove it?
Then I will use a fernco connector for the new 110mm plastic soil pipe to the cast iron stack, are these angled? How do I seal the join? Because clearly I will need to angle the pipe slighlty more than the old pipe as it is going to be higher up (slighlty above the old pipe pictured).
Then I will use an angled 87.5 degree elbow into the house, where I will run a further length of 110mm soil pipe through the cavity. How to I make the join? between the elbow and the 110mm pipe? Is this using silcone sealant?
I will then connect to the pan using a standard flexi pipe.
Does this sound correct?
Thanks again Richard
I have received some excellent advice on here so far, and with that encouragement I have decided to have a go at replacing the soil pipe that joins the cast iron soil stack.
I just wanted to check everything I have picked up on so far.
I intend to first Remove the existing lead 3.25" soil pipe, by sawing it in small sections(I am guessing it is heavy!).
Then make good the joint into the cast iron soil stack, people have mentioned about there being to a brass thimble that`s caulked into the branch of the stack - see the "lump " on the pipe
Read more: http://www.diynot.com/forums/plumbing/replace-soil-pipe.341632/#2551296#ixzz2AmjOJz6n
Can I just double check is this the small lump in the pipe here?

Will this require heating to free? Or can I simply just saw it and remove it?
Then I will use a fernco connector for the new 110mm plastic soil pipe to the cast iron stack, are these angled? How do I seal the join? Because clearly I will need to angle the pipe slighlty more than the old pipe as it is going to be higher up (slighlty above the old pipe pictured).
Then I will use an angled 87.5 degree elbow into the house, where I will run a further length of 110mm soil pipe through the cavity. How to I make the join? between the elbow and the 110mm pipe? Is this using silcone sealant?
I will then connect to the pan using a standard flexi pipe.
Does this sound correct?
Thanks again Richard
")
