- Joined
- 9 Apr 2024
- Messages
- 60
- Reaction score
- 15
- Country

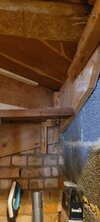
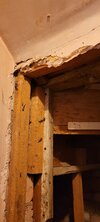
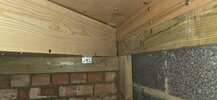
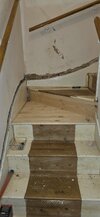
Good Morning,
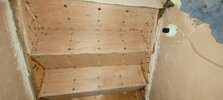
The previous owners started to utilse the space underneath the stairs as storage and I want to open it up a lot more. I have the following challenges:
1) The stairs creak underfoot.
2) You will see from the images its a mess and the classic a block of wood and more nails will do the trick.
The go to support method is a piece of wood in the middle straight to ground. I would like to remove these so I open up the space for boxes and so on. The supporting walls are made out of dense block and the stair floor is hard wood. The property was built in the 1970s.
Whats the best way to support the stairs and solve the underfoot creaking?
Thanks in advance.