Hello.
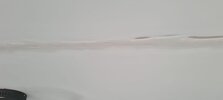
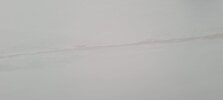
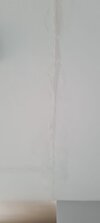
We have had an extension and major works 2 years ago, got a crack line running across the ceiling, it was about 3 - 4m long, one was 3m long and the other 4m long. I filled it last year and sanded It but I think my filler mixing was bad, the filling doesn't stick and after a few days starts to fatten out and eventually cracks and breaks out, also I suspect there are beams around the area. One of the cracks definitely has a beam around the area, the other doesn't but has a sky lantern opening within close proximity.
This time i decided to do things differently.
I am using ready mix filler (interior and exterior).
Tried to open the crack so it's a little bigger and form a V shape with the cut opening let's say 2p coin and slightly bigger in some places.
Applied a bit of SBR Pva prior to filling.
Applied sticky fibre tape (orange colour ) across the length of the crack, cut the tape into 2, say 20mm covering.
What is the issue now ?
The filler is rock hard, I cant sand it by hand and make I flat. Then when I read the tub, I said internal and external use.
I have used a detail sander and 40 grit sand paper. Not much is coming off to get a flat surface before painting and not damage the filling with thr intensity. To make things worse, the joint fibre paint is orange in colour and therefore is quite obvious with filler on It even though I have tried to use filler to cover the tape. Too much filler means you get a bump.
I'm confident the cracks will.no longer show up, however to make it look good. I need to sand it further before painting. What tools can I use apart from a detail sander or what should i do in the situation ?