Nest sanity check

Joined
16 Feb 2011
Messages
96
Reaction score
3
Location
Sheffield
Country
United Kingdom
Hi all,

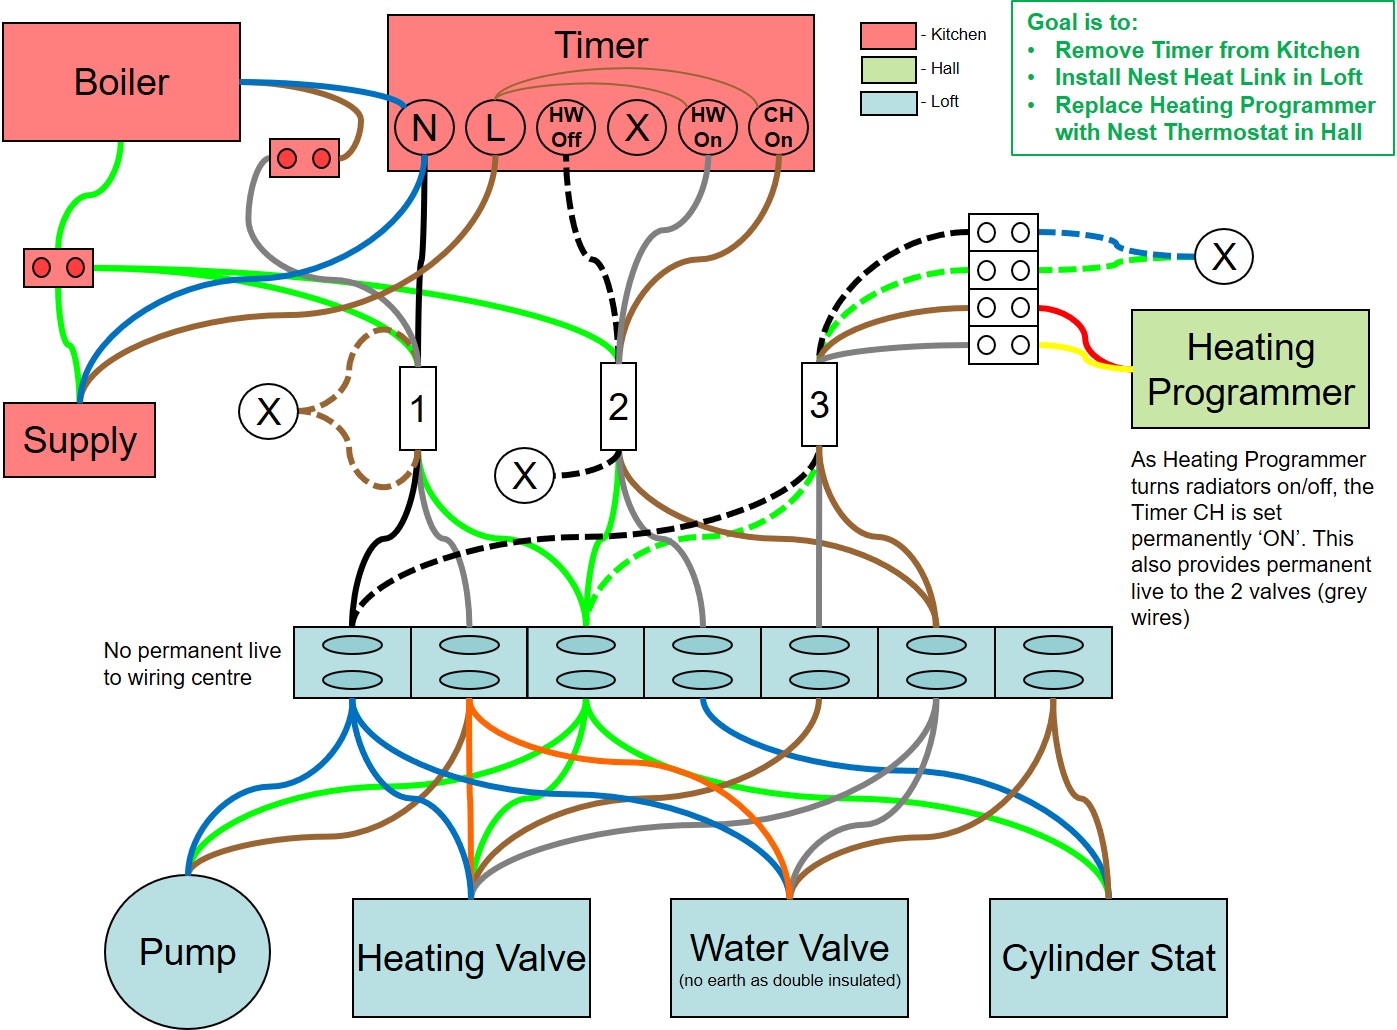
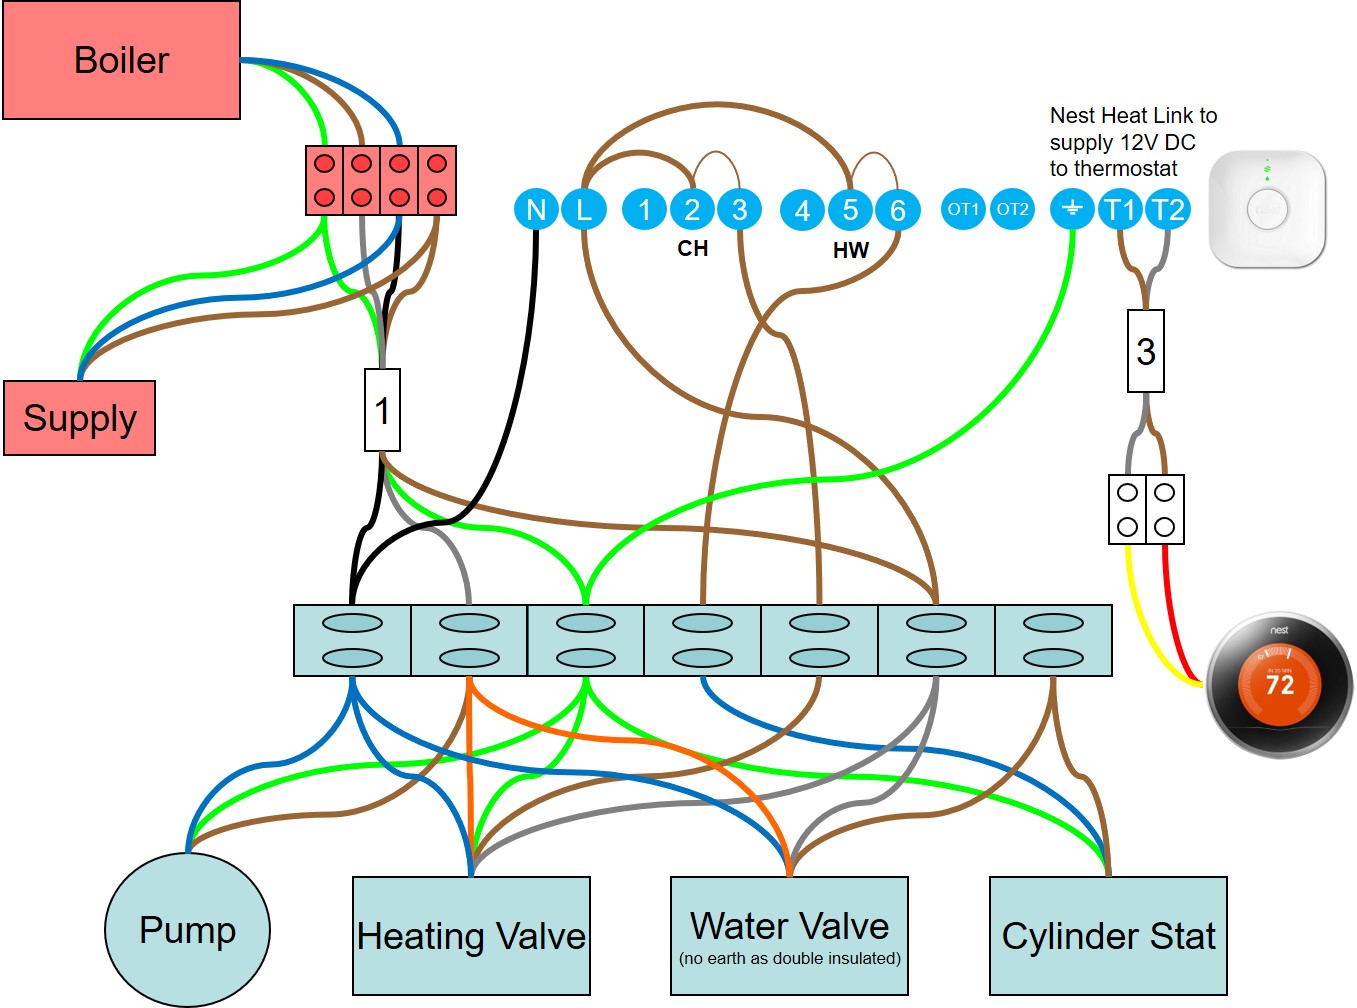
Just about to purchase the 3rd gen Nest Heat Link & Thermostat but first I thought it would be a good idea to do a little research on how it works and how I would replace the existing setup. I've drawn out how the current system works and how I propose to install the new system. Wondering if more knowledgeable installers could check to see if I have everything covered.

Many thanks.


Sponsored Links
It all looks good to me. I assume the brown loops between terminals 2 & 3 and 5 & 6 represent the internal switching of the Heatlink and not wires that you plan to add.
 
Stem, yes that is correct. The loops between 2 & 3 and 5 & 6 represent the internal switching - it helps me understand the path through the wiring. Thanks for your comment
 
Sponsored Links
Also, it ties up the original ahem....... untidy installation nicely too (y)

I inherited the current installation when I bought the house. It works but it is a bit of a mess with a few wires in the timer, thermostat and wiring centre not connected to anything and not labelled correctly. Luckily I can use a multimeter so I could determine the current situation and plan for a replacement. The main reason for doing this is the current Honeywell thermostat/timer temperature sensor isn't very accurate and the lcd screen is failing so instead of buying a direct replacement, I thought I'd look at alternatives.
 

DIYnot Local

Staff member

If you need to find a tradesperson to get your job done, please try our local search below, or if you are doing it yourself you can find suppliers local to you.

Select the supplier or trade you require, enter your location to begin your search.


Are you a trade or supplier? You can create your listing free at DIYnot Local

 
Sponsored Links
Back
Top