- Joined
- 17 May 2012
- Messages
- 11,444
- Reaction score
- 1,039
- Country

Next project started today. Turning a box room (2.36m square) into a bathroom.
1930s bungalow, solid 9 inch external brick walls, internal brick walls, suspended wood floor.
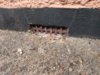
Started lifting floorboards and removed some skirting. Usual: rotten joists, rotten skirting boards, blocked air bricks, radiator pipes with no insulation, and about an inch of dirt. Need to replace 2 joists nearest the external wall, and some of the sleeper wall timbers (looks like they have been replaced once before!). There is no air brick in this room (totally covered externally) so I will have 2 new added when the drainage is done.
Plan is to move the radiator to the wall on the right, next to the door. Brick up the lower part of the window, replace top with new frosted window. Toilet on left wall next to external wall, basin below the window, shower in the left corner.

Ideally, the toilet will go right above where the 2nd joist and mains water pipe is, but I guess it will have to go a left between the joists. There is a WC in the room behind this wall (which will be removed) so hoping I can attach the drainage. But, got a shower waste dilemma - want a low level shower tray... thinking of cutting the ends of the joists and using large ply sheets for flooring, so the shower waste can run along the edge to the external wall.

This is the rough plan....

The radiator pipes are in the perfect place to be cut and have a new rad fitted to the right. There is also only one electric socket, which is spurred from the back of the socket in the hall, so I can remove this.
For extractor, there is an old air brick cavity in the top left, so thinking of putting a wall mounted extractor there - is that a good idea, or is ceiling always best?
The external wall will be insulated with 50-70cm of Kingspan. I want a shaver point by the basin. Shower will be from the boiler. I have a couple of spare slots on the consumer unit so could get an electrician to run a new circuit for shaver and extractor, and leave the light as it is.
Also plan to replaster the whole room (new ceiling boards) then just have a tiled (or wall boards) shower area. Or even a cabin - although these cost too much really.
Not sure on flooring - is plywood the best option, or a good chipboard OK? Will just have a single sheet of vinyl on top, so should be watertight. The plumbing will come down from the ceiling, so all that will be buried under the floor (which I will be insulating with 50mm kingspan with 50mm rockwall on top) will be the radiator pipes and shower / toilet drainage.
Tomorrow I'll mostly be clearing all that dust and dirt out, and pulling out nails.
Feedback and suggestions welcome.
1930s bungalow, solid 9 inch external brick walls, internal brick walls, suspended wood floor.
Started lifting floorboards and removed some skirting. Usual: rotten joists, rotten skirting boards, blocked air bricks, radiator pipes with no insulation, and about an inch of dirt. Need to replace 2 joists nearest the external wall, and some of the sleeper wall timbers (looks like they have been replaced once before!). There is no air brick in this room (totally covered externally) so I will have 2 new added when the drainage is done.
Plan is to move the radiator to the wall on the right, next to the door. Brick up the lower part of the window, replace top with new frosted window. Toilet on left wall next to external wall, basin below the window, shower in the left corner.
Ideally, the toilet will go right above where the 2nd joist and mains water pipe is, but I guess it will have to go a left between the joists. There is a WC in the room behind this wall (which will be removed) so hoping I can attach the drainage. But, got a shower waste dilemma - want a low level shower tray... thinking of cutting the ends of the joists and using large ply sheets for flooring, so the shower waste can run along the edge to the external wall.
This is the rough plan....
The radiator pipes are in the perfect place to be cut and have a new rad fitted to the right. There is also only one electric socket, which is spurred from the back of the socket in the hall, so I can remove this.
For extractor, there is an old air brick cavity in the top left, so thinking of putting a wall mounted extractor there - is that a good idea, or is ceiling always best?
The external wall will be insulated with 50-70cm of Kingspan. I want a shaver point by the basin. Shower will be from the boiler. I have a couple of spare slots on the consumer unit so could get an electrician to run a new circuit for shaver and extractor, and leave the light as it is.
Also plan to replaster the whole room (new ceiling boards) then just have a tiled (or wall boards) shower area. Or even a cabin - although these cost too much really.
Not sure on flooring - is plywood the best option, or a good chipboard OK? Will just have a single sheet of vinyl on top, so should be watertight. The plumbing will come down from the ceiling, so all that will be buried under the floor (which I will be insulating with 50mm kingspan with 50mm rockwall on top) will be the radiator pipes and shower / toilet drainage.
Tomorrow I'll mostly be clearing all that dust and dirt out, and pulling out nails.
Feedback and suggestions welcome.