Tile finish around a bath

Joined
17 Apr 2007
Messages
2,489
Reaction score
127
Country
United Kingdom
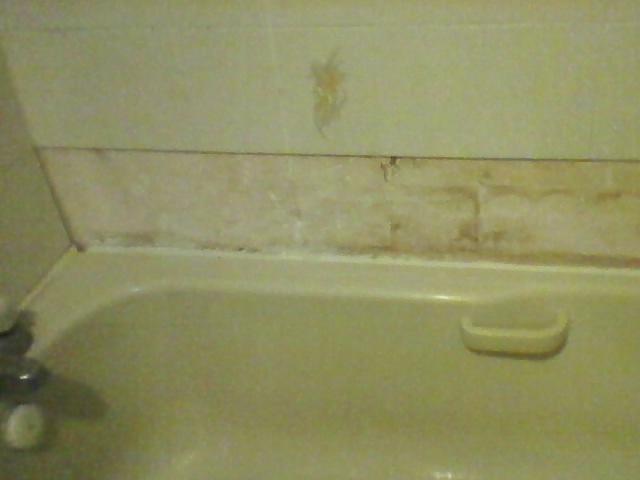
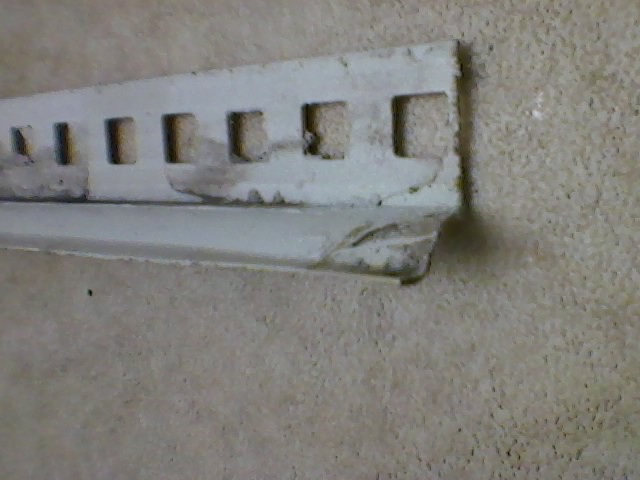
I've removed the trim because it was badly cracked and mould was creeping in underneath.

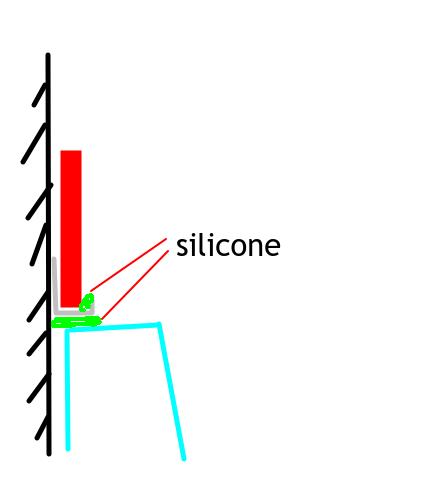
Are these trims still available or is there better ways to finish tiles down to a bath's edge?


full
 
Sponsored Links
Links in this post may contain affiliate links for which DIYnot may be compensated.
I don’t like them personally, good old fashioned silicone seal for me.
 
No, it seems the strip rolls aren't too well liked - they don't stick very well.

Main issue I have is that the long side of the bath is not quite parallel to the wall with about 5/8" gap the the front, a 1/4" at the rear, which the old plastic trim sealed up nicely. Tile grout wouldn't fill the gap so really needs a new trim if I can find one.
 
Sponsored Links
Should still be able to achieve decent results with silicone. Post a photo and I should be able to advise better
 
I did attempt to fill the gap with grout but I'm not happy with it.

This is the gap at the front.

full


This is the side of the bath, lower tile row removed. Rear/front tiles and trims are still in place.

full
 
Probably just have to layer the silicone up, or go for @KenGMac 's advice and quadrant tile it?
 
Short answer is no that type of trim is for the external corner of a tiled wall.

Can you replace the removed tiles??? or fit new tiles??? then fit a quadrant half round, this half round will cover a gap between the tile and the bath and when fixed with a mastic the trimming of the excess mastic very, very simple??
 
I get what you mean. Are quadrants available for tiling or do I get a wood length from a timber merchant and paint it gloss?

I did originally plan to reuse the old tiles but four broke and chipping the old grout of the others would probably crack them.
 
Do you have enough clearance space behind the taps for a quadrant tile? Even if you do you might need to remove the taps so that you can silicone them (the quadrants) properly.

Personally I am not a fan of quadrant tiles, particularly when used on plastic/resin baths because of the flex.

You mention that the worst gap is 5/8ths (1.5cm)- that is massive, especially if your tiles are, for example, only 6mm thick. Assuming that you don't want the hassle of removing the bath and re-tiling the whole room, I guess you could let the replacement tiles "kick out" at the bottom so that the required silicone gap isn't so big.

I would recommend against building up layers of silicone- silicone doesn't like sticking to cured silicone. You can get fairly decent results when working with large silicone joints if you use something like this Fugi silicone profiler. Given the size of the gap, you might want to use masking tape as well if you aren't terribly confident.

https://www.amazon.co.uk/Cramer-Grouting-Silicone-Profiling-Applicator/dp/B07H8K5W8D

Cheaper alternatives are available via the likes of screwfix etc.

When working with silicone, mix a little washing up liquid with water to stop it sticking to your fingers/tools. Clean the area with meths first to de-grease it. The washing up liquid contains silicates so don't let it get on to surfaces not yet siliconed.
 
  • Thanks
Reactions: CBW
Tbh I meant layering up whilst still uncured.
 
Tbh I meant layering up whilst still uncured.

Thanks for the clarification- I guessed you meant that but it is good that you have clarified it for anyone else reading this thread.

Kudos.
 
  • Thanks
Reactions: CBW

DIYnot Local

Staff member

If you need to find a tradesperson to get your job done, please try our local search below, or if you are doing it yourself you can find suppliers local to you.

Select the supplier or trade you require, enter your location to begin your search.


Are you a trade or supplier? You can create your listing free at DIYnot Local

 
Sponsored Links
Back
Top