

Hello all,
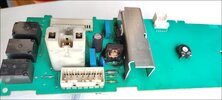
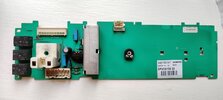
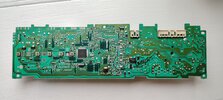
We've had a trusty Bosch Classixx 1200 Express for over 15 years and fixed a few things when necessary (including bearings 6 months ago). It looks like the heating relay is on the way out. A repair man came and tapped the relay it and it worked again for a couple of weeks. His suggestion was to source a replacement control board if I wanted to repair it.
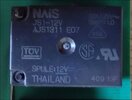
My question - how difficult is it to identify, source and replace the relay for the heating circuit? Anyone done it before? (no photos of the component yet)
I've done something similar in my subwoofer (a relay) and it worked a treat. Obviously a washing machine will be higher power/currents/fire-risk.
Machine is WFO2466GB/07
Thanks
We've had a trusty Bosch Classixx 1200 Express for over 15 years and fixed a few things when necessary (including bearings 6 months ago). It looks like the heating relay is on the way out. A repair man came and tapped the relay it and it worked again for a couple of weeks. His suggestion was to source a replacement control board if I wanted to repair it.
My question - how difficult is it to identify, source and replace the relay for the heating circuit? Anyone done it before? (no photos of the component yet)
I've done something similar in my subwoofer (a relay) and it worked a treat. Obviously a washing machine will be higher power/currents/fire-risk.
Machine is WFO2466GB/07
Thanks


")