BSP shower connection - just loads of PTFE?

Joined
11 Mar 2011
Messages
99
Reaction score
2
Location
London
Country
United Kingdom
Hello,

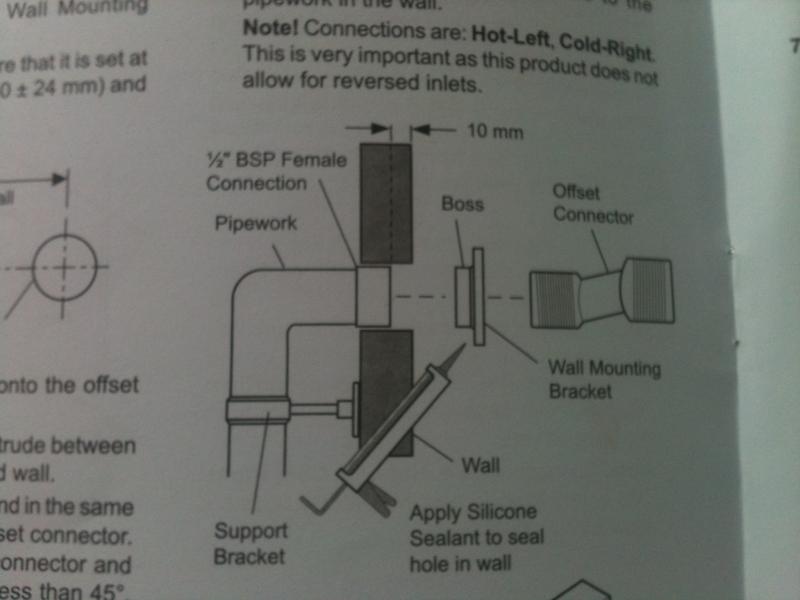
I'm about to bury some plumbing behind some tiles so I'd really like to get it right. I bought a Mira shower and you are supposed to fit it to a partition like this:

I have bought these from Wall Plate Elbows Toolstation to get me from Polyplumb 15mm too the shower fixing of a 1/2" BSP:
http://www.toolstation.com/shop/p85095
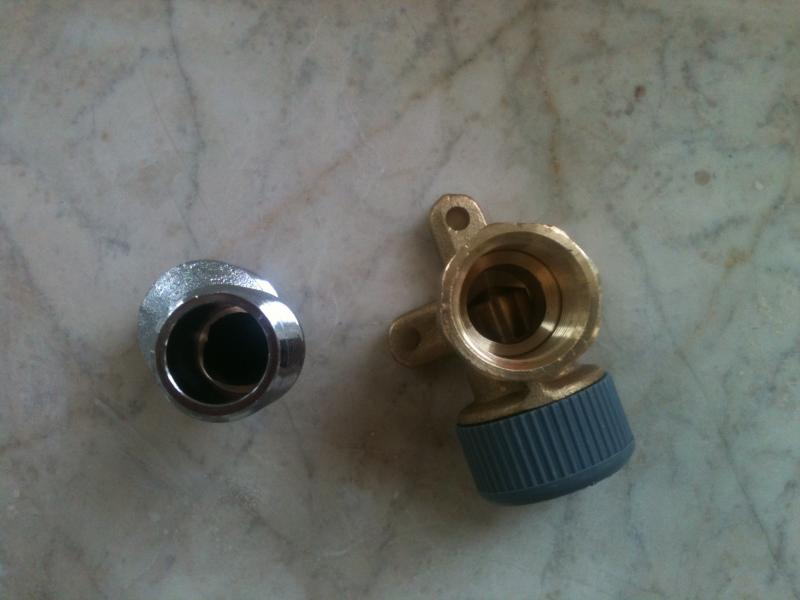
Here is an end-on view of the toolstation elbow (right) and the shower fitting (left):


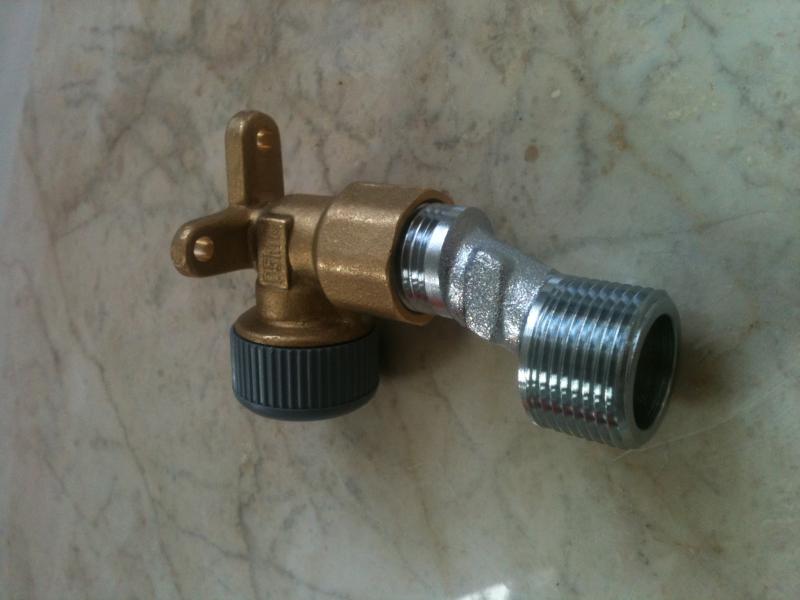
The plan is just to screw the thread together with loads of PTFE tape in there to form a permanent watertight seal. Here is a picture of it dry fitted:


Is this what you would do? Or do I need a tap connector like for an appliance with a rubber bit in the end? I'm pretty sure PTFE and these fittings will work but once they're buried I'm in a real mess if they leak!

I'd be really grateful for any advice from someone who knows what they're doing!

Thanks.
 
Sponsored Links
Why wallplate elbows? Are they attaching to a wall?

You would be better with tap connectors sooner than just female threaded elbows. They will come with a ring-seal.

PTFE/Loctite 55/liquid PTFE only as a belt and braces measure.
 
Sponsored Links
The wall plate elbows would work the same way as a 15mm compression elbow to 1/2" BSP female and should be ok with a good thread sealant, PTFE tape, not too muck or you could crack the fitting, or threadloc/liquid PTFE as Charnwood says.
For a shower fitting though then NGI spots it with the screw on wall couplings, much easier, comes with olives and double threaded compression fitting that compresses the pipe on one side and fits the shower on the other. You just need to have about 2 inch of tail through the wall for each feed pipe, dont forget the inserts for the poly pipe, push the fitting over the pipe and screw to the wall add the olive and then add the coupling tighten mark the pipe and then take off and cut pipe flush re-assemble, jobs a guddun.
Critical with this job is getting the measurements/ levels perfect when fitting brackets for the pipe so it fits the the shower inlets. There's very little margin for error and if wrong you wont be able to screw the shower onto them or it won't be level.
 
Critical with this job is getting the measurements/ levels perfect when fitting brackets for the pipe so it fits the the shower inlets. There's very little margin for error and if wrong you wont be able to screw the shower onto them or it won't be level.

The trick is, cut the pipes and fit the brackets and tighten on to the pipe, then attach the shower, hold it level and mark the holes. remove shower/drill/screw refit he shower DONE
 
Yes, I was going to fix the wall plate elbows to the brick behind the studwork to give a solid fixing.

I didn't know about liquid PTFE. Does it act as a glue as well as a sealant? Could you still move or unscrew the male shower fitting in them once you'd put it on?

Is liquid PTFE definitely better than PTFE tape? I've always used tape on radiators and they've been on touch wood.

I could use those brackets but could be trickier finding something solid to fix them into, and this shower model has no other forms of support for its main valve, which is fairly heavy.

Thanks for all the replies so far.
 
Liquid PTFE is designed for threads, it is demountable. http://www.toolstation.com/shop/Plumbing/Consumables/Talon+TSeal+Liquid+PTFE+50g/d20/sd2711/p34357 though tape will do the job as well.
There isn't a back plate for the shower body that screws onto the wall and then the body fixes onto that for support?
Well another option then could be one of these - http://www.screwfix.com/p/h-c-contemporary-bar-valve-fixing-kit-chrome-effect/76919 if the inlet pipe centres are 150mm and you have the clearance behind the stud wall. This will fix securely to the brick wall.
Those Z connectors can be real fiddly as they need to be in the fitting tight enough to seal and that may not be where you need them to be to fit the shower inlets, it's then remove and add/remove tape to get it right.
 
Can't remember exactly what it was - a loctite product similar to liquid ptfe. Anyway - screwed a test valve into a tee fitting and set the position. An hour or two later realised the schoolboy error and tried to rotate the valve.

No flicking chance. Even had my big stilsons on the case but just started crunching the body. Came up with plan C in the end. Valve and tee still there 3 years later under 3 bar of pressure no problems. :mrgreen:
 
I thought all Loctite thread seals were 'breakable'. Some high torque required for the high strength ones, though. Some are over 40 foot-pounds IIRC.
 
Newgasinstaller has the best advice. Stick to 15mm copper pipes out at the right centers and then after tiling the fixings tighten up with a compression joint and the you drill the tiles and screw the brackets to the wall.
 
Put a pad of thick ply into the wall to attach the brackets to! its not hard and one millions times better job
 
I'm with newgasinstaller. Those shower mounts from toolstation are the mutts nuts. Dead easy to use and look great. A far better finish than the cheap chrome covers that probably came with the shower.
 

DIYnot Local

Staff member

If you need to find a tradesperson to get your job done, please try our local search below, or if you are doing it yourself you can find suppliers local to you.

Select the supplier or trade you require, enter your location to begin your search.


Are you a trade or supplier? You can create your listing free at DIYnot Local

 
Sponsored Links
Back
Top