
You are using an out of date browser. It may not display this or other websites correctly.
You should upgrade or use an alternative browser.
You should upgrade or use an alternative browser.
Building a Domestic Extension in Stages
- Thread starter CHarr
- Start date

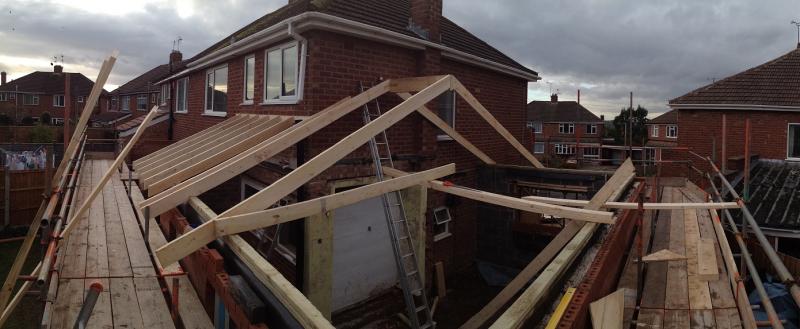
I would fix a ply gusset onto that common end before I fixed the single common (in t'uther direction) and the hip blades.
Has the chippy trimmed off the wall plate corners to allow the hip blade b/m to sit nicely?
Has the chippy trimmed off the wall plate corners to allow the hip blade b/m to sit nicely?
I would fix a ply gusset onto that common end before I fixed the single common (in t'uther direction) and the hip blades.
Like this?
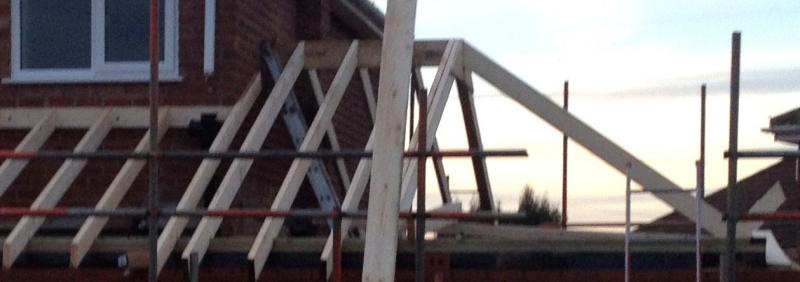
There's a SS tie bar to go across the base of those common rafters too, as it will be a vaulted ceiling.
He'll do the hip rafters in the morning: I've got no intention of telling him how to do it!

Looking good.
The hips are always a challenge, mostly trial and error.
Try not to be tempted to have the ceiling going all the way to the apex. Rather flatten the last say, two or three feet off.
This will give you something to hang a ceiling fan from and install lights or run cables.
Going to a point encourages a dust trap and is a pain to plaster, particularly on steeper vaulted roofs.
Has the chippy trimmed off the wall plate corners to allow the hip blade b/m to sit nicely?
Yes, and made a very tidy job of it.

I'm waiting for the velux windows & flashings to arrive (and the tie bar), but we should be ready for inspection by mid-week, which gives me a couple of days to finish preparing the sub-floor, ready for concrete.
So brickies are back tomorrow to finish the cut up at the end of the monopitch section, and the matching parapet wall (between which the glass roof of the conservatory will sit), and that's being measured for on Monday. Seeing a roofer, tomorrow, too, so we should be weatherproof and secure in a couple of weeks.
At least I can now see where he cut his ply gusset from!
I guess he will have the least envious job of dressing the rafter ends after the weekend, a job I'm not keen on. It takes a fair bit of man handling holding a circular saw up to those rafter ends, i can tell you. I do try and cut down hill though.
The hip blade end usually ends up being cut with a hand saw and that does make your arm ache!
The smallest jack rafter right at the end is sometimes best fitted when the fascia is in place, i wonder if your chippy does the same?
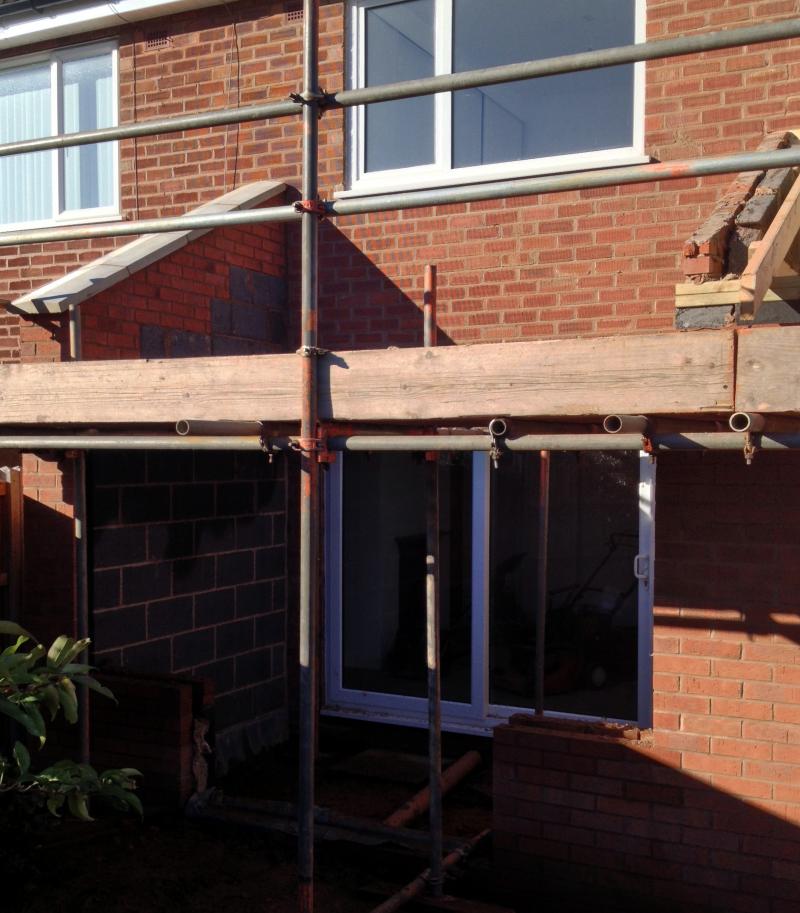
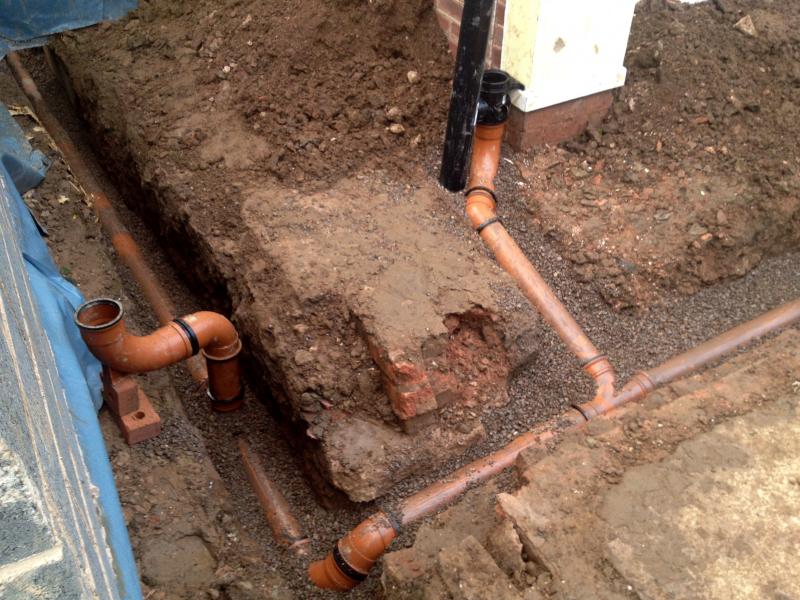
Brickwork finished yesterday. Measuring for the lean-to conservatory tomorrow: a glass roof sitting between the two walls, about 30cm lower than the tiled roof of the remainder, french doors with windows either side below. It's going to be quite nice, I think. I just need to clean all that mortar off the 'new' patio door, now.
I shouldn't have had a cill put under the door: the height of the finished floor will be 'just' over the cill. Should I just leave it, and pour screed around it, or cut it off? - I'm a bit concerned about expansion of the plastic ...
I'm puzzled by the quantity of concrete you have used. How thick did the concrete end up in the trenches?
When I built an extension bigger than this and two storey I laid the foundations 150mm thick, or a bit more in places. Building inspector was happy, that seemed to be the standard then, though it was 22 years ago.
Did everything myself except bricklaying and plastering. Drew the plans, applied for permission, dug the trenches by hand, mixed the concrete, laid foundations, bricked up to ground level, laid the drains, fixed the wallplates, put the roof trusses on, felted, latted, tiled the roof, all electrical and plumbing.
How times have changed.
22 years ago 

Bet you still paid your bricky in shillings and had a yankee screwdriver
Bet you still paid your bricky in shillings and had a yankee screwdriver
Thank the lord.How times have changed.
Puzzled?
I'm more puzzled that you risked a two storey extension on as little as 150mm of concrete. Very amateurish.
Thank the lord.How times have changed.
Puzzled?
I'm more puzzled that you risked a two storey extension on as little as 150mm of concrete. Very amateurish.
It is what the text books specified.
It was approved by the Building Control inspectors.
Was it not normal in those days? Is anything more just a waste of concrete?
After 22 years there are no problems.
225mm is the accepted minimum for a two storey fella.
Anyone that has had to lay or had to pay a gang of brickies to lay heavy blocks in a trench will soon tell you that mass filling is a brilliant idea.
As far as economy and practicality goes mass filling wins by a big margin and is especially significant in the winter months.
We started mass filling 27 years ago and I have been doing it ever since. It is only in situations where drains or other factors like a sloping site, that you would opt for a low level foundation.
Was it not normal in those days? Is anything more just a waste of concrete?
Anyone that has had to lay or had to pay a gang of brickies to lay heavy blocks in a trench will soon tell you that mass filling is a brilliant idea.
As far as economy and practicality goes mass filling wins by a big margin and is especially significant in the winter months.
We started mass filling 27 years ago and I have been doing it ever since. It is only in situations where drains or other factors like a sloping site, that you would opt for a low level foundation.
I'm puzzled by the quantity of concrete you have used. How thick did the concrete end up in the trenches?
When I built an extension bigger than this and two storey I laid the foundations 150mm thick, or a bit more in places. Building inspector was happy, that seemed to be the standard then, though it was 22 years ago.
We demolished an old garage at the side of the property, and it had been built at much the same time as your extension. It too had 6" (not 150mm, surely
) of concrete bedded on a bit (an inch?) of clinker, and that WAS the prevailing standard at the time, but it never failed, and even after all the machinery pounding the concrete floor slab (4", with no sub-base to speak of) during the demolition and subsequent excavation, it was in perfect condition, with not a single crack.I took the decision to trench fill on advice, and on the grounds of economy. We did use more concrete that I would have liked (I had budgeted for 8m3, not 12m3) but access to two areas adjacent to the boundary meant that the trench had to be wider than ideal, and we were on a sloping site with a deep drain invert at one end. I'm happy with the result, and our spend, to date, is just over 60% of the quoted costs of any of the general builders that looked at the job (but every one of them wanted to exclude something, and none would actually do the whole job from start to finish).
I'm surprised that no one wanted to take on the whole job. IS there something that your not telling us????
DIYnot Local
Staff member
If you need to find a tradesperson to get your job done, please try our local search below, or if you are doing it yourself you can find suppliers local to you.
Select the supplier or trade you require, enter your location to begin your search.
Please select a service and enter a location to continue...
Are you a trade or supplier? You can create your listing free at DIYnot Local
Similar threads
- Replies
- 2
- Views
- 20K
- Replies
- 8
- Views
- 4K