DIY CU install - photos

Joined
19 Jan 2007
Messages
543
Reaction score
1
Location
Cheshire
Country
United Kingdom
Afternoon all,

You may remember I was in the process of rewiring my house (well, most of it anyway). BCO came out to inspect first fix and approved it.

I finaly managed to get round to fitting the new CU and connecting it all up and testing it. OK, so I probably shouldn't have connected it to the supply until BC have approved it but I wanted to see it orking (and also needed it working for obvious reasons so had to really.

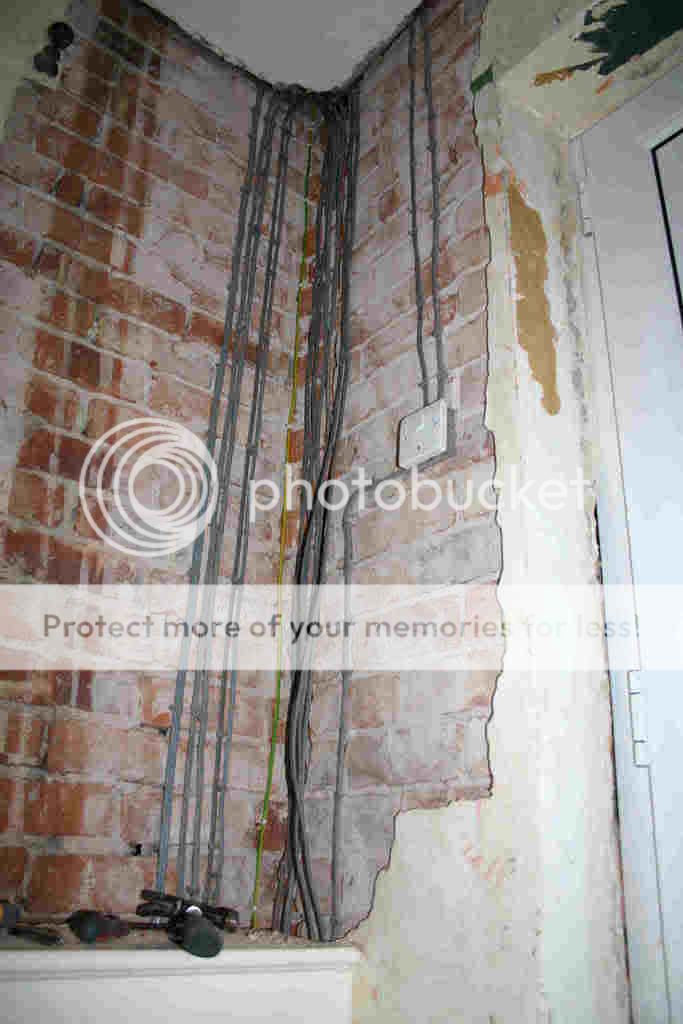
There are a few pics missing which I'll add when I find them. Basically, the original cabling came down in two places. One right in the corner, all stuffed into a single piece of conduit and the other at an angle down the wall. Like I say, I'll post pics of this when I find them.

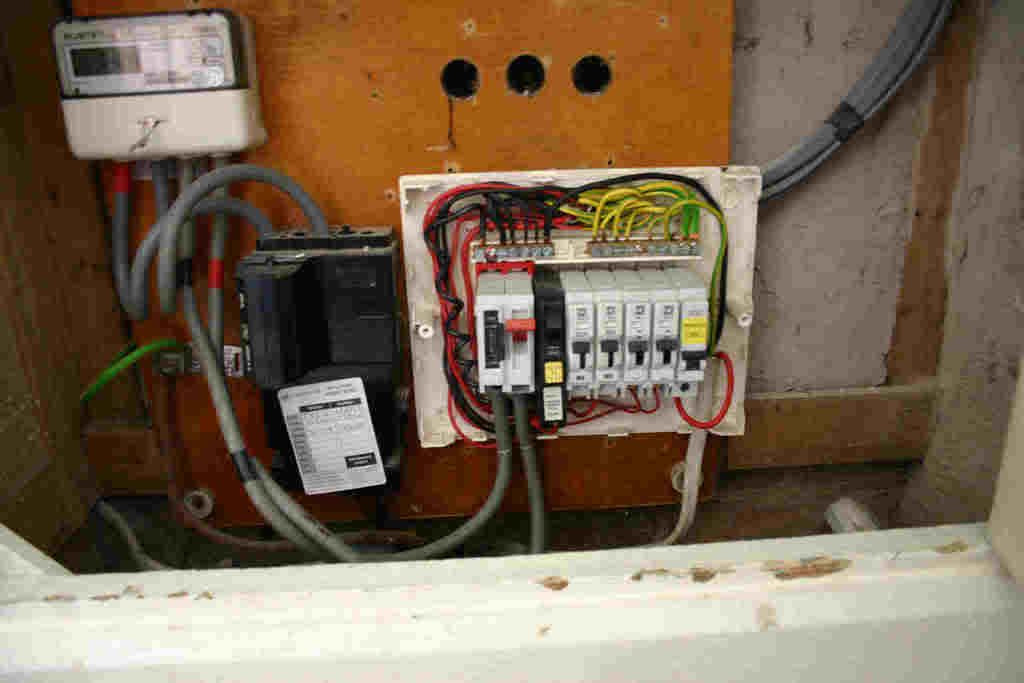
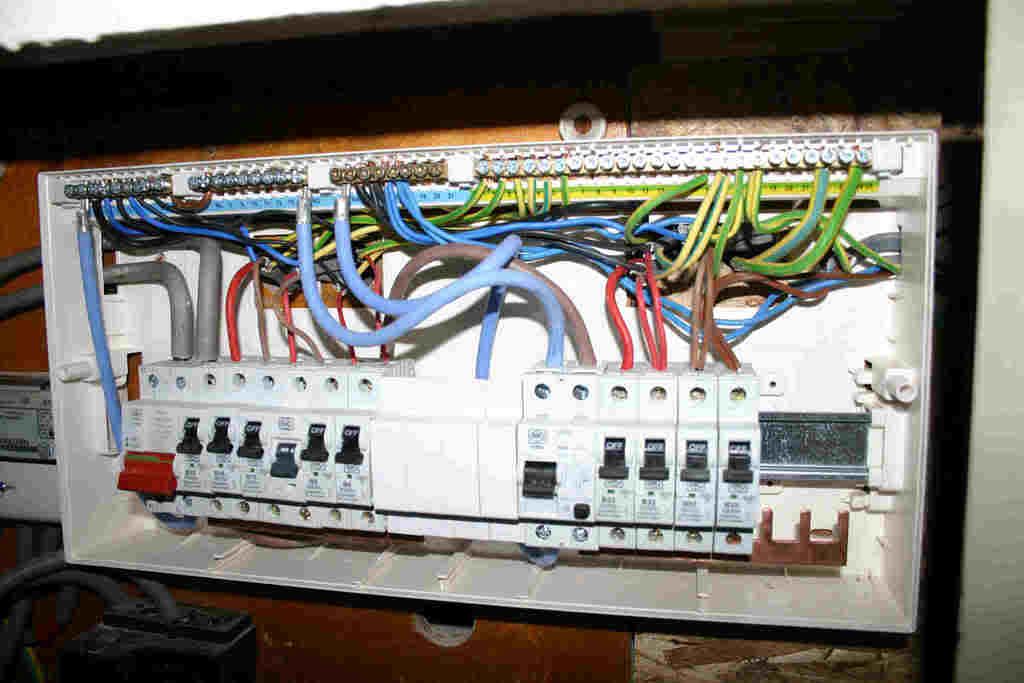
Here's the old install:

OLD_CU_1.jpg


OLD_CU_2.jpg


OLD_CU_3.jpg


OLD_CU_4.jpg


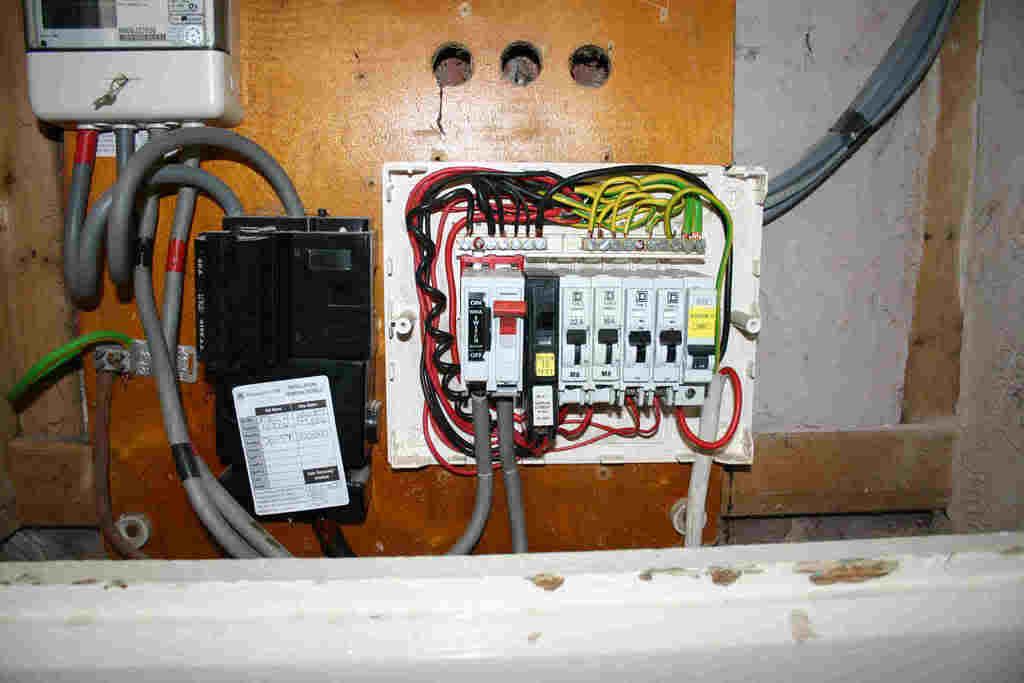
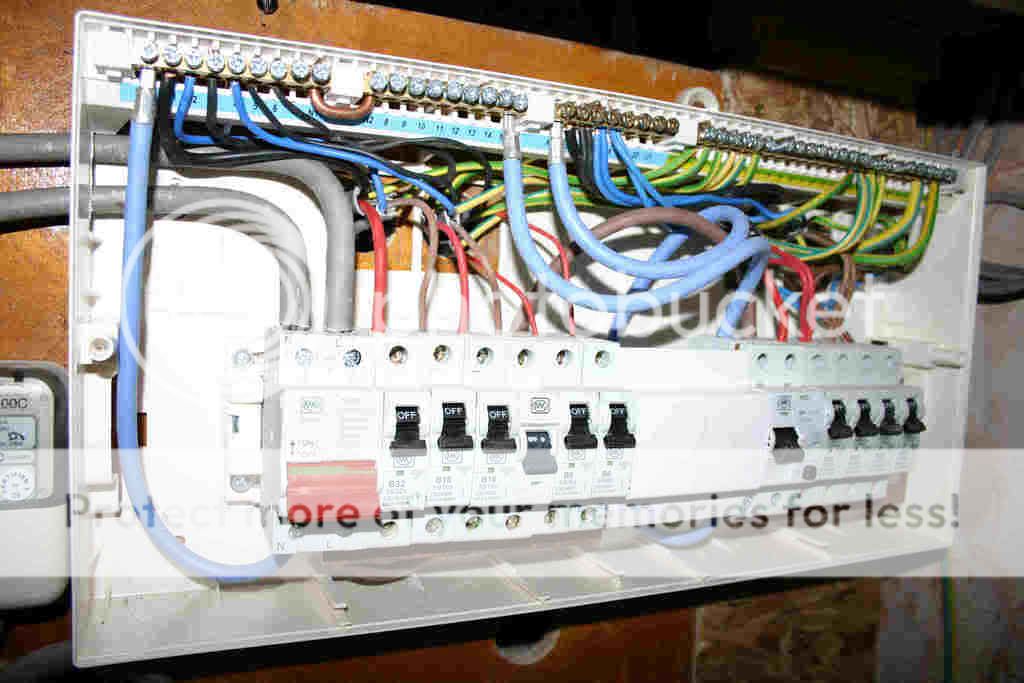
And here's the new install:

NEW_CU_1.jpg


NEW_CU_2.jpg


NEW_CU_3.jpg


NEW_CU_4.jpg


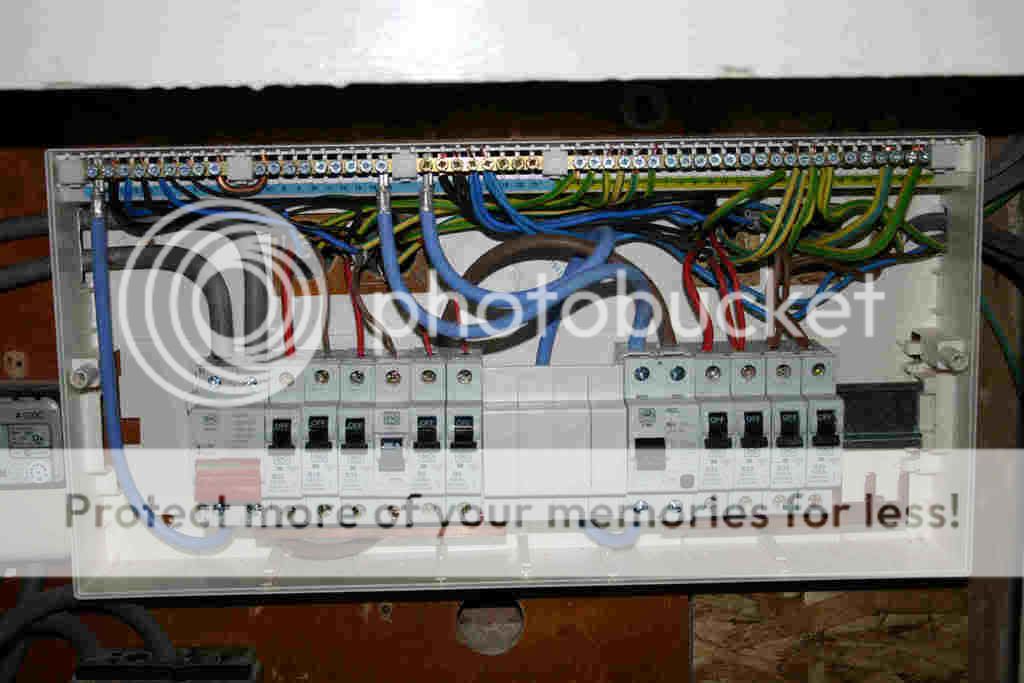
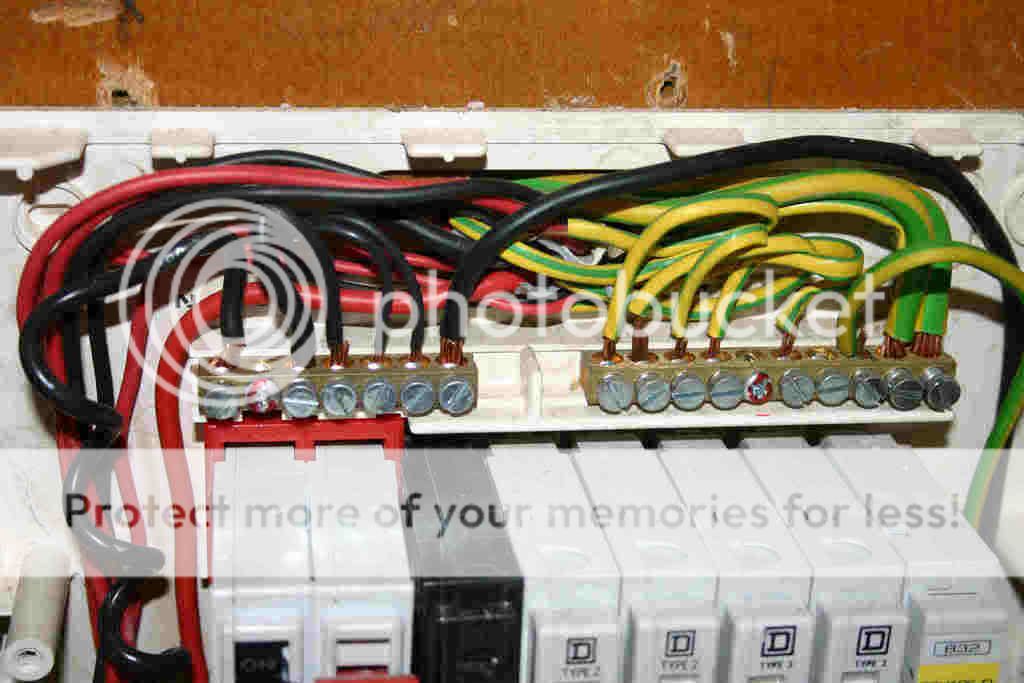
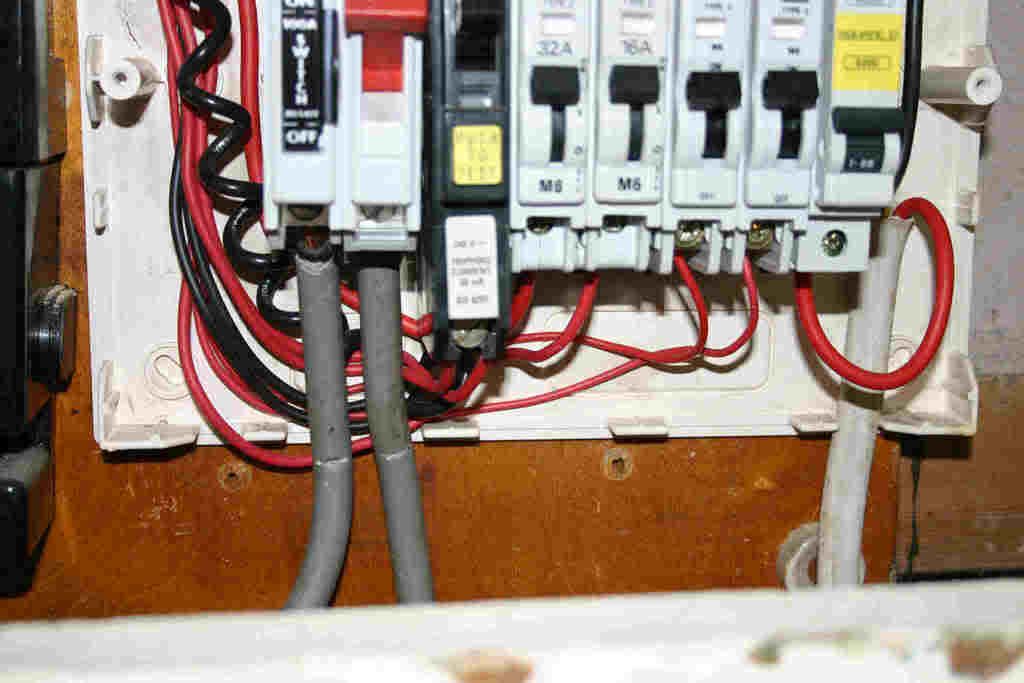
And the new cabling. The loose cables you see on the right are now clipped to the wall - I just hadn't got round to doing that when i took the picture.

NEW_WIRING_1.jpg


I was quite proud of the end result and pleased with how tidy it is considering it's a DIY job.

Can anyone see anything immediately obvious that could cause it to fail insection? I've got a couple of pics of the finished CU with cover on which again I'll upload when I find them. I've stuck a great big yellow sticker on the cover warning of mixed wiring too.

Regards

Fred
 
Sponsored Links
Can anyone see anything immediately obvious that could cause it to fail insection?

Double check the cables on the left as they look more than 150mm from corner

CU is mounted on flammable material - not normal practise to mount on DNO s board
 
DESL said:
Can anyone see anything immediately obvious that could cause it to fail insection?

Double check the cables on the left as they look more than 150mm from corner

CU is mounted on flammable material - not normal practise to mount on DNO s board

Cheers DESL,

The cables on the left and right are 170mm from the corner. However, when I plaster over the'll be 150mm from the corner. I checked and double checked this with the BCO when they inspectd first fix and they said they'd be happy to pass it. I clarified it again just to make sure.

As for mounting on the DNO's board, there's nowhere else to mount it really. It's where the old CU was and it's where my neighbours CU's are too. The only other place would be above the cupboard in which it's currently located but that'd mean longer meter tails and also the Cu would be exposed rather than hidden (and therefore in effect protected from accidental knocks).

Do you think I'll fail the inspection because it's mounted on wood?

Cheers

Fred
 
It's a bit messy like, and you've cut the cores a bit short. IMHO
 
Sponsored Links
DESL said:
CU is mounted on flammable material


This is only an issue if the CU doesn't have a fireproof backplate, such as old wylex CUs.


The cables to the left appear to be directly above the CU, and therefore inside the safe zone.


As DIY installs go, could be a little neater but not a bad effort IMO :D
 
are there no finger guards for the exposed bus bars?

also please check every factory fitted connection as these may not be fully tight and can lead to fire risk...

tails need to be marked which is live, which is neutral.. or just stripped outer sheath back a bit..

3 spare ways need blanks..

some of the earths look a little tight.. like 1, 2 and 15

breaker 4 different make?
 
C&GStudent said:
It's a bit messy like, and you've cut the cores a bit short. IMHO

It's the best I could do given the only route for cable entry was through the back from the right hand side. Ideally I would have liked the cables to enter directly from above but I wasn't comfortable with having the entire width of wall covered in cables and the CU couldn't be sited any further down.

The cores are long enough to fit through the terminal block without any exposed conductor being eft sticking out the side of entry. All are well clamped without clamping the insulation and they're all secure.
 
Just out of intrest what part of Cheshire are you in ? And which local authority did the inspections ?
 
ColJack said:
are there no finger guards for the exposed bus bars?

also please check every factory fitted connection as these may not be fully tight and can lead to fire risk...

tails need to be marked which is live, which is neutral.. or just stripped outer sheath back a bit..

3 spare ways need blanks..

some of the earths look a little tight.. like 1, 2 and 15

breaker 4 different make?

Cheers Coljack, well spotted. Yes, there's a busbar guard which I fitted after the photos were taken but before the front cover was fitted.

I undid every factory connection, checked the conductors were in place correctly and then re-tightened.

Re the tails, they're marked further down towards the meter but I'll stick a strip of tape round each one inside the CU. Thanks for that.

All spare ways are blanked off - again, after pics were taken but before cover fitted.

All the earths were tightened to the same torque but I'll loosen and check when the cover is off for inspection.

Breaker 4 is a MK breaker like the rest although I bought it from the big orange shed. 'Twas a sunday afternoon and I realised I was short of one breaker of correct rating and had no choice but to buy it there. Best part of £8 there you know!! Only £3.65 in the local electrical factors!

Thanks again for the pointers everyone.

Regards

Fred.
 
streetlighter said:
Just out of intrest what part of Cheshire are you in ? And which local authority did the inspections ?

As far as I'm aware it was Chester City Council. I'm actually in Vale Royal Borough Council area but had to send notification to Chester.

Why d'ya ask? You thinking of doing something similar?

I was petrified of the first inspection but all was good and the BCO was a perfectly reasonable person.

Regards

Fred
 
What size cable have you got for the earth cable between the CU and MET? Same size as Main Bonding?
 

DIYnot Local

Staff member

If you need to find a tradesperson to get your job done, please try our local search below, or if you are doing it yourself you can find suppliers local to you.

Select the supplier or trade you require, enter your location to begin your search.


Are you a trade or supplier? You can create your listing free at DIYnot Local

 
Sponsored Links
Back
Top