Dpc

FFL's are not "normally about the same level as the DPC".
That is a well wrong claim that shows a lack of knowledge.
An ignorance that could be expensive for the OP & interested viewers.

The white paint was not "slopped on top of the bricks" - its a very neat piece of painting.

Whatever does the suggestion by a random stranger that the OP should not take advice from "random strangers" mean?
Ree doing his usual thing, sadly.

Please don't ruin another thread with your pointless bickering.

Obviously things are different in California!
 
No they are not - perhaps you should read the Building Regs?
Yes they are ,from said regulations(y)
1790875788589.png
 
Last edited:
Poster #20,

Why not read what I said, & what the OP said - read very carefully & you will then understand what was said, & what it meant?
 
OMG, I agree with ree!

Typically, where there is a concrete floor, the DPC would be level with the top of the floor.

In some cases, a cavity tray arrangement can mean a DPC is higher or lower.

Where there is a timber floor, the DPC is commonly a course or more lower than the floor surface - common in older properties.
 
OMG, I agree with ree!

Typically, where there is a concrete floor, the DPC would be level with the top of the floor.

In some cases, a cavity tray arrangement can mean a DPC is higher or lower.

Where there is a timber floor, the DPC is commonly a course or more lower than the floor surface - common in older properties.
FFL (not internal DPC) is mostly around the height of the ext DPC, was the point being made, which in most cases it is.
 
OMG, I agree with ree!

Typically, where there is a concrete floor, the DPC would be level with the top of the floor.

In some cases, a cavity tray arrangement can mean a DPC is higher or lower.

Where there is a timber floor, the DPC is commonly a course or more lower than the floor surface - common in older properties.
In which case... the FFL is irrelevant anyway!

Yet another thread derailed and turned into pointless bickering by Ree from California.
 
Call sign CG, no its not - no you didn't.
CG & Poster #24, with respect - why dont you two guys give it up?Unfortunately, neither of you know what you are talking about?
Poster #24 attacking the man proves it.

The OP started by claiming previous "vents" - now "bricked in."
Low level "vents" i.e. air bricks vent suspended floors.
The correct position of a DPC on the inner leaf of a suspended floor is in the bed under the joist tails.
Having the DPC under the joists sets it well below the FFL.
The FFL does not have to be "the height of the ext DPC"
The correct position of a DPC on the outer leaf is 150mm above GL.
He later stated that the floor was solid - i.e. the suspended floor had been replaced with a solid floor.

Obviously, given the above, I was all along referring to a suspended floor - why? because thats what was on the page.
Unfortunately some of the posters got emotional & began to see what was not there.
There are a number of other factors that have not been discussed but whatever, Que sera, sera.
Ask yourself - do you think your posts are helping the poster of this thread at all?

The answer's no by the way. In which case you're adding no value and just turning it into the pointless bickering that you try to turn every thread into.
 
Thanks for all the replies so far.

Removed the plasterboard & skirting just now.

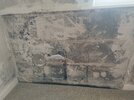
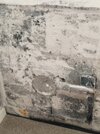
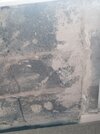
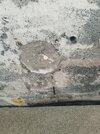
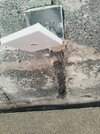
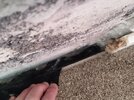
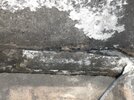
Am i assuming rightly that the black plastic sheet is the dpc. It goes in to the brickwork(poor picture again) sorry.

Where the cable goes into wall & the small hole to the right of the circle both go as far as the cavity. Both have expanding foam in it as per last two photos.

Anything else i should have mentioned or taking a pic of, let me know. Many thanks.
 

Attachments

  • IMG_20261002_122829.jpg
    IMG_20261002_122829.jpg
    615.4 KB · Views: 30
  • IMG_20261002_122807.jpg
    IMG_20261002_122807.jpg
    474.5 KB · Views: 32
  • IMG_20261002_122814.jpg
    IMG_20261002_122814.jpg
    410.3 KB · Views: 31
  • IMG_20261002_122641.jpg
    IMG_20261002_122641.jpg
    673.9 KB · Views: 34
  • IMG_20261002_122651.jpg
    IMG_20261002_122651.jpg
    648.9 KB · Views: 29
  • IMG_20261002_122719.jpg
    IMG_20261002_122719.jpg
    414.2 KB · Views: 30
  • 20261002112847270.jpg
    20261002112847270.jpg
    124.5 KB · Views: 31
  • 20261002122421791.jpg
    20261002122421791.jpg
    106.5 KB · Views: 33
OP,
As you acknowledge, the pics are pretty poor - maybe you can supply a bit more light?
1.There are a few signs of damp on the blockwork but you report previous penetrating damp. What condition was the back of the plasterboard in?
2. If you knocked out a couple of blocks it would enable you to look into the cavity for any cavity rubble bridging the DPC & DPM or mortar on wall ties?
And see how far the black membrane goes under the blocks?
3. The membrane (the DPM) has been installed incorrectly but maybe it works?
4. As requested earlier, why not measure down from the window board to the floor & then mark that dimension on an outside pic?
 
OP,
As you acknowledge, the pics are pretty poor - maybe you can supply a bit more light?
1.There are a few signs of damp on the blockwork but you report previous penetrating damp. What condition was the back of the plasterboard in?
2. If you knocked out a couple of blocks it would enable you to look into the cavity for any cavity rubble bridging the DPC & DPM or mortar on wall ties?
And see how far the black membrane goes under the blocks?
3. The membrane (the DPM) has been installed incorrectly but maybe it works?
4. As requested earlier, why not measure down from the window board to the floor & then mark that dimension on an outside pic?
I blame the camera lol

Didn't notice anything on old plasterboard but will check again.

Best way to remove blocks without damaging ones around it?

Will measure.
 
Measured it & it comes out where top of brickwork is , so I scraped away a bit of paint & you can clearly see dpc.

Hopefully these pics are a bit better.
 

Attachments

  • IMG_20261003_133419.jpg
    IMG_20261003_133419.jpg
    1,007.9 KB · Views: 24
  • IMG_20261003_133426_BURST1.jpg
    IMG_20261003_133426_BURST1.jpg
    621.7 KB · Views: 22
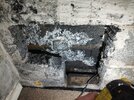
Removed a couple of blocks & behind it was full of expanding foam(pic 1)

Removed as much as I could & where it attached to outside wall was very damp. I cleaned out quite a lot of mortar, broken block/brick & foam/CWI.

If I put my hand down into the cavity LHS as you look at wall i removed CWI which was very very wet.

The CWI to the left & right of the opening above the dpc are dry, only wet if i reach down into the cavity.

I am looking at replacing CWI in the near future anyway but is there a way of checking whether the render has had it's day too.

I thought about using a dehumidifier to dry out anything that was damp in the cavity & then wait until we have rain & see if any does come down or is that too simplistic?
 

Attachments

  • IMG_20261006_120026.jpg
    IMG_20261006_120026.jpg
    997.1 KB · Views: 19
  • IMG_20261006_140437.jpg
    IMG_20261006_140437.jpg
    906.9 KB · Views: 24
  • IMG_20261006_140324.jpg
    IMG_20261006_140324.jpg
    709.9 KB · Views: 19
  • IMG_20261006_140404.jpg
    IMG_20261006_140404.jpg
    504.7 KB · Views: 20
OP,
Well done for your continuing investigation & finding the damp CWI & rubble that I referred to in post#8.
If you remove block down to FFL level then it would be clear if there now is a DPC at that level or does the DPM go under th blockwork?

You need to remove as much rubble as possible, and to remove all the reachable CWI - you could open the wall up further to the right? Wall openings should be a few feet apart for structural safety.
The render looks fine but definitely observe during rain - or when the exterior is being hose pipe sprayed.

Despite the render looking fine moisture is still maybe penetrating the wall? I think moisture is rising in the cavity rubble & CWI.
Has the gully trap been cleaned out?
 

If you need to find a tradesperson to get your job done, please try our local search below, or if you are doing it yourself you can find suppliers local to you.

Select the supplier or trade you require, enter your location to begin your search.


Are you a trade or supplier? You can create your listing free at DIYnot Local

 
Back
Top