- Joined
- 13 Oct 2009
- Messages
- 96
- Reaction score
- 0
- Country

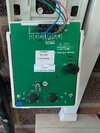
We have a Eurosec CP8L alarm, with two keypads.
A few days ago, the main keypad by the front door was completely dead, nothing on screen and buttons not working.
Went and checked the keypad in garage and that was the same.
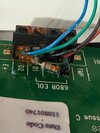
A few days later, and we've discovered a leak above the garage, now resolved. And you've guessed it, its directly above the garage keypad.
The alarm box itself is in the loft, so will not be affected, the only water ingress will be to the 2nd keypad.
Everything now drying out.
The main control box in the loft has a single green LED on the front.
What is the likely prognosis for this?
My understanding is that it has several fuses, so I'm guessing check them first. However, I'm keen to NOT set the actual alarm off, something that hasn't happened up until now. Or could it actually just sort itself out when the keypad dries out? Or could that set the alarm off if I do nothing?
Thanks in advance.
A few days ago, the main keypad by the front door was completely dead, nothing on screen and buttons not working.
Went and checked the keypad in garage and that was the same.
A few days later, and we've discovered a leak above the garage, now resolved. And you've guessed it, its directly above the garage keypad.
The alarm box itself is in the loft, so will not be affected, the only water ingress will be to the 2nd keypad.
Everything now drying out.
The main control box in the loft has a single green LED on the front.
What is the likely prognosis for this?
My understanding is that it has several fuses, so I'm guessing check them first. However, I'm keen to NOT set the actual alarm off, something that hasn't happened up until now. Or could it actually just sort itself out when the keypad dries out? Or could that set the alarm off if I do nothing?
Thanks in advance.