Hollow wall anchors

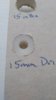
Thanks for the input chaps. For info my rad is 1.8M tall and I have already ordered extra brackets because it only come with 4 - I plan to use 6. My foot print comment was not so much worrying that the hole will show but more that it has not got so much strength spreading the load than a batten would have so I have a 30mm diameter thing being fixed over a 15mm hole.
These form G washers look like they will do it or there must be something out there like model making stuff that comes in a round bar with a hole in it and I could cut down. Could even work where the thing being fixed is already on the wall and the bar could be cut to the length to go through it as well as the wall.
Loosing the toggle on removal is not so bad.
 
Sponsored Links
In your situation, rather than change the fixing to suit the bracket, I would alter the bracket to suit the fixing (i.e. my favourite ones).

How much 'meat' is there in the base plate? Enough to confidently sand/dremel away just under half a mm in the centre only, to fit over the flange of a brolly type, making it a concave base, but still keeping the 30mm diameter contact patch?
 
I found these cups but still not wide enough but they do stack nicely and sort of self level.
IMG_20190122_184444420.jpg

The nut in the spring toggle looks very thin, they are rawl plug ones - is that about normal.
IMG_20190122_184731905.jpg


And here is the measurement of the flange on the rawlplug 5x 37
IMG_20190122_184318640.jpg
 
I would not trust the bottom of the bracket to make it any thinner. Its plastic. I don't have them with me to post a picture
 
Sponsored Links
Don't worry about the spring, they are purely to open the toggle after insertion, nothing at all to do with the strength of the fixing. They would work fine without it there at all, with a little jiggling to open the 'wings'.
there must be something out there

Closest I can find is nylon spacers 15mm OD...

https://www.ebay.co.uk/itm/192581956316

The last item on the drop-down menu, or scroll down the page to where it says NEW SIZE. They are M6, that teeny adjustment may come in handy. They're 20mm long though, but nylon is easy to cut.

Edit: You musn't let the toggle tighten up against the spacer. I'd be tempted to cut them down to 10mm so that cannot happen.
 
Links in this post may contain affiliate links for which DIYnot may be compensated.
rsgaz -well done that man !. Good detective work they look like they would do the job but as you say best cut them down a bit.
Sorry its not the spring but the nut in the toggle, I was just calling it a spring toggle to make sure people did not think I was talking about the umbrella fixing. The nut looks very thin.
 
Sorry its not the spring but the nut in the toggle

Ahh, sorry. Did I misread that or did you edit that bit? :oops: Anyway...

On a normal nut, it's only the first 2 or 3 threads that actually do anything, look at the stress diagram...

asb0417joint6.jpg


So the nut is fine. You don't want to go crazy tight with any kind of plasterboard fixing anyway, you actually make the situation worse by weakening the board. As a guess, the only reason ordinary nuts are so 'long' is to get a better grip with a spanner and provide some redundancy against worn nuts. Which would only be relevant for nuts which suffer constant vibration, changing stress levels/angles, temperature changes, regular undoing/tightening, etc. Car wheel nuts probably the ultimate example.
 
Finally got round to posting an update. I brought a rawlplug setting tool and used those fixings for the towel rad. But I first took off the plasterboard skim with a 15mm forstner bit (being carefull not to cut into the plasterboard paper )which then meant that the flange on the plug would sit below the surface, future fixings I will forstner the back of what is being fixed but in this case I could not. First picture shows that.
Second picture is the bracket nice flat on the wall.
Last picture is the job done but out of shot is another pair of brackets right at the top.
I brought an extra set of brackets as in the middle I had a good fixing behind the plasterboard into a stud and wanted to use that but that also meant that there was nothing from the middle to the top because you only get 4 brackets. My case 2 at bottom at 2 in the middle. I did not fancy such a big rad with just fixings into plasterboard. So you can see on my photo of the bracket I had to cut it down to match the other 4. You can not see the end as it is the unseen telescopic part.
 

Attachments

  • IMG_20190206_131036499.jpg
    IMG_20190206_131036499.jpg
    99.5 KB · Views: 93
  • IMG_20190206_131935848.jpg
    IMG_20190206_131935848.jpg
    78.6 KB · Views: 77
  • IMG_20190208_111706513.jpg
    IMG_20190208_111706513.jpg
    114.6 KB · Views: 101
Last edited:
@rsgaz I brought the spacers that you found- or similar, I looked and looked for something shorter but could not find so I got the slightly too long ones and cut them down. Picture shows one in place. They are 15mm diameter so I Brought a 15mm engineers drill a 15mm forstner bit and a 15mm hole saw and tested to see which one gave the tightest cut for the spacer and also that did not do too much damage to the rear of the plasterboard on break out. The best for non break out was the hole saw but it was a bit of a loose 15mm hole - as was the forstner which also was the worse for break out damage. So the best was the standard 15mm drill bit. So with the spacer inserted the 15mm hole becomes 7mm
Although in the end I did not use the butterfly fixings.
 

Attachments

  • IMG_20190206_153133677.jpg
    IMG_20190206_153133677.jpg
    125.2 KB · Views: 85
All you needed was 1 x19mm woodbit and 4 red gripits. Job done. They hold 71kg per fixing use them on towel rails on dob and dab all the time.
Back in the day we used to drill out say a 50mm hole put a wooden batton in. Then replace the cutout bit. Easyfill over then fix towelrail up.
 

DIYnot Local

Staff member

If you need to find a tradesperson to get your job done, please try our local search below, or if you are doing it yourself you can find suppliers local to you.

Select the supplier or trade you require, enter your location to begin your search.


Are you a trade or supplier? You can create your listing free at DIYnot Local

 
Sponsored Links
Back
Top