My house extension diary

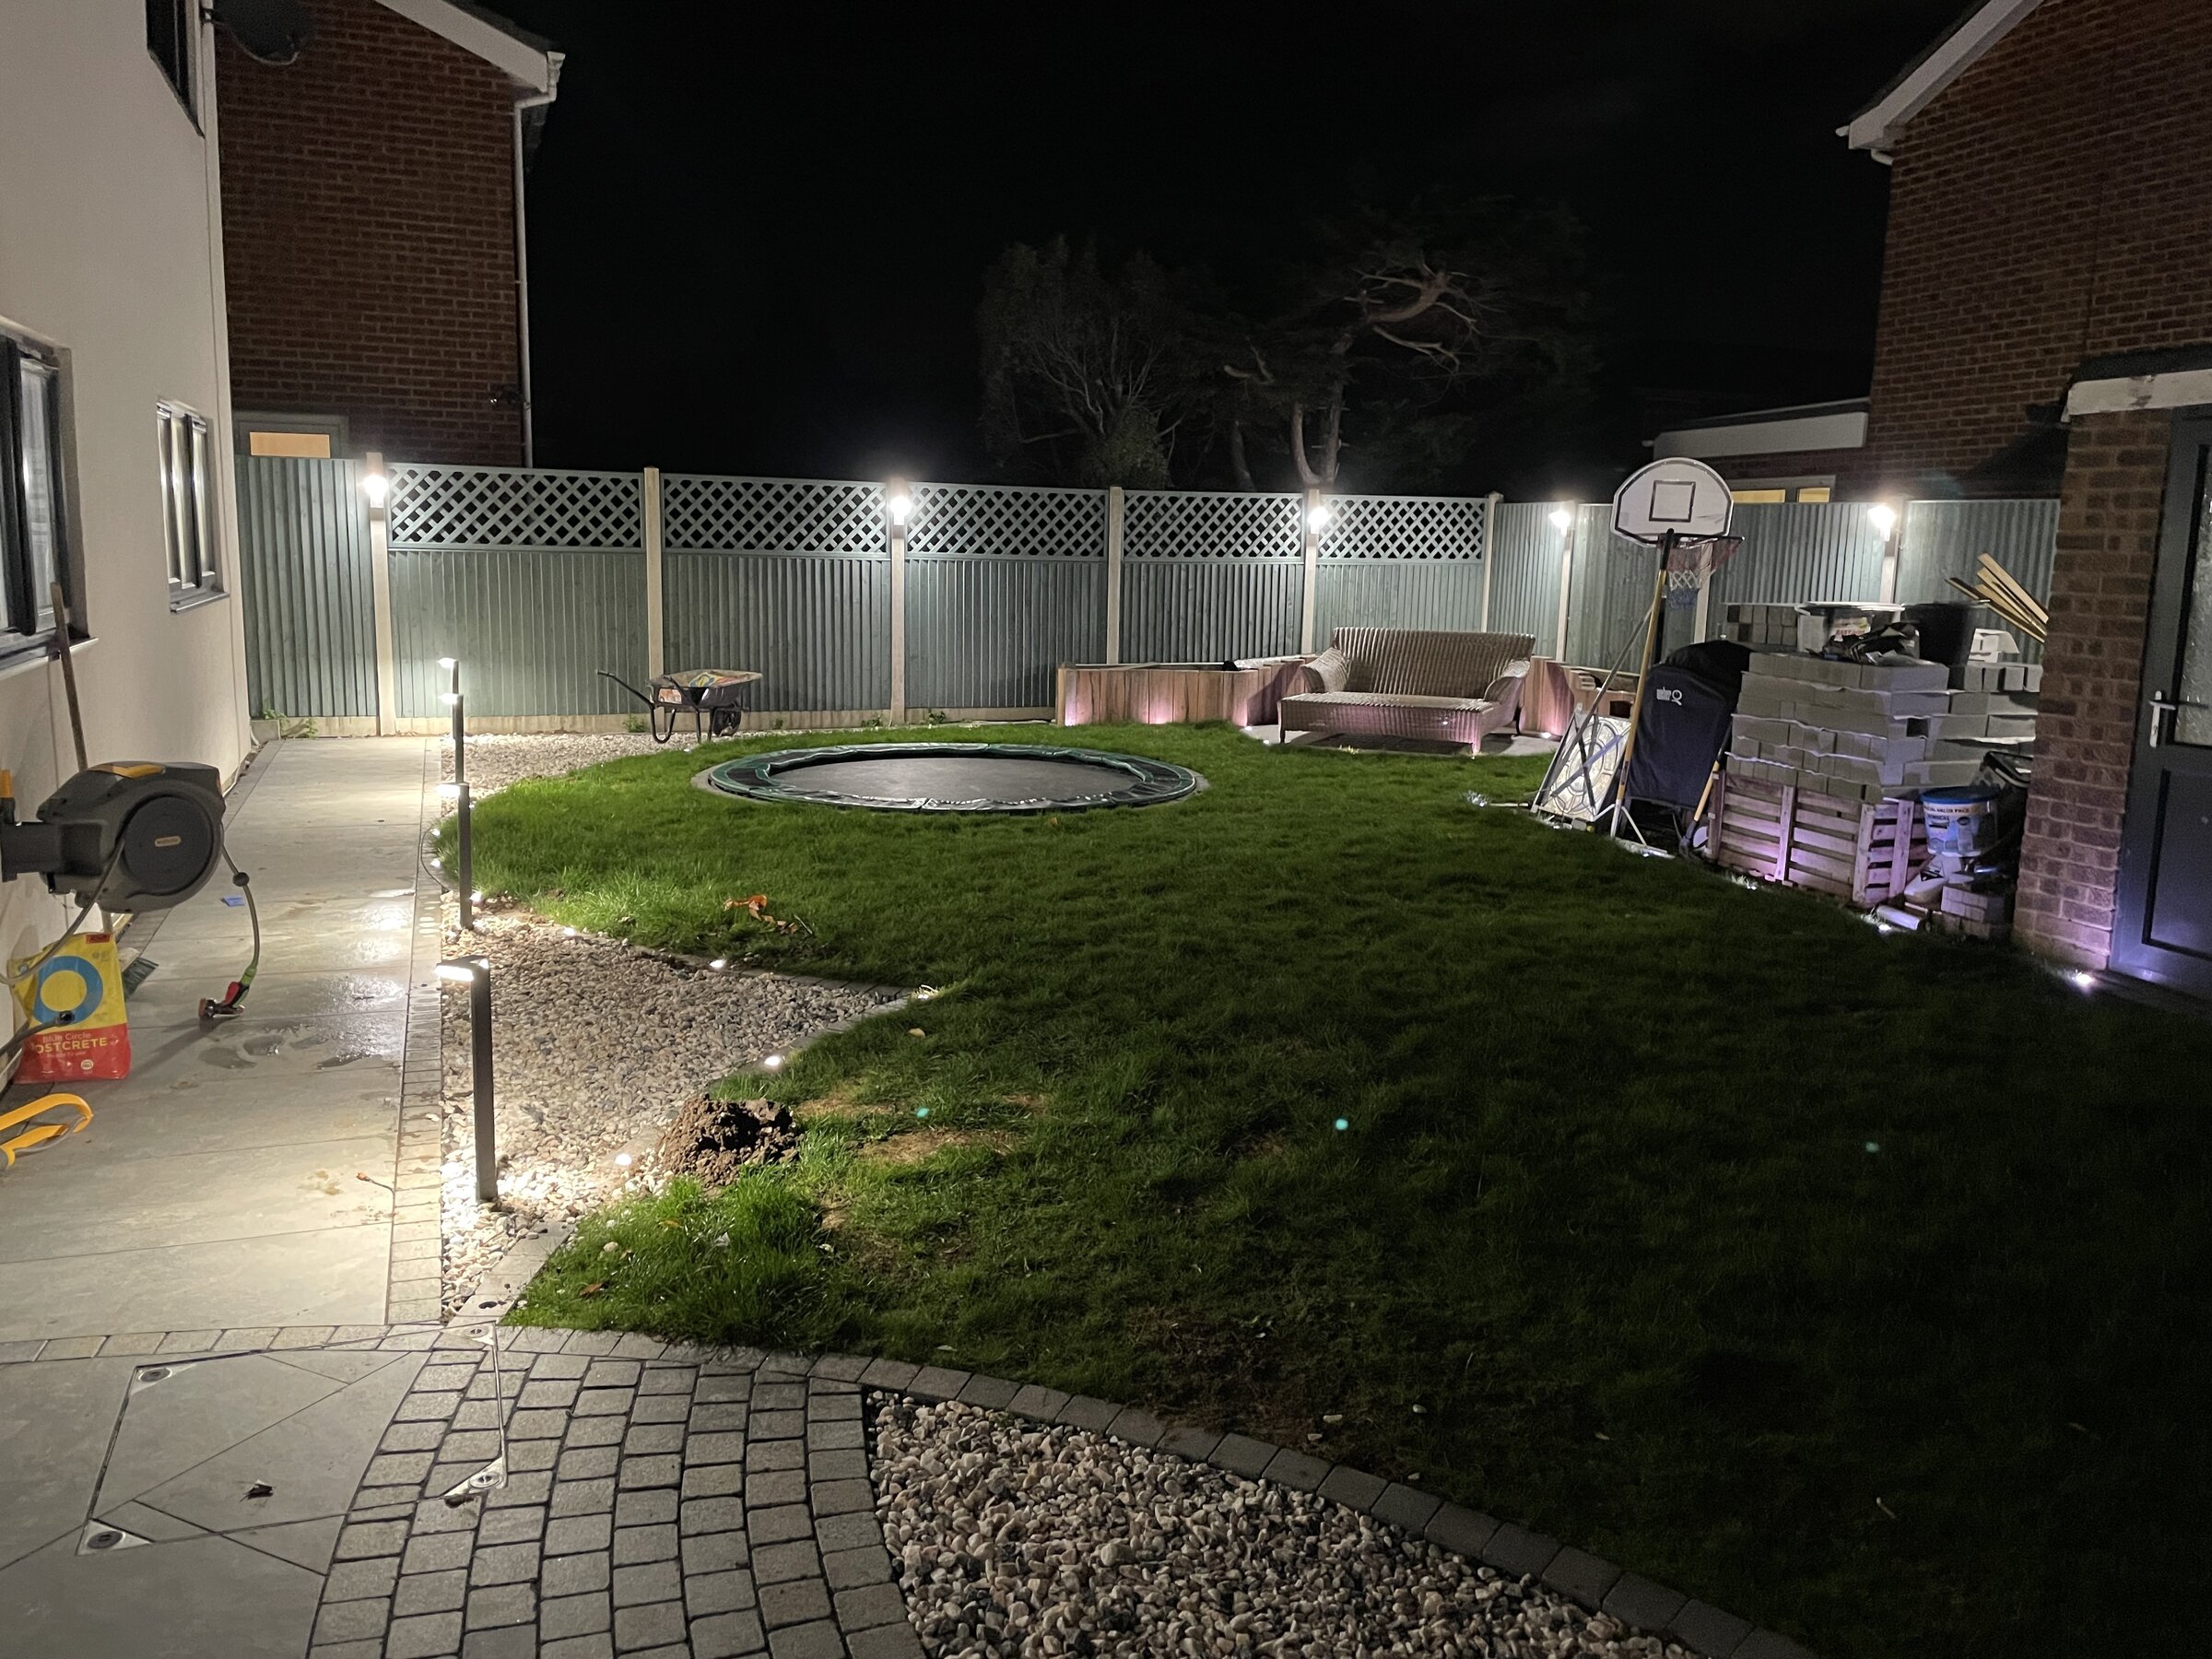
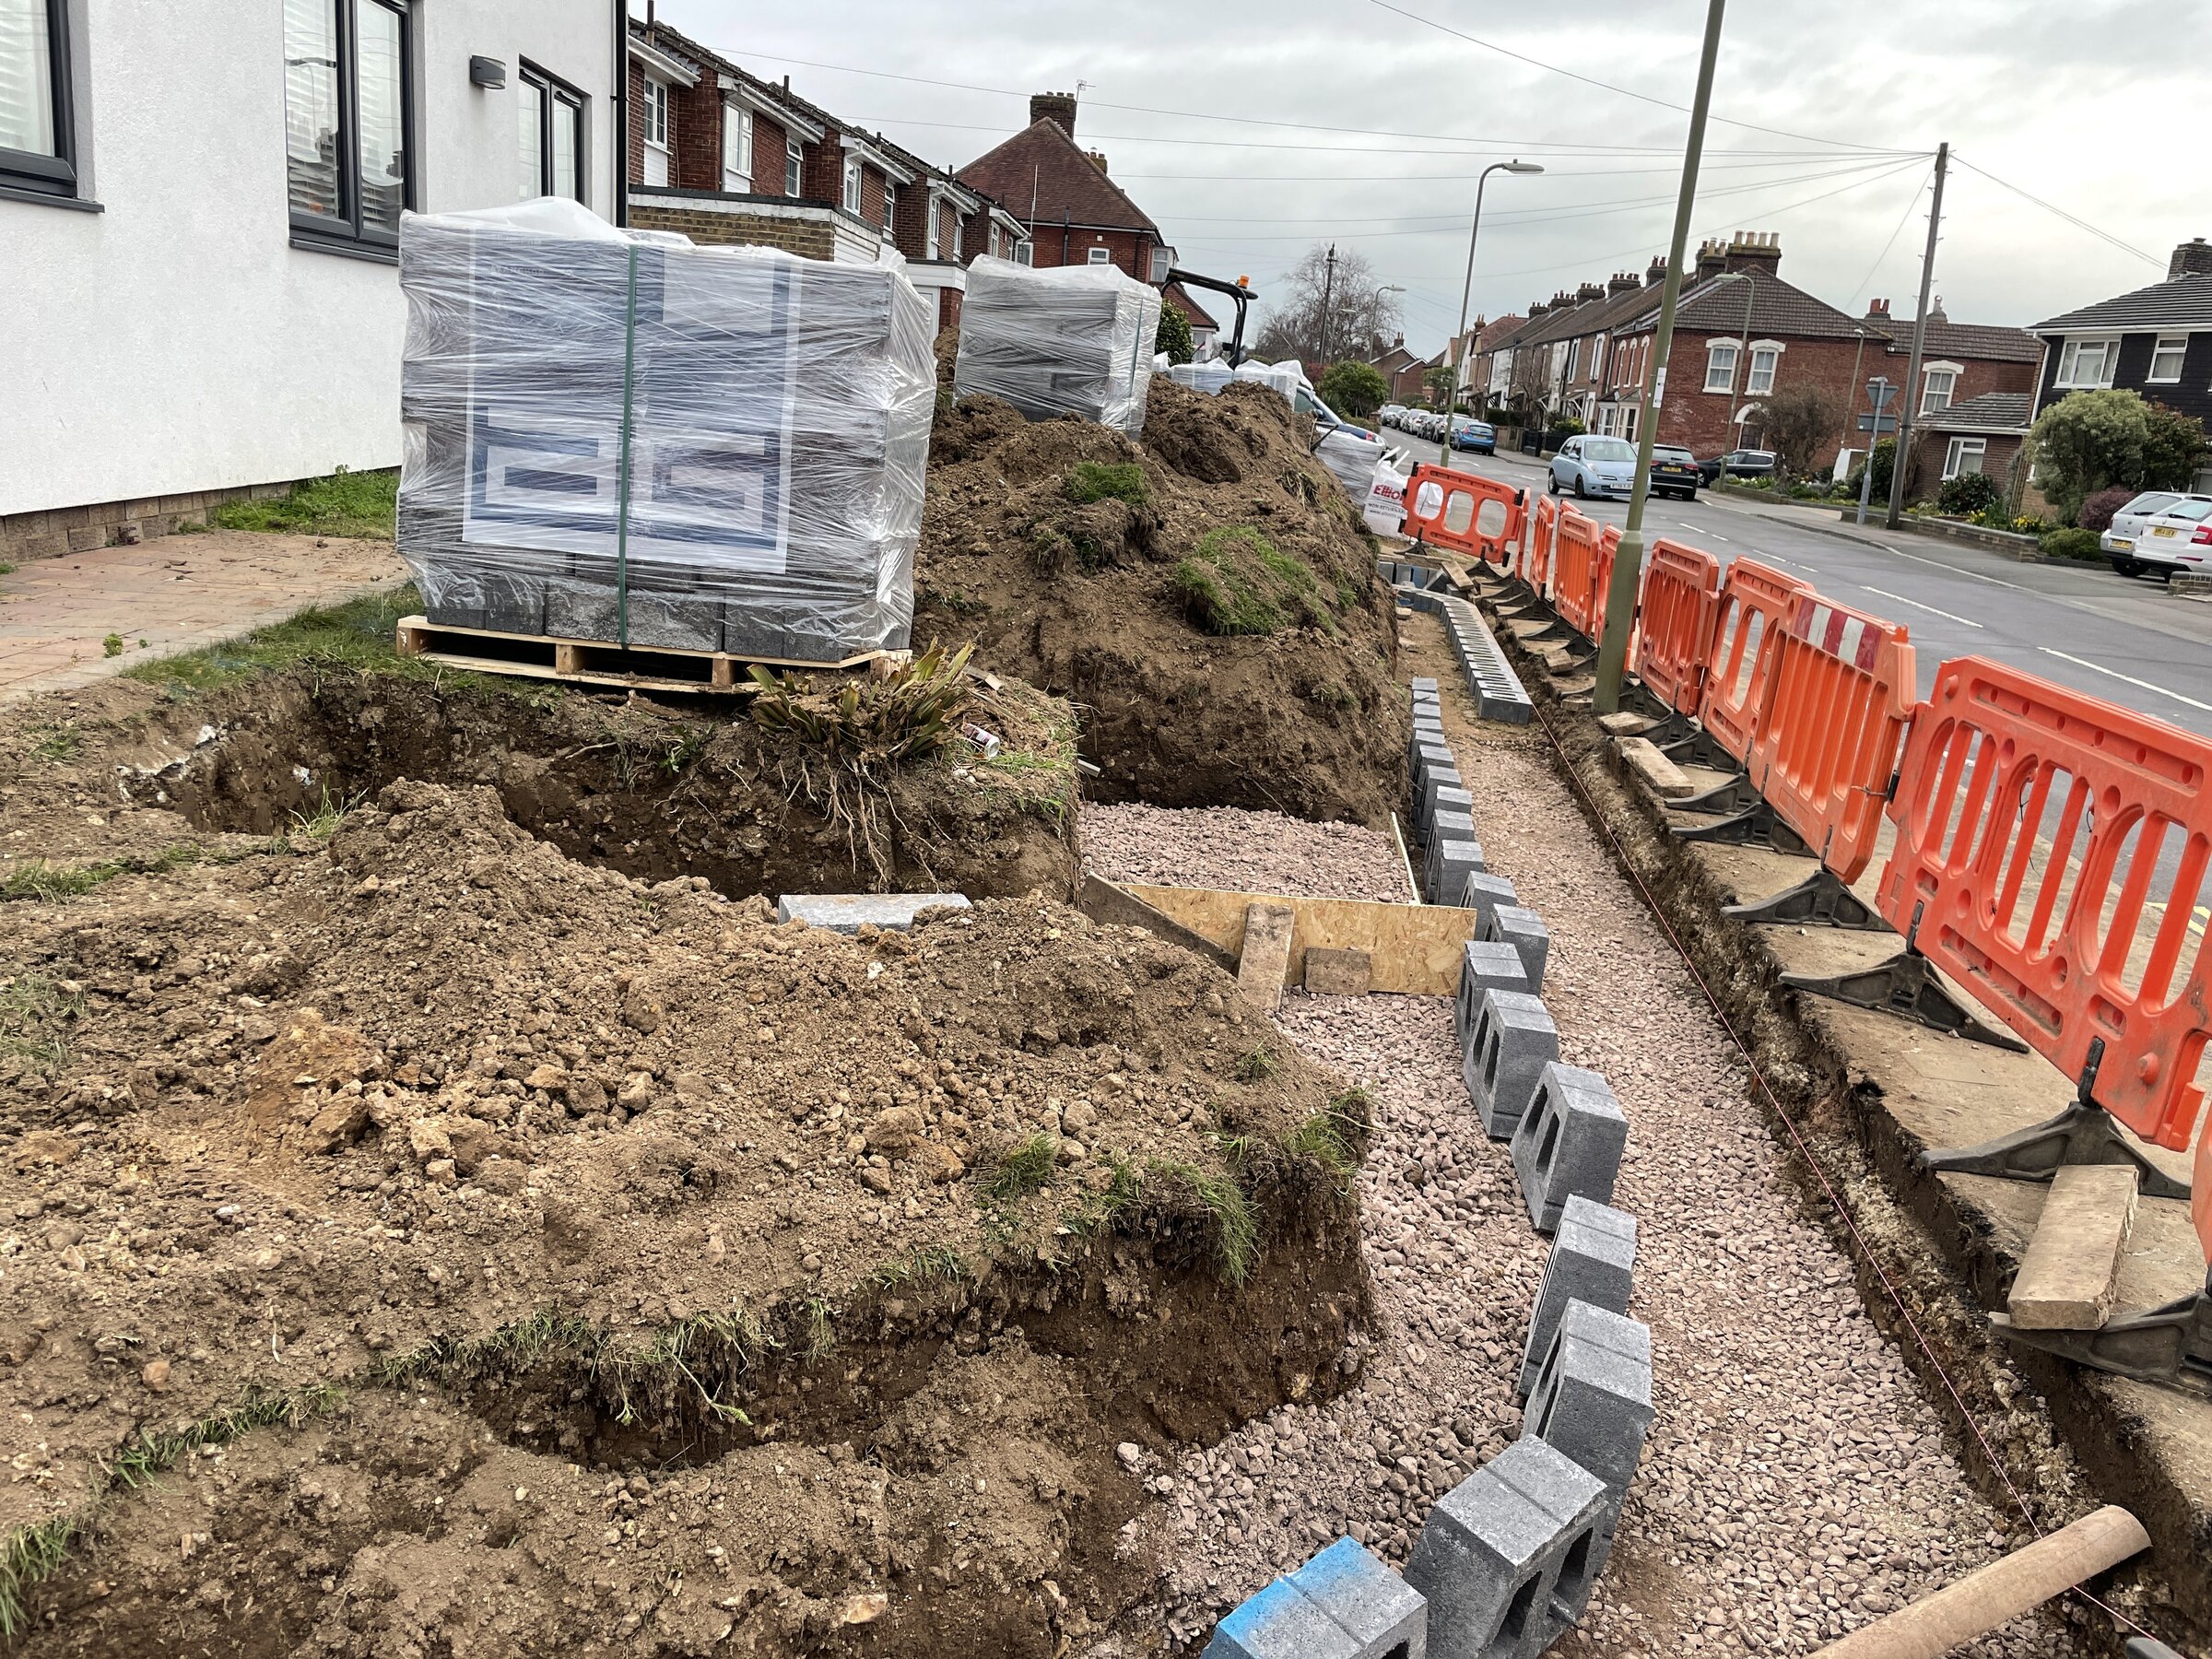
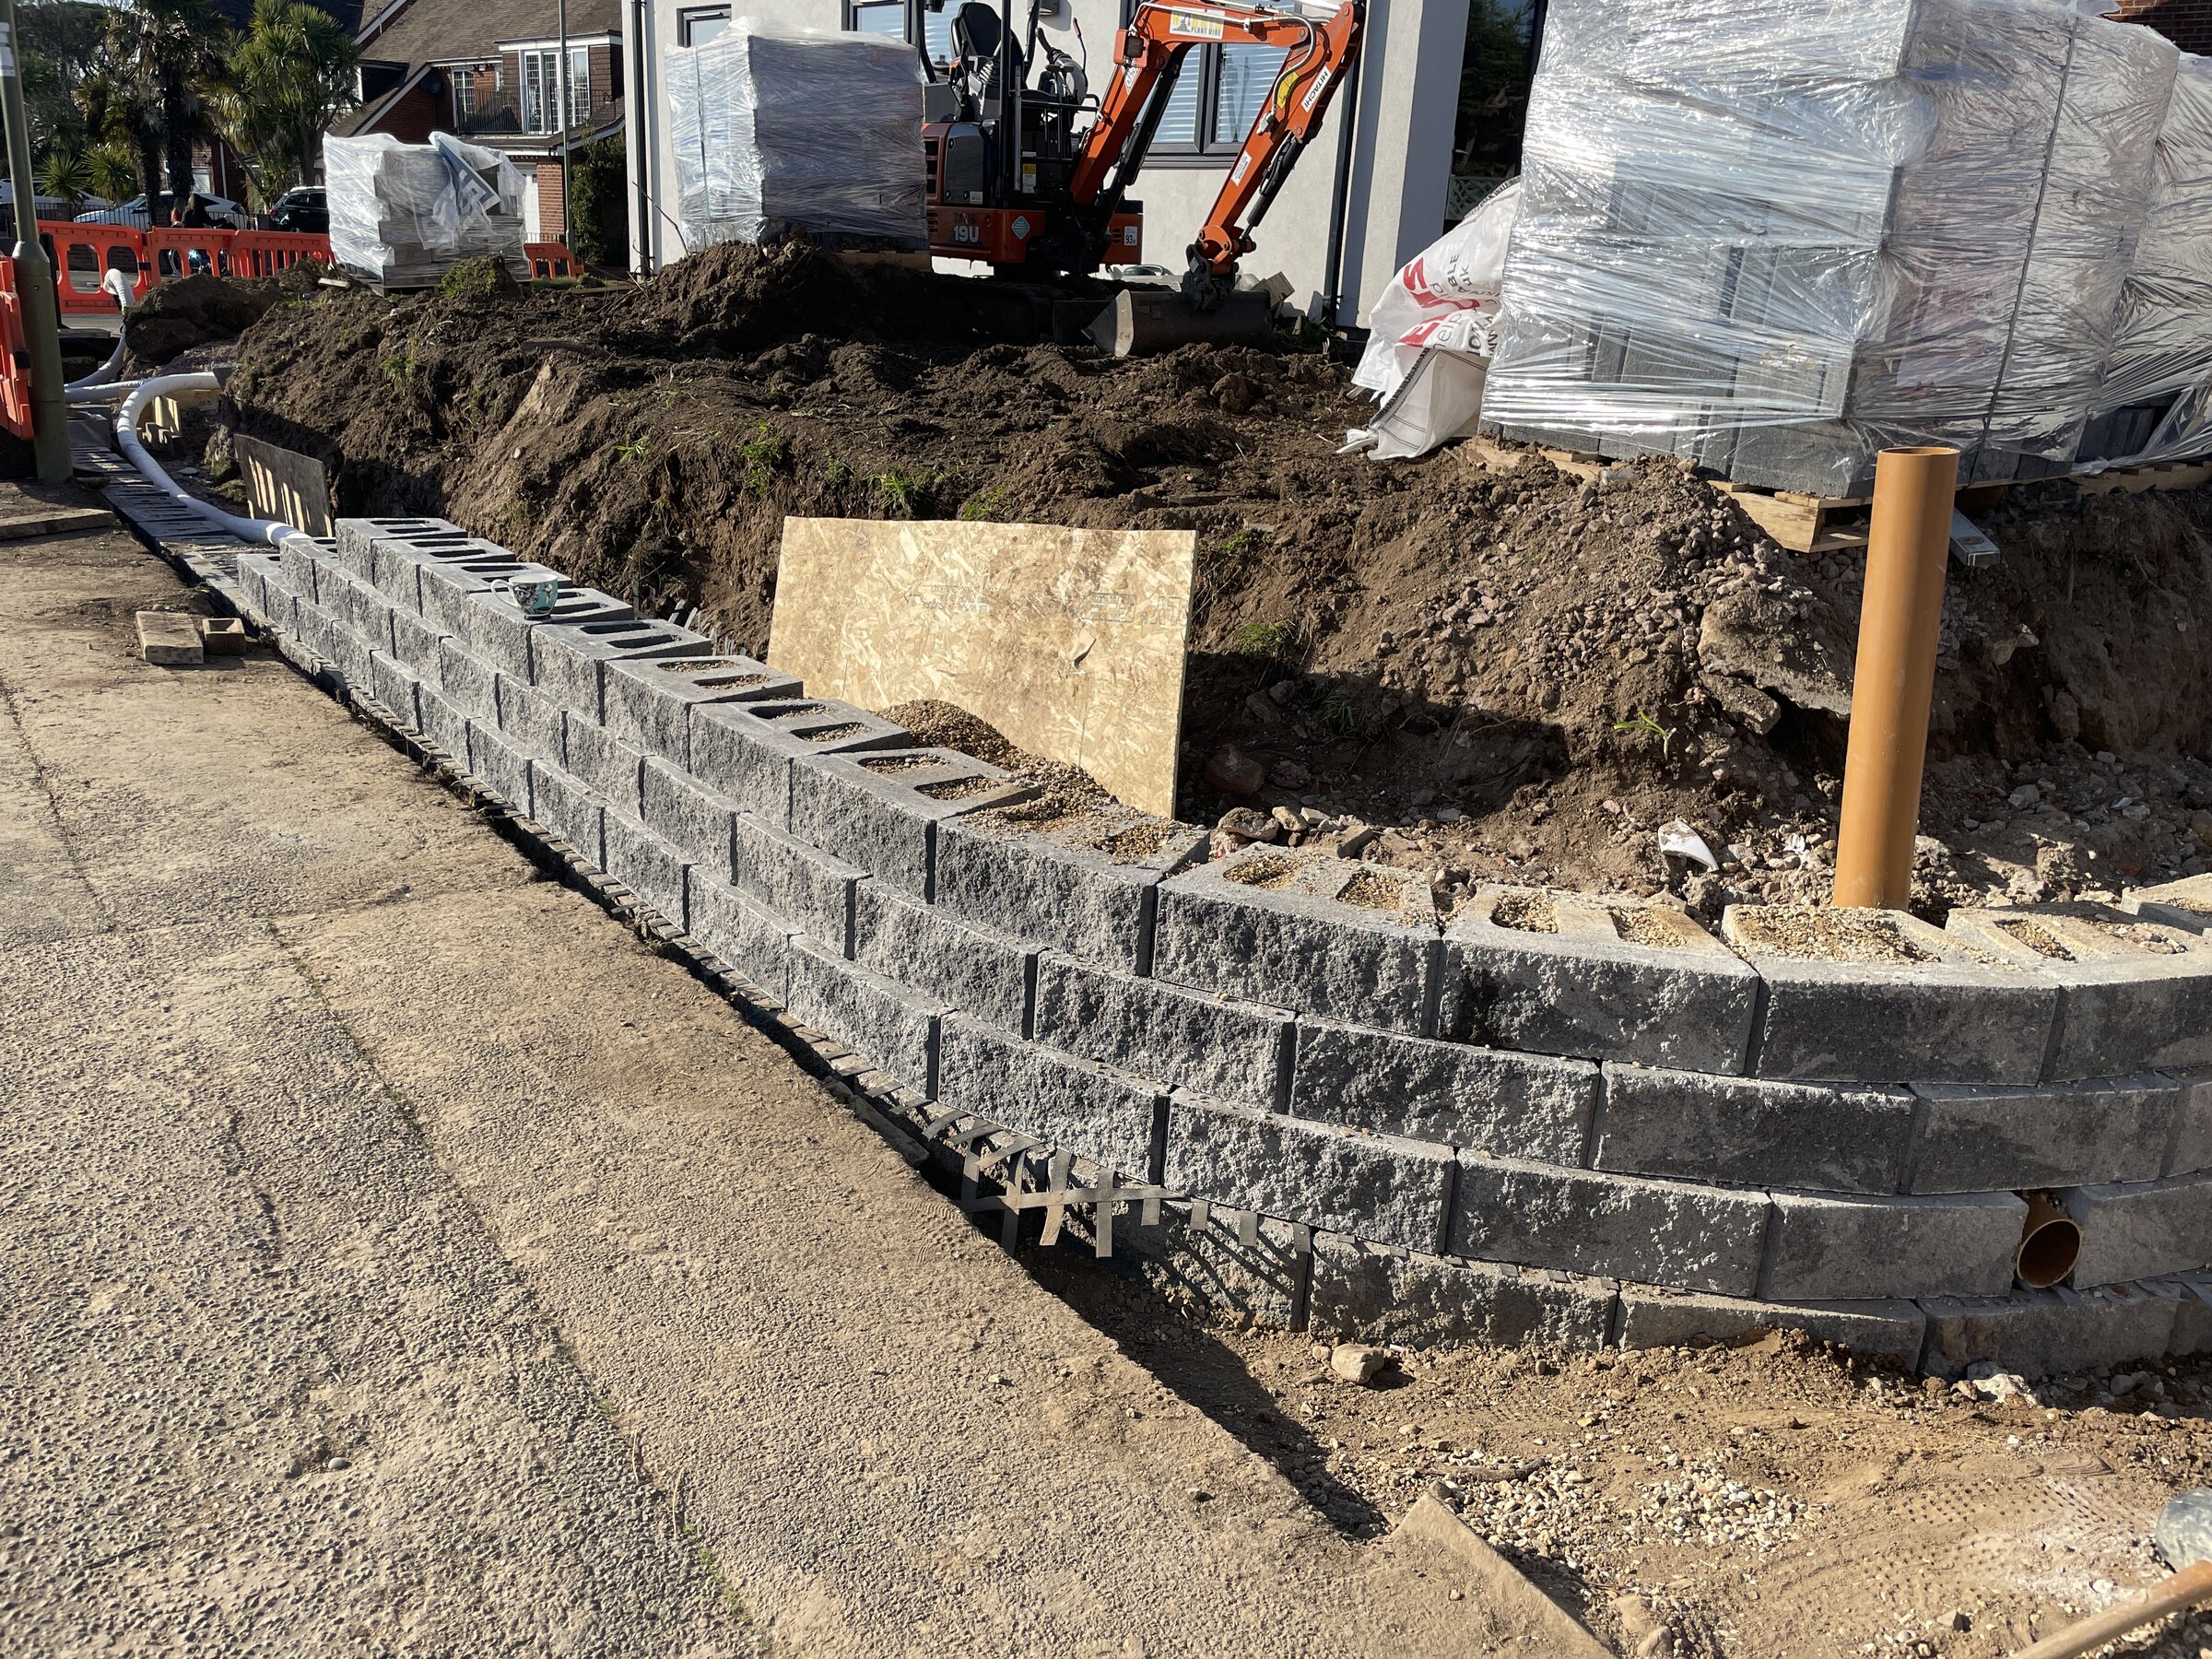
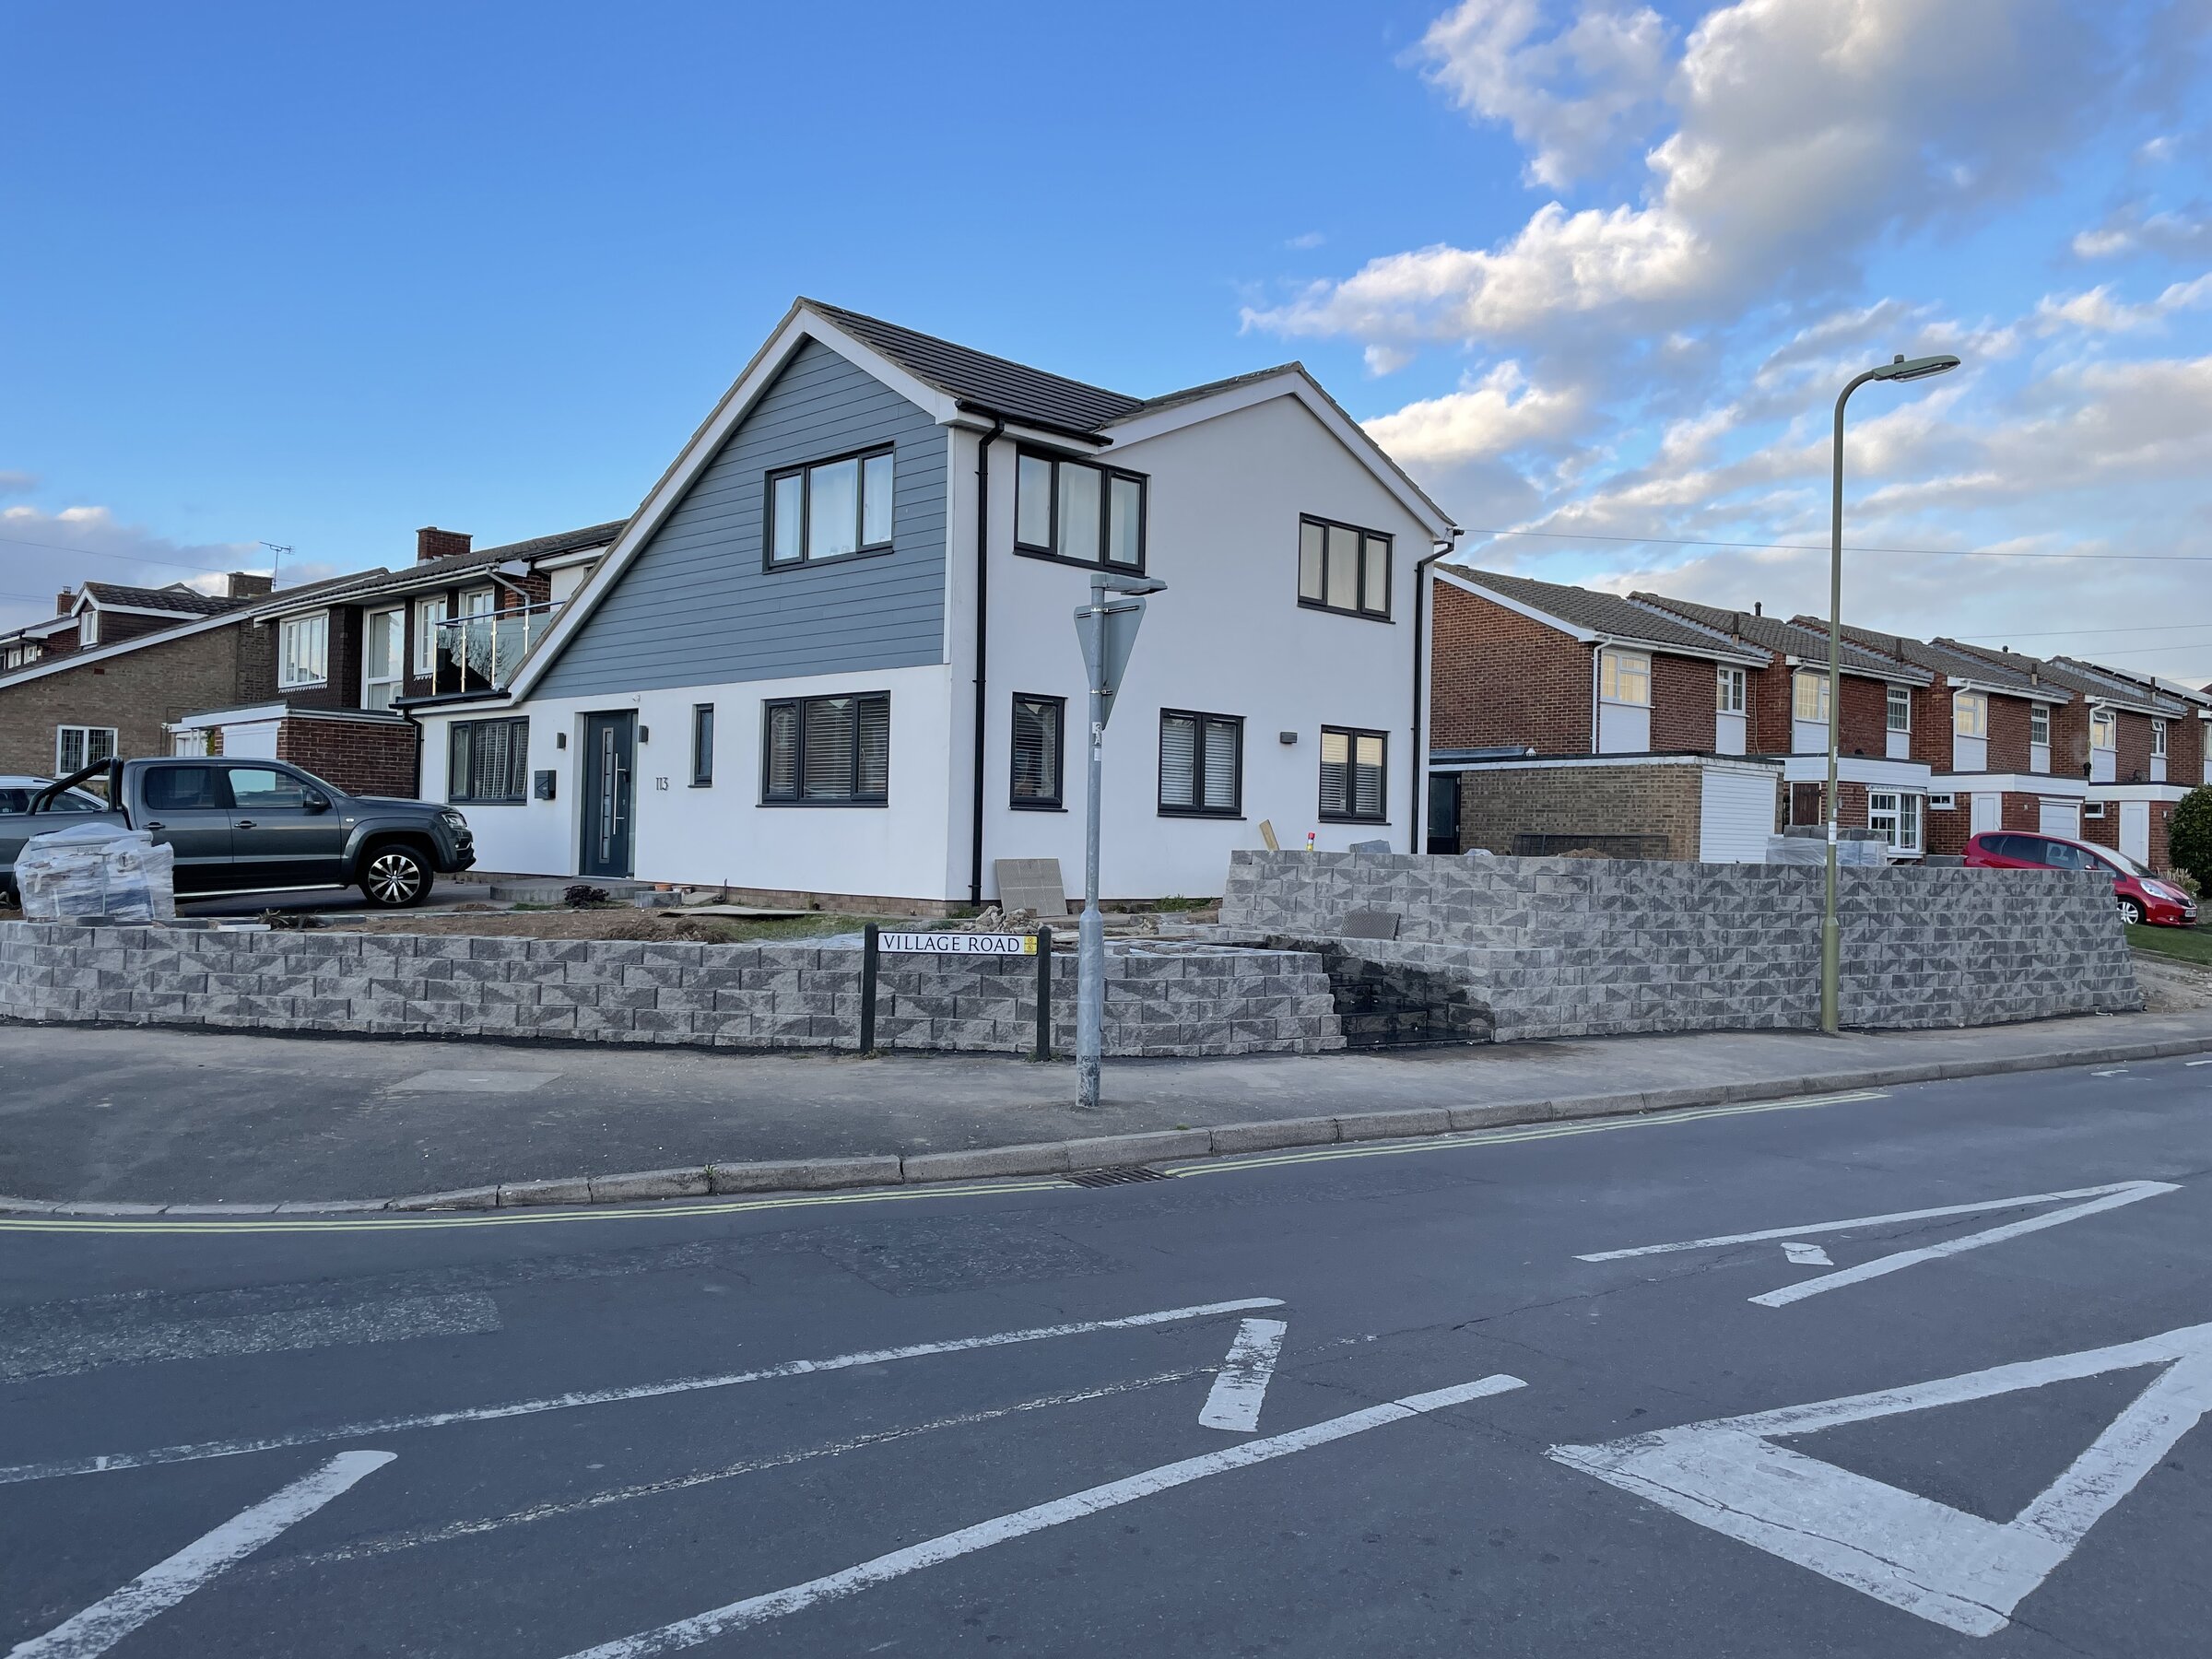
The edging blocks we went with are ‘blue black’ granite setts. They are a light grey when dry but really dark when wet. If you seal them they stay the darker colour and this is what we intend on doing.

64D7D8E2-3F64-457C-A534-4F8049B10F57.jpeg
6B12D9FA-186A-443D-89DE-5D41E3E87947.jpeg


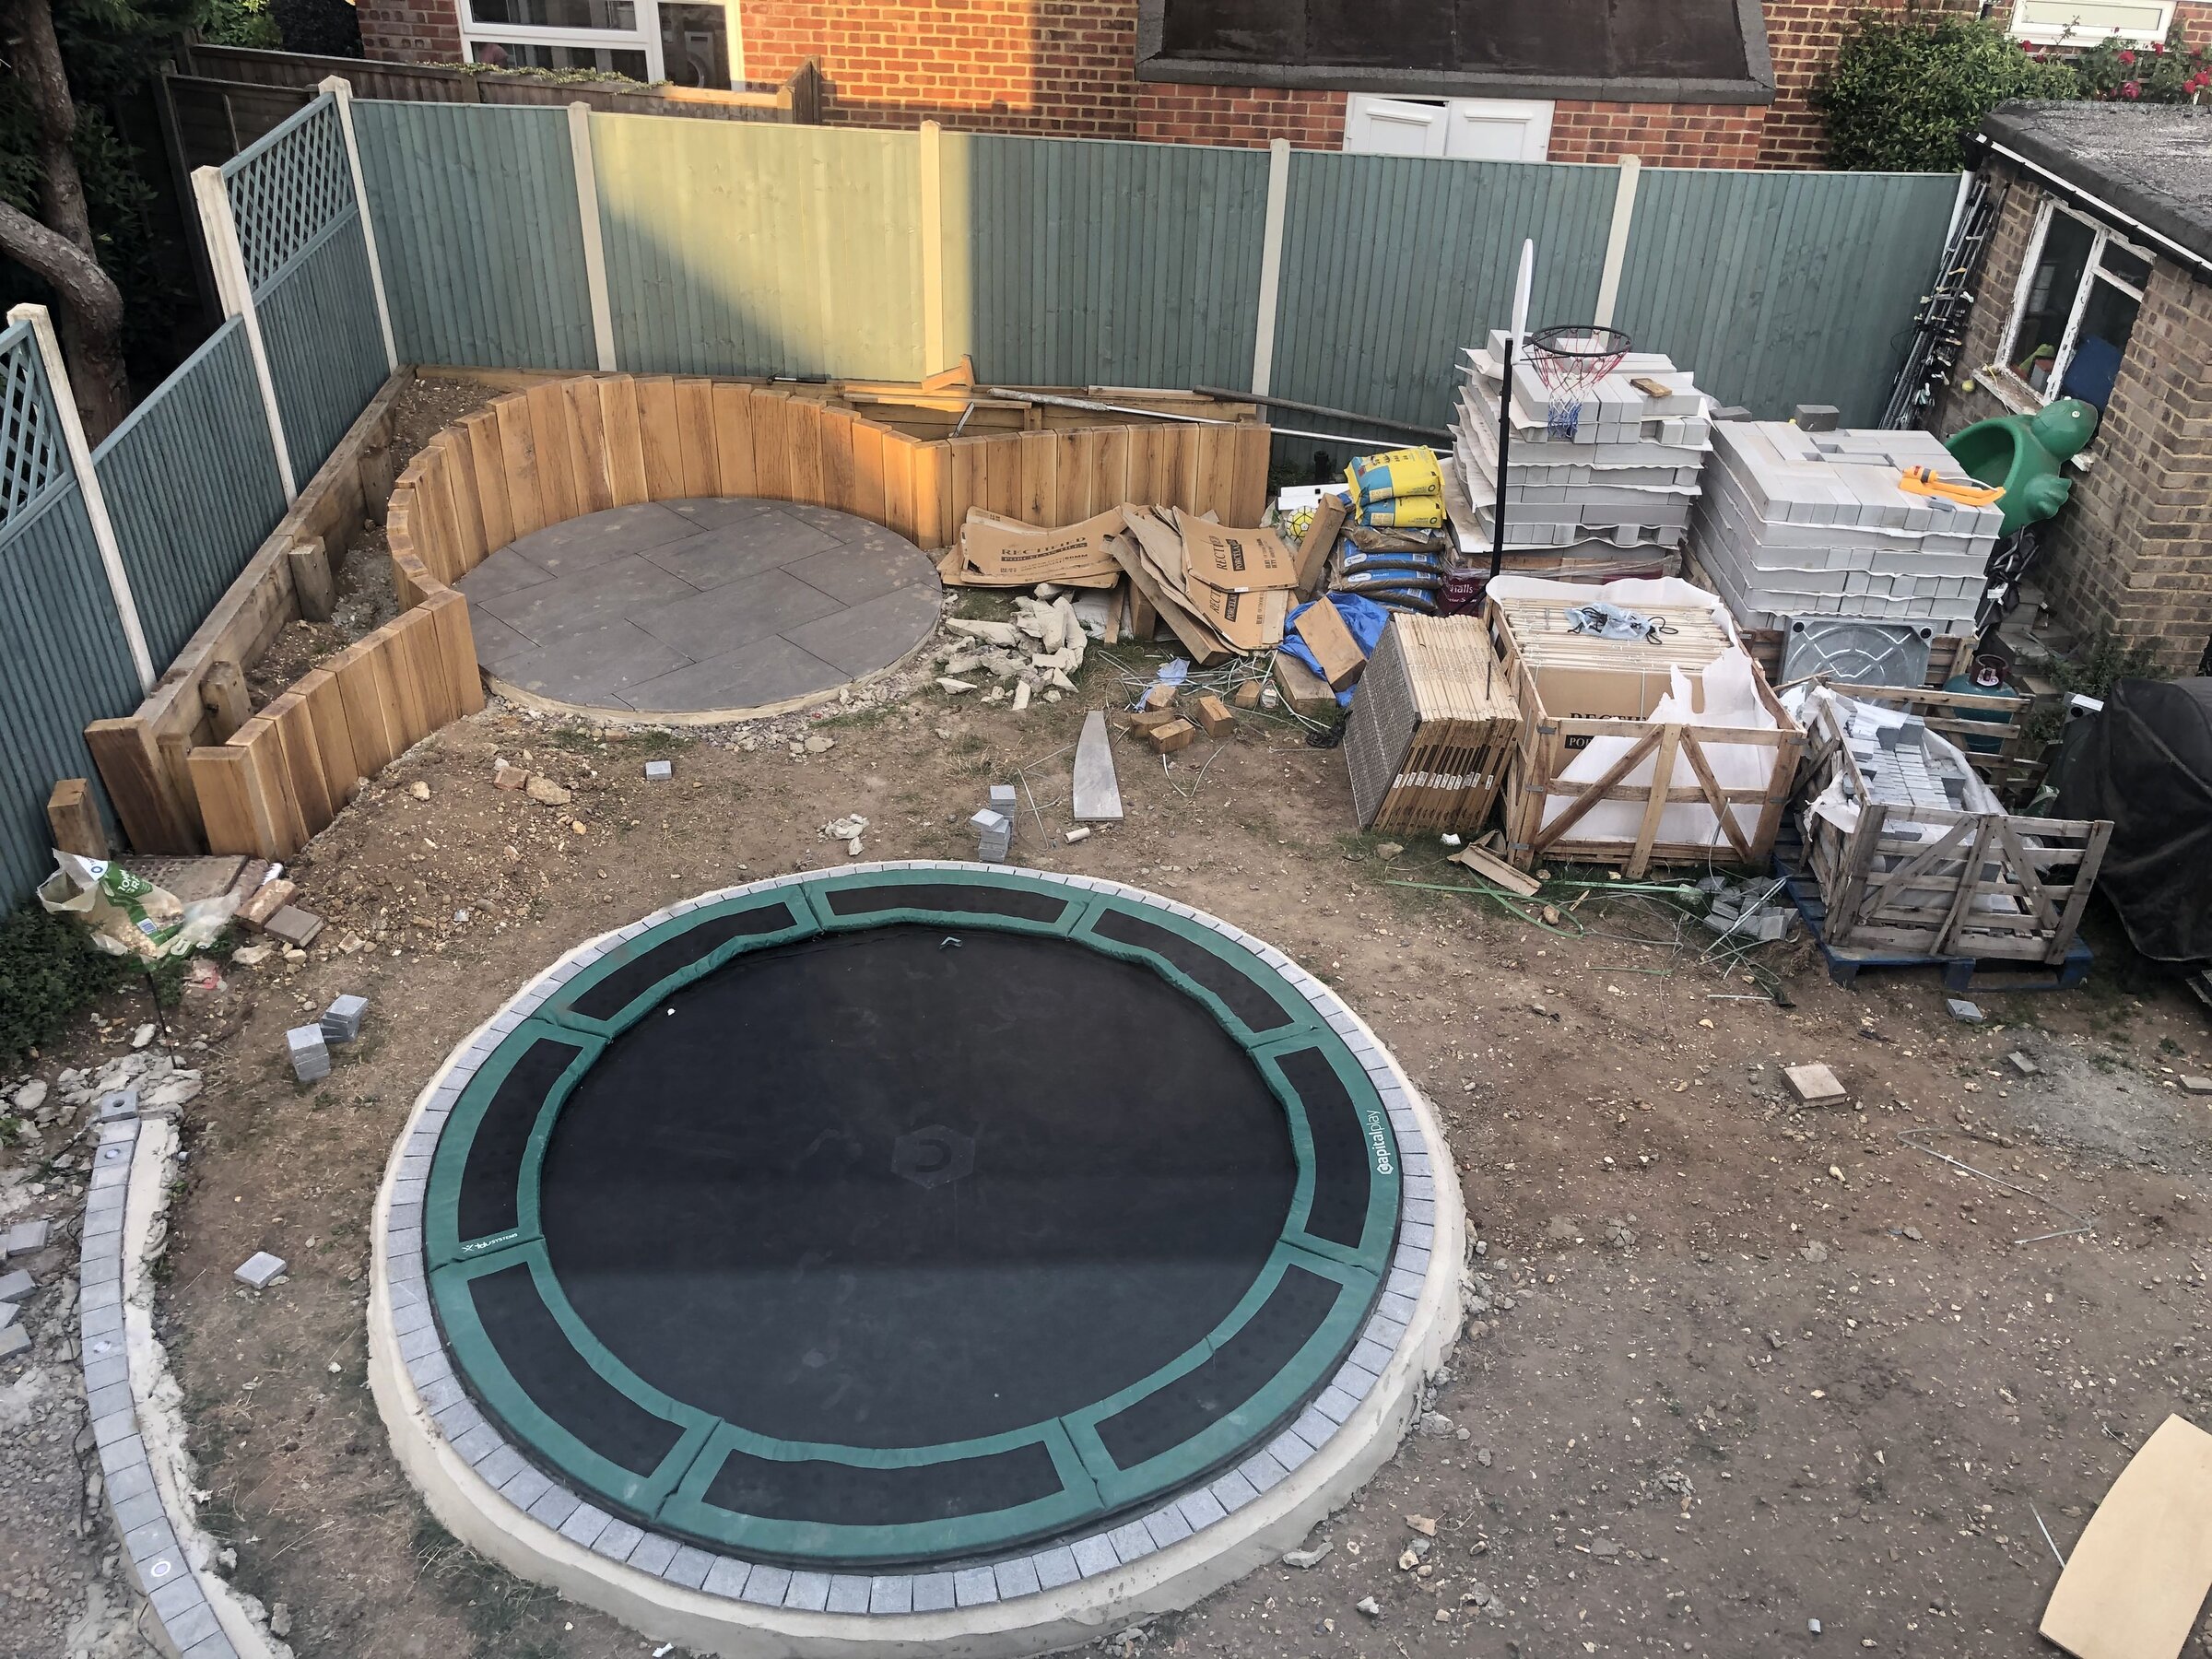
For the raised planter I went with some oak sleepers. I’m planning on slightly raising each of these around the circular patio with the highest point being in the centre and then bringing them back down. For the front ones I’m getting them all planed down so they have a smooth face which I will sand down and curve all the edges. They look so much nicer than just sawn. I’m treating them with Osmo exterior oil which should also help keep their natural colour.
C316465B-7086-4387-A2C8-735A21A44269.jpeg
9334DB7B-3416-440E-B7FC-D12D6CFDC2BB.jpeg


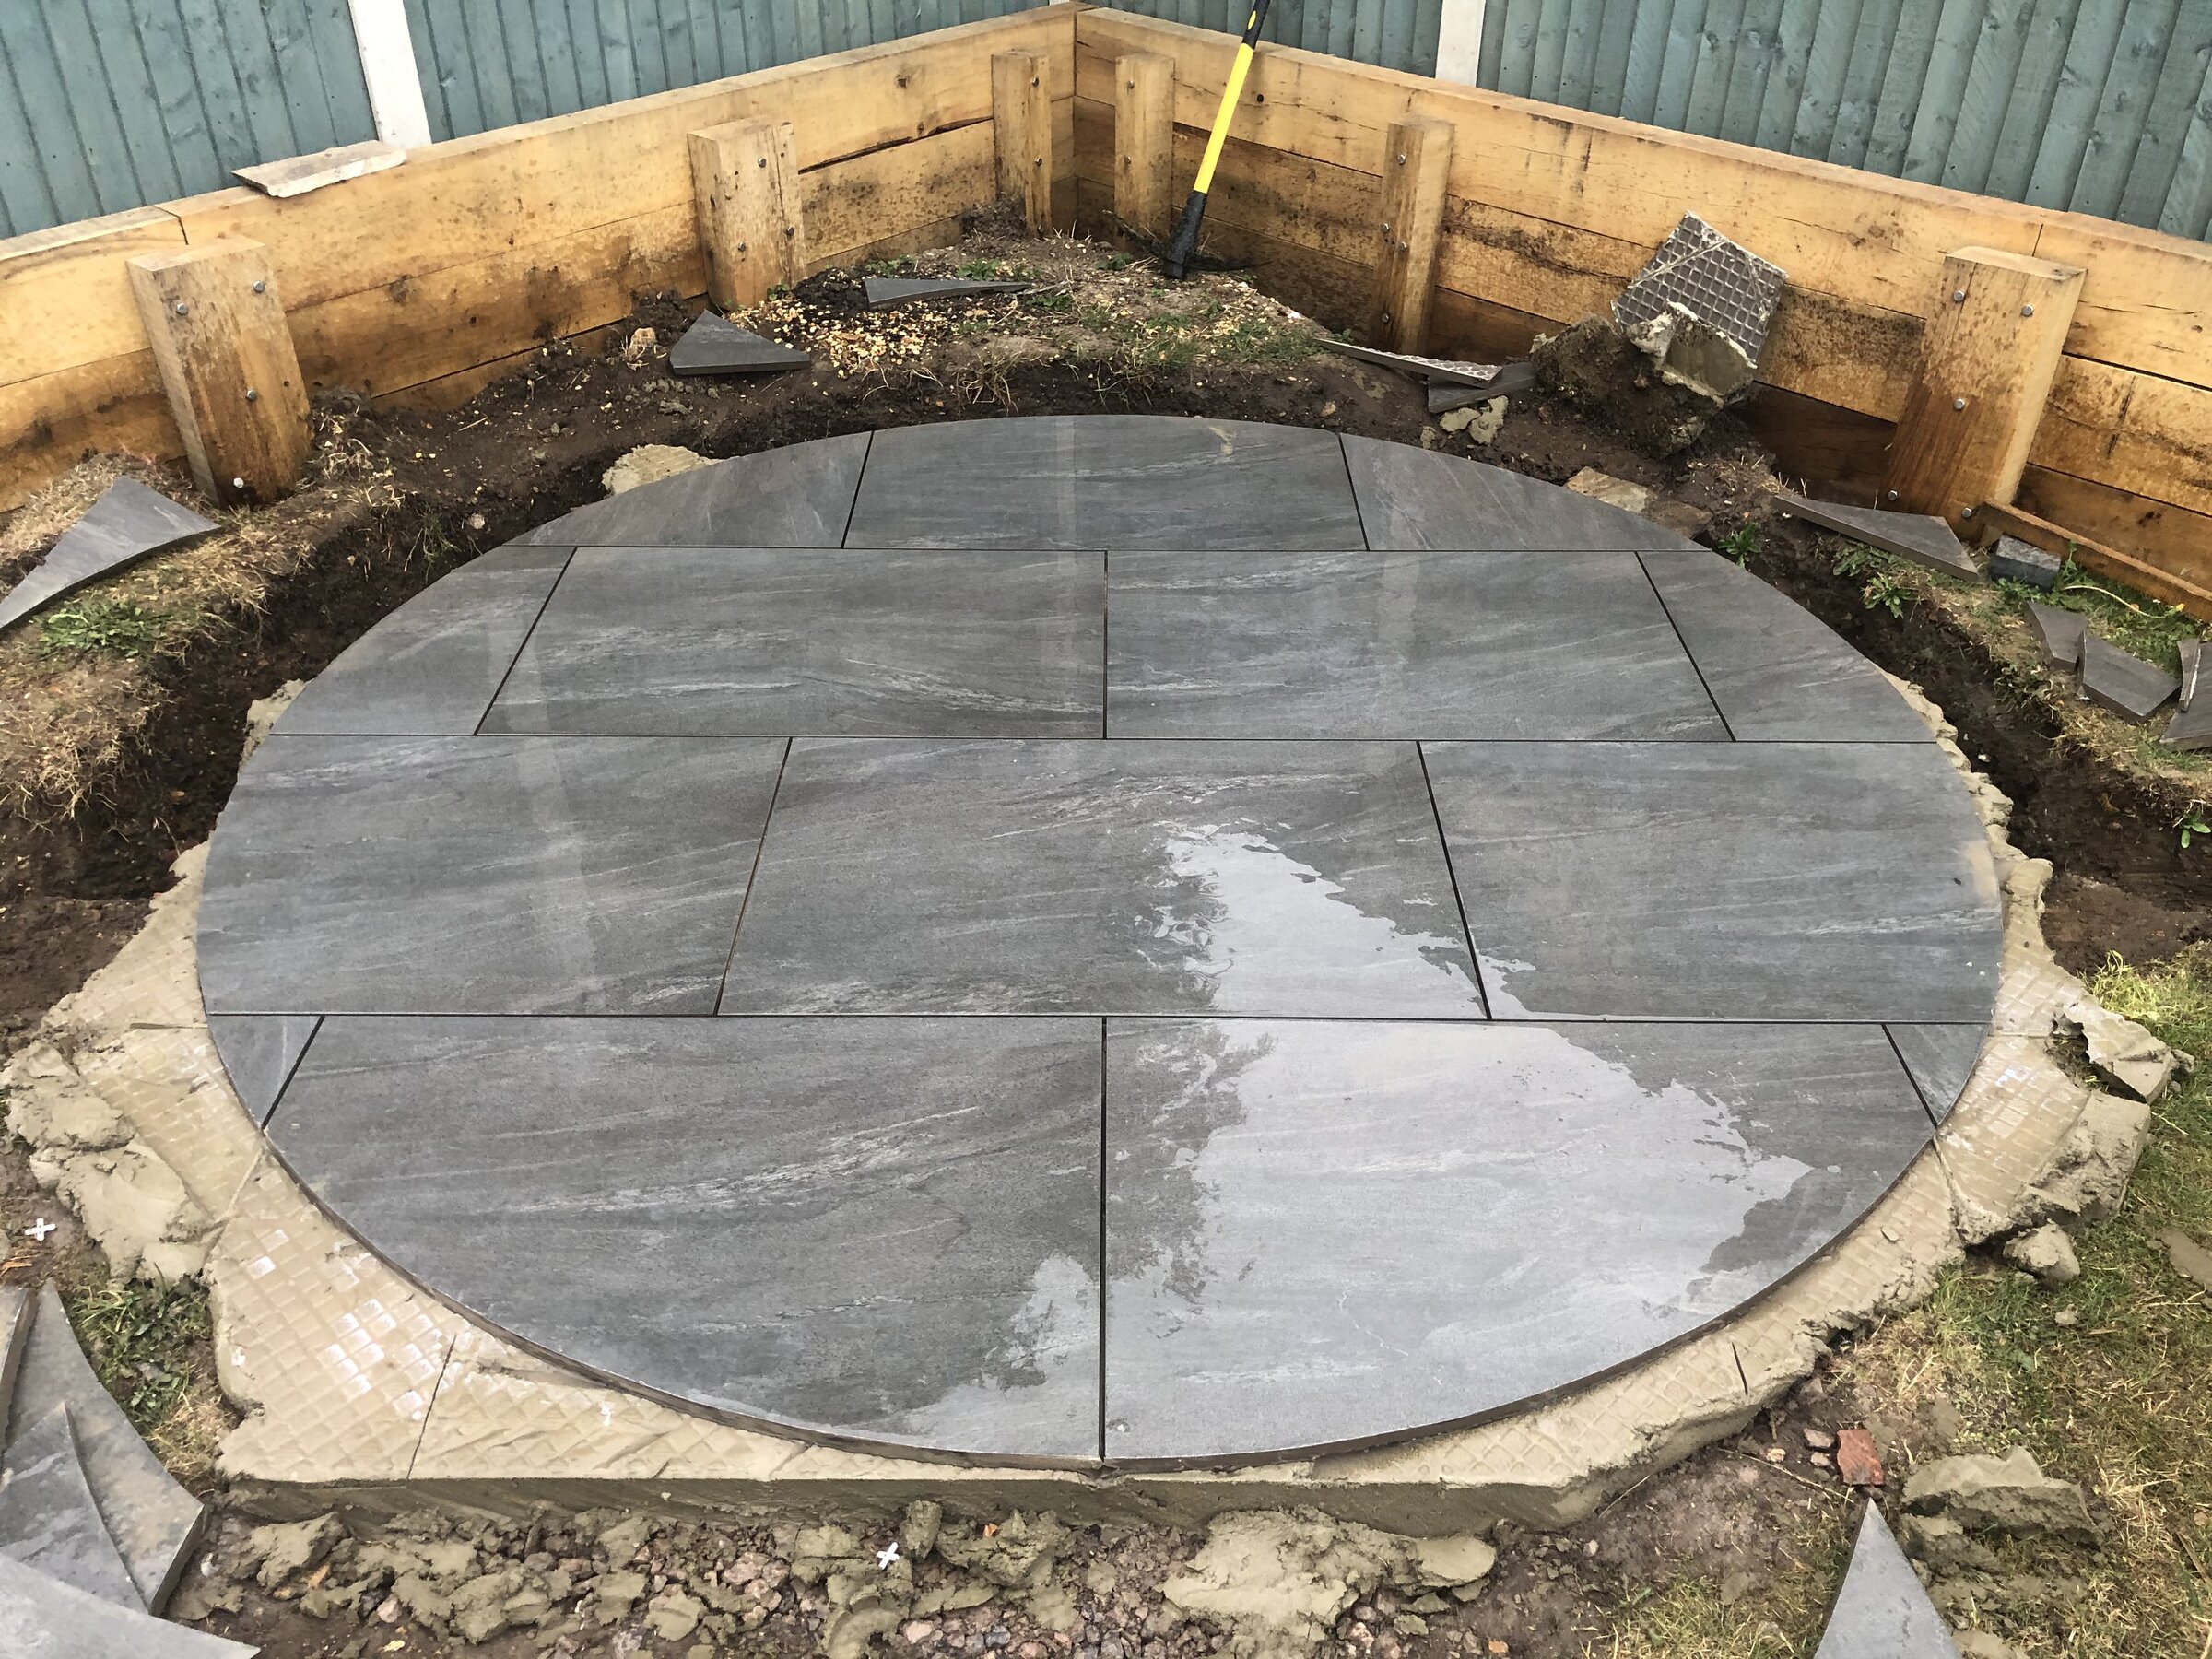
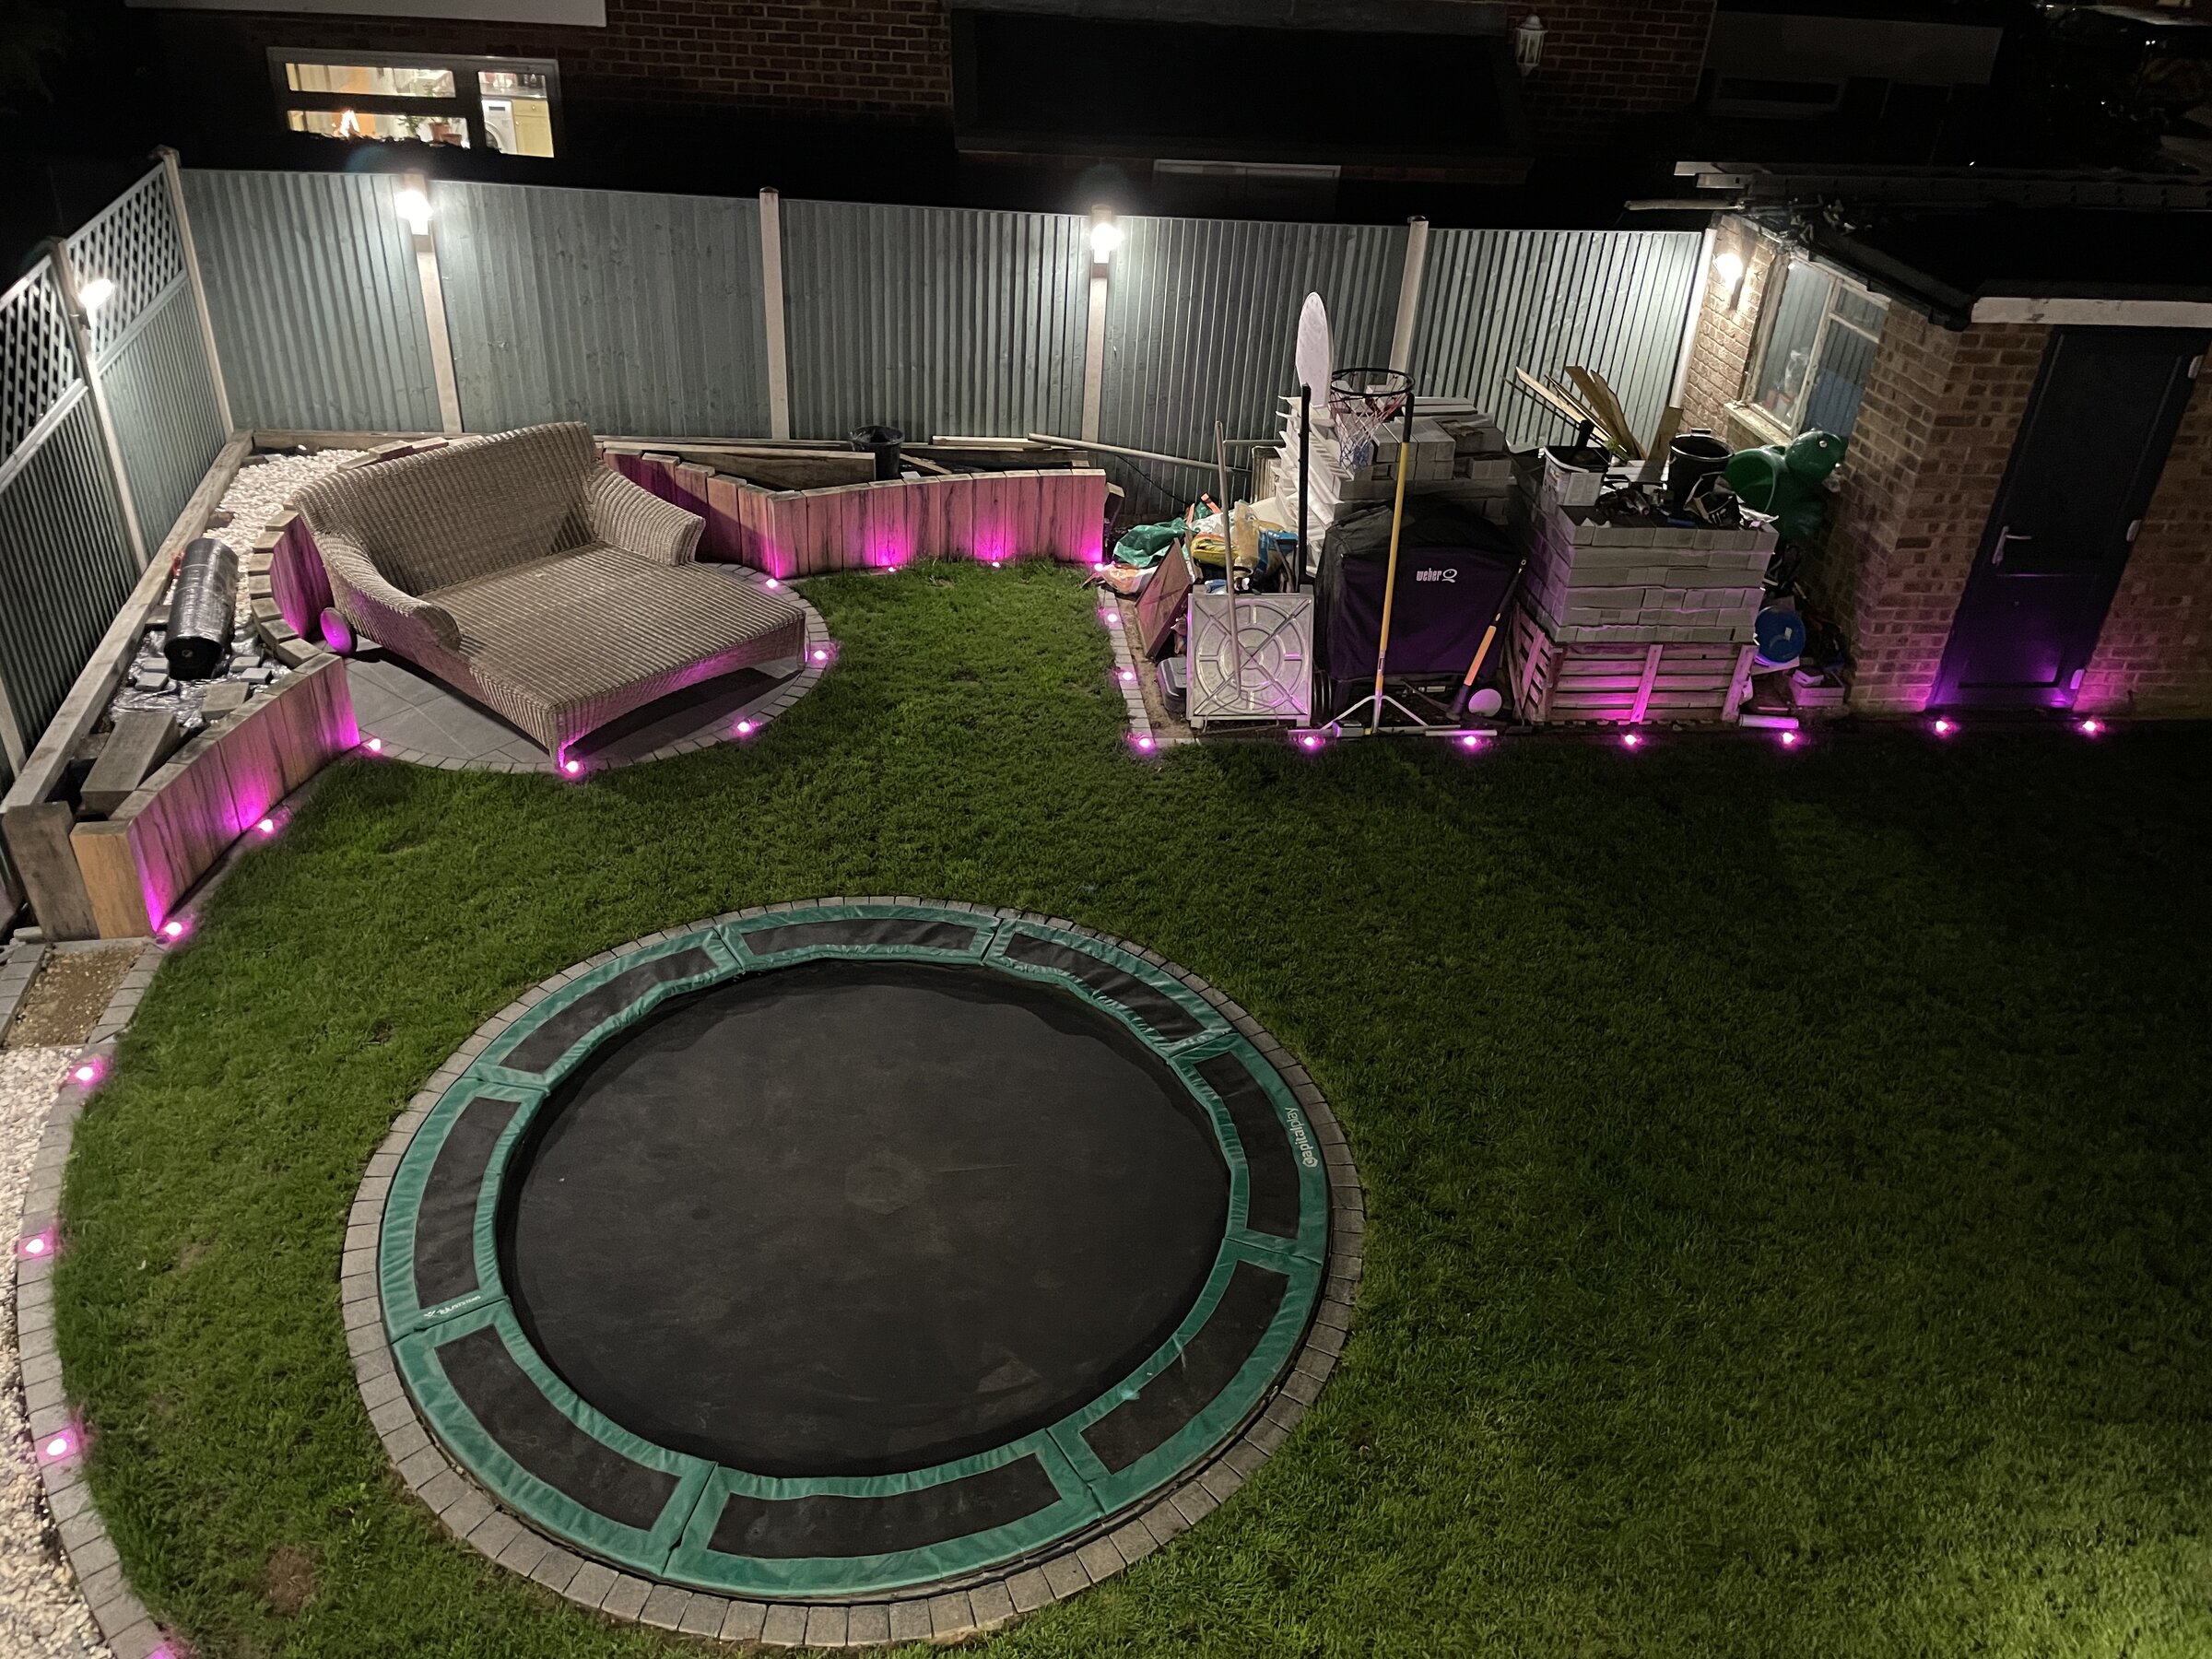
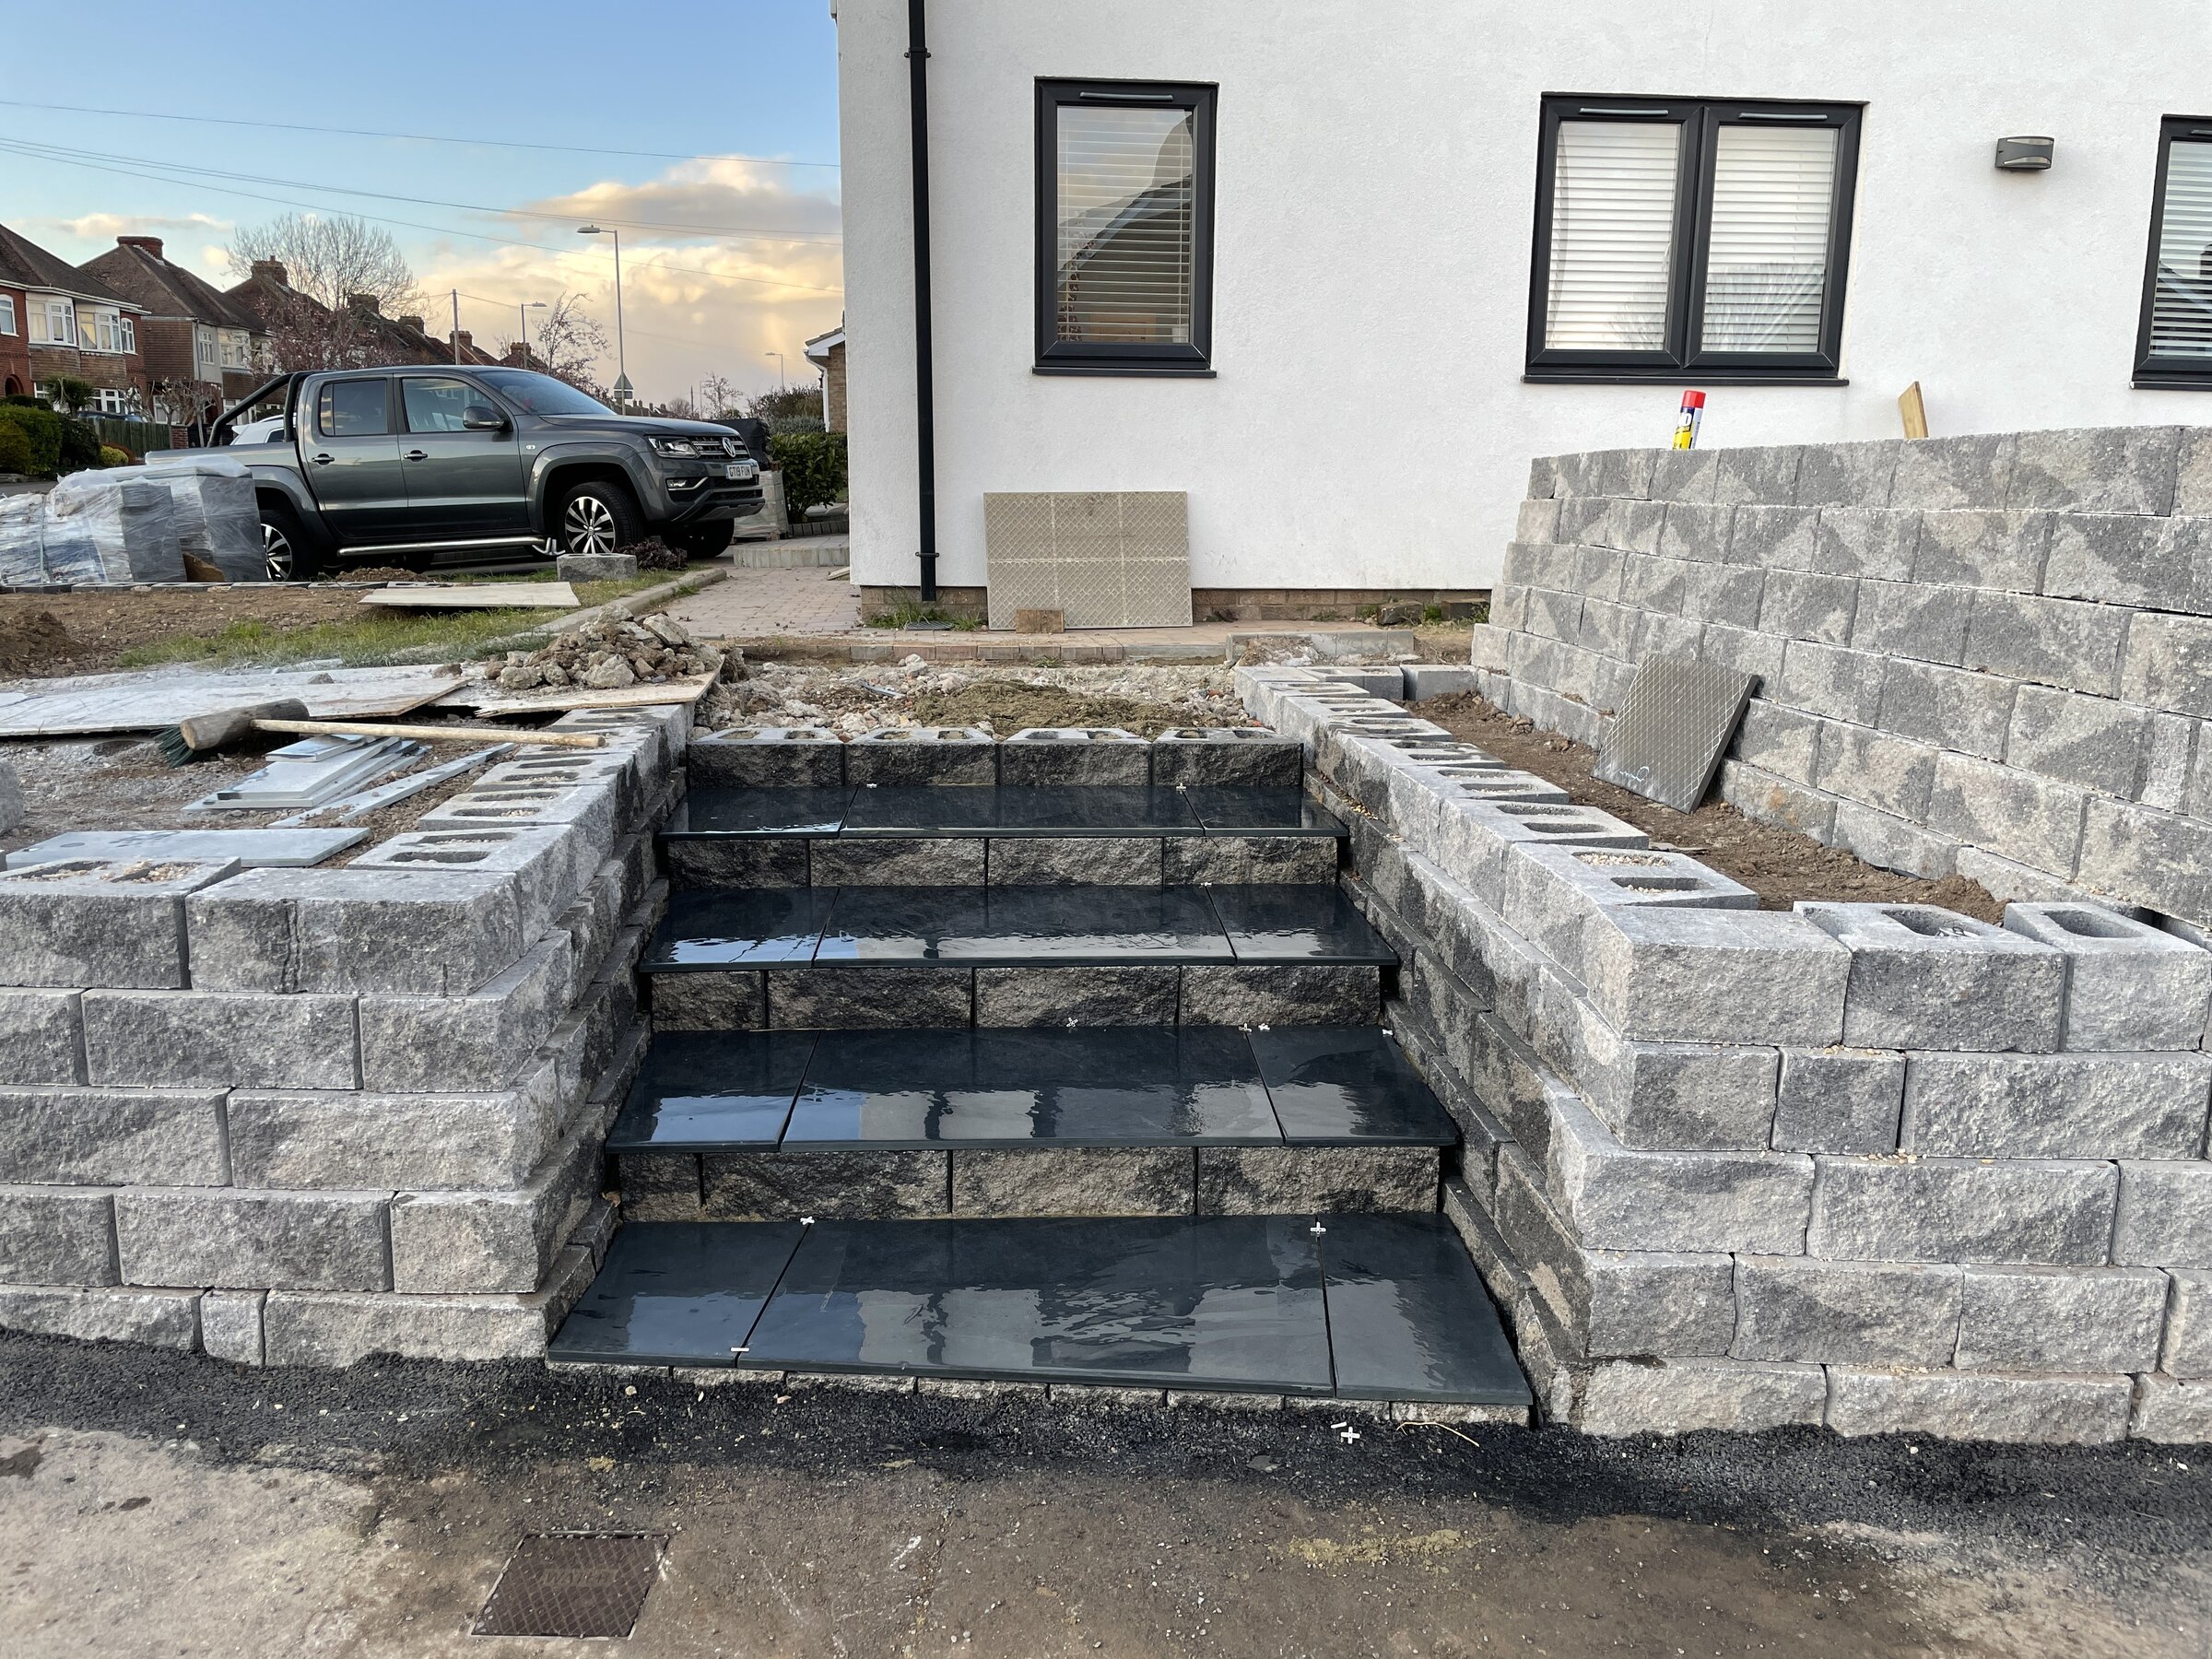
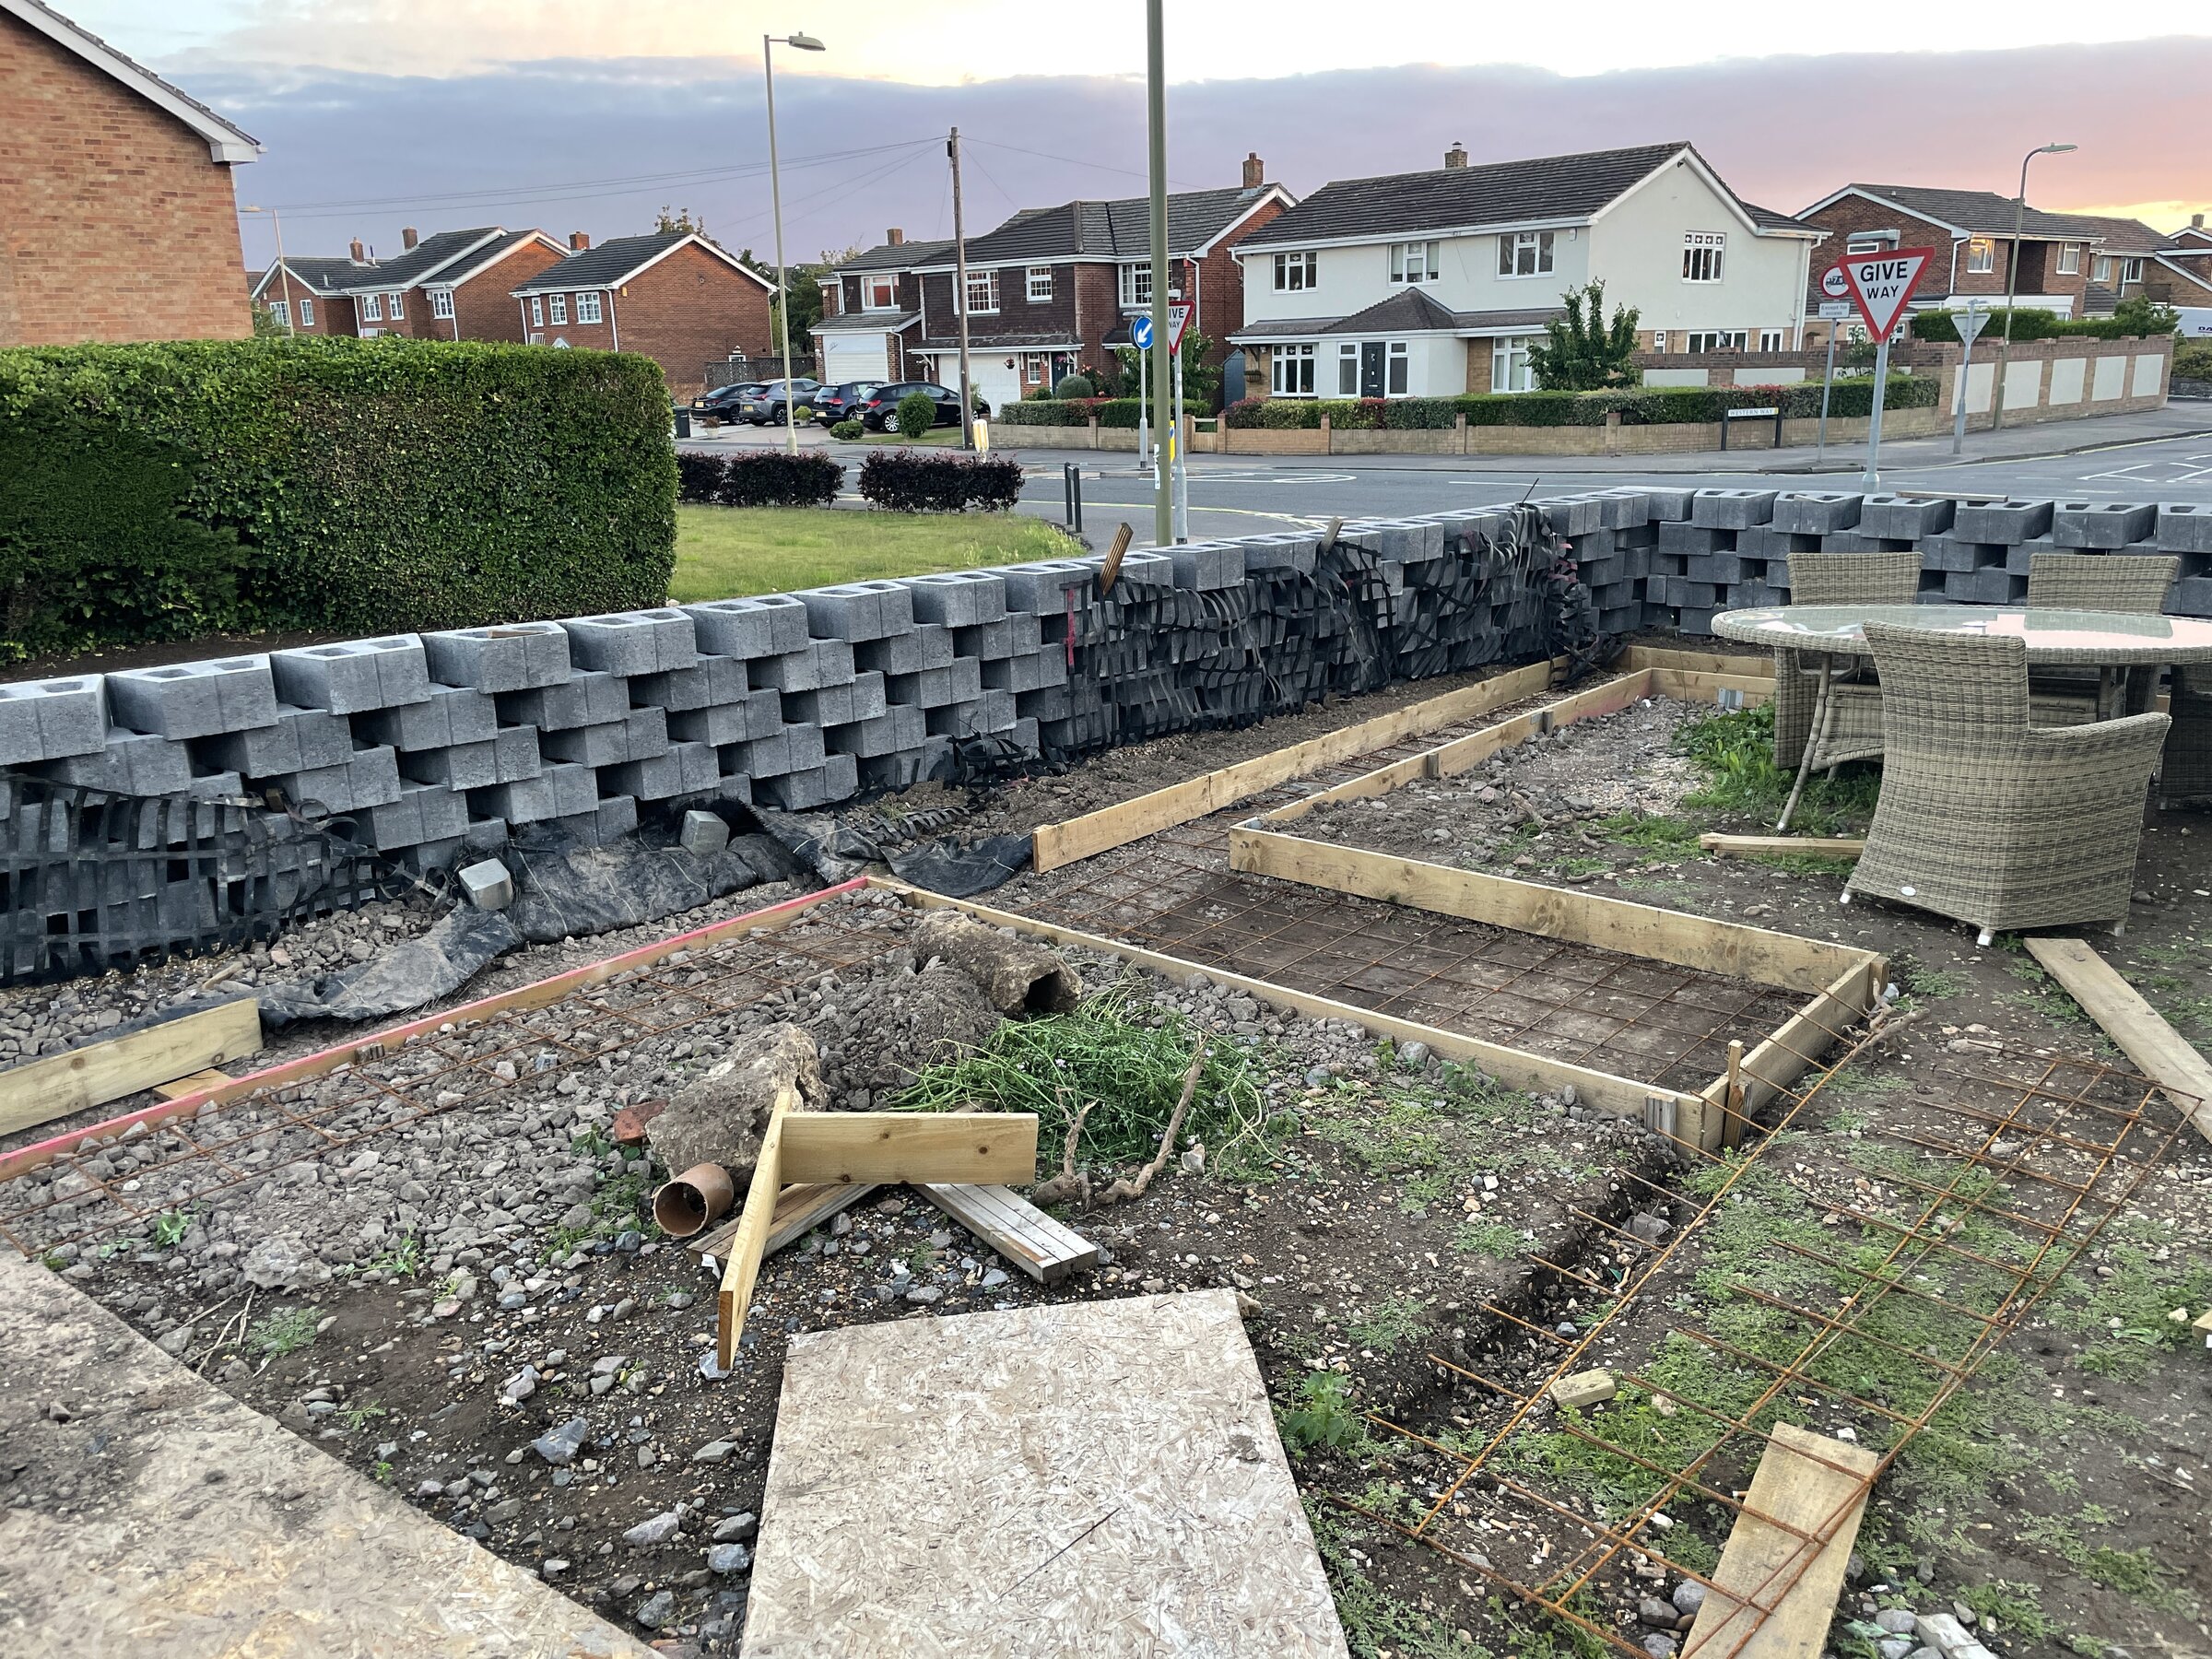
So this is where I’m up to so far. It’s definitely starting to take shape. We went with porcelain tiles as they look amazing and require very minimal maintenance. Interestingly the shop selling them said they are impossible to cut in a curve. I really hope they are wrong as I have lots of curves to do. Before ordering I took a look online and the recommendation was a angle grinder with a diamond blade - toolstation sell a porcelain blade for around £15. I got an offcut and whilst it was very slow going I managed to cut a curve. I will update later if it is indeed a lot more tricky than I thought.

6F5A3D76-F71A-455C-A7A4-C291DB5505D0.jpeg
4D4FB391-A7CC-48DB-A3FB-823479253F10.jpeg


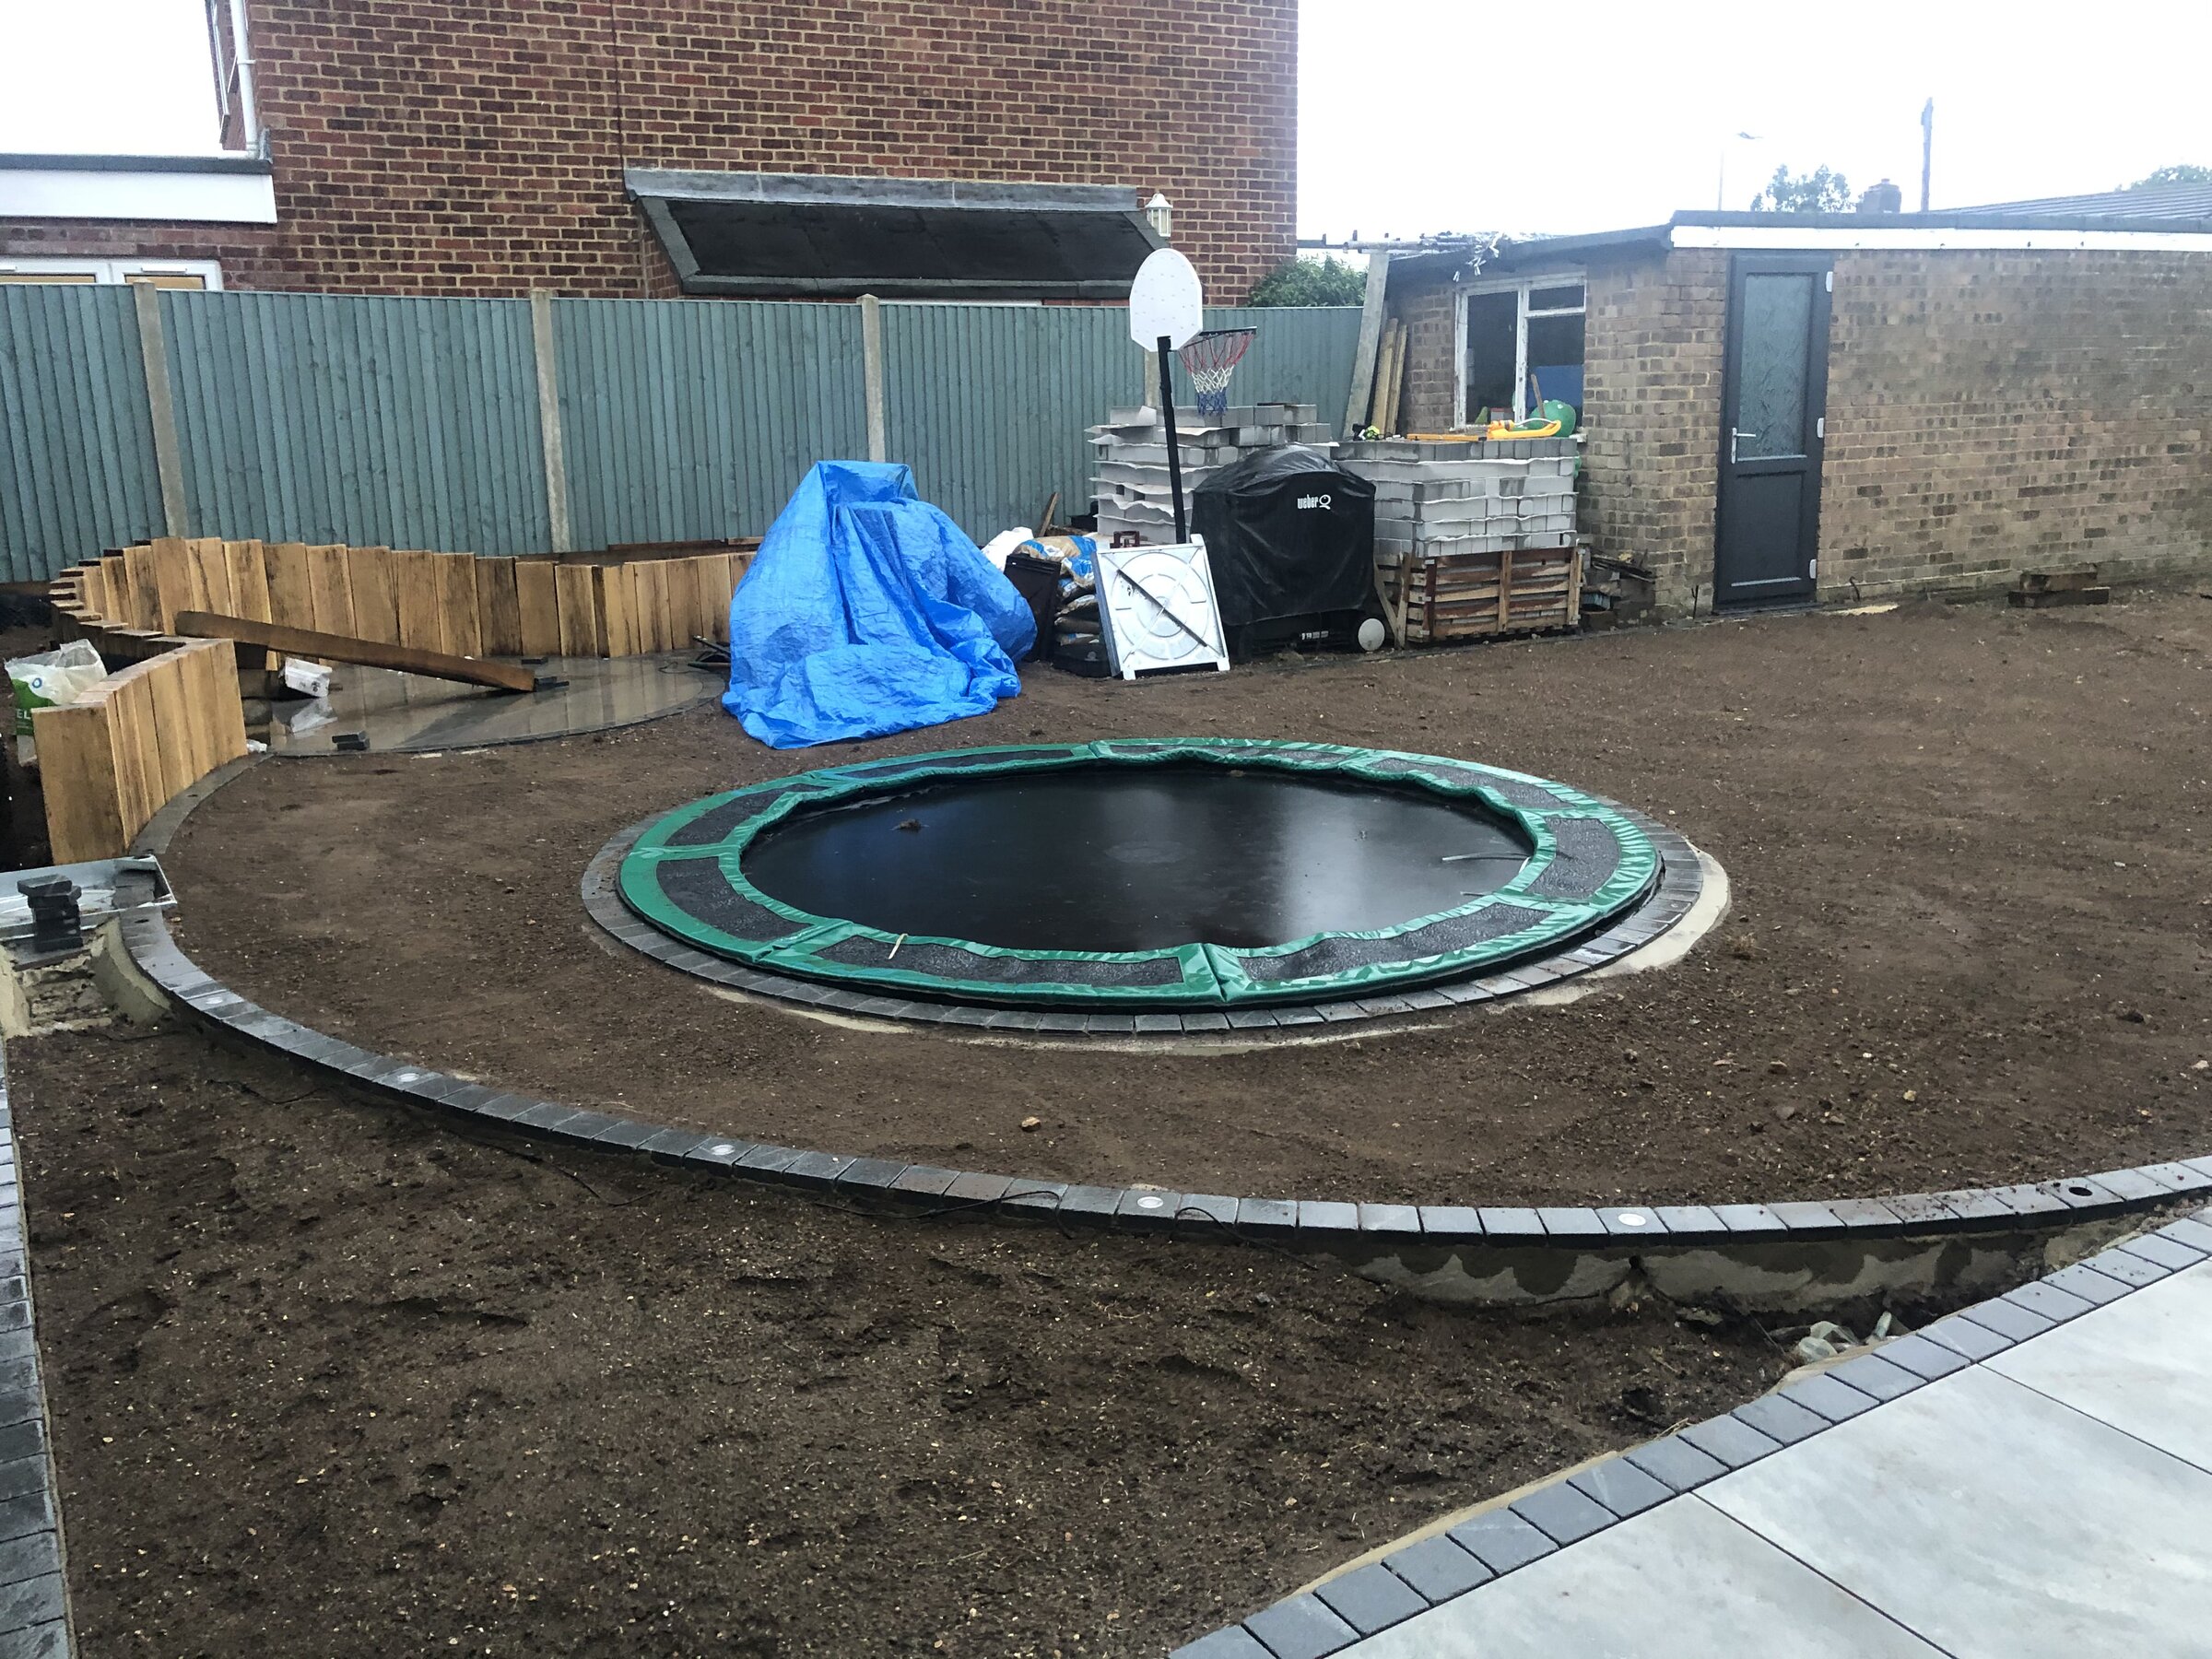
and finally the trampoline. The garden will level with the top of it and I’m also planning to put some granite edging around it. The plan is that then I can run the lawnmower over the setts and cut the grass right up to them which saves any potential damage to the trampoline.
4CE0EAC4-CE18-430A-B530-15211521B67F.jpeg
 

Attachments

  • BFA91990-0EC0-4737-83AE-B090EDC52238.jpeg
    BFA91990-0EC0-4737-83AE-B090EDC52238.jpeg
    693.3 KB · Views: 119
Sponsored Links
I've just enjoyed spending a good bit of time reading this! Great read... I have to laugh at the trampoline though sorry; it reminds me of a trip to Vietnam where we saw the Punji Stick traps :)
 
I've just enjoyed spending a good bit of time reading this! Great read... I have to laugh at the trampoline though sorry; it reminds me of a trip to Vietnam where we saw the Punji Stick traps :)


Thanks for the message Steve. I had to google Punji Stick traps. They look pretty effective and painful. It’s given me an idea for when the mother in law comes over.
 
Sponsored Links
Wow I can't believe its been yet another year since I have updated this thread. I keep meaning to update as I go but life is always super busy.

I have a great installment with lots of progress to share. I will break it down into a couple of posts to keep things a bit simpler. This first one is the update on the first half of the garden.

Since the last photos we cut a perfect circle in the porcelain and edged the garden with the granite blocks. I think its worth mentioning that all the porcelain companies I spoke to said you can't cut curves in porcelain. Its very brittle and tends to chip easily. Also unless you cut right through both sides first it is very easy to break them. I used a porcelain angle grinder disk from tool station and it did the job well its just a slow gentle process.


We finished off the raised sleeper bed. Each of the sleepers were sanded down and an Osmo sealer applied to help keep their original colour. TBH it really didn't work well and they look a bit stained now a year later so in future would just leave them to fade to a natural colour or paint them.


I sieved a load of soil to remove any stones and levelled out the garden. I also put in an underground watering system with the plan being that I can set them to a timer and wouldn't ever need to water the grass. I also have an automatic mower which I haven't installed yet to hopefully save needing to mow. The water system ended up being a complete pain and although it is installed it is really temperamental and wouldn't be something I would chose to do again.


Lastly I wanted the area to be usable all year round so wanted plenty of lighting. I went with lights on the fence for the garden, bollard lights for the path and small secondary lighting in the granite setts to add a bit of colour. The lighting wasn't cheap at circa £1500 for just that half the garden but looks lovely. Its all smart enabled so once the garden is finished I should be able to set a scene, push 1 button and it all comes on. Thats the plan anyway.


Let me know what you think. :)
 
Looks great, I bet the kids love the sunken trampoline. Did you have to put a pump sump system in under the trampoline or was the natural drainage adequate to stop it filling with water?
 
Looks great, I bet the kids love the sunken trampoline. Did you have to put a pump sump system in under the trampoline or was the natural drainage adequate to stop it filling with water?

Hi Danny

The sunken trampoline was something the misses wasn't too keen on at first buy honestly one of the best things we did. It works so well, everyone uses it - in fact Ive just come in from having a bounce with my son. We didn't put any drainage in and its been fine even through heavy spells of rain. I guess this would be different depending on the type of soil where you are based. It was a fair bit of work as we created a concrete ledge for it to sit on (not specified by the manufacturer but will stop it sinking). We also put the edging stones around it which will make cutting the grass up to the edge possible without accidentally cutting the crash mat.
 
The next big project on the list was the garden wall. This was always going to be a tricky one as our garden is around 1m higher than the pavement and I really didn't want any issues down the line. I did a lot of research into different products and ended up going with a mortarless retaining wall. The idea with these is you get the base completely level and these are literally just placed one on top of the other. At various intervals you put a high tensile mesh between the blocks which goes back into the garden. You backfill over this which anchors it all together. This should mean if part of the wall wants to move it is held in place by not just the rest of the wall but also the many tons of earth behind it.

The blocks I used were from a company called AG Walling. Like most of these types of blocks they are based in NI. AG's products are more commonly used in commercial settings but the size and colours worked well with the house and their telephone support was initially very good so I went with it. They didn't have the facility to offload them from the lorry so I got them delivered to a local supplier who for a fee put them on a truck and lifted them onto site.

First though was a matter of digging out the footing. Whilst not super deep it was wide and I had something like 80 ton of soil to get rid of which was a lot more expensive than first thought.


The foundation was just a simple type 1 compacted down. We put drainage at the base and then backfilled the first 30cm behind the wall with pea shingle and then some no fines backfill.


We added in some steps which weren't original planned but work really well

And the finished result

On my next post I will give an update on the new space it has created. Previously this was just a slope down to the pavement and the whole plan was to create some more outdoor space for a lounge and dining area. :)
 
Impressive work. Agree with Andy, your place definitely stands out!
 

DIYnot Local

Staff member

If you need to find a tradesperson to get your job done, please try our local search below, or if you are doing it yourself you can find suppliers local to you.

Select the supplier or trade you require, enter your location to begin your search.


Are you a trade or supplier? You can create your listing free at DIYnot Local

 
Sponsored Links
Back
Top