Pendocks boxing in and beading

Joined
22 Nov 2018
Messages
1,588
Reaction score
26
Country
United Kingdom
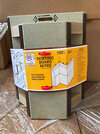
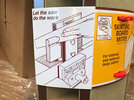
Got some radiator pipes (100mm high 30mm wide)I need to box in so was gonna use pendock. (Used once before) 150mm high and 70mm wide. Glue baton floor and plug and screw into wall. Run the pendock an extra metre behind book case to end of wall them run bullnose skirting from there.

Got some mdf beading which needs replacing (used to cover the expansion points of laminate). Shall I pin and glue or just pin and us it too small for shop saw? Use a mitre mate?

gonna use smaller architrave (not stuff currently used).
20230109_162159.jpg
20230109_162401.jpg
20230109_162451.jpg
20230110_160410.jpg
 

Attachments

  • 20230109_162152.jpg
    20230109_162152.jpg
    267.7 KB · Views: 56
Sponsored Links
You say that you've already installed Pendock - so you should know what you are doing with it. You should also know, as a tradesman, that you never install anything by fixing it to laminate flooring. So you need to either trim back the laminate (which I happen to think is inadvisable, or you need to fix the Pendock back to the wall so that it doesn't depend on being fixed to the laminate, or you need to find anothet solution.

As to beading, you can cut even the smallest beading with a mitre saw providing you use a fine enough saw blade - and if spelching is a problem then just make up an auxilliary base and backing fence (which are an L-profile) to deal with that. Alternatively, consider the old school approach of a mitre block and a fine tooth hand beading saw. 16 gauge nailers can be too large to fix very small beadings (you risk splitting it), so you may need to consider smaller gauge pins (18 gauge or even 23 gauge) or find another fixing method

And before anyone says I am being unfair I'll point out that the OP is a tradesman and is being paid to do this work, so...
 
Last edited by a moderator:
You say that you've already installed Pendock - so you should know what you are doing with it. You should also know, as a tradesman, that you never install anything by fixing it to laminate flooring. So you need to either trim back the laminate (which I happen to think is inadvisable, or you need to fix the Pendock back to the wall so that it doesn't depend on being fixed to the laminate, or you need to find anothet solution.

As to beading, you can cut even the smallest beading with a mitre saw providing you use a fine enough saw blade - and if spelching is a problem then just make up an auxilliary base and backing fence (which are an L-profile) to deal with that. Alternatively, consider the old school approach of a mitre block and a fine tooth hand beading saw. 16 gauge nailers can be too large to fix very small beadings (you risk splitting it), so you may need to consider smaller gauge pins (18 gauge or even 23 gauge) or find another fixing method

And before anyone says I am being unfair I'll point out that the OP is a tradesman and is being paid to do this work, so...
Actually I'm pretty sure it's vinyl not laminate (apologies)that should be ok to glue baton to for pendock?


Also, got some architrave but it's 69mm in width I couldn't find the usual 50mm stuff, is this a bit wide?

20230111_110001.jpg
20230111_105748.jpg
 
Actually I'm pretty sure it's vinyl not laminate (apologies)that should be ok to glue baton to for pendock?
You shouldn't use adhesives on vinyl - any solvent may attack and degrade the vinyl, particularly domestic quality vinyl which is a lot softer than industrial/commercial quality vinyl. You will need to get some form of mechanical fix into the sub floor beneath the vinyl (screws screws and plugs, etc depending on what the make up is)

Also, got some architrave but it's 69mm in width I couldn't find the usual 50mm stuff, is this a bit wide?
You have a circular saw, folding trestles and a block plane - so what about ripping it down?
 
Sponsored Links
You shouldn't use adhesives on vinyl - any solvent may attack and degrade the vinyl, particularly domestic quality vinyl which is a lot softer than industrial/commercial quality vinyl. You will need to get some form of mechanical fix into the sub floor beneath the vinyl (screws screws and plugs, etc depending on what the make up is)


You have a circular saw, folding trestles and a block plane - so what about ripping it down?
20230126_113855.jpg
20230127_100444.jpg
20230127_100031.jpg
20230127_100016.jpg
20230127_095625.jpg


Is it better to use a mitre box for cutting beading or even skirting or architrave than mitre saw? I bought the plastic one , is wooden one better? Also put a finer blade on mitre saw. Nightmare to do got engineer in shop to do it. Couldn't find the 18 or 24 gauge nails the lost head nails just come in 20mm or longer. 20mm too short for beading?
 
"Manual" nails just don't come in gauges like machine pinners use. In terms of thickness they go veneer pins, panel pins, small nails. With small beading you can pilot drill for panel pins, etc - same with ovals. Remember to blunt the tips on the cheek of your hammer to reduce the tendency to split the beading. How big is your beading?

A power mitre saw can be set up to cut small stuff, but apart from a fine tooth blade you also need to support it below and to the rear with an auxillliary base and fence - basically two pieces of 3 x 1in or 2 x 1in planed softwood glued up to form an L-shape - NO SCREWS, NAILS OR PINS BECAUSE THEY CAN DAMAGE SAW BLADES. Can be held in place on the saw with double sided tape. This is sacrificial, so don't worry about cutting into it
 
Last edited by a moderator:
"Manual" nails just don't come in gauges like machine pinners use. In terms of thickness they go veneer pins, panel pins, small nails. With small beading you can pilot drill for panel pins, etc - same with ovals. Remember to blunt the tips on the cheek of your hammer to reduce the tendency to split the beading. How big is your beading?

A power mitre saw can be set up to cut small stuff, but apart from a fine tooth blade you also need to support it below and to the rear with an auxillliary base and fence - basically two pieces of 3 x 1in or 2 x 1in planed softwood glued up to form an L-shape - NO SCREWS, NAILS OR PINS BECAUSE THEY CAN DAMAGE SAW BLADES. Can be held in place on the saw with double sided tape. This is sacrificial, so don't worry about cutting into it
Look how good my architrave cut is with mitre box compared to one with chopsaw(big gap). Chopsaw must have something wrong with it. How do you cut skirting in mitre box? I tried (in pix but not successful) too narrow to lay flat.
20230131_115947.jpg
20230131_115135.jpg
20230131_112334.jpg
20230131_115243.jpg
 
Last edited:
Then you need to recalibrate your mitre saw. I seen to recall telling someone (maybe even you?) how to do this a while back on this very forum...

You might also like to know that I've done 3 short projects since September where I needed to produce nice tight architrave corners and outside mitres on skirtings (gaps = a pull). I did so using my 12 year old deWalt 216mm mitre saw on bevel cut (i.e head canted over) which is checked for accuracy from time to time, and adjusted as necessary. There were no complaints about my mitres...

For skirting with a manual mitre box you'd probably need to look for the Emir-style skirting mitre box which allows you to feed the material through the box and where the saw can be canted over to make the cut (or the cut can be made vertically). With bigger stuff you might still have to make adjustments to the joint face with a block plane to overcome cupping, etc

Here is the Emir style mitre box I was talking about. They are used with a panel saw (30 yo 24in/500 to 600mm long). It should be possible to make one of these yourself. In fact, you might have to as Emir (Emmerich-Berlon Ltd, I believe) have now stopped making wooden tools altogerher
 

Attachments

  • Internet_20230131_154910_2.jpeg
    Internet_20230131_154910_2.jpeg
    41.9 KB · Views: 43
  • Internet_20230131_154910_1.jpeg
    Internet_20230131_154910_1.jpeg
    40.4 KB · Views: 46
  • Internet_20230131_154910_3.jpeg
    Internet_20230131_154910_3.jpeg
    40.6 KB · Views: 36
Then you need to recalibrate your mitre saw. I seen to recall telling someone (maybe even you?) how to do this a while back on this very forum...

You might also like to know that I've done 3 short projects since September where I needed to produce nice tight architrave corners and outside mitres on skirtings (gaps = a pull). I did so using my 12 year old deWalt 216mm mitre saw on bevel cut (i.e head canted over) which is checked for accuracy from time to time, and adjusted as necessary. There were no complaints about my mitres...

For skirting with a manual mitre box you'd probably need to look for the Emir-style skirting mitre box which allows you to feed the material through the box and where the saw can be canted over to make the cut (or the cut can be made vertically). With bigger stuff you might still have to make adjustments to the joint face with a block plane to overcome cupping, etc

Here is the Emir style mitre box I was talking about. They are used with a panel saw (30 yo 24in/500 to 600mm long). It should be possible to make one of these yourself. In fact, you might have to as Emir (Emmerich-Berlon Ltd, I believe) have now stopped making wooden tools altogerher
 
Links in this post may contain affiliate links for which DIYnot may be compensated.
Then you need to recalibrate your mitre saw. I seen to recall telling someone (maybe even you?) how to do this a while back on this very forum...

You might also like to know that I've done 3 short projects since September where I needed to produce nice tight architrave corners and outside mitres on skirtings (gaps = a pull). I did so using my 12 year old deWalt 216mm mitre saw on bevel cut (i.e head canted over) which is checked for accuracy from time to time, and adjusted as necessary. There were no complaints about my mitres...

For skirting with a manual mitre box you'd probably need to look for the Emir-style skirting mitre box which allows you to feed the material through the box and where the saw can be canted over to make the cut (or the cut can be made vertically). With bigger stuff you might still have to make adjustments to the joint face with a block plane to overcome cupping, etc

Here is the Emir style mitre box I was talking about
20230201_110431.jpg
. They are used with a panel saw (30 yo 24in/500 to 600mm long). It should be possible to make one of these yourself. In fact, you might have to as Emir (Emmerich-Berlon Ltd, I believe) have now stopped making wooden tools altogerher
Got someone £30 to check and recalibrate my mitre saw. Thinking of buying one of these to check it.
20230201_110431.jpg
 
Learn to do things for yourself you lazy so and so!

You don't need to pay anyone or buy anything. In fact, for setting up a mitre saw that electronic doohickey would be a complete waste of money. All you need is a half decent combination square which you have checked for squareness. Nothing much else. You should already have this. You should also know how to check your square. The square is a useful way to run an initial check on your mitre saw

Here is a post I made which will inform you about checking a try square for trueness. A combi square is no different

And here is a thread telling you how to check a mitre saw for square cutting.

There is a sequence to this, as well. First you need an accurate square to do anything worthwhile in woodworking. Then you need to get your saw cutting plumb on crosscuts. Then you need to get your saw cutting aquare at 0/90 degrees. Read the posts, try it, then come back if you can't hack it. It is a methodical process, nothing more, and like a lot of things in woodwork this is something where you cannot just buy yourself out of problems with a bit of technical wizzardry - you really do need to know the principles and to be able to apply them to the real world (and if you understood the principles you'd know why that gauge won't work)

BTW also really do need to learn how the search function on this site instead of continually asking questions which have previously been both asked and answered. The foregoing is a case in point
 
Last edited by a moderator:
Decided to neither screw through vinyl or glue baton to vinyl but to screw baton on floor to wall then next piece of into that and bottom of penfock into that. Pendock is only 75mm wide.

Won't damage vinyl then or go through a kitchen pipe under floor
20230202_171457.jpg
 
Last edited:
Did the job but customer wants pendock removed as it's too big and doesn't like plastic screw caps on top. Will remove it and run skirting from wall to start of radiator. Leave pipes visible. I screwed in at
an angle to not rub drill on wall.

Had mitre saw calibrated but one side of architrave still not great and external corner of skirting wasn't perfect used two 30mm
lost heads on them. Caulked it up.


20230204_170759.jpg
20230204_170737.jpg
20230204_165616.jpg
20230204_165540.jpg
20230204_164149.jpg
20230204_163812.jpg
20230204_163534.jpg
20230204_150819.jpg
20230204_130519.jpg
20230204_132113.jpg
 
Last edited:

DIYnot Local

Staff member

If you need to find a tradesperson to get your job done, please try our local search below, or if you are doing it yourself you can find suppliers local to you.

Select the supplier or trade you require, enter your location to begin your search.


Are you a trade or supplier? You can create your listing free at DIYnot Local

 
Sponsored Links
Back
Top