Thanks for this. How would I determine the sizes of the cables?
As I suggested above. 2.5mm will be one single copper core strand, 4mm will have seven strands. Often the sheath will also have the size moulded on it to, or at least a type number.

Thanks for this. How would I determine the sizes of the cables?
If you are sure the socket by your desk and the one in the guest room are the only ones connected to MCB #1 then take the face off one of them. If it has 2 cables, then check the other one. One of them will have 2 and one of them will have 1. The single cable is the end one and the 2 cable is the first one. Changing both sockets, (the one by your desk and the one by your wifes desk will make no difference whatsoever. Just remember when you are doing them that they are on different circuits so check they are completely isolated before working on each of them.Hi Harry,
Based on my detective work (and with the help of a tester pen and socket tester from Screwfix) I’ve determined the following:
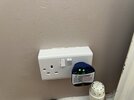
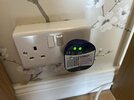
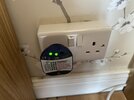
The two sockets in the study are on different circuits. Socket #1 at my wife’s desk is the one that has 2 sets of wires in it. It’s connected to MCB #7 in the CU, which is 32A and seems to be the ring circuit. Socket #2 at my desk is connected to MCB #1, which is a 16A MCB. The only other socket I can see connected to this MCB is in our guest room, on the other side of the house but in the same position on the wall (back wall, under the window in the corner).
I don’t know which of these two sockets is first in the spur, but I suppose opening it up would allow me to see how many wires there are.
Look at Harrys post above, (#85). Odds on, if it is a single copper wire it will be 2.5mm, if it's stranded it will be 4.0mm. You should use the same.Thanks for this. How would I determine the sizes of the cables?
The two sockets in the study are on different circuits. Socket #1 at my wife’s desk is the one that has 2 sets of wires in it. It’s connected to MCB #7 in the CU, which is 32A and seems to be the ring circuit. Socket #2 at my desk is connected to MCB #1, which is a 16A MCB.

Thanks Harry. I have certainly been given a lot of helpful advice - trolls notwithstanding!That is an unusual set up, normally, all sockets in a room would be on the same circuit, unless there is a good reason for them not to be. No matter, follow the good advice you have already been given and ignore the trolling.
That is an unusual set up, normally, all sockets in a room would be on the same circuit, unless there is a good reason for them not to be.
This is fairly typical of reconfigured electric heating circuits, especially E7 tariff systems where each room has a heater point and a socket circuit (ring final), also depending on the age of the wiring system many houses started with a radial and one single socket in each room Might have even a BS546 15A! and adding a Ring final may have been easier than extending the radials.That is an unusual set up, normally, all sockets in a room would be on the same circuit, unless there is a good reason for them not to be. No matter, follow the good advice you have already been given and ignore the trolling.
1. Flick off MCB protecting the socket I want to work on then test with socket tester to verify it is not live.
Thanks Harry. That did occur to me after I’d posted this. To be safe I’ll hit the main switch then.Small reduction in risk, but sometimes it can be safer to isolate the entire supply, on the chance that someone has borrowed a neutral, from the circuit you are working on.
Thanks for that. As I said to Harry it did occur to me after posting that I should switch everything off, so I will do! As for “confirming dead”, I have a socket tester and no contact pen tester from Screwfix so I’ll use these before turning off power and once again after turning off. I’m always naturally quite paranoid/anxious about working with electricity - call it survival instinct!Full isolation is going to be the absolute safest method, although it’s still good practise to confirm dead.
I don’t think you’re “harping on” - you’re trying to help me make sure it’s done properly, which I appreciate. Your advice and that of others has helped me create a useful checklist.Your plan is sound and sorry to harp on but again make sure those screws in the back of the socket are tight.
Thanks, I’ve seen this done in existing switches that I’ve been replacing so I’ll be sure to do it myself.If you’ve got 2 cables then tighten down on them, if you find a single then I believe good practise is to double over the conductor.
Thank you!Good luck mate.
Thanks Lee. You have been extremely helpful.Oh another thing
On the Wago box there are details/measurement for the length of stripped conductor required for the connector. It ensures you’ve got the insulation inside the body of the wago.
That really is it from me now
Honest.
If you need to find a tradesperson to get your job done, please try our local search below, or if you are doing it yourself you can find suppliers local to you.
Select the supplier or trade you require, enter your location to begin your search.
Are you a trade or supplier? You can create your listing free at DIYnot Local