- Joined
- 15 Jan 2004
- Messages
- 233
- Reaction score
- 3
- Country

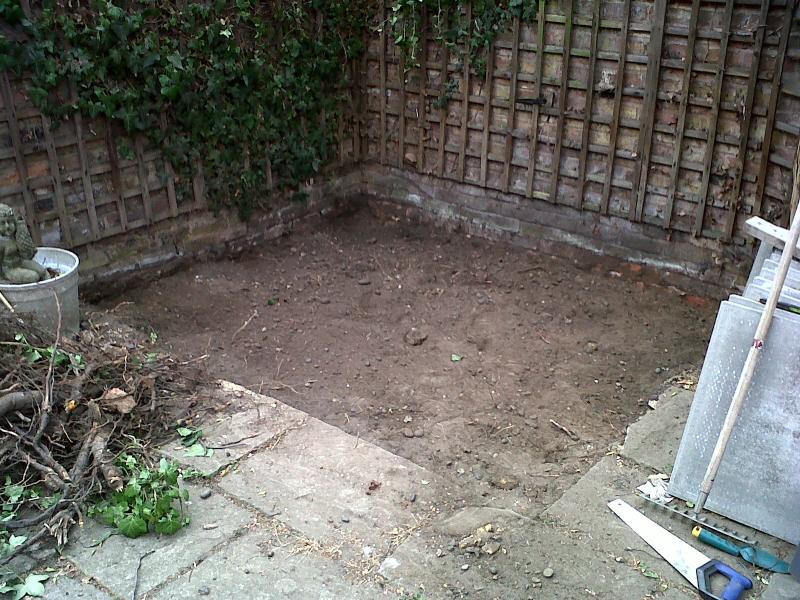
I'm building a shed in my patio garden. I've never done anything like this before so thought I'd bounce some ideas off you guys. I'll also update the thread with photos as I go along so others can benefit from the advice dispensed to me.
I've looked at bigall's photos of his shed and I'd like to end up with something just as nice.
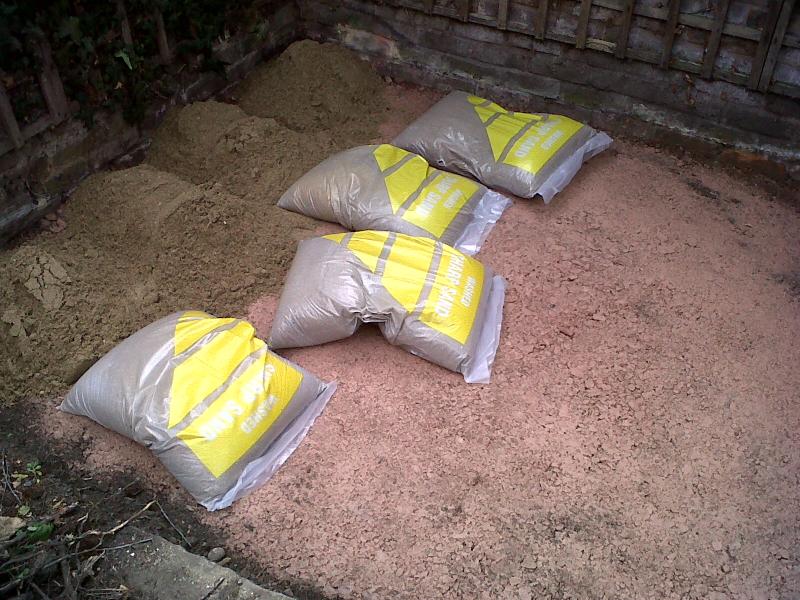
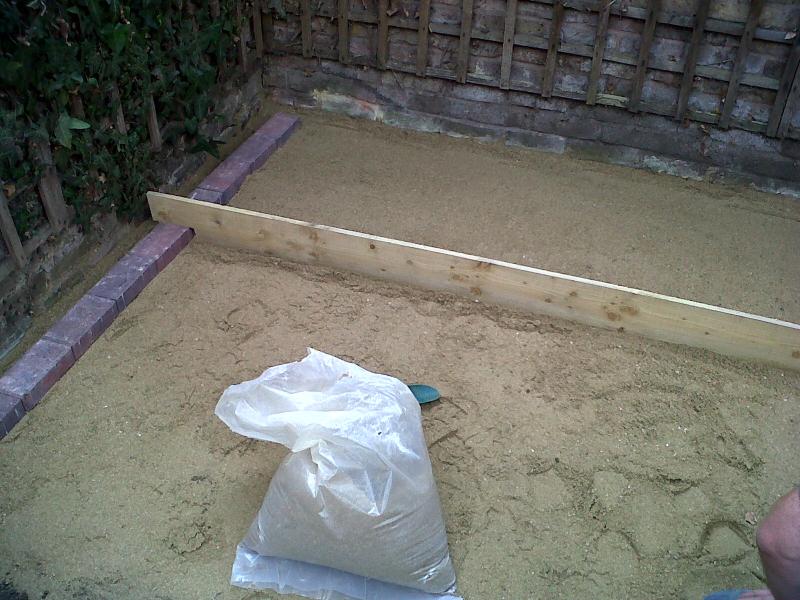
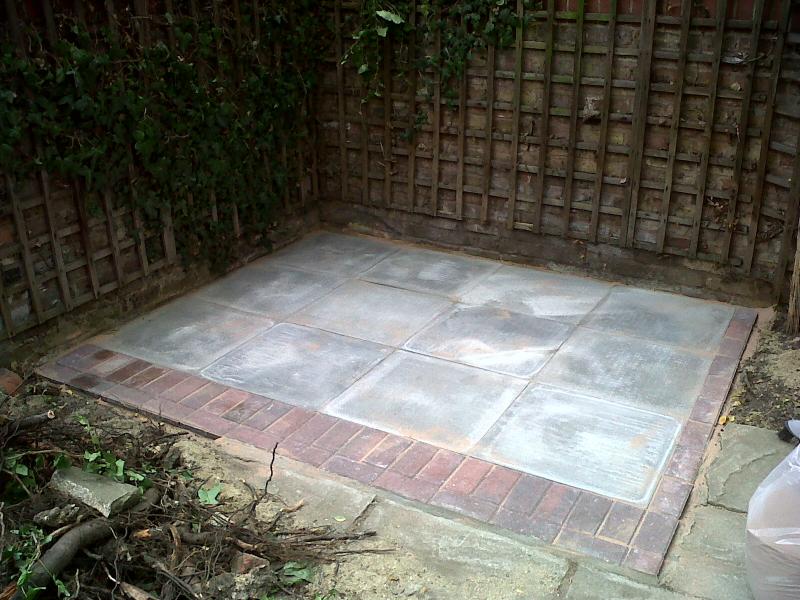
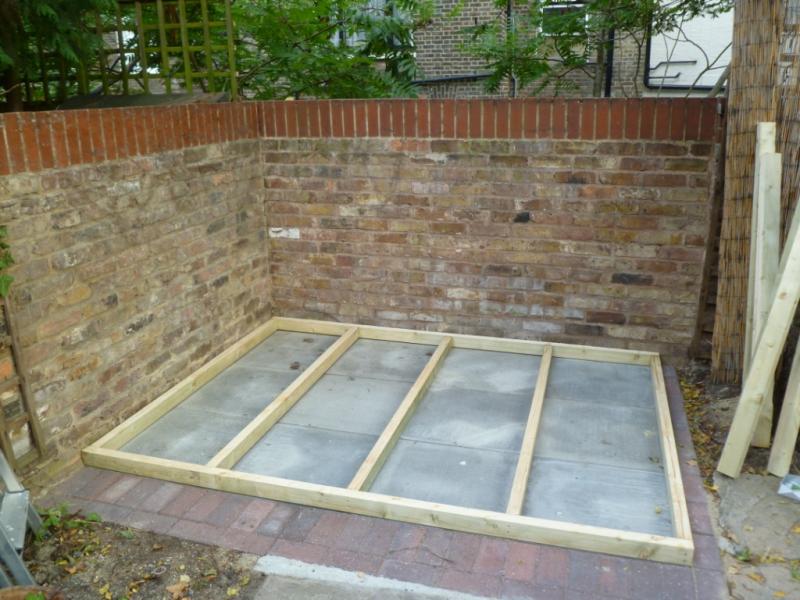
I completed the base yesterday. I dug out a lot of earth, wacked down 50mm of Type 1 followed by 50mm of sharp sand. This was then screeded over with a thin layer of sand before 600x600x50mm slabs were laid, edged with paving bricks. The edges were pointed in and the gaps filled with kiln dried sand. I'm very pleased with the result and am slightly disappointed to be covering it up with a shed!
I was planning on using 3x2 timbers for the frame spaced at 600mm. Is it OK to only use treated timbers for the base and untreated ones for the frame inside?
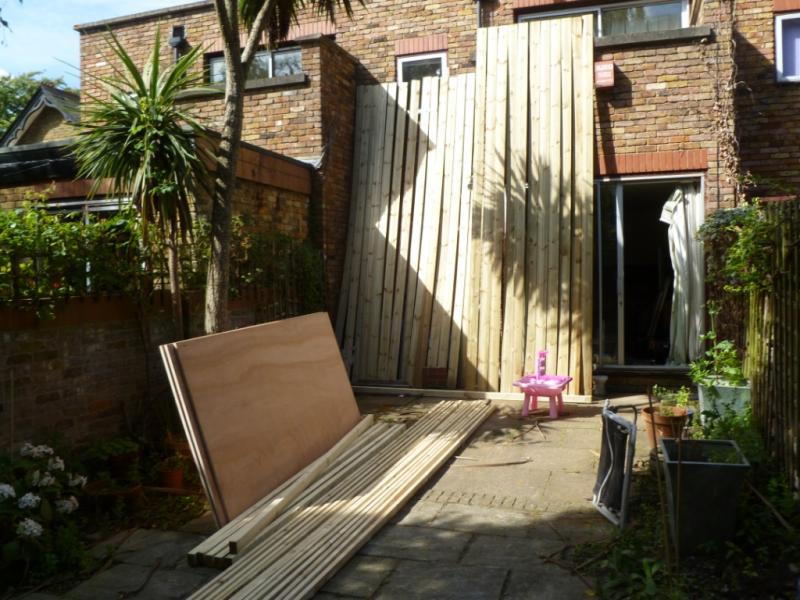
I was going to use treated shiplap for the outside, except where the shed will be against the boundary walls (the existing trellis and foliage will be going). Where the shed sits against the wall I was going to use a DPM. Would this be OK?
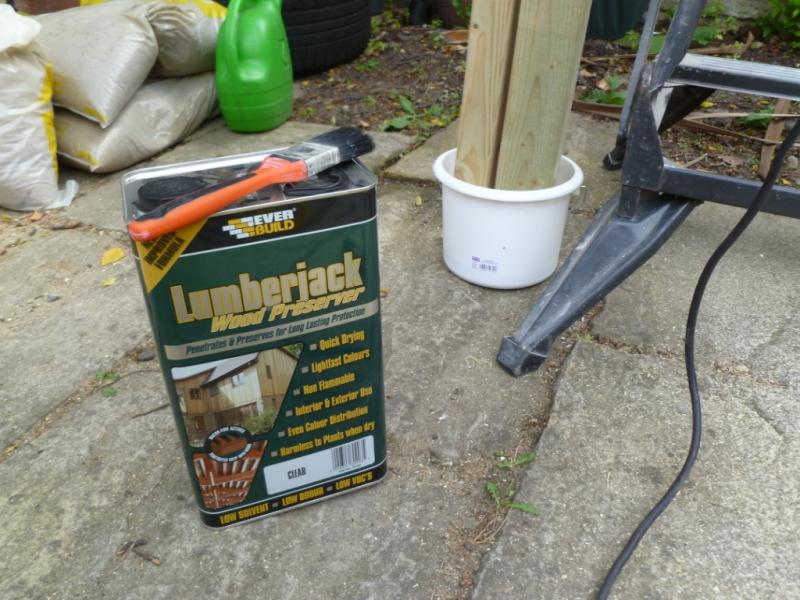
Once the shed is up I'm not going to have much access to the shiplap that will be atop the two sides above the walls. Is there anything I can put on top of the treatment to make it last longer?
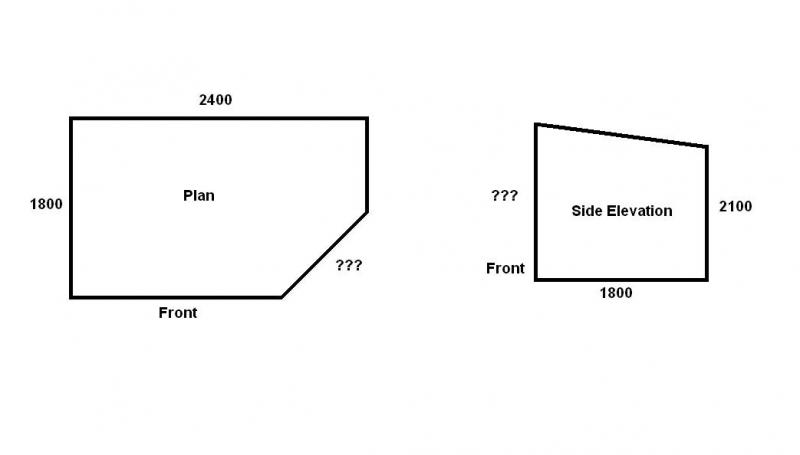
The garden is very small and the shed will take up about 10% of the space. In order to reduce the visual impact I was going to install the door across the corner. What sort of size opening should I go for?
What sort of roof angle should I be aiming for? I was going to make the rearmost side 2100mm high and would like the front to be as close to that as possible.
Any problems with using bitumen shingles for the roof?
What thickness exterior ply should I use for the roof/floor?
Sorry for all the questions but I'd like to get it right first time!
Cheers....
I've looked at bigall's photos of his shed and I'd like to end up with something just as nice.
I completed the base yesterday. I dug out a lot of earth, wacked down 50mm of Type 1 followed by 50mm of sharp sand. This was then screeded over with a thin layer of sand before 600x600x50mm slabs were laid, edged with paving bricks. The edges were pointed in and the gaps filled with kiln dried sand. I'm very pleased with the result and am slightly disappointed to be covering it up with a shed!
I was planning on using 3x2 timbers for the frame spaced at 600mm. Is it OK to only use treated timbers for the base and untreated ones for the frame inside?
I was going to use treated shiplap for the outside, except where the shed will be against the boundary walls (the existing trellis and foliage will be going). Where the shed sits against the wall I was going to use a DPM. Would this be OK?
Once the shed is up I'm not going to have much access to the shiplap that will be atop the two sides above the walls. Is there anything I can put on top of the treatment to make it last longer?
The garden is very small and the shed will take up about 10% of the space. In order to reduce the visual impact I was going to install the door across the corner. What sort of size opening should I go for?
What sort of roof angle should I be aiming for? I was going to make the rearmost side 2100mm high and would like the front to be as close to that as possible.
Any problems with using bitumen shingles for the roof?
What thickness exterior ply should I use for the roof/floor?
Sorry for all the questions but I'd like to get it right first time!
Cheers....