TOP TIPS & FIXES (Bending. Soldering, Repairs etc)

Sponsored Links
2) SOLDERING TIPS

Cut pipes using pipe cutter and deburr.Clean the inside of fittings, and the outside of pipe with wire wool. Cleanliness is important!

Join pipework to fitting(s) to make sure it all fits and then disassemble.
Apply flux to the pipe ends and reassemble pipework. It is a good idea to twist the fittings so flux is spread evenly inside).

Remove excess flux from the outside of the fittings and position a soldering mat behind the fitting.
Apply heat to the fitting. When you think it's hot enough, apply solder (or if solder ring, watch ring appear), and it should melt and be pulled into the joint.
Remove heat and let it cool gradually then wipe with wet cloth.

NOTE

1) Overheating is a common cause of leaks.

2)If the flame goes green your joint may oxidise, go black and not stick.

3) If using endfeed a 15mm length of solder does 15mm pipe and 22mm for 22mm pipe.

4)Remember to use lead free solder on all potable pipework.

TIP.......you cannot solder a pipe if there is water present as the pipe temp will not get hot enough to melt the solder.

p3522914_l.jpg
 
3) SCRAP METAL PRICES

As we all know there is a lot of money to be made by weighing in all your scrap metal. Copper especially is well worth the trip to the local scrappy as it is currently worth over £4 per kilo to you. An old cylinder is worth more than gold:cool: and you should get in excess of £45 for it.

Mixed brass will give you around £2.70 a kilo and scrap lead is worth around 99p per kilo.

For up to date prices see below.

New URL is http://www.letsrecycle.com/prices/metals/non-ferrous-metal-prices/
 
4 ) HOW TO CONNECT A BASIN TO A TOILET WASTE

An easy way to drain a basin (without having to drill into the wall and running a waste pipe to the existing soil stack) is to plumb it straight into the existing toilet hole.

You will need to swop the existing pan connector for one of these:

prod-images%5Clarge%5CMTK302.jpg


Well worth the £10 or so cost as it will save you a lot of work!
 
Sponsored Links
5) CONNECTING A TOILET TO WASTE

Easiest way is to put the pan and cistern in situ and then look at what fitting you will need to join the pan to the existing waste pipe.

You will have no problems with leaks if they are correctly and squarely lined up to the pan. Washing up liquid is good to lubricate when fitting also.

WASTE HOLE IN THE FLOOR

p1071931_l.jpg
p1078421_l.jpg


WASTE HOLE IN THE WALL

p1062302_l.jpg
p1062074_l.jpg
p1076802_l.jpg
]


The first is an offset one and the the second is an extension piece.
 
6) HOW TO PLUMB A WASTE PIPE TO A SOIL STACK

If you wish to plumb a 32mm or 40 mm waste pipe to a plastic soil stack you will need a strap on boss like this:

p3243317_l.jpg


and also (depending on pipe size) a 32 mm or 40 mm adapter like this

p1062623_l.jpg


You need to drill a 50 mm hole in the stack and attach the strap on boss so that the lugs fit into the hole. Use solvent weld to fix it in place, and tighten the boss via the nut at the back.

Fit correct size adapter and then route your waste pipe into the boss.

Some stacks already have fittings which don't need a strap (Terrain)
Please note you cannot fit less than 150 mm below a wc branch.
 
7) REPLACING WC FLOAT VALVE

If you undo the blue nut on the RHS, you can take the other parts off the stem and swap the new one for your old one. The old plastic ball float screws onto the end. After taking off the old and before fitting the new valve, turn the water on for a few seconds (with the lid on to reduce splashing) to flush out any debris from the pipes.

The white plastic screw on the RHS should press against the side of the cistern as its purpose is to prevent strain on the threaded shank of the bottom-fed inlet valve.
The white plastic screw on the arm is to adjust the water level.

p1812512_l.jpg
 
8 ) CHANGING A CISTERN FLOAT VALVE

IF one of your tanks in the loft is overflowing, it may be down to float valve failure. It could be just the washer needs replacing but for £5 you can change the whole valve. You should be able to do this yourself as it is fairly easy.

You will need to purchase a new (part 2) float valve BS1212.

p2329917_l.jpg


Firstly turn your cold water off at the mains which will cut supply to tank.

If you have a part 2 valve already it's easier to split the valve in the middle at the big nut and just swap the moving parts. (You can also do the same with a part 1 valve too)

Alternatively, to change the whole valve, undo the bent tap connector and then unscrew the old valve off the cistern and discard. Fit the new one on by reversing taking one off. Turn water back on and test for leaks.

SETTING THE WATER LEVEL

For the large cistern- supplying the cylinder............

Adjust the float by sliding it up or down the arm via the screw (or you may need to bend the metal arm) so that the water cuts off 3 inches below overflow pipe.

For the smaller F & E cistern- supplying the heating system..........

Adjust float to cut off water when the water level is 100 mm deep to allow for water expansion.
 
9) FLUELESS FIRES- Do you fancy one?

Flueless fires have been discussed on this site a few times and the resounding advice given from Gas Installers is to AVOID at all costs!

These fires are attractive to consumers as they are 90% efficient as opposed others which are only about 70%. BUT....... As the products of combustion are not expelled up the chimney, these fires require a specific volume of ventilation to ensure their safe operation!

Flueless gas fires require correct installation and depend on :

A) Correct pipe sizing
B) Room Size
C) Ventilation
D) Gas rating checks
E) Gas Analyzing checks
F) Regular servicing

All existing Flueless fires MUST have an audible tone CO alarm installed in the same room to help to protect the occupants.

There have been a number of deaths attributed to these fires and you should bear this in mind if you are considering having one. :(

Further comments on these fires can be found HERE

5023539383005_001c_v001_zp


---

Edit , July 2011
In the last couple of years some manufacturers have reacted to the safety concerns and addressed some of the problems to some extent. It remains true that
1) you need a large draughty permanent vent.
2) They can, like all things, go wrong. If they do, they can produce a lot of carbon monoxide. You can't smell CO, and if you take two breaths at 1% concentration, you're on the floor dying. The vent, probably a 10cm square hole through the wall with a draught baffle and a grille, will make little difference.
3) A CO detector is a must, but they do not come with the fire. They should squeal at a concentration well below a dangerous level, but they can go wrong too. I'd use two, of different makes. They also have a finite "shelf life" (typically 5 years) after which they won't work. You can't test that yours is working. Pressing the button on the front is not the same as giving it a blast of CO.

So if you fit a flueless gas fire, you probably won't die.
 
10 ) TOILET FLUSHING PROBLEMS

1) Your first check should be the water level in the cistern is at the correct level normally marked on the side.

2) Inspect the float valve is working correctly and cutting the water at the marked level. Also check the round float (if fitted ) is not punctured.
See post no 15 if you need to replace the float valve which is the same principle even though they are different.

3) Check AAV (if applicable) is functioning correctly and allowing air in.

4) See if your siphon is in 2 parts and allows the diaphragm section to be withdrawn. You can then check the condition of the diaphragm (thin plastic sheet on the bottom of siphon) and replace if torn.

5) If you have a single part siphon :

p2635095_l.jpg


a) Isolate the cold supply to the cistern and flush the WC. Sponge (or wet vac) out the remaining water.

b) If close coupled then remove cistern from pan and wall, if a low level detach flush pipe from siphon.

c) Unscrew back nut and remove siphon.

d) Install new siphon or just replace the diaphram.

e) If close coupled then ensure that you use brass screws when reattaching the cistern to the wall, and consider using a new doughnut washer. Reattach flush pipe if low level WC

f) Reinstate cold supply and test.
 
11) HOW TO FIT A STONE SHOWER TRAY?

Stone shower trays need to be raised on a timber platform to give clearance for the trap. You can use 4 x 2 or 6 x2 wood to make the platform depending on how high you wish to have the tray,

Make the timber framework up with 4 lengths spaced at 300 centres with noggins to add extra strength. Fit 18mm WBP plywood onto the timber framework, and then place the tray on top.
Mark the waste hole onto the plywood and then cut out enough material to allow for fitting of the trap to the tray.

Screw the timber frame to the wall and then bed the tray with a layer of fine sand and cement. Use a good quality silicone (Dow Corning 785 is good) to seal tray edges to the wall.

Finally, connect the waste pipe to the trap and make up your plinths.

PIC THANKS TO SECO SERVICES
24012072sh3.jpg
 
12) LIMESCALE REMOVAL

As you may know limescale is particularly hard to remove from taps, basins etc. Here is a few things you may like to try.

1) You can try cotton wool soaked in vinegar on the offending areas, a video clip is HERE

2)The best limescale removing spray on the market (according to Which magazine and myself :D ) is Fresh and Green sold at Waitrose. Cillit bang is very overrated and does not live up to its reputation.

bottle.jpg


PREVENTATIVE MEASURES

You can fit a Combi Mate or similar to your rising main which helps to break up the limescale and stop it sticking.

p1037942_l.jpg


If you are flush with cash there are electrical de-scalers which
may or may not work. There is little hard evidence (no pun intended ) and this suits the industry well!. They will not give you soft water but may reduce scale buildup.

Eddy.jpg


An ion exchange water softener will produce true softened water (you have to add special salts monthly) but they cost anything from £400 to £1000! :(
p4757952_l.jpg
 
13) LAYING PIPES IN CONCRETE

Thanks to Seco Services

You can lay them in a duct or in conduit as below .

p2634440_x.jpg


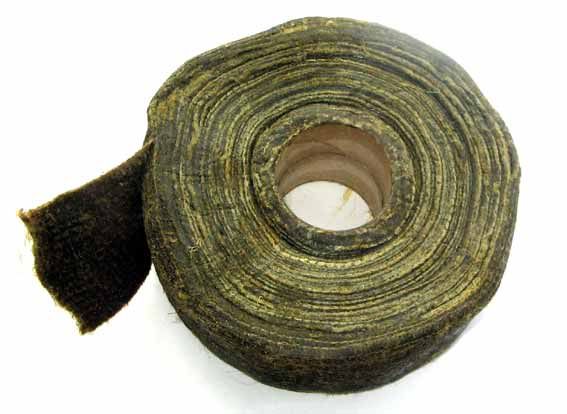
Lay them in Denso tape.
DENSO_1997_567.jpg
 
14) CHANGING FROM LEAD PIPE TO COPPER

A post that has come up quite often is how to change an old stop tap on a leaded supply.

You will need a fitting called a Lead Loc which is basically a compression adapter to go from lead to copper.

p1943335_l.jpg


There are a few different sizes so ensure you get the right one. Details on sizing can be found HERE .
When you have got your fitting, turn off the water in the street and cut the lead main with a hacksaw. Clean it up with wire wool and fit the Lead Loc. As lead is not a strong metal, do not overtighten when fitting.

Fit a small piece of copper pipe in the opposite end and then attach your new stop tap.

Make sure the arrow on the stoptap is pointing towards the flow of the water.
From there you can carry on in copper pipe to your other outlets.

p1073343_l.jpg


If your incoming mains water supply pipe is lead, you should consider upgrading it to 25 mm MDPE pipe as you WILL get more pressure and you will no longer be drinking water that may have lead particles in it. :(

It is worth asking your Water Company if they have any schemes available to change lead mains at a reduced cost or even for free. :D
 
15) REMOVING AIR LOCKS

An air lock is a pocket of air in the pipework which blocks the flow of water. Normally found on tank supplied hot or cold water pipework that is not under mains pressure.

Try this remedy wherever you have a mixer with one supply working but not the other:

1). Put a sponge inside a carrier bag, place it under the bath tap, and press firmly upwards with your palm.

2). Turn on the cold tap and then the hot tap.

3) Wait until the gurgling stops (if any)and turn off the hot tap.

4) Leaving the cold tap open, abruptly remove the sponge.
Keep repeating until you get better flow.

Another method is to try bridging the hot and cold water. If you have a mixer, you put a sponge over the outlet and turn both hot and mains cold supplies on.

You can also try using a hose between two taps or link across washing machine supplies.

You can also try sucking water through the offending tap with an Aquavac. Use short bursts for hot water as you can suck more air in down through the vent pipe over the loft tank.
p2534741_l.jpg
 

DIYnot Local

Staff member

If you need to find a tradesperson to get your job done, please try our local search below, or if you are doing it yourself you can find suppliers local to you.

Select the supplier or trade you require, enter your location to begin your search.


Are you a trade or supplier? You can create your listing free at DIYnot Local

 
Sponsored Links
Back
Top