Window ledge options

Joined
18 Nov 2005
Messages
200
Reaction score
4
Country
United Kingdom
Just replaced a rotten window in the attic (dorma)
As with everything UPVC when the window came in was the exact height

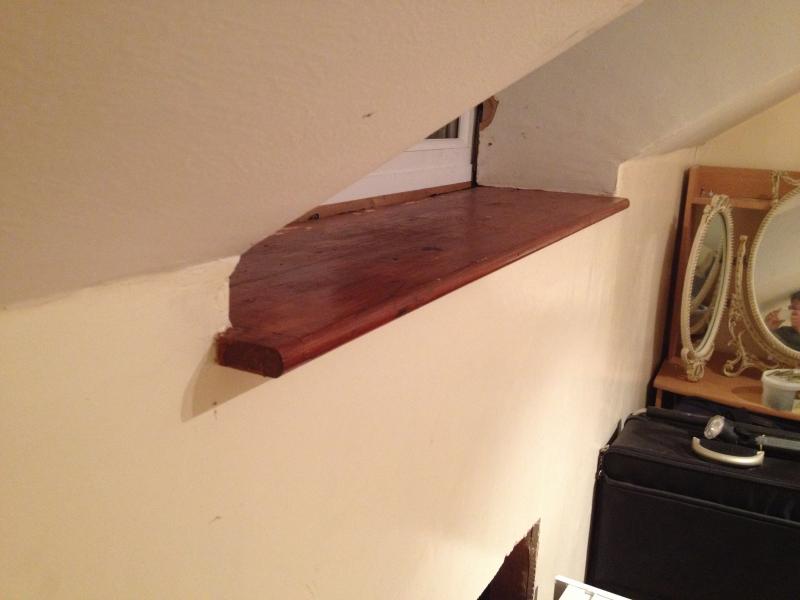
Anyway I have fitted the window without issue but to get the window in properly meant i have had to sit it on a 2" timber

The problem I have is the window now sits about 2" above the existing internal ledge and looks a bit silly

The ledge was actually put on and then the walls built on top/around it so without doing some rather substantial ripping out of boards etc it's not really an option to remove the ledge

(I'm a plasterer by trade so the plastering side doesn't worry me it's just not really feasible to remove it)

What would my options be to make it look somewhat decent

I have thought about getting a 2" timber board and fixing it on top to bring it up to the window but the original has a bullnose on the front and might look silly
 
Sponsored Links
The internal ledge you describe is actually called the sill or cill depending where you come from.
You could cut the protruding edge (the overhang bit which stick out past the wall) flush back to the wall. Fixing spacers to the cut back cill will allow a new cill to be fitted on top of the old and a new apron fitted below this to cover any gaps...pinenot :)

Ledge/sill/cill all the same to me lol

I did think about trimming flush to wall but didn't know what tool was best to use as there is no chance I'll get a hand saw/jigsaw or router in as the sloping ceiling joins to it

When you mention an "apron" to the front can you expand a little further as I'm not sure I understand
Do you mean like thin strips of timber to give like a laminate effect and fill the seams/joins etc?

I'll see if I can get a picture to illustrate will make it easier to vision what I'm trying to do
 
Sponsored Links
A jig saw can be used to cut in both directions if that's what you require, personally I would simply use a chisel (bearing in mind wood grain direction) struck in from an end or chopped down where required to trim the existing cill back to wall level. If this action reduces the existing cill back from the wall edge i.e. more toward the window, that's to the good, once packed and the new cill fitted there will be the edge of both cills showing, one you want and one you dont want to see, these get a plate over them called to hide the ensuing gap and this is called the apron...pinenot :)
 
A jig saw can be used to cut in both directions if that's what you require, personally I would simply use a chisel (bearing in mind wood grain direction) struck in from an end or chopped down where required to trim the existing cill back to wall level. If this action reduces the existing cill back from the wall edge i.e. more toward the window, that's to the good, once packed and the new cill fitted there will be the edge of both cills showing, one you want and one you dont want to see, these get a plate over them called to hide the ensuing gap and this is called the apron...pinenot :)

Top man you've just given me an idea the direction of the grain is in my favour for using a chisel
If I can get it back past the wall I can fix a thin slither of plasterboard on to patch and make good
Thus hiding the cill underneath and making it look like the original only higher!! Or if that doesn't pan out use a decorative trim as the apron

Top man
 
All sorted

Cut sill back with a chisel past the wall just enough so I can get a bit of mesh in to patch up with plaster

Thanks for the tips

Next stage putting cupboard storage in which is quite tricky but that's for another day/thread
 

DIYnot Local

Staff member

If you need to find a tradesperson to get your job done, please try our local search below, or if you are doing it yourself you can find suppliers local to you.

Select the supplier or trade you require, enter your location to begin your search.


Are you a trade or supplier? You can create your listing free at DIYnot Local

 
Back
Top