Wired doorbell to trigger wireless button?

The relay ensures wireless transmitter dc voltage never gets mixed with bells AC voltage. and a relay can operate with just a single diode rectifier and capacitor.

OP, if you need a schematic drawing how to do it just give us a shout.

(bear in mind wireless door bells have tendency to be unreliable as the distance becomes greater, the range suffers, so you may even have to place the transmitter mid way in your home for it to reach your outbuilding office.) 100m range is specified in clear field, usually they have problem even at 20m range indoors through walls and general building layout.)
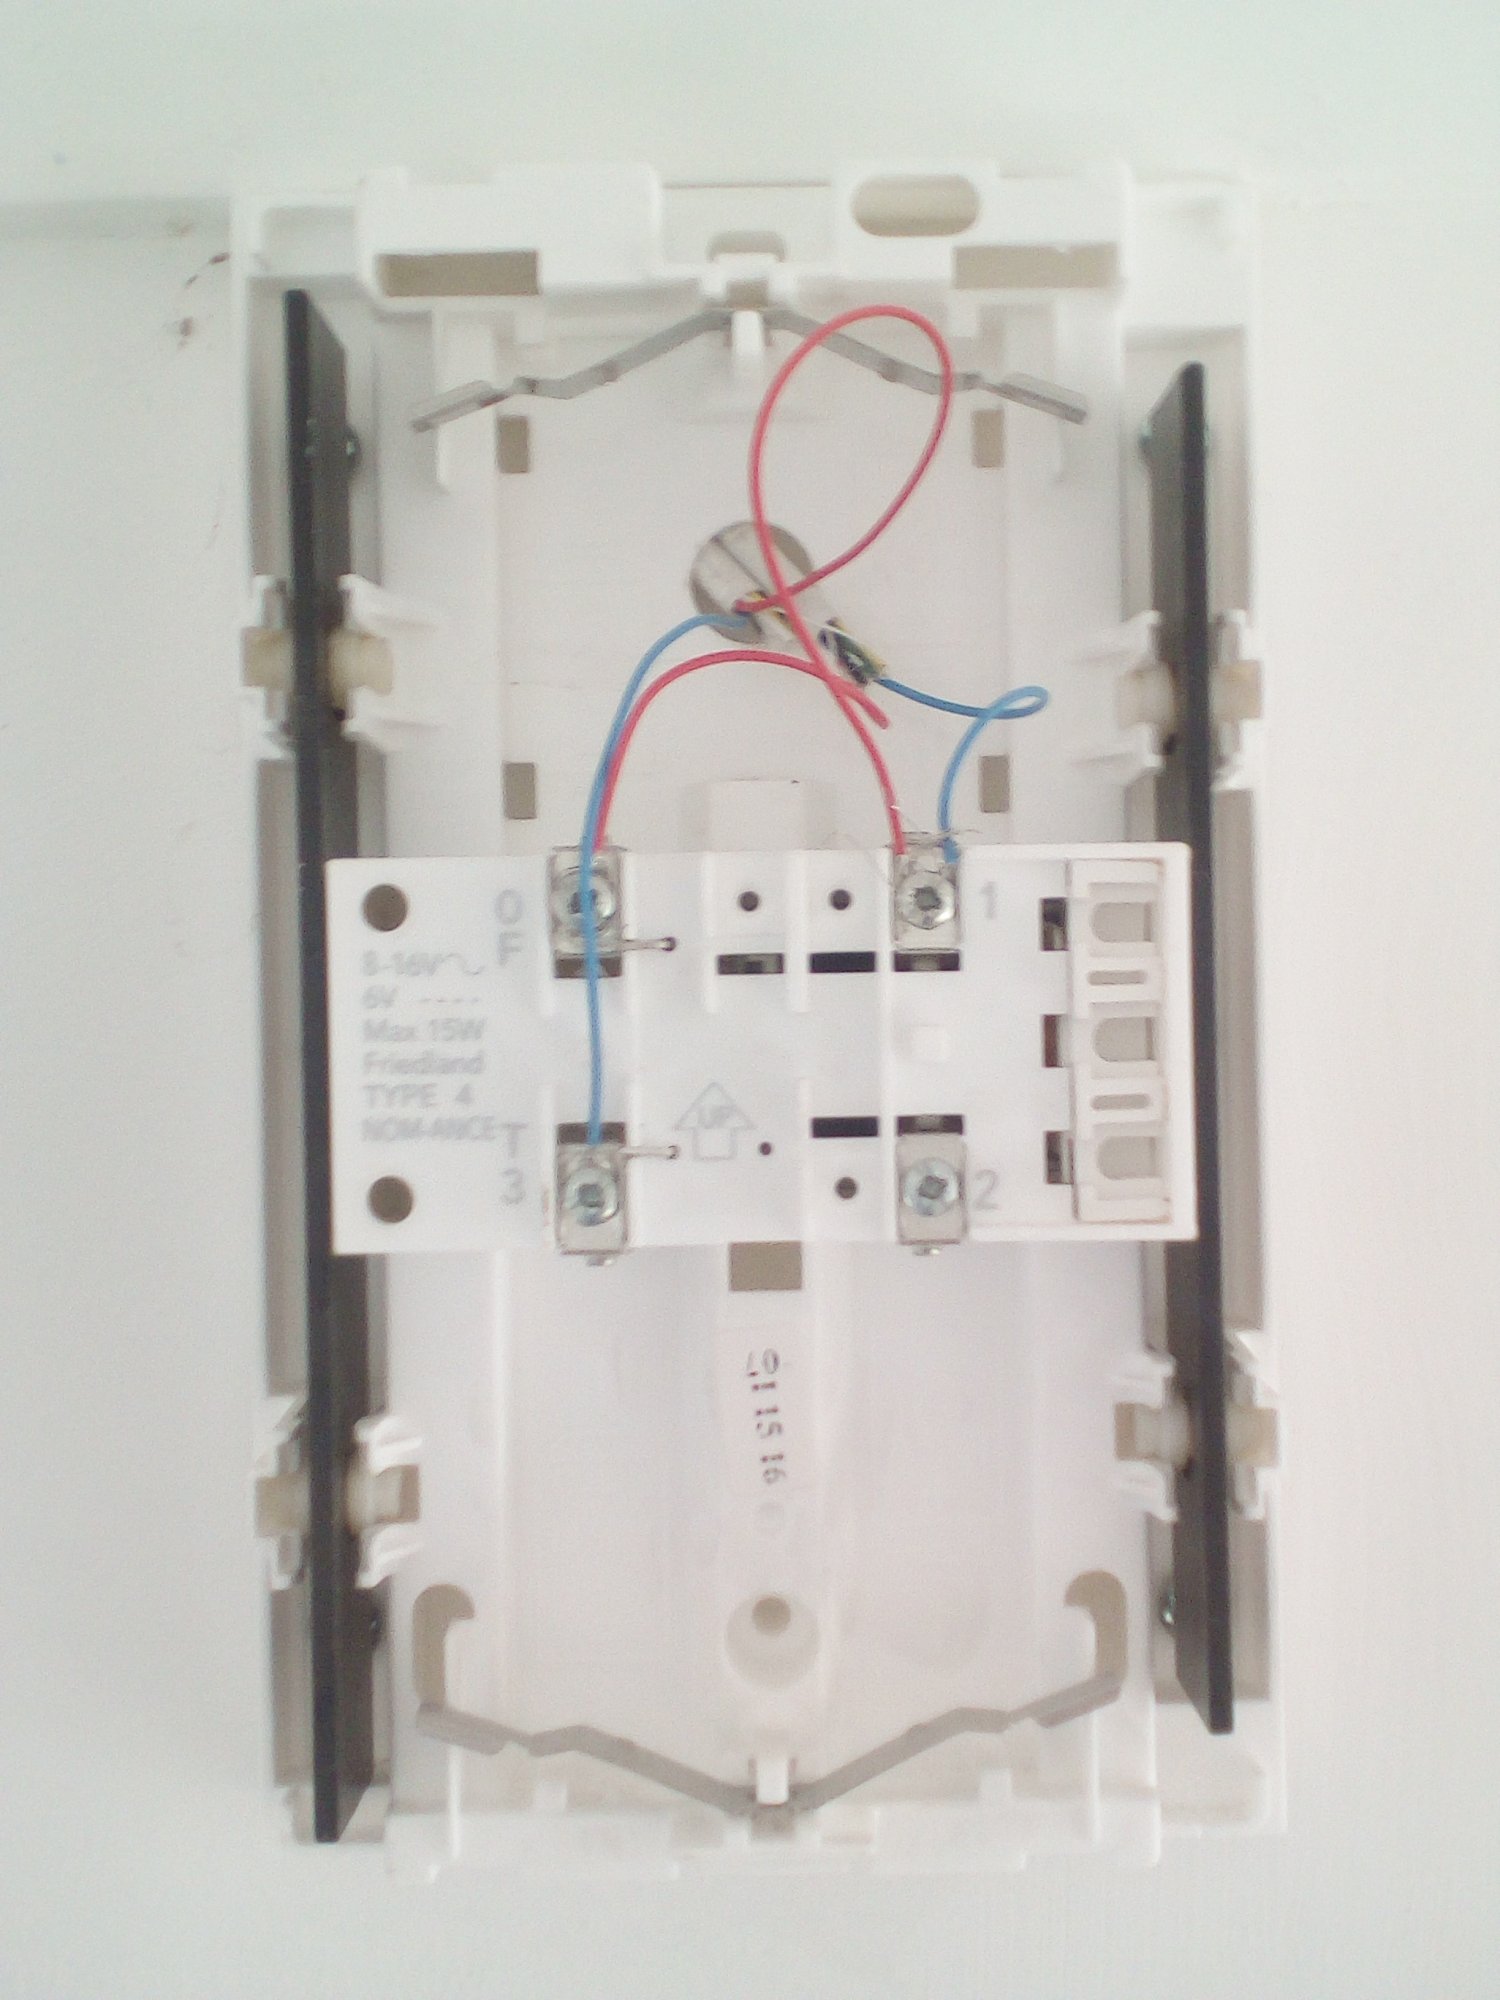
This sounds like a solution to me, it makes sense in my head at least although i would need help in identifying which of the 4 wires coming into the box i need to use as well as the wiring of the relay and diodes mentioned! As for the receiver it is a plug in receiver and as the doorbell is in the hall with a direct run through the kitchen all that is between my desk and the doorbell is the glass of the back door then 8M to the wooden office again with a lot of glass across the front. I have tested the bell as it stands from the front door and it rings every time in the office.

If you could help with a list of parts and wiring i would be very grateful.
 
Sponsored Links
wireless bell xtension.png
No problem. I presume the 4 wires are two that goes to the bell and two that goes to bell switch, and are you familiar with relays? and light soldering work? would you want to build this on a strip board or doesn't matter if you were to solder directly on to relay pins? I am trying to avoid you using expensive relays with bases to which you can screw wires using screw terminals. so give me some pointers and do you have access to volt meter (multi meter) I have all the parts and can even build it for you and send it foc, you will need to pm me your address. ( I can also send you components if you want to try and make it yourself)

I am off for now, will come back around 8pm to check. and possibly draw a little sketch layout.

Components are readily available from Maplin etc, nothing critical, measure your DC Voltage after diode, this determines your relay voltage but if your DC volts are between 8 and 16v a 12v relay is good enough, over 16v go for a 24v relay, contacts rated at 2Amp ac, or minimum 1Amp DC, if you can't get hold of components let me know I can bung them in a jiffy bag and post 1st class your xmas present!

Although this may not be the case, to prolong relay contacts when switching inductive loads such as a conventional dong bell, a small value capacitor of 0.1uf or even 0.22uf can be wired across contacts from pitting when they make and break.
 
Last edited:
I am not sure which two would have been the signal wires but reading across the top two in the picture gives 14V without the button in then down to 8V when pushed. Reading from the top right to bottom left gives 14V down to 1V when pushed.

Your first measurements, 14V/8V, is probably across the output of the transformer.
Your second measurements, 14V/1V, is probably across the switch.

You should be able to see the wires that go from two of the terminals to the solenoid. That's where you'll make the connection to the transmitter. I'd expect it to go from 0V to 8V when you press the button.
 
Sponsored Links
If I were doing this I'd build a circuit with about 5 components that I already have on a piece of verboard.
But if you don't already have the parts, it's awkward because you end up buying several things that each cost next-to-nothing but then there's P&P. And you might need to tweak something later.
So the approch in the link posted earlier, where you get an off-the-shelf regulator board, looks appealing. For example, this one: http://www.miniinthebox.com/lm317-dc-40v-to-1-2-7v-voltage-step-down-circuit-board_p1011568.html . Or search ebay for LM317.
The only issue to worry about with that is that you've got an AC input. It will be fine as long as the capacitor on the output is large enough and the regulator is tolerant of reverse polarity input for half the time. I think you're OK in that case, but the alternative is to get one that is designed for an AC input. Again there are plenty on ebay, though it might have to come from china and take a few weeks.
 
Last edited:
meter on ACV 200 and measure between the red and blue single wires with the bell button held in


Read more: //www.diynot.com/diy/threads/w...r-wireless-button.472054/page-2#ixzz4S0J2M9dE

I am not sure which two would have been the signal wires but reading across the top two in the picture gives 14V without the button in then down to 8V when pushed. Reading from the top right to bottom left gives 14V down to 1V when pushed.

Thank you for the help in getting a reading, we are getting closer :)
Red and blue SINGLE wires, not SIGNAL, you measured every other combination
:)

Top left to bottom is the solenoid as you have now found out
 
Last edited:
But here is what it would look like if you did 333rocky's way which would also work just as well albeit shortened button life.

wireless bell xtension 2.png
well to be honest, i agree it could have been done your way as well, and I did think about that wiring a relay across the bell (solenoid) using a single diode and a smoothing cap, I ruled this out on the bases that bell switches are known to cause arcing under heavy load such as the solenoid bells, I spent more time replacing ,my bell switches than anything , hence why I opted the button to switch a relay on which in turn switches solenoid, no other reason other than contact wear on bell buttons. The cost of a 2 pole relay is no higher than cost of a single pole relay, I purchase these in hundreds and pay around 40p for each from various places like Anglia components, etc, its just my way of thinking which no doubt would differ from others way of planning, but not to say either method won't work, I paid more thought to long button life, relay contacts are made of high temperature materials and bell buttons are merely made of steel stamping or often bare copper contacts that has low MP.
 
Last edited:
For OP, in your picture and the readings you took from these it can be deduced that right hand cable pair (blue and red) is your transformer low voltage supply which reads off load as 14v ac, and when under load (button pressed ) it gets loaded down to 8v ac, the other pair from the left cable is your bell button pair and when pressed you get 1 volt drop across that wire, hence instead of getting as low a voltage drop you are getting 1 volt drop, which doesn't really matter much as long as your bell rings effectively, so from those readings you will need to use a 12v relay.
 
why :?:
put the transmitter and relay in the bell housing

The disadvantage of a relay is that you still need a 1.5 V battery.
You also need a relay coil that can cope with voltages between 8 and 14 V AC. Have you found a suitable one?
 

DIYnot Local

Staff member

If you need to find a tradesperson to get your job done, please try our local search below, or if you are doing it yourself you can find suppliers local to you.

Select the supplier or trade you require, enter your location to begin your search.


Are you a trade or supplier? You can create your listing free at DIYnot Local

 
Sponsored Links
Back
Top