Hive successful install - how to remove wall thermostat?

Joined
6 Dec 2021
Messages
5
Reaction score
1
Country
United Kingdom
I have successfully installed Hive as a replacement for EP2002 for my Kingfisher MF RSL 100. Unsure if it's going to be successful I just set old wall (wired) thermostat to highest setting.

All is good for few weeks now and works great! Therefore I would like to remove my unused wall (wired) thermostat. Quick way to do it would be to remove the wall unit, connect directly the wires in the box and cover it. However living live wires in the wall is not the right way to do it.

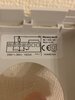
Would someone be so kind and share information which connectors/wires on Kingfisher MF RSL 100 are responsible for the external wall thermostat and needs to be connected directly?

That would allow me to have it done the right way, although I would still leave the wires in the wall (just in case) but they would be safe.
 
Last edited:
Sponsored Links
The wires will likely go back to a control box, not directly to the boiler (i could be wrong, dunno your system).
Just trace the wires back to the main junction box and bridge them there. Tag them for future reference.
Remove the wall box/cover/wires entirely. Wired thermostats (or anything) is dead end technology and won't be making a comeback anytime soon.
 
For a more definitive answer it would help to know the make / model of the existing thermostat and details of the wires presently connected to the thermostat terminals.

Unfortunately where it’s connected depends upon the preferences of the original installer. Often, but not always, where a system was fitted with an EP2002 programmer, as it has spare terminals [Marked A B C & D] they can be used for the room thermostat wiring connections. Other installations may utilise a separate wiring centre. You will have to find the origin of the cable.
 
Last edited:
@stem, @BlueLoo thank you for pointers. I was able to find some time today morning to investigate further.

Thermostat is Honeywell T6360B 1028 and it has three wires connected to it:

terminal - wire colour
===============
earth - none
2 - black
3 - red
4 - none
1 - red
5 - none

Cables from the thermostat end up in a wall cavity where the EP2002 controller was installed. In there they were twisted 1-1 to another three wire cable which again was going back into the wall. I assume that it was going to the PCB on the boiler. In order to investigate and identify the cables (as two are red) I had to untwist them and then connect them again using Wago connectors.

When deinstalling EP2002 programmer there were no connections to spare terminals (marked A,B,C,D).

My next step would be to install connection box and directly connect wires from the cavity. Questions arises: how those wires need to be connected?

That would allow me to safely deinstall the thermostat and leave safe/unconnected cables in the wall.

Any ideas?
 

Attachments

  • IMG_9388.jpg
    IMG_9388.jpg
    108.1 KB · Views: 106
  • IMG_9387.jpg
    IMG_9387.jpg
    187 KB · Views: 160
Sponsored Links
Sounds very dodgy with the wires "twisted together" good job you rectified that. Can't understand why they didn't use the ABCD terminals that's what they are there for!

1. The wires in the Honeywell T6360B thermostat terminals are:

T6360B Wiring.jpg


In your case:

Red wire in Terminal 1= Live
Black wire in Terminal 2 = Neutral
Red wire in Terminal 3= Switched Live

2. Trace the thermostat cable back to its origin. Unfortunately as I said before, where it’s connected depends upon the preferences of the original installer.

3. Take take a photo, or make a note of where the red wires that go to the existing thermostat terminals 1 (Live) & 3 (Switched Live) originate from

4. Disconnect all of the wires going to the old thermostat and remove the cable and thermostat.

5. Insert a wire link between the terminals where the Live and Switched Live wires have just been removed from, so that they are now electrically joined together.
 
Last edited:
Thank you for very quick response :)

5. Insert a wire link between the terminals where the Live and Switched Live wires have just been removed from, so that they are now electrically joined together.

As a temporary measure I will place connector box into the cavity where the EP2002 was and connect both red ones (Live and Switched Live) in there. That would allow me to deinstall thermostat for now.

Next weekend I will try to trace where those wires originate from. I have an idea where it might be but there is no access to this space :( 
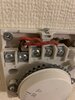
at least I'm unable to find it now. Cables from pump and valves go there so I treat this as an indication that it might be a right assumption that this cable ends up there as well.

Thank you very much for you help!
 
I've been snooping around this forum a while now but created an account today to say thanks to the community here. Thanks to mainly this thread we were able to accomplish the successful removal of the old Honeywell thermostat completely. I've had the smart Hive heating system (dual channel) for a year now but only realised whilst researching home heating best practice, the thermostat should be typically in the hallway. This is when I decided to remove the old thermostat.

Doing so stopped the heating and hot water working. My wife spent about 45 minutes reverse engineering the wiring diagram on the control box (the wiring did not match the diagram on the box entirely). Once she worked out which wires were the live and switch live, we removed those and bridge the connections with additional copper and success! We really did not want live 240v in the walls as I've read on a number of threads how that is not best practice, so i'm glad we were able to get the job done properly.

Glad you got the help you needed.

I would argue best practice was to have a single thermostat in a hallway or coldest room, however, i do believe that now, given the leap in technology, that best practice is to have a thermostat in every room via a rad valve (where fitted) and manage via an app.

Some do disagree with that, still preferring the more macro single thermometer approach, but i would counter with my experience of installing the above "Zero-zone" system. For me it has been a revelation.

I'd agree that is the more efficient method of heating a home, especially large houses with less used rooms. At the time I purchased Hive, I did consider Tado but ended up with Hive at a real good steal of a deal. We have TRV's on all of our radiators that we use to approximately regulate temp in each room/area.
 
I would argue best practice was to have a single thermostat in a hallway or coldest room, however, i do believe that now, given the leap in technology, that best practice is to have a thermostat in every room via a rad valve (where fitted) and manage via an app.

@BlueLoo can you recommend any reasonable rad valves for this purpose? I did read that those sold by Hive are not very good and reliable (just opinions from forums and reviews)
 
At the time I purchased Hive, I did consider Tado but ended up with Hive at a real good steal of a deal. We have TRV's on all of our radiators that we use to approximately regulate temp in each room/area.

@mydan99 would you be so kind and share which TRVs did you get to work with Hive? Are you happy how the whole system works? Would you recommend them or something else what's available on the market now?
 
@mydan99 would you be so kind and share which TRVs did you get to work with Hive? Are you happy how the whole system works? Would you recommend them or something else what's available on the market now?

The TRVs at my house were already here before we purchased the place in 2020. They are the manual type which you twist with numbers 1-5. Hive looked to be the easier self installation option for me (dependent on your current setup). Im not so familiar with other brands; i remember ruling out Nest, i think because it was supposedly harder to install.
 
@BlueLoo can you recommend any reasonable rad valves for this purpose? I did read that those sold by Hive are not very good and reliable (just opinions from forums and reviews)

don't know if it works for your system but i have found the Wiser/Drayton system marvelous.
 

DIYnot Local

Staff member

If you need to find a tradesperson to get your job done, please try our local search below, or if you are doing it yourself you can find suppliers local to you.

Select the supplier or trade you require, enter your location to begin your search.


Are you a trade or supplier? You can create your listing free at DIYnot Local

 
Sponsored Links
Back
Top