Bevelled 'brick' tiles in 3-sided shower cubicle

Joined
4 Feb 2013
Messages
3
Reaction score
0
Location
Staffordshire
Country
United Kingdom
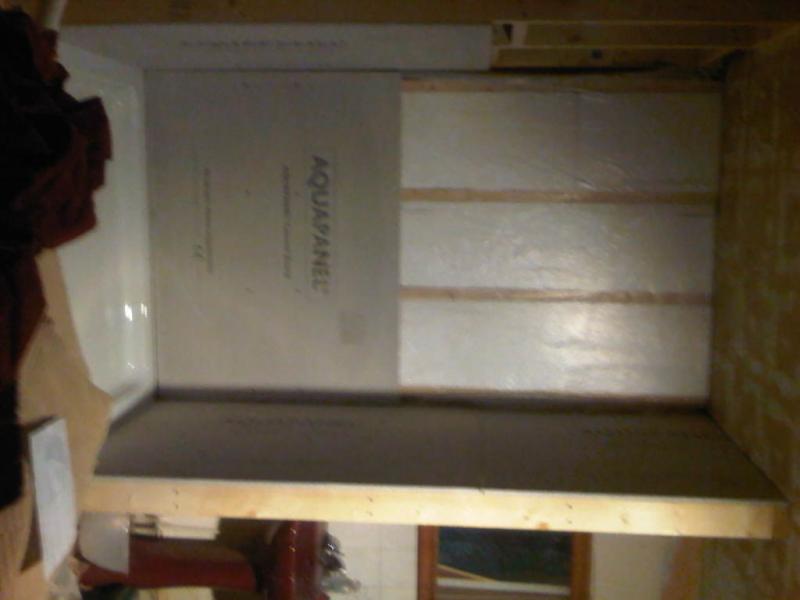
Hi, I’m looking for advice on the best way to tile a shower cubicle using 10x20cm bevelled “underground” style tiles using a brick wall style layout pattern. I have built a 3-sided cubicle (i.e. open on one just side) using studwork and Aquapanel. I have read that into the internal corners, and also on the outer edges, the bevelled tiles should always be cut so that there are no joins or ends at the end of the tile (i.e. on the bevel). This tells me the best way to lay them out horizontally, but not vertically. I have two questions:

1) Should I start with a full tile along the edge of the shower tray, or should I also cut the bevel off for best visual effect in this case?

2) The tiles will not go right to the ceiling. What is the best way of finishing at the top visually – again, should I cut the bevel off and finish with a tile edging strip, or just finish with a complete tile and leave it at that with no edging?

Thanks in advance for any hints.
 
Sponsored Links
Hi there, I agree that it may look best to fix the tiles horizontally, maybe using a brick bond format? Without seeing the tiles I am not sure about cutting the bevel off but I wonder whether using a tile trim strip to finish them off. If they are not going right to ceiling how far from ceiling will they finish?

Best of luck in your project.
 
the bevel is deceptive, its usually only 1.5 -2mm so wont cause any visual or sealing issues.
You'd be best to finish a full tile on the top, giving you the same thickness coming up to your trim.
On the front face and the internal, you'll have to have cut tiles if you are fixing brick bond, but use a trim to match the thick part (usually 7mm if its metro) and do a good grout job.

Tileclick - welcome, you might want to change your username before a moderator gets you, save you the hassle i had!
 
I'd try and start full tile from the shower tray and finish full tile on top. Id only trim the sides but you will have to buy trim for the thickest part of the tile. Will look nice though.

Some pics of the shower would help :)

Paul
 
Sponsored Links
Hi TPT,

Thanks for the tip, I wasn't aware I am breaking any rules but I guess I am. Do you have any idea how to change user name? I have been through all the settings and can't see anywhere to change unless I close the account and start again but of course would rather not do this?

Do you have any ideas?

Thanks
 
Thanks for the comments. Here's a picture of the cubicle under construction - please forgive the poor phone-camera quality and the fact it's rotated, but hopefully enough to give an idea!

The bevel on the tiles is quite wide as they are the "subway/underground" style. Sounds like I'm best off edging the sides, and having a full tile along tray and at the top then, cheers.


...and here a picture of what I'm trying to achieve with the tiles...


One more question - if I tile down to the tray, how much of a gap should I leave for final sealing?
 
Not sure how you are putting the tray in but you should apply clear mastic to all edges of the tray that meet the Aquaboard, smoothing off around the top of the tray then start full tile from the tray and work up. I just go full tile on and my mastic man seals around the tiles. In effect you would have 2 layers of mastic making the tray watertight.

If you want to go for a tanking system there are many on the market
 
I have fitted the tray by just placing it on the floor within the studwork enclosure (it stands on its own adjustable legs), and then I have butted the panels down to the top of the tray. There is a 2 or 3mm gap between the top of the tray and the bottom of the boards.

So I'll fill that small gap with the sealant, then tile from the top of the tray, then seal again.

Thanks!
 

DIYnot Local

Staff member

If you need to find a tradesperson to get your job done, please try our local search below, or if you are doing it yourself you can find suppliers local to you.

Select the supplier or trade you require, enter your location to begin your search.


Are you a trade or supplier? You can create your listing free at DIYnot Local

 
Sponsored Links
Back
Top