Constructing a vehicle Inspection Pit

If you cost this up, would it not be less hassle to go to a mechanic or upgrade the motorhome than ripping up that nice drive?

All sorts of services could be down there. (electrical, sewers, drainage etc)

Got the plans from EON and Transco for Gas & Electric and these services travel down the shared boundary, phone is on the other side of the drive as is the foul drain, not sure where surface water is, so I have to investigate that.

As the drive is gravel, it will be relitivly easy to work with, I have brushed and raked the stones to one side before, so all the constuction work will be hidden quite effectivly.

I'm used to doing DIY so the drive should go back together :) (fingers crossed)


Put some pics of last project:
 
Sponsored Links
Get a steel one made, dig hole drop in, fill surrounding with concrete, job done.

Pretty much anyway.
 
Get a steel one made, dig hole drop in, fill surrounding with concrete, job done.

Pretty much anyway.

Hi Hitachmad,
In the town is a great metalcrafting company and I did think of doing this, it certainly would be quicker than shuttering a hole and I have not fully discounted this option yet.

Reasons why I have not followed this through are the weight/manual handling of a large steel vessel, and making it corrosion resistant (it would proberbly see me out anyway,lol)

But its not a no, and will form part of the costing excercise when quantities are established from design.

Ian
 
not something I know about, but you say you have a high water table, and I have heard of swimming pools and basement foundations floating up out of the ground, when they are empty and light.
 
Sponsored Links
Hi there,
Some years ago now I lived close to a mate who tried his hand at this. He first tried using brick but was plagued by water. He then had the idea of sinking a used oil central heating tank of suitable size which he eventually did. The next day though it had lifted out of the ground by a couple of feet. [We had heavy rain overnight] He tried again and was able to lay a few inches of concrete in the bottom of the tank for ballast. I think he dug a bit deeper for the tank then finished off the top perimeter with a course of bricks to make good. The upshot is though that it worked.
If your tank is heavy to manouver you could borrow a couple of engine hoists to attach each end and lower. The bore hole idea would cover you in case and you could sink just outside one end of the tank with a prepared base beneath the tank.

Just a little chip-in
Regards,
Volvomanx.
 
not something I know about, but you say you have a high water table, and I have heard of swimming pools and basement foundations floating up out of the ground, when they are empty and light.

Doing the research for this project, I also came across this, hence the addition of a drainage channel,sump and pump outside of the pit to releive the hydrostatic pressure (sound like I know what I'm talking about lol, only cos I read it)

Snipped from a pool site:
Most modern in-ground pools have a special hydrostatic valve near the main drain to guard against damage from ground water pressure. Basically, if the ground water pressure is great enough, it will push up on a small float, which opens the valve. When the valve opens, ground water flows in and equalizes the pressure.
 
Hi there,
Some years ago now I lived close to a mate who tried his hand at this. He first tried using brick but was plagued by water. He then had the idea of sinking a used oil central heating tank of suitable size which he eventually did. The next day though it had lifted out of the ground by a couple of feet. [We had heavy rain overnight] He tried again and was able to lay a few inches of concrete in the bottom of the tank for ballast. I think he dug a bit deeper for the tank then finished off the top perimeter with a course of bricks to make good. The upshot is though that it worked.
If your tank is heavy to manouver you could borrow a couple of engine hoists to attach each end and lower. The bore hole idea would cover you in case and you could sink just outside one end of the tank with a prepared base beneath the tank.

Just a little chip-in
Regards,
Volvomanx.

Cheers Volvomanx, I need all the 'chipping in' I can get, like the idea of the engine hoists.

I've got to compare the cost of manufacture of the steel pit with that of shuttering, additional excavation and concrete, so lots to think about!
 
you might also consider a method I have seen in military depots

they have two lowish brick or concrete walls, each of which has a slope at the end taking the top down to ground level.

the walls are spaced at vehicle track distance, you drive onto them and your vehicle is then standing on top of the walls so you can comfortably work underneath it.

more permanent than steel ramps, and much less disruptive than digging a pit

in a domestic situation, you could finish the brickwork neatly, pave between the walls and decorate with pot plants, disguise it as a barbeque area.
 
Costed for the steel pit just to confirm that is was more cost effective to shutter the hole.

The digger & Driver is sorted as is the skips, before i book them, a quick question,
I will be using steel mesh reinforcing supported by standoffs on a plastic sheeted lined base.

As the base will be clay, and the trench walls are shear, I dont want to stand on the mesh and puncture the membrane, how would the pro's do it?

Would you pour a thin top coating of concrete and work on that for example, any help would be much apreachiated.

Ta
 
@ Redpis, Dunno where your upto with your pit but if its any help I'm right in the middle of the same project and am using extra thick guage DPM and standard mesh for the base bent round to stick out of the kickers so that when I cast the walls Ive got something to wore the wall mesh to. The job's at a stop at the moment while I decide on how thick I need the walls. 2 ft of topsoil and then 4 ft of clay, seems stable enough but am wondering whether to step the wall out a few extra inches at the bottom just to be safe.

For the record the hole is:- 3.5m long x 1.1m wide x 1.8m deep.


Decided to dig the pit in the left bay before I laid the concrete floor


I'll post the results when I'm done. :D
 
in your 3rd pic, is that a brick wall I can see at the end of the holel?

151000_150380_26970_56727370_thumb.jpg


I was wondering how much the surrounding building would be destabilised by digging it out.
 
No its just the top of the clay, I thought I would chop the soil back a bit to form a step in case I needed to climb out in a hurry as the ladder isn't too marvellous as you can see by the missing rungs.

The concrete ribs i have poured are just to set the levels of the floor so I have something to tamp off when the ready mix lorry arrives. The dpm is folded back on itself several times, there is about 1m overlap.

The ground has never been disturbed so I dont think it will destablise too much if at all. I've had a bit of advice off a structural engineer to make the walls a bit thicker so I intend to dig another 4" out each side, although IMHO i think its a bit of overkill.

I've got mesh for the base folded up to form starter bars, and have mesh for the sides which i will tie in at the top. So I'll post some more pics when I get some more done.
 
Looks like a nice job.

OOI, what are the dimensions of the hole, and how long did it take you with the baby digger? Have you used one before?

Did you just dump out of the digger into a skip?
 
Thanks :)

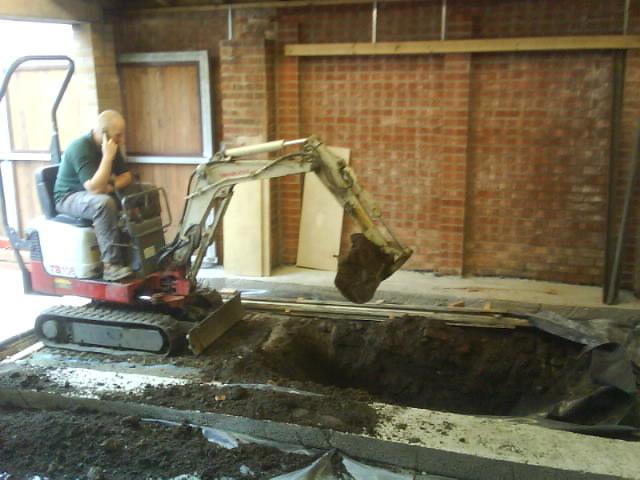
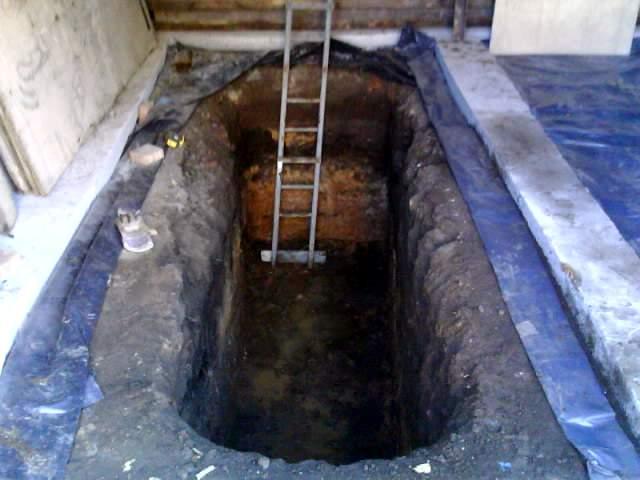
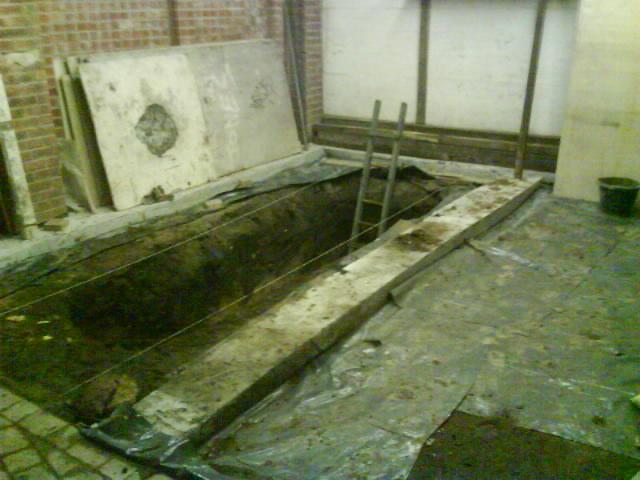
The hole is now 4ft 4" wide, 11ft 6 long and about 5ft 8 deep (3500x1320x1750) although its a bit hard to guage the depth when trudging around in the clay and the water, LOL.

I made a depth guage out of timber to measure 1700mm but I've dug past that now just trying to keep the stones from the soil falling into the clay. they tend to be a lot sharper than the pebbles in the clay and Ive been worried about perforating the 1200 guage visqueen.

The guy with the digger took about 6 hours, he took 14 ton out and had a large Ifor Williams trailer parked in the right hand bay of the garage to dump the stuff straight in. He made 3 trips to the dump to get rid of the spoil. It worked out at £180 for him and the digger, and 3 x £50 for removing the waste, so £330 in total.

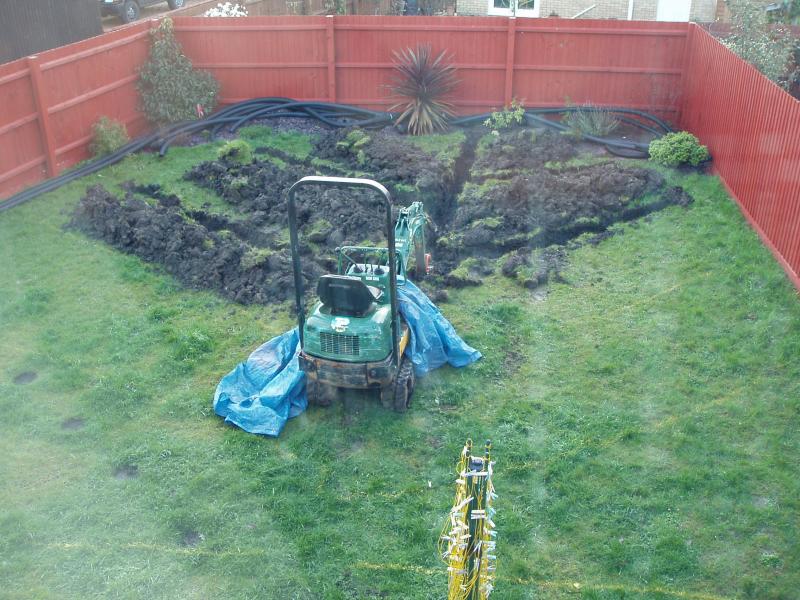
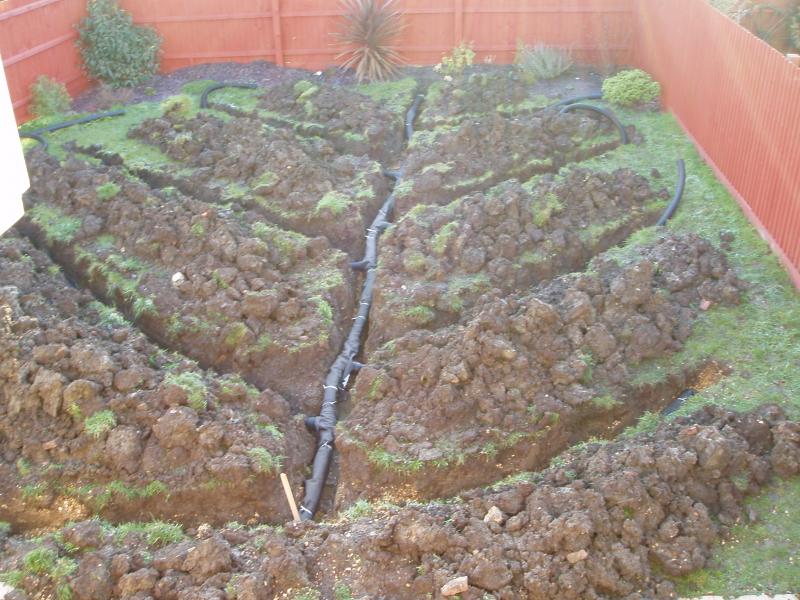
I'm realising now it is not going to be a cheap job but I've started so I'll have to finish :confused: 
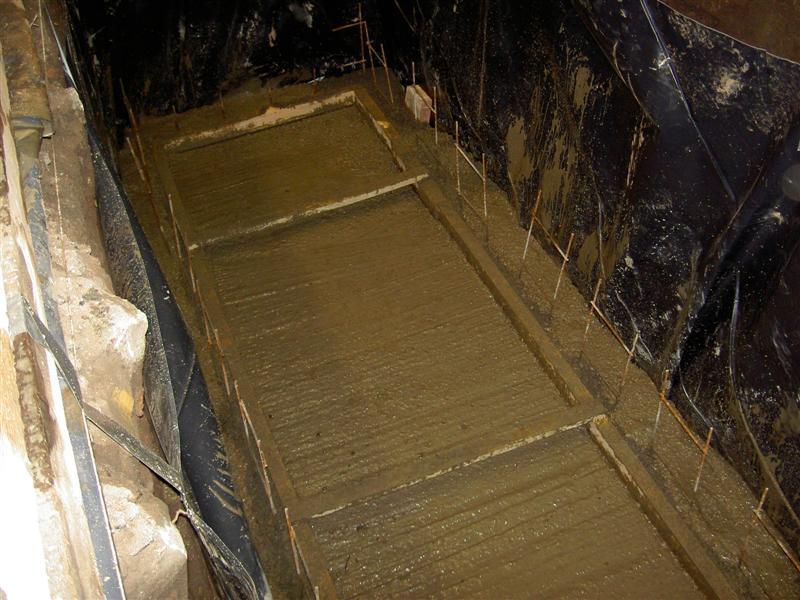
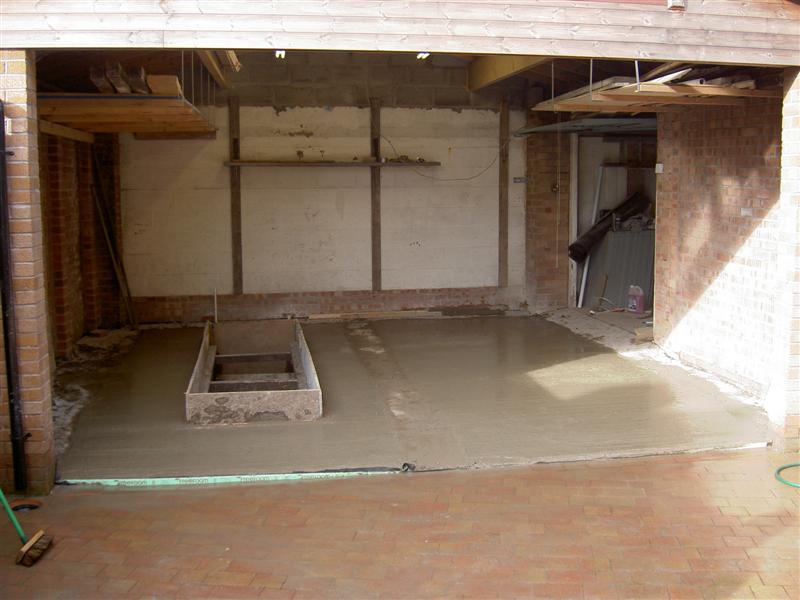
I'm going to get readymix when I fill up the bays as they are cheaper than my builders merchant, but for the time being while I'm getting 1/2 cubes of concrete from my local builders merchant in ton bags dropped into a trailer. At £150 a cube they are expensive but I get to set levels and tit about at my own pace whereas readymix will just throw it in and go (readymix are £125 first cube and £85 thereafter).

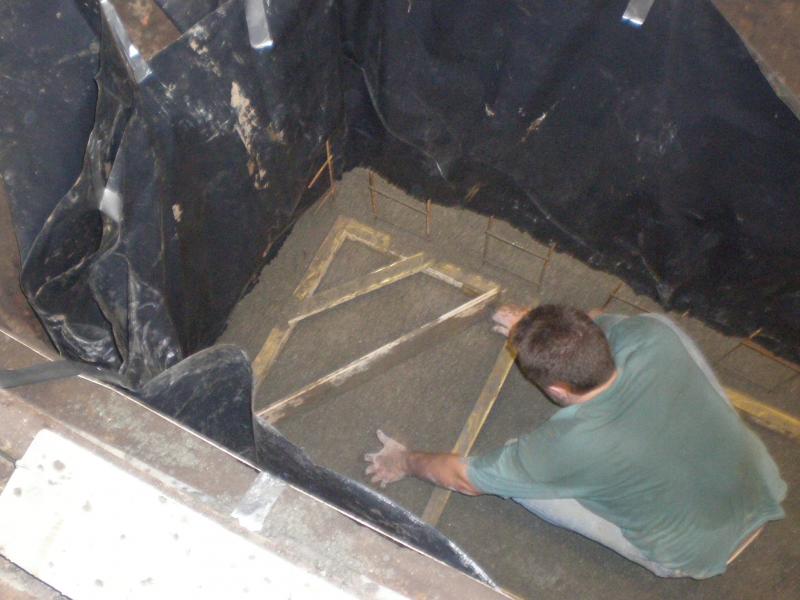
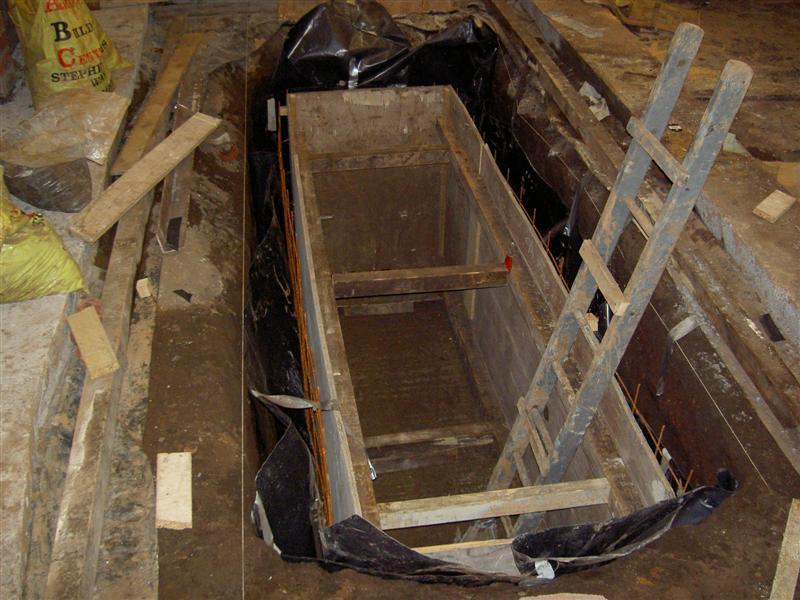
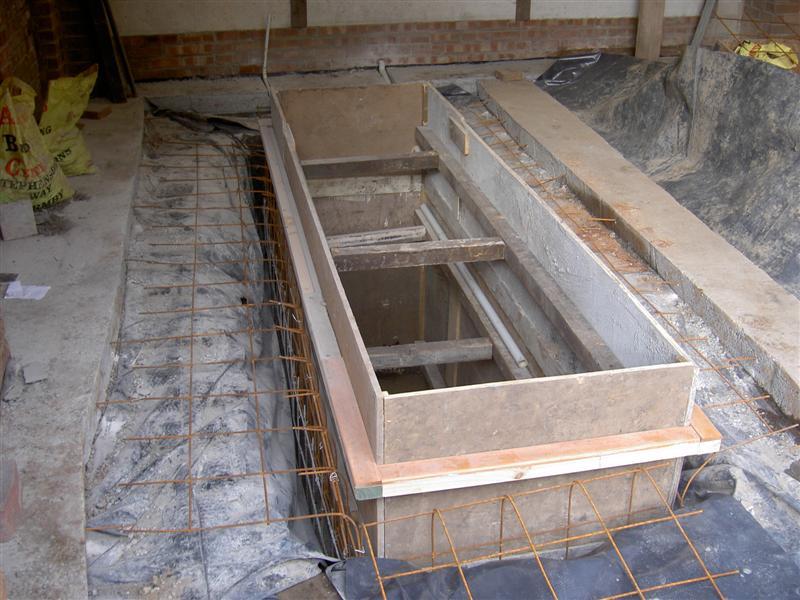
I've now cast the floor and kickers (1/2 cube), and will have the first lift of the walls done on Saturday. Will need to get the mesh tied in to the starters first and then form the mesh round to meet up with the garage floor slab.

It's a slow job as its just me doing it, but I'm so glad I'm out of the mud :)


DIYnot Local

Staff member

If you need to find a tradesperson to get your job done, please try our local search below, or if you are doing it yourself you can find suppliers local to you.

Select the supplier or trade you require, enter your location to begin your search.


Are you a trade or supplier? You can create your listing free at DIYnot Local

 
Sponsored Links
Back
Top