
Enamel for alloy wheel?

Following inspection, I only found one bad spot on the tyre bead seat. This was about 1/4 wheel away from the marked leak location.
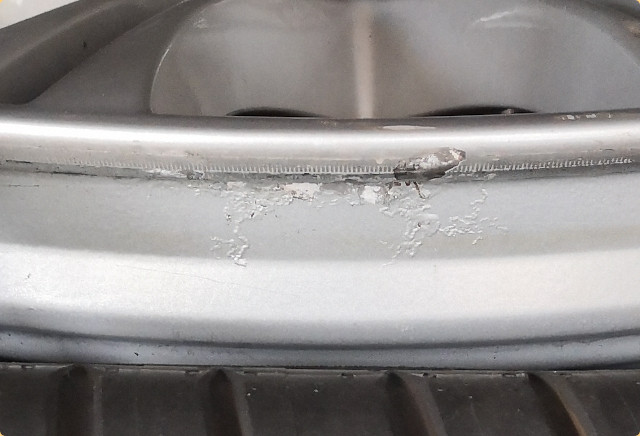
corrosion.jpg


The loose paint and aluminium corrosion powder were scraped away using a wood chisel. The debris was prevented from going into the wheel or onto the bead, and vacuumed away.
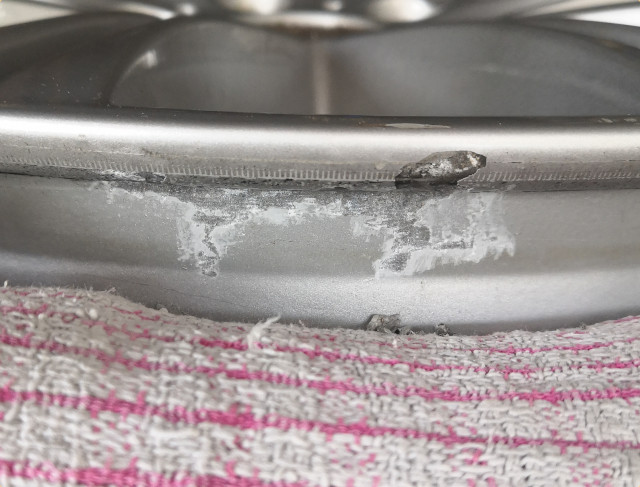
scrape.jpg


The area was washed and then patched up using bead sealant. The rough finish will be flattened by the tyre.
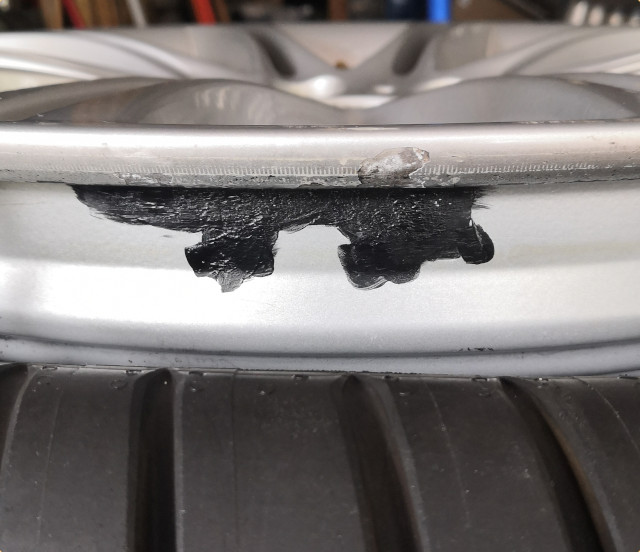
patching.jpg


Since there was no issue near the marked leak spot, sideways progression of a leak elsewhere was suspected. Sealant bands like this were put at regular intervals on the bead seat to block sideways leaking. Another possibility for the leak was debris introduced by the shop during tyre mounting.
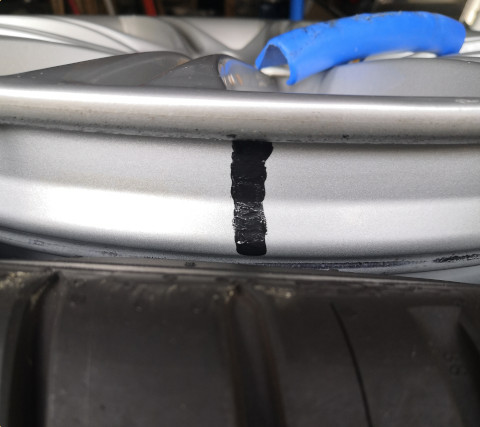
bands.jpg
 
Last edited:
A combination of playing the wheel like a basket ball, and plenty of tyre paste/soap on the bead seat and reachable tyre rubber allowed me to seat the front bead on the first attempt. The reason it worked was that the bouncing produced internal air and mechanical shock waves that pushed+flexed the bead out. The paste assisted the bead to go further than it could otherwise. The tyre rubber was extremely stiff. No form of hand or other bodily manipulation was possible excepts through using the screwfix f-clamps I bought earlier in the project. I went to bed last night thinking I would have a serious struggle on my hands. But luck favoured me and I succeeded with no more front leaks.

I allowed the sealant to cure overnight because I noticed the previously used sealant on the play wheel remained very stretchy and soft after months. There was some risk that insufficient curing could cause the sealant to be easily displaced when rubbed by the tyre during seating.

The leak on the back was significantly more aggressive compared to when I first examined it months ago. With the process now worked out and well oiled, I don't anticipate any drama in dealing with this.

rear-leak.jpg
 
Last edited:
The bead breaker being fairly narrow, breaking the bead wasn't completely straightforward, but good enough. On the first clamp, the bead's mating surface was flipped into the open and the clamping began to slip. The next attempt was to the left of the starting position. Same thing happened. The third attempt was to the right of the starting position. This time, the clamp grip held and the bead was broken.

While the bead mating surface was in the open, the white debris on it was cleaned using a wetted brush. Once that part of the bead was broken, the mating surface was no longer accessible. Inspection and cleaning of the bead was only possible before the bead broke. Similar debris was on the whole bead. This could be the reason for the leak. The debris did not appear to be dried tyre paste because the shop used black paste. Nor did it appear to be dried soap because it was not soapy when wetted. My white paste reverted to being soapy once wet again.

debris.jpg


There was one bad spot on the bead seat along with several developing bad spots. All these were patched. There were also lots of hair-sized scratches. These were lightly patched. There was nothing obviously wrong near the marked leaking spot. I would place the leak at 50% probability caused by debris. Sealant bands to block sideways leaking were also added.

patching.jpg


Here's an experimental patch to deal with external broken paint. I wanted to see how well tyre sealant worked in this application, also to stop the corrosion spreading. Corrosion was infectious affecting all surrounding areas. The wheel cleaned up well. Along with scraping using old credit card, white spirit was effective in completely removing defunct foam pads of balancing weights.

external-patching.jpg
 
Last edited:
Back
Top