

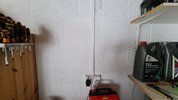
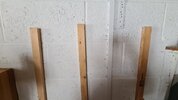
I'm after a bit of advice please. I've picked up a Clarke tool rack and want to fit it to my block garage wall which has an electrical socket and trunking on it, so it needs to be spaced off the wall to clear the trunking.
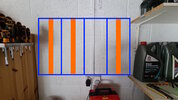
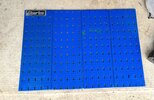
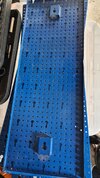
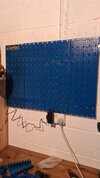
Three out of the four steel rack panels have hanging points on the back of them, so the one without the hanging points can sit in the third position over the conduit and they can all be connected to each other on their vertical edges.
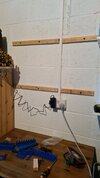
Should I fit three battens to the wall vertically, and attach each panel to that? Or should I fit two battens and then an MDF or similar board to them, and then the rack to the MDF board?
The latter I would imagine would give me more options for a sturdier fixing to hang the rack on to in terms of thickness of material to drill into, and perhaps make it easier to align the fixing positions by allowing me to fit it to the board in advance of it going on the wall.
Or am I overthinking this and there's a much simpler way I've not thought of?
 Thanks in advance.
Three out of the four steel rack panels have hanging points on the back of them, so the one without the hanging points can sit in the third position over the conduit and they can all be connected to each other on their vertical edges.
Should I fit three battens to the wall vertically, and attach each panel to that? Or should I fit two battens and then an MDF or similar board to them, and then the rack to the MDF board?
The latter I would imagine would give me more options for a sturdier fixing to hang the rack on to in terms of thickness of material to drill into, and perhaps make it easier to align the fixing positions by allowing me to fit it to the board in advance of it going on the wall.
Or am I overthinking this and there's a much simpler way I've not thought of?
")