garden wall tile creasing

S

sammoseley

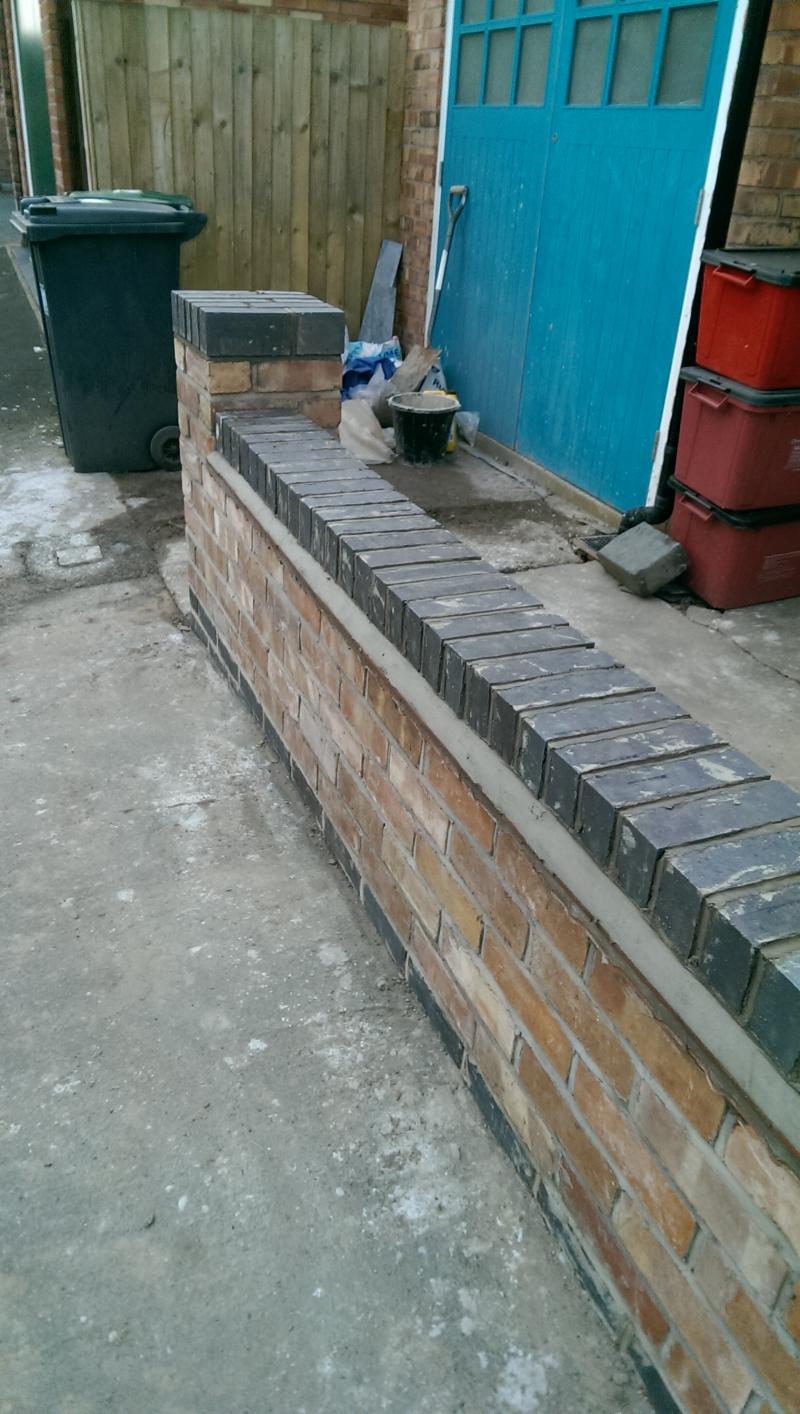
Hi, done garden wall as shown in pic, happy overall as not done a lot of brickwork but the blue brick course on the tile crease was a nightmare! I ran a line on the front edge and tried to keep the back edge level with a level, but found they shifted all over the place and I couldn't get the mix/buttering right so the mortar Squeezed out all the joints like you want, so had to point most of the joints after. I know this comes down to experience but any tips always much appreciated!
Cheers
Sam

 
Sponsored Links
In cooler weather, the best thing to do with blues is lay them then walk away.

Have a cup of tea and a kitkat then have a look to see if things have firmed up.

In the mean time you should have a small pile of muck going off somewhere, preferably one that has been left in the sun or left on a porous surface. This will be ideal for filling/pointing afterwards as it will have firmed up.

You always end up having to fill soldier blues after they have been laid simply because the muck is not contained like when laid vertically i.e. it will slump down and outwards, when you faff about with them.

It is best to lay a lot of blues then have a play with them rather than lay one brick and mess with each one as it is laid.

We use two lines when laying blues. The principal line is the one you obey and lay to, the back like is there for getting the blues level. If for example there are a few short blues then these will finish short of the back line but will still be level with it. Laying without the back line means you end up having to drop a level on the bricks too often, thus causing more smudging.

We often remove the fillet mortar then add some sharp sand and more cement to it. pointing the fillet with this 'improved' mix means that it will not yield shrink cracks in the summer and it will set like bell iron.

Your job looks good. The smudging is normal for blues. It will clean off.

Why didn't you crease the pillar?
 
Cheers noseall
yeah I laid each blue and tried to level each one which caused the others to shift. I thought about using 2 lines, should have done that. Main issue I had was a few of them dropped below level then were a pain to lift up. I think I rushed it as it sounds like it takes time. Yeah the wall looks ok in the pic but you can see the blues are wavy as you look along the top which lets it down.
Didnt crease the pillar as access to house is quite narrow and didnt wasn't it to stick out and catch people. Did crease the 9 inch pillar at the other end.
thanks for the reply and learned a lot from your other posts too over the years :D
Cheers
Sam
 
I usually have a slightly dryer mix for the bed joints and a bit wetter for buttering up. Getting the bed joint right helps so you can push them gently into place. If they are really dirty you can get the worst off when they are just about dry, and then get the film off later.
 
Sponsored Links
Thanks, makes sense
the prob I had was couldn't get the mix to squeeze out the sides even with a wettish mix so guess it's how I'm buttering them or basic lack of experience doing soldier courses!
 
Agree with the others , use 2 lines next time , you can remove mortar stains with brick acid . Looks ok though !
 

DIYnot Local

Staff member

If you need to find a tradesperson to get your job done, please try our local search below, or if you are doing it yourself you can find suppliers local to you.

Select the supplier or trade you require, enter your location to begin your search.


Are you a trade or supplier? You can create your listing free at DIYnot Local

 
Back
Top