Hotpoint WD420 fault

Status
Not open for further replies.
our 3 year old hotpoint aquaries wd420p flashing lights cured (no thanks to hotpoin) but a big thankyou to harry in yorkshire new capacitator fitted machine now in perfect working order total cost£1.00
ben ewen turriff aberdeenshire
 
Sponsored Links
flashing lights problem totally cured (no thanks to hotpoint) but a big thankyou to harry in yorkshire c17 capacitator supplied and fitted locally total cost £1.00
 
hotpoint aquarius wf530 washing machine flash like Christmas tree when turned on for ages for varying lengths of time. More recently stopped working all together, went to error code#9 eprom/setup error (wash enhance and mini load lights flashing).

Thankyou Harry, followed your precise instructions, I replaced domed capacitor for the maplins:VH50E - PC Elect 1000uf 16V(£0.56).

Just got to fix the on/off switch where the misses booted it now.
Nice1. Happy partner and clean family again :) Very great full
 
Thankyou Harry, followed your precise instructions, I replaced domed capacitor for the maplins:VH50E - PC Elect 1000uf 16V(£0.56).

I'd like to echo this. Hotpoint WF321 fixed for 56p - many, many thanks!!!
 
Sponsored Links
Hi all. I have recently had the washing machine do the christmas tree light thing. After reading this forum I took the PCB board out and the C17 capicitor was convex and had a crust around the top.

Replaced it and all is well. Slightly more than 56pence for me. I had to buy a soldering iron!

Thanks a lot

Great tip
 
hi i've got the same problem..flashing light..can i ask for a spare C17 please..thanks
 
I had the same problem that all of the lights on the left were flashing and 2 controller lights across the top were flashing. The on-off button wasn't responding and I wasn't sure what to do.

After phoning the Indesit helpline - they said it was an F15 error and that implied a heating part had gone - however, my machine is a washer only - so their information from Hotpoint (since the took them over - isn't 100% accurate).

However, after following other peoples advise, we took off the PCB (as per last post instructions) and noted where the wires went. A trip to Maplin cost 42p for the new Capacitor (C17 on the circuit board - same as last post recommended), soldered it back on and the machine is working again.

So for quotes in excess of £100 to have it looked at, 42p and 30 mins of work sorted it.
 
Just wanted to add my success story.

I've got a hotpoint wf541 washing machine. Few weeks ago, all the lights started flashing for 30 seconds. After this the machine would work fine. But about 10 days later, the lights would flash constantly with no buttons responding.

Phoned Hotpoint. £105 flat fee to come and fix it.

Came on this forum, read this thread.

Took the computer board out which was awkward but okay. Made a note of where each wire goes that I disconnected from the board.

Removed the C17 cap (mine had bit of rust on top) by using a desoldering wick to remove the existing solder. Then replaced with a new capacitor. I bought one from maplins - item code VH50E. Made sure it went in the right way in terms of polarity.

Soldered the new one on. I watched a couple of youtube videos on how to solder stuff which was very useful.

Put the board back in the machine, reconnected all the wires with the notes i made earlier and hey presto! It's all working fine!

Total cost for me was £17 as I had to buy a soldering iron, solder wire, desolder wick and of course the capacitor itself which cost 56pence!

Thanks to everyone who posted information about this and a big thanks to Rocks1 for all his help!
 
iI have been referred to this section as i have a wt741 thinking it's a christmas tree. will try solution on return from holiday. keep you posted.
 
Adding to HarryM1BYT's description of his circuit board fix for his Hotpoint WD420.

I'm guessing all the Hotpoint range use the same circuit board as my Hotpoint Ultima WT741 washing machine developed the exact same fault.

For the faint hearted who are concerned about doing this fix themselves, I have added some photo's to help guide you.


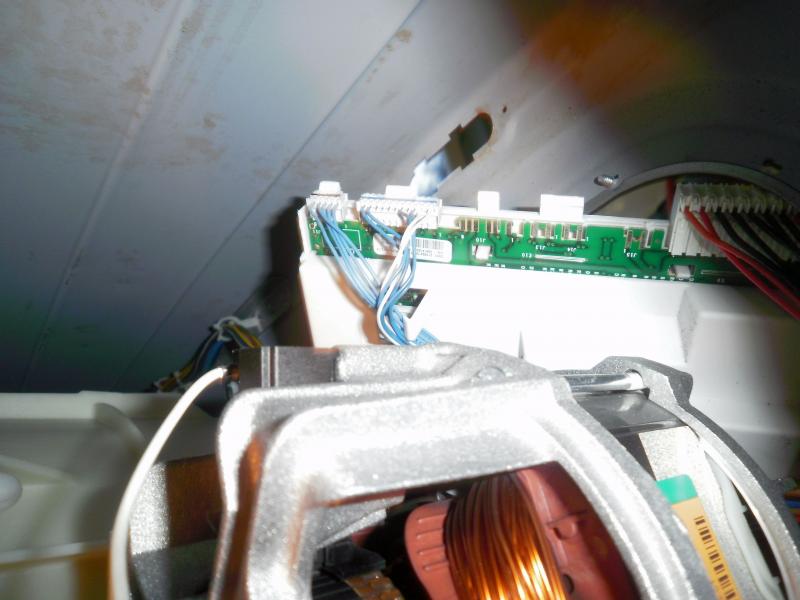
Here are connections 1 and 2 to be unplugged, the board is held in place in the machine by a single screw near the bottom and left hand edge at the back of the machine.


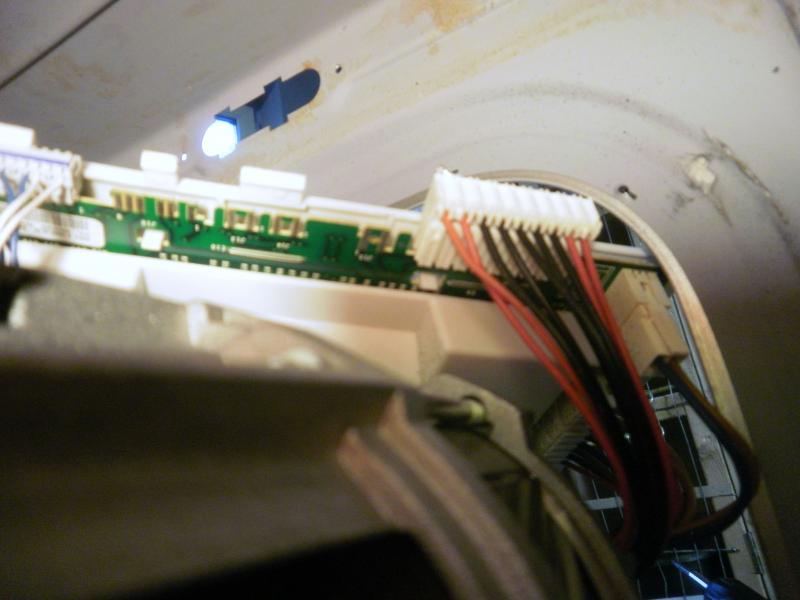
Remove the 3rd connection photoed


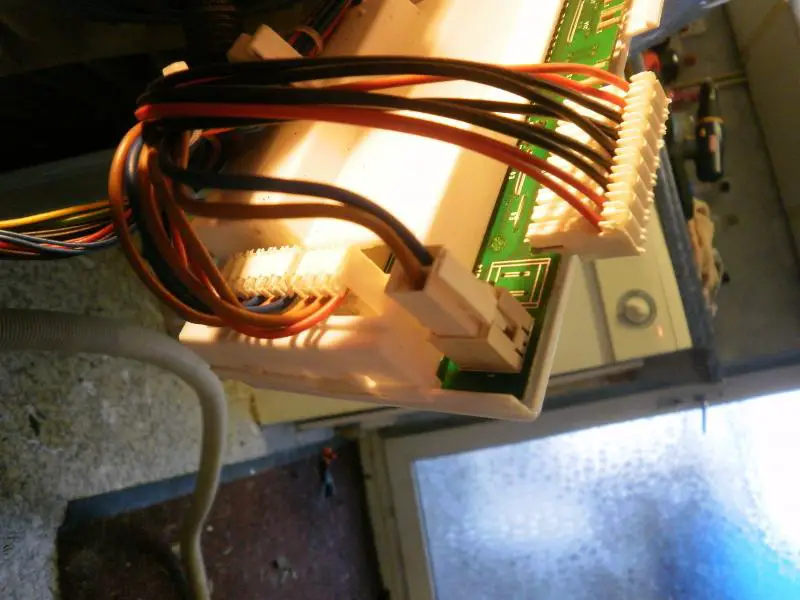
Remove the 4th & 5th connections photoed


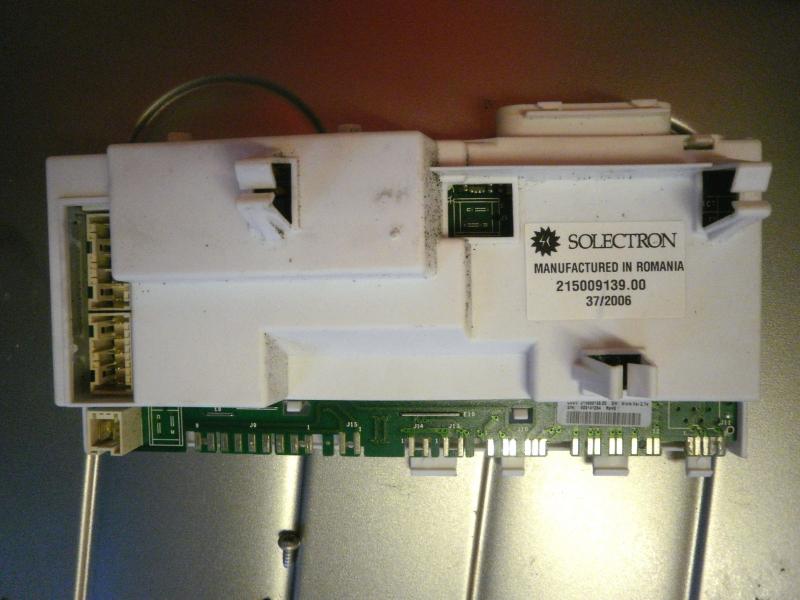
Here is the board still in its protective plastic casing, carefully press in the snap connector tabs along the sides and top edge to open the case.

The prize away two more snap connector tabs holding the circuit board to the case.


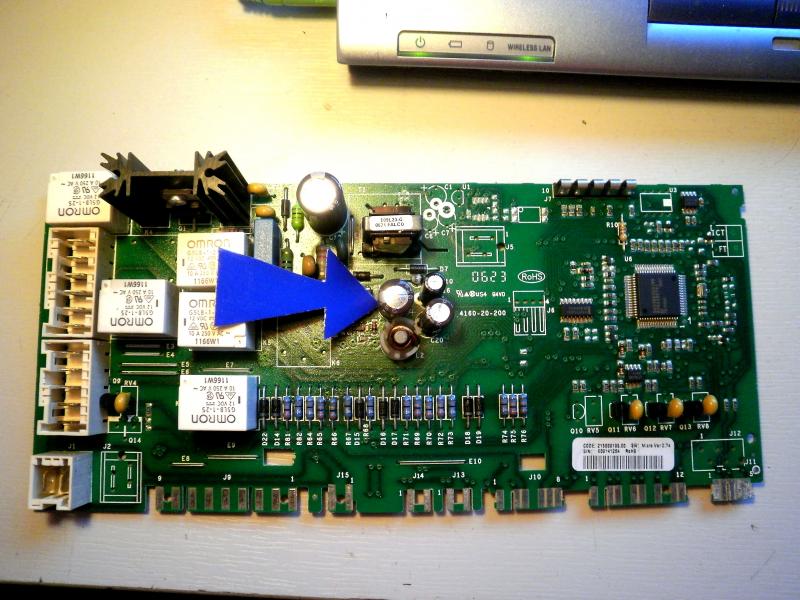
Here is the offending capacitor arrowed in the middle of the board at location C17.


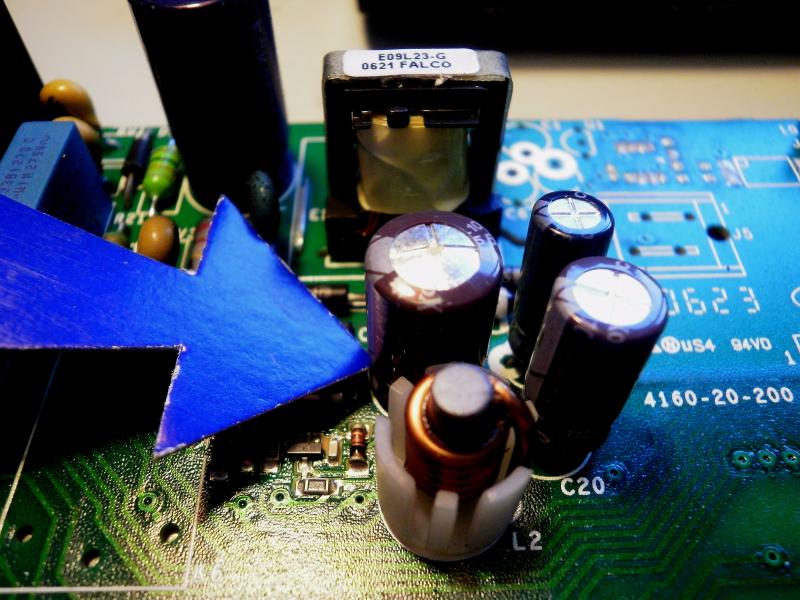
Close up of the capacitor


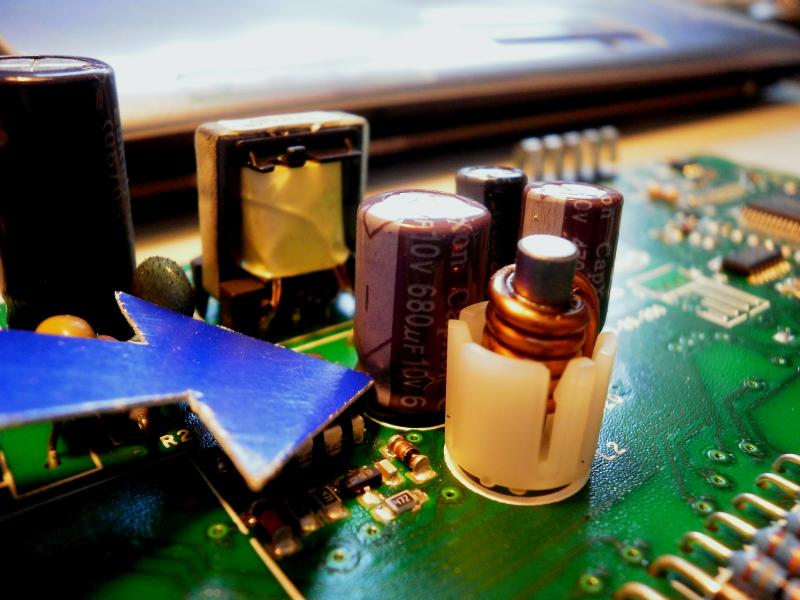
Here you can see as compared to the other capacitors in the group the slight doming of the failed 680mF capacitor.

Note the negative markings in relation to the board.


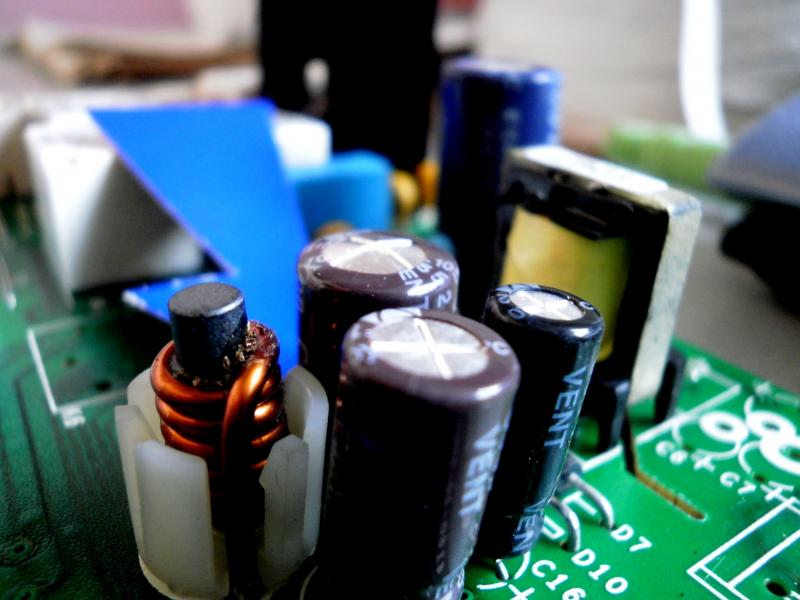
Again from the opposite side of the capacitor group showing the doming of the failed capacitor more clearly.

Simply fire up your soldering iron and while its warming up, locate the two soldered joints for the capacitor on the back side of the board.

While gently prizing the capacitor from the board using a see-sawing motion whilst at the same time simultaneously heating both joints, pull the dead capacitor free from the circuit board!

Locate a new 1000mF 10 Volt capacitor

I found one on an old computer motherboard I had in my loft along with other old circuit boards I keep just in case of emergencies!

Solder new capacitor in place taking careful note of polarity.

Assembly of circuit board back into washing machine is a reversal of removal.

Cost of replacement circuit board £54 . . . . . .

My costs . . . zero!

Hey-presto!

Clean clothes again!
 
Back from the Christmas frovilities. Have ordered my capacitor from ebay. I have chosen the 1000uF 16volt version.
I have no problems with removing the board and replacing the capacitor being of the electrical sort by trade. Only thing which annoyed me is not noticing the capactor failure however it's not something i probably would have noticed anyway. I was looking more for dry joints or hot spots.

Very nice tutorial though.
 
This is a brilliant fix, I found everything very easy to follow. I have a slight problem though, I didn't take note of all the connections to the board unit and might have put back one or two in the wrong place as the machine seems to be stuck on the start cycle; filling and turning slowly but doesn't seem to be heating, but no lights are flashing. Would anyone have any diagram please? btw my model is wf101, thanks in advance
 
How do you know it's not heating if it don't heat it will not stop washing , until you switch it off.
 
How do you know it's not heating if it don't heat it will not stop washing , until you switch it off.

During the first trial wash after the fix I put my hand to the glass as you can always feel a bit of warmth on it but it was cold, and youv' just hit the nail on the head there because I thought that the wash was taking forever! so actually my wife just probably switched it off and did a rinse and spin (which worked fine).
 

DIYnot Local

Staff member

If you need to find a tradesperson to get your job done, please try our local search below, or if you are doing it yourself you can find suppliers local to you.

Select the supplier or trade you require, enter your location to begin your search.


Are you a trade or supplier? You can create your listing free at DIYnot Local

 
Status
Not open for further replies.
Sponsored Links
Back
Top