Ideas for hanging a ceiling fan ?

Joined
4 Nov 2010
Messages
6,129
Reaction score
656
Location
Cumbria
Country
United Kingdom
We have a lounge with a high ceiling - one of those with no attic, just the ceiling following the underside of the roof timbers. In the middle there's a flat strip where it's boarded horizontally underneath the steel ridge beam. From the old attic, I've been able to get access to the end of the ridge beam and can see down the small space - the plasterboard is flush to the underside of the RSJ flange and is fastened at each side to the sloping timbers. At least no problem fishing a cable through :)
I picked up a rather nice, but large and heavy, ceiling fan/light fitting at a local charity shop and want to get it put up.
I was hoping there'd be some battens running across to screw into - but no such luck :(
The RSJ flange is a little over 4" wide, and the mounting holes in the fan hanging bracket are slots allowing a range of around 3½ to 4½" between centres. That does mean that I could (theoretically) put a screw either side of the flange - but providing something for the screw to go into would be problematic, working 7' down a narrow gap (must be scope for gynaecologist or proctologist jokes there).
The options I've come up with so far are :
  • Nail a round piece of wood (which would end up as a visible pattress) through the plasterboard to the RSJ - and then screw the hanging bracket to the pattress. But I don't know anyone with a Hilti to nail it on with so that's out, and there's also the issue that there's 2off T&E cables running along there and I'd be "a tad annoyed" if a nail went through one (or both) of them).
  • Drill and tap the flange, and either mount the bracket direct or use a pattress. Doable, but not easy working on top of ladders that are probably a bit short for the working height.
  • Cut a hole in the plasterboard either side of the flange, manipulate some bits of batten in there, then screw up a piece of wood (same visible pattress as first option) so the battens clamp down onto the flange. The pattress would need to be big enough to cover the holes in the plasterboard.
  • The issues of working at that distance notwithstanding, the above but manipulating the battens down the gap and somehow positioning them in the right place.
Any other ideas or comments ?

Oh yes, here's a photo from the estate agents brochure, unfortunately it doesn't show the highest bit of the ceiling I'm referring to.
14 Holly Bank - Lounge(small).jpg
 
Last edited:
Sponsored Links
bolts.jpg


J bolts hooked over the edge of the flange, via tiny holes in the plasterboard.
2 each side. Some form of metal plate / bracket will be required in the centre under the beam to attach the bolts to and provide something to fix the fan bracket to.

With proper positioning there should be room to conceal the bolts and bracket behind the fan covering so nothing will be seen after installation.
 
Last edited:
Sponsored Links
J bolts hooked over the edge of the flange, via tiny holes in the plasterboard.
2 each side. Some form of metal plate / bracket will be required in the centre under the beam to attach the bolts to and provide something to fix the fan bracket to.
With proper positioning there should be room to conceal the bolts and bracket behind the fan covering so nothing will be seen after installation.
Now that's something I hadn't thought of. Can't see any way to put the bolts through without making a slot at least as long as the overall width of the hook.
Caddy do a range of clips that fit on rsj either by knocking on or tightening a peice of studding, using them would leave 2 protruding fixed studs, to either fit a wooden patress or possibly just the fan bracket.
Britclip do them as well, in several styles. I just can't see how I'd get into the space above the ceillng to tighten the bolt and locking nut.
Tie the cat to the fan.
If that was a joke then it was in rather bad taste; if it wasn't a joke then you really are a sick person.
 
Can we have a picture of the garden, the bath and the front door too please?
They are about as useful as the Op pic. :)
 
When designing the method of fixing take into account that a fan like this

ceiling fan.jpg


will exert a twisting force on the attachment as well as the vertical force of it's weight.
 
Britclip do them as well, in several styles. I just can't see how I'd get into the space above the ceillng to tighten the bolt and locking nut.

.

you dont, you use it upside down, throw the bolt away and screw in stud, as you screw it in from below it will clamp itself
 
When designing the method of fixing take into account that a fan like this ... will exert a twisting force on the attachment as well as the vertical force of it's weight.
Indeed, though the torque isn't large - it's easy to hold it up in one hand (for testing purposes), the hardest part of that is holding it far enough away to avoid being hit by the blades :eek:
What's probably more important is that they tend to wobble a bit - how much depends on how well balanced the fan assembly is.
you dont, you use it upside down, throw the bolt away and screw in stud, as you screw it in from below it will clamp itself
Ah, yes I see what you had in mind. Specs on the Britclip ones are here, I'd definitely have to use a patress - both to hide the holes needed in the plasterboard, and to hide the depth of the bracket. But I think that's probbaly the best idea so far.
 
Well, I hadn't realised it had been quite that long, SWMBO has been commenting that the fan would never get put up :unsure:
Anyway, I was informed a few weeks ago that I've decided the living room is getting decorated this year - so I got back to thinking about how to get the fan up. With a small drill I established that it's just plain plasterboard (and accurately located the RSJ), no insulation, and also decided that I wasn't going to be decorating this room off ladders - I'm not that young, fit, and ... daft :eek: So got a small tower in for the job.
Once I could work off a sensible platform, I had another measure and decided to just drill and tap two holes. Still needed a bit of a pattress to hide where the cable comes around the side of RSJ flange.
20220731_172721.jpg

20220807_183300.jpg


At the moment it's still using the remote control module (hence black aerial wire dangling) - it's my plan to do some chasing for other services and get rid of the remote, that might involve some "discussion" with SWMBO :rolleyes:

20220807_190700.jpg


I suspect it's not been well treated between coming off someone else's ceiling and me getting it. When I got the blades back on (I took them off for ease of storage and handling), it was a tad out of balance. The manual on dynamic balancing says to gently bend the blade attachment brackets to get them all in the same plane - I had a little success, but didn't want to break one as that would be "unfortunate".
Must have taken an hour fiddling with the clip and weights, but it now runs with very little wobble with balance weights on top of two blades.

20220808_122257.jpg


20220808_123123.jpg


One of the bulbs has blown. I thought they might be maybe 20W each - pulled the blown one out and they're 60W :eek: So LED replacements for those - not having 180W for SWMBO to leave on all the time :rolleyes:
 
One of the bulbs has blown. I thought they might be maybe 20W each - pulled the blown one out and they're 60W :eek: So LED replacements for those - not having 180W for SWMBO to leave on all the time :rolleyes:
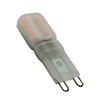
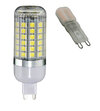
I had the same problem, the G9 bulb, they have glass covers over the bulb to stop hot bits falling if the break when they fail, and stop the harmful rays, so size of LED limited to fit inside the glass cover, G9-small.jpgbut the light output is low, and there is no room in the package for smoothing capacitors or leak resistors, so electronic neutral less switch would not turn them fully off, and when on there was a shimmer, I found bulbs which did have smoothing, and leak resistors in them G9-comp.jpgbut the covers no longer fit, OK does not need the cover, as not likely to explode showering white hot bits on the bed linen, or emit harmful waves, but they change the whole look of the lamp.

Lucky I said even before she bought it, I don't like G9 lamps, so she has not complained, she knows all she will get is I told you so, but we have so many G9 bulbs that we bought before finding ones that worked. And in a bedroom the 6 watt LED bulbs are a bit of over kill, think we have 5, so 30 watt LED in a bedroom? But the 2.5 watt was the other extreme, 12.5 watt was just enough, in your case 7.5 watt for that room would be silly, hope they are not G9 bulbs under the covers?
 
If I've read the description right, these are G9 bulbs - 9mm between centres for the contact loops.
20220809_073519.jpg


The shades/diffusers are just that. With open ends they aren't going to stop anything falling out if the capsule explodes.
With a very quick search I found (at B&Q) these at 450lm - so 1350lm for 3 of them. It's not going to make the room really bright - but we have the original 4 uplighters for that. They originally had 120W R7s lamps, I found some nice Phillips R7 14W dimmable and modified the fittings to take them (got the R7 lampholders just before Maplins went under) - now SWMBO complains that they don't go yellow as you dim them, but I'll take that over running ½kW of lights.
Must admit, that is one thing I miss about LEDs - with a few exceptions, they just don't dim the same. Funny isn't it - if we were used to LEDs that don't change colour much when dimmed, who would accept horrible lamps that didn't stay white when you dimmed them. Oh well, nostalgia isn't what it used to be :rolleyes:
 

DIYnot Local

Staff member

If you need to find a tradesperson to get your job done, please try our local search below, or if you are doing it yourself you can find suppliers local to you.

Select the supplier or trade you require, enter your location to begin your search.


Are you a trade or supplier? You can create your listing free at DIYnot Local

 
Sponsored Links
Back
Top