Lath partition wall to bathroom - repair

Joined
1 Feb 2024
Messages
9
Reaction score
0
Country
United Kingdom
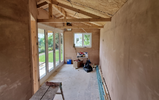
I'm renovating a bedroom with original Victorian lath and plaster walls. Due to be reskimmed. I noticed a bodge in one corner - bulging pink gypsum patches covered in some kind of waterproofing paint - and pulled at them. Lo and behold, it's small rectangles of thin plasterboard, nailed into the original lath with short, very loose nails. The other side of this partition is a shower, which wasn't properly waterproofed: you can see cement board at the top (hurrah), but ordinary plasterboard at the bottom (what?!), which had just been gypsum skimmed to a shiny finish and then tiled over. lt moves or swelled, cracked the grout lines between tiles, and got soaked. So that shower needs redoing, with Hardie backer and tanking (floor to ceiling) this time. The whole bathroom will get a redo, while we're at it. Ditto the sodden ceiling below.

So, coming back to my bedroom, back on the other side of that partition wall:

2024-02-06-12-56-11-265.jpg

I've removed the loose lime plaster. The rest of the wall has a bit of give/bounce, but not too bad. So: do I cut the plaster away a bit more, until I have a nice rectangular opening, pyt in some rot-proofed noggings, screw in moisture resistant plasterboard (properly fastened to the studs this time), make it all level with the surrounding plaster (either with gypsum, or lime plaster?), and then let the plasterer skim over the top of everything? Or do I go a bit more drastic, and redo the whole wall in plasterboard?
 
Sponsored Links
If you redo the whole wall in plasterboard, will you still get a plasterer in to skim over? I've never been happy with my amateurish plasterboarding with taped and filled joins; always found it better to have skimmed over and that isn't a DIY job (for me). If you are getting a plasterer in anyway, your second option would also allow you to easily re-site that surface-mounted socket on the skirting higher up in a plastic backbox suitable for plasterboard.

However if you don't want to call in a plasterer, which I could well understand could be difficult or expensive or both for such a small job depending on where you are, then your first option would be fine but the finish would depend entirely on how well you can level and blend in the edges. If not perfect after your best efforts, you might consider lining the wall with thick lining paper before painting or wallpapering.

Whatever, I would not bother with treated timber. Fix the leak(s), as you plan, and untreated timber will last well.
 
I've recently had a similar situation - I was originally going to patch, but the more I tried to get a neat edge to blend in the plasterboard, the more the lime plaster became loose!
I took the lot down and re-boarded with tape and fill - for me, it was worth the hassle and I'm pleased with the result.
And your wall is reasonably sized to do this.

As for skimming, skimming gypsum over lime plaster, in my opinion is a bad idea.
The lime is breathable and has different material characteristics to the gypsum. Wherever my lath and plaster has been over-skimmed (by the previous owner), the plaster has blown.
 
A thin skim of gypsum is pretty vapour-permeable. I've often suspected (albeit without solid evidence either way) that cause and effect are reversed: old skims go over areas of lime that were already problematic; the skim is a symptom, not a cause.

At least on internal walls, anyway!

If I take down the whole lathe and plaster, foes that trigger anything under building regs? (Fire/soundproofing... Doesn't make much sense for a partition wall adjoining a bathroom...)
 
Last edited:
Sponsored Links
Lime is soft and flows so you almost never see cracks. One old (1863) house I lived in had lime walls, when the paper was removed I ended up with lots of pock marks, polyfilla sort of looked smooth, but when the lining paper was applied it all popped loose out of the soft lime and looked horrible. had to redo it with lime, that at least stayed attached. so like the others say make the whole wall gypsum or lime, dont mix them, they dont sit well together.
 
Lime is soft and flows so you almost never see cracks. One old (1863) house I lived in had lime walls, when the paper was removed I ended up with lots of pock marks, polyfilla sort of looked smooth, but when the lining paper was applied it all popped loose out of the soft lime and looked horrible. had to redo it with lime, that at least stayed attached. so like the others say make the whole wall gypsum or lime, dont mix them, they dont sit well together.

I am a decorator.

I have used powder based fillers over loads of lime plaster walls (solid and stud). I can't honestly recall those fillers blowing on the walls once I line them. Did you size the filler first?
 
If it was mine, I'd replace the missing laths, and replaster the missing area with lime putty plaster - I find it very easy to use, and you've a lot more time to play with it than you'd have with gypsum...
 
I am a decorator.

I have used powder based fillers over loads of lime plaster walls (solid and stud). I can't honestly recall those fillers blowing on the walls once I line them. Did you size the filler first?
It was sized then filled, and the blowing occurred while papering, as I slid the paper to final position loads on bits of filler just slid with the paper, not all of it, just enough to ruin the whole thing.
 
It was sized then filled, and the blowing occurred while papering, as I slid the paper to final position loads on bits of filler just slid with the paper, not all of it, just enough to ruin the whole thing.

Sorry, I wasn't doubting you, but I suspect that something else was going on- by that I mean that the filler should have been fine.
 
Now is the time to learn DIY skimming skills! - nice little wall in a bedroom which will undoubtedly be partly hidden by stuff.

Rip it all off. Get some new PB and screw it to the studs, adding any noggins over joints you need to. Scrim the joints. Go buy a big yellow bucket and a whisk (or hire a whisk), a hawk, a bucket trowel, and a not-too-expensive plastering trowel. I would use multifinish, others might use board finish. Watch some you tube.

Once you have learned to mix up the mud to the consistency of melting ice cream and found it will stay on the hawk even when the hawk is upside down, you're cooking on gas. For a small wall like that time isn't a problem. I'm no plasterer but I'd DIY that no problem. Once you've discovered you can do small areas to a reasonable standard it'll be a very useful skill.

It may not be up to pro-plasterers standard, but I can almost guarantee you'll get a better finish than trying to patch up the holes. What have you got to lose except a very small investment in some tools?

I am a professional decorator. I tried to plaster a wall 30 years ago- I am unlikely to ever try again.

Admittedly, it was back to brick rather than plasterboard.
 
Admittedly, it was back to brick rather than plasterboard.

never tried that but I suspect it is a load more difficult than getting 2-3mm of skim on fresh plasterboard. I'd tried once and made a mess but then had another project where the finish wasn't critical so had another go and found I could make an acceptable finish (to me, anyway - a pro plasterer probably wouldn't agree). If you don't try you'll never learn. This is the biggest job I've done....
 

Attachments

  • gardenroom_skim.png
    gardenroom_skim.png
    1.1 MB · Views: 20
Last edited:

DIYnot Local

Staff member

If you need to find a tradesperson to get your job done, please try our local search below, or if you are doing it yourself you can find suppliers local to you.

Select the supplier or trade you require, enter your location to begin your search.


Are you a trade or supplier? You can create your listing free at DIYnot Local

 
Sponsored Links
Back
Top