We have a large gulley which had always had problems with leaks. A few years ago, and at great expense we had it totally overhauled with new lead, an increase in the fall and an expansion point added.
The plumber that did the work came well recommended, and clearly knew what he was doing.
Since then the gulley has coped admirably with torrential rain, but on the 3/4 times when we have had thick snow it has leaked when it has thawed. I had assumed that it was down to ice dams, and was determined to witness where it was coming in with the next thaw. This was last Saturday.
As the damp began to appear in the spare room I began to watch in the attic space, expecting to see water dripping back through the Rosemary tiles (there is no felt). But nothing ...
The only conclusion I could make is that the water was finding it's way through the lead itself, and the fear was that the lead had failed. After a while a damp patch appeared on one of the purlins that the lead is wrapped around. When I pushed a plastic marker through the tiles at this point it coincided precisely with the point in the lead where it overlaps.
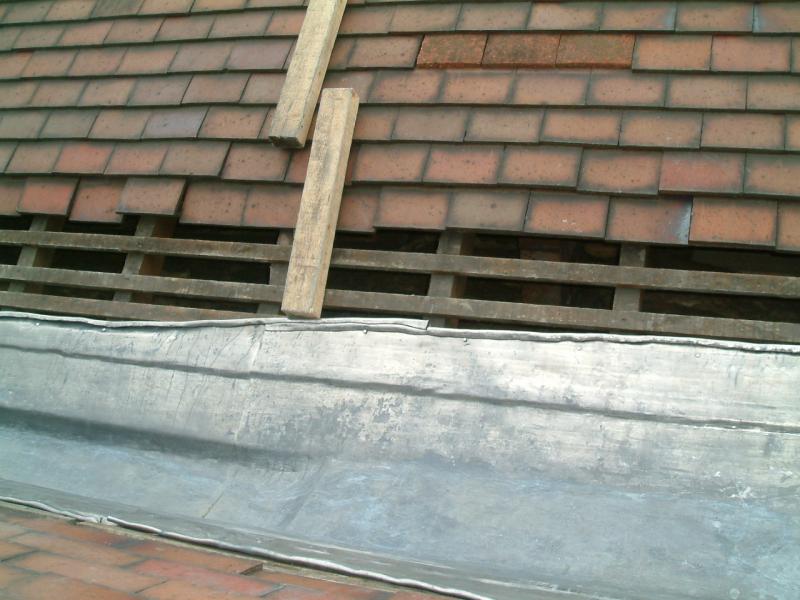
I can only imagine that after heavy snow, thawing snow is icing up and squeezing itself back through the two layers of lead. It overlaps for about 12 inches.
Does this sound a sensible reason? If so, I could imagine that some flashing tape on the join might just stop ice and thawing water from travelling upwards at this point. I hate the idea of using flashing tape since this is how the previous house owners bodged it, but since it's not really making a temporary repair but just adding a defence against occasional travelling ice I would be willing to use it.
Any suggestions?

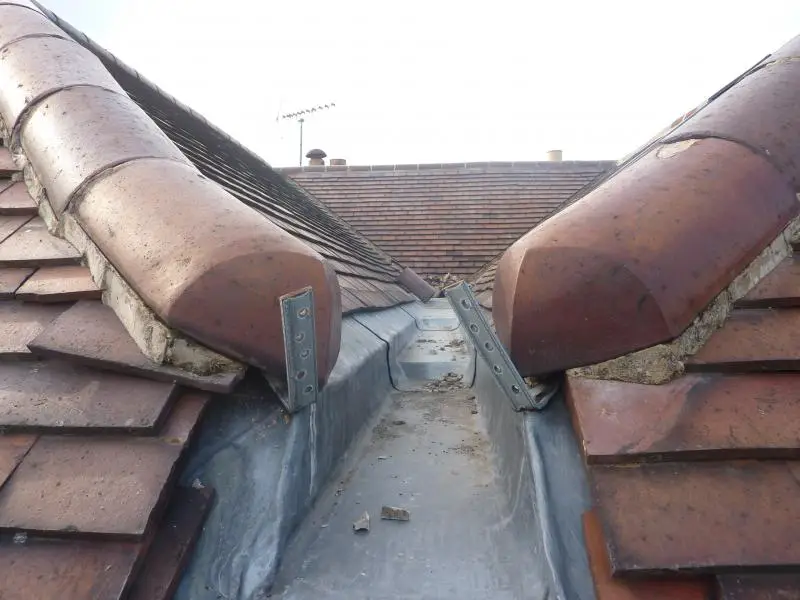
From left to right just after new lead was installed in 2008, and just before tiles were replaced:
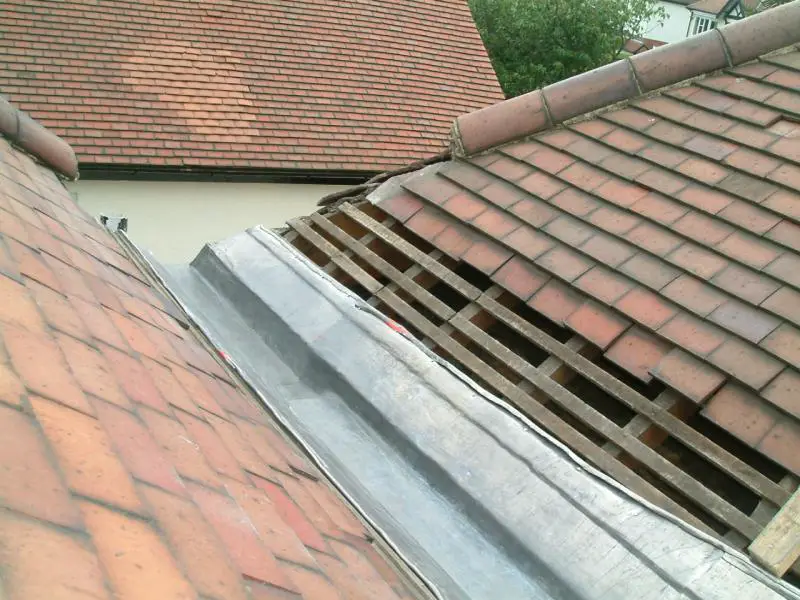
The picture above is where the problem is. Where the lead overlap, about a metre from the end is where the water is getting in after heavy snow. I suspect that ice sits in the bottom metre and forms a dam in the gulley and when it starts to melt the water is unable to fall off the end and squeezes back through the two layers of lead.
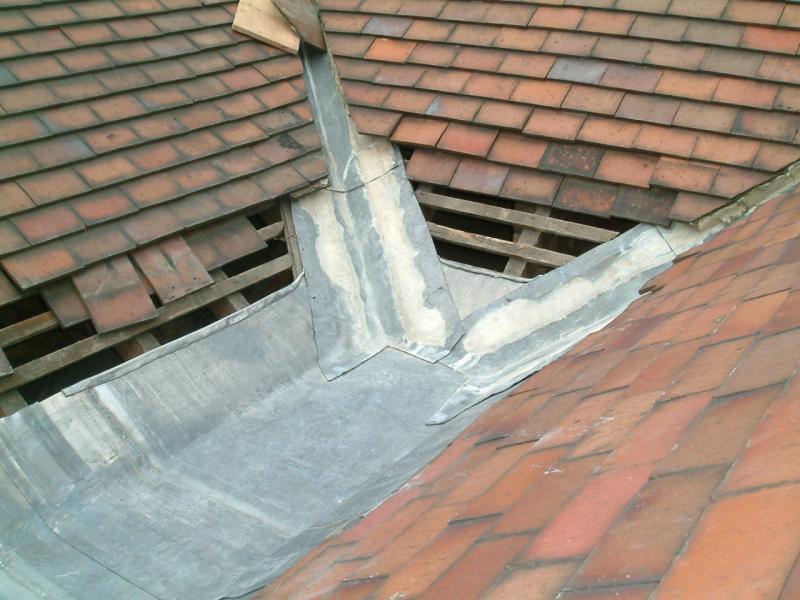
There are no problems with the centre and right of the gulley, or the valleys.
The gulley is accessible through a Velux window from the attic.
The plumber that did the work came well recommended, and clearly knew what he was doing.
Since then the gulley has coped admirably with torrential rain, but on the 3/4 times when we have had thick snow it has leaked when it has thawed. I had assumed that it was down to ice dams, and was determined to witness where it was coming in with the next thaw. This was last Saturday.
As the damp began to appear in the spare room I began to watch in the attic space, expecting to see water dripping back through the Rosemary tiles (there is no felt). But nothing ...
The only conclusion I could make is that the water was finding it's way through the lead itself, and the fear was that the lead had failed. After a while a damp patch appeared on one of the purlins that the lead is wrapped around. When I pushed a plastic marker through the tiles at this point it coincided precisely with the point in the lead where it overlaps.
I can only imagine that after heavy snow, thawing snow is icing up and squeezing itself back through the two layers of lead. It overlaps for about 12 inches.
Does this sound a sensible reason? If so, I could imagine that some flashing tape on the join might just stop ice and thawing water from travelling upwards at this point. I hate the idea of using flashing tape since this is how the previous house owners bodged it, but since it's not really making a temporary repair but just adding a defence against occasional travelling ice I would be willing to use it.
Any suggestions?
From left to right just after new lead was installed in 2008, and just before tiles were replaced:
This is the left side of the gulley.
The overlap here, about a metre from the end is where the water is getting in after snow. I...
The picture above is where the problem is. Where the lead overlap, about a metre from the end is where the water is getting in after heavy snow. I suspect that ice sits in the bottom metre and forms a dam in the gulley and when it starts to melt the water is unable to fall off the end and squeezes back through the two layers of lead.
There are no problems with the centre and right of the gulley, or the valleys.
The gulley is accessible through a Velux window from the attic.