Rewire an old light fitting

Joined
18 Aug 2011
Messages
51
Reaction score
0
Location
Cheshire
Country
United Kingdom
Hiya, I'm hoping someone can offer some advise.
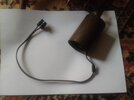
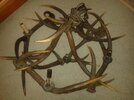
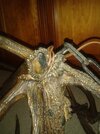
I have an old light fitting and was wondering if someone could tell me if it needs rewiring? I own a multimeter but I'm not sure how to test to see if the wires are functioning. It's a chandelier type set up with wires connecting to several arms.
Also there only appears to be 2 wires? How would they be connected to a 3 wire set up?
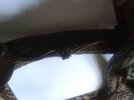
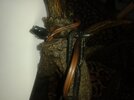
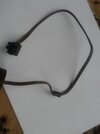
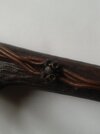
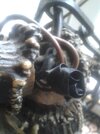
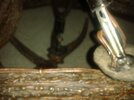
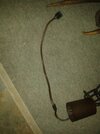
I've added a few photos. The first shows the wires to the ceiling. The second a connector used to connect to different arms and the third a strange one a connecter with tape around it.
 

Attachments

  • 20231206_123144.jpg
    20231206_123144.jpg
    160.6 KB · Views: 77
  • 20231206_123201.jpg
    20231206_123201.jpg
    155.7 KB · Views: 74
  • 20231206_123241.jpg
    20231206_123241.jpg
    180 KB · Views: 81
Sponsored Links
Come on - need better pictures than that.

The second one is to dark and blurred to make out and the third looks like you are tying up a crocodile with the wires.
 
Think that is as good as it's going to get sorry
 

Attachments

  • 20231206_125604.jpg
    20231206_125604.jpg
    149.2 KB · Views: 66
  • 20231206_125721.jpg
    20231206_125721.jpg
    157.1 KB · Views: 65
  • 20231206_125803.jpg
    20231206_125803.jpg
    217.5 KB · Views: 66
Sponsored Links
A pic of the whole light fitting would be very helpful it is hard to make out what's what from those pictures. From what we can see though, the tape joints are not good.
 
Come on - need better pictures than that.

The second one is to dark and blurred to make out and the third looks like you are tying up a crocodile with the wires.
Struggling with English again EFL?
 
I've been let down by 5 electricians so far who just didn't show and the only one that did tried to prise off one of the staples holding a wire with a penknife and when that didn't work said he would have tape the new wires to the piece.
Could someone tell me if there is a way to test that the wires are working with a multi-meter.
The last photo shows a connector from the main piece to the bit that connects to the ceiling. Might it be okay to just replace this piece?
 

Attachments

  • 20231207_110827.jpg
    20231207_110827.jpg
    247.2 KB · Views: 54
  • 20231207_110842.jpg
    20231207_110842.jpg
    189.2 KB · Views: 57
  • 20231207_110934.jpg
    20231207_110934.jpg
    336.5 KB · Views: 58
  • 20231207_110957.jpg
    20231207_110957.jpg
    333.2 KB · Views: 56
Apologies again for the poor photos. It's the best I can do with my phone that is over 12 years old sorry.
 
Looks like a typical continental hack job from the 50s or early 60s. Flat two-core flex nailed to the body of the light and exposed choc blocks. I‘d suggest doing everything over, possibly including the sockets, using all double insulated flex and making sure all connections are inside some kind of enclosure. Earthing may or may not be required, most likely the canopy that goes onto the ceiling will need to be earthed even if nothing else does.
 
I had another close look at the pictures on a larger screen and it's pretty much as I thought. The sockets are faux candle ES14 sockets that are considered double-insulated if the candle sleeves are fitted (i.e. they don't need to be earthed). I'm not a huge fan of those as the sleeve can be removed without any tools revealing barely shrouded live terminals but they're legal and still sold like that in every lighting supply store. So the biggest issue are the wires and connections. I'd suggest replacing all the wires and fixing the new flex to the antlers using strong thread and possibly the occasional dab of hot snot. Try to run all individual cables straight up to the canopy and put one larger choc block up there. Inside the canopy you should find a metal bracket that connects the chain to a hook in the ceiling, that should have one or two earth terminals. If you can't get all the individual cables into the canopy you'll need some kind of unobtrusive proper junction box on the light itself.
 
The regulations say "A circuit protective conductor shall be run to and terminated at each point in wiring and at each accessory except a
lampholder having no exposed-conductive-parts and suspended from such a point." so a chandelier does not NEED an earth wire, although when made of metal most would have one.

It seems yours is made of bone? But to have choc blocks would not look nice, and the whole aim it to look good, to wire anything neatly above ones head is hard, so I use a plug in ceiling rose for my chandeliers so I can wire on the floor, then offer it up and plug it in, but ceiling roses I have used seem to no longer be made, but there are others.

Before 1966 you were allowed to have no earth to the lights as long as "Lighting fittings using filament lamps installed in a room having a non-conducting floor, mounted at such a height that they cannot readily be touched and are out of reach of earthed metal." although today it only allows the suspended part to have no earth, I think the "cannot readily be touched" is still what we are looking at, I had a raise and fall lamp in one house (with a high ceiling, could never do it here) and the lamp had a loop of metal to grab hold of to pull it down or lift it up, in that case clearly it should have been earthed, although it was not, bought from Habitat before they gave up trading in UK around 1975 I think.

So you have to consider will anyone be likely to touch the chandelier with it turned on? With proprietary made chandeliers you often find plastic tubes which carry the cables inside the metal parts, so they are double insulated, braided lighting cable today tends to be three core.
 
I'd use brown flat two-core flex (H03VH-H) and route all the six (my guess, can't really see how many sockets there are) flexes up the chain into the brass canopy that covers the connections on the ceiling. Otherwise you'd need to figure out a way of neatly and safely splicing those wires at the light itself, either a brown or black junction box or possibly some sort of heat-shrink splice.
 
I fully agree with Ragnar_AT
Looks like a typical continental hack job from the 50s or early 60s. Flat two-core flex nailed to the body of the light and exposed choc blocks. I‘d suggest doing everything over, possibly including the sockets, using all double insulated flex and making sure all connections are inside some kind of enclosure. Earthing may or may not be required, most likely the canopy that goes onto the ceiling will need to be earthed even if nothing else does.
It appears to be a collection of "Antlers" assembled together to form a type of "Chandelier".

There is one piece of evidence that E14 (Small Edison Screw)
or
B15 (Small Bayonet) Candle Light Holders - with stem - were used originally.
An organization such as
https://www.kingschandeliers.co.uk/...der-with-stem---ses-e14---total-height-100mm/
appears to stock suitable replacement items - at a cost.

use all double insulated flex and making sure all connections are inside some kind of enclosure.

Such an "enclosure" could be the "stem" of the "candles", with the wires of the cables joined at the "Candle" Lamp Holder.
(See the above reference.)

NOTE:- If you use Edison Screw Lamp Holders you MUST make sure that the LINE wire goes to the Centre terminal of each Lamp Holder.
Earthing may or may not be required, most likely the canopy that goes onto the ceiling will need to be earthed even if nothing else does.
Earthing will be required if any new item includes metal in its supporting construction.
 
Hiya, thank you all so much for your replies.
Not sure if it will help any. I've added a couple more photos. The first shows the wire that runs from all 5 arms. It goes into connector (A)that is taped up and another wire comes out from that connector (A) and up to the ceiling connector (B) (sorry for over using the word connector)
Could a possible solution, be that rather than replacing all the wire that runs to each of the 5 arms (as that could be tricky to do neatly) Could I just find someone to replace the wire that comes out of connector A and goes into connector B? I've wrote on the photos to hopefully make it a bit clearer.
connectors.jpg
ceiling.jpg

I have seen the replacement candlelight holders at Kings Chandlers and they would be a good replacement if they needed replacing. I'm not sure if it is made of bone or resin. The only metal I can see is the chain and the drip trays under the candles the rest is plastic.
I'm still having trouble finding someone to do it but hope if the job is a bit simpler it might help :)
 
Following on from my last post I found some Braided 3 core flex. If the above is possible would this be okay to use?
 

DIYnot Local

Staff member

If you need to find a tradesperson to get your job done, please try our local search below, or if you are doing it yourself you can find suppliers local to you.

Select the supplier or trade you require, enter your location to begin your search.


Are you a trade or supplier? You can create your listing free at DIYnot Local

 
Sponsored Links
Back
Top