Hi folks,
I thought I should start documenting what is probably one of the slowest builds on this forum.
Over the past few years I’ve found diynot to be a fantastic resource for any help I’ve needed, so this thread is here to assist others and show the regular contributors exactly what project all my various questions have been for!
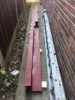
We bought our place in late 2012 as a very ugly 1979 detached property which needed a total refurb. The area was nice and the house has a fair bit of land with it (relatively for the area) and we thought it had potential. All the garden both left and right in the first photo is ours.


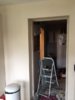
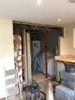
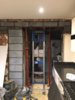
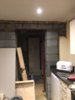
Fast forward 9 months and the inside was pretty much renovated (including 3 months of living upstairs!). Turned out ok inside but the refurb left the old kitchen, boiler, etc in situ as we had decided at this point we wanted to extend the house on the left hand side (when looking from the front), which would ultimately relocate the kitchen.


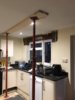
We then had to get the house remortgaged so we were looking at ways to add value to get the LTV down, so I bought a second hand K2 conservatory from eBay for £1.7k. Probability a bit steep for a used conney, but glass roof and steel floor and steel walls (with brick slips) made it a doddle to install...and I also made my first door opening ever as the French doors were into the house were into what was previously an exterior wall. Total cost of the install of the conservatory was £2.5k in the end. And then another £1.5k for the new shed and decking for the garden...
Haven’t put too many pictures of the conservatory build or refurb here, as this thread is mainly about the extension....


So that was 2013 pretty much covered off.
2014 we got our plans drawn up for the extension. We wanted an extra bedroom as there was no true master (biggest current bedroom 3.5 x 4m). Most houses on the estate have a double garage whole we had a single, so we wanted to have that extra storage space. We also wanted a bigger kitchen/diner.
Originally the idea was a straight up double storey extension, but as soon as our designer can round that idea was canned as the house has a really low roof, so joining the extension roof at 90 degrees mean that the width of the 2nd floor room were limited somewhat because of the roof line and maintaining a suitable angle for a pitched roof.
Eventually we ended up with these plans, which give us what we wanted.


We also wanted to change the look of the property, with the now popular look of white render, grey windows and some wood cladding to hide the ugly stonework.
The planning application went in during 2015 as we weren’t in a mega rush (more of this later), and was approved in December 2015.
I thought I should start documenting what is probably one of the slowest builds on this forum.
Over the past few years I’ve found diynot to be a fantastic resource for any help I’ve needed, so this thread is here to assist others and show the regular contributors exactly what project all my various questions have been for!
We bought our place in late 2012 as a very ugly 1979 detached property which needed a total refurb. The area was nice and the house has a fair bit of land with it (relatively for the area) and we thought it had potential. All the garden both left and right in the first photo is ours.
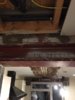
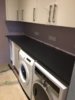
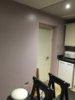
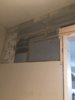
Fast forward 9 months and the inside was pretty much renovated (including 3 months of living upstairs!). Turned out ok inside but the refurb left the old kitchen, boiler, etc in situ as we had decided at this point we wanted to extend the house on the left hand side (when looking from the front), which would ultimately relocate the kitchen.
We then had to get the house remortgaged so we were looking at ways to add value to get the LTV down, so I bought a second hand K2 conservatory from eBay for £1.7k. Probability a bit steep for a used conney, but glass roof and steel floor and steel walls (with brick slips) made it a doddle to install...and I also made my first door opening ever as the French doors were into the house were into what was previously an exterior wall. Total cost of the install of the conservatory was £2.5k in the end. And then another £1.5k for the new shed and decking for the garden...
Haven’t put too many pictures of the conservatory build or refurb here, as this thread is mainly about the extension....
So that was 2013 pretty much covered off.
2014 we got our plans drawn up for the extension. We wanted an extra bedroom as there was no true master (biggest current bedroom 3.5 x 4m). Most houses on the estate have a double garage whole we had a single, so we wanted to have that extra storage space. We also wanted a bigger kitchen/diner.
Originally the idea was a straight up double storey extension, but as soon as our designer can round that idea was canned as the house has a really low roof, so joining the extension roof at 90 degrees mean that the width of the 2nd floor room were limited somewhat because of the roof line and maintaining a suitable angle for a pitched roof.
Eventually we ended up with these plans, which give us what we wanted.
We also wanted to change the look of the property, with the now popular look of white render, grey windows and some wood cladding to hide the ugly stonework.
The planning application went in during 2015 as we weren’t in a mega rush (more of this later), and was approved in December 2015.
")