Hi all,
Another couple of months have passed so about time for another update.
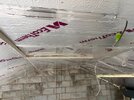
I'd been waiting for a clear and dry day to fit the dry ridge on the roof, as the first step is sticking a breathable (i think) membrane down over the ridge batten of the roof. You then lay your ridge tile, bang one of the plastic tile jointer and then once the second tile is in you screw down down the stainless steel fixing into the batten...being careful not to over tighten.
Well the day started out dry, but pretty much as soon as I laid the membrane down this happened:
Suppose I shouldn't have expected anything less in the winter!
Ridge tiles all on with the fixings. You can get some dry ridges with plastic fixings between the ridge tiles, but the stainless steel I think is a bit better given that it'll be exposed:
Moving onto the inside, I started to fit the 100mm insulation between the rafters.
This was a pig of a job as I measured and fitted the rafters rather than being (in hindsight) sensible and using a bit of wood or something to exactly fix the width of the rafters all the way along. This mean that my spacings were all different top to bottom (unusually by +/-5mm, but enough that every bloody piece of PIR had to be cut to the space and then shaved/wrestled/bashed into place. Also I was too casual about the angles at the top, meaning extra foam was needed in places.
You live and learn!
50mm PIR then goes over the top at a 90 degree angle and it all gets foamed and taped as you go to fill in the little gaps.
I've deviated from my plans a bit as the original plans just had an inverted V shaped vaulted ceiling, but I wanted somewhere to run wires, and also to avoid faffing with boxing in the RSJ, so I used a load of left over timber to add a flat panel to the roof.
I am also having a small kitchen area so planned to have a small internal stud wall to break up the space. On top of this area I also wanted some general storage, and therefore although I insulated all the ceiling like its vaulted, approx 1/3 of the space will have a regular ceiling at 2.4m with a bit of storage above.
In order to accomodate the ceiling, I had to cut back into my newly fitted insulation to allow the joists to sit on the wall plate. I figured it would be easier to get the insulation in place, cut out a slot to the wall plate, then fit the wood...rather than trying to work around a pre-fitted ceiling.
I've got two 6 x 2s which will be coach bolted together (wasn't done in the picture below) that run from wall plate to wall plate. I have one of the 6x2s cut so 50mm of each sit on the 4x2 stud wall (with the other side on the wall plate) and then one 6x2 that runs over the longer span and entirely over the stud wall, with a shorted bit just on to the other wall plate. Once bolted together I think this should be fairly strong - I've not had any calcs done for this bit, as it's just for a bit of storage - the height above is limited, so it;s not like I'll be walking around up there!
The other side has a ledger plate wish is through-bolted into the wall, with the 5x2 joists on hangers running at 90 degrees. I used 5x2 here as I had a load spare from my decking, and once i stick loft boards on top it'll be about the same height as the 6x2s on the perimeter.
Some of you may be wondering why I went with the joists running parallel, rather than just more joists from side to side. That was because at either end there was some noggins in the roof that held the wall straps in place. (You can see one taped over on the image above. These straps were only about 100mm off the wall plate height, so I wouldn't have been able to fit deep enough joists for the span on the wider side (about 3.5m), so I needed to fit the wood in a way that didn't interfere with those straps.
It's kind of hidden in the picture below by the scaffold, but I've tactically put noggins in the stud wall for sockets, and where the wall cabinets and radiator will go, so give me some decent fixing spots.
Getting closer to being finished now, and Milka approves of the new space!
A fairly cheap(!) month or two for me. Insulation was £650, tape and expanding foam was another £100 or so as my foam gun was knackered. £150 on the 6x2 and 4x2 C24 timbers, and the rest came out of my leftovers from the house extension. Dry ridge kit was also a leftover, as were all the hangers, bolts, screws, etc I've been using.
So total garage spend to date £34k ish and total overall spend £153k.
Next up - electrics! Cheers