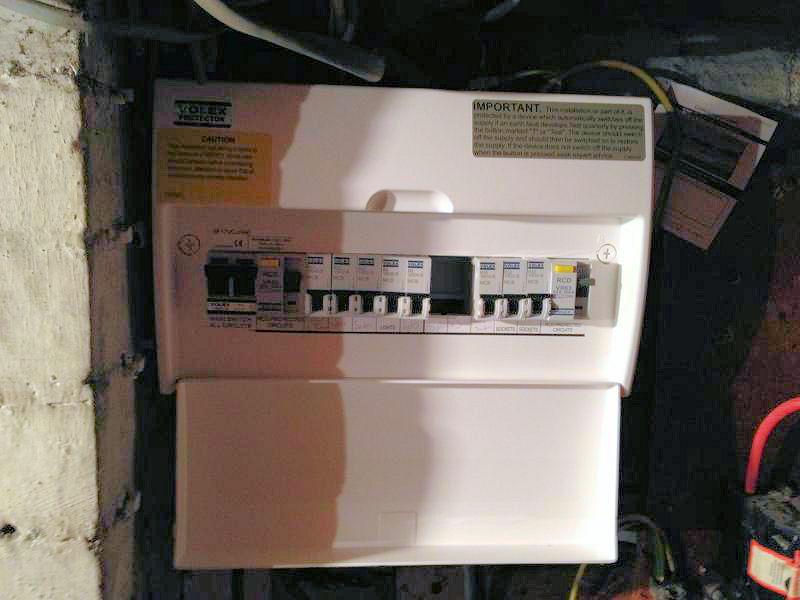
Picture with CU visor down showing MCBs, are the spares blanked or exposed?
Sorry you lost me there. How would I be able to tell?

Picture with CU visor down showing MCBs, are the spares blanked or exposed?
You have RCD on left with yellow test button, then three MCBs going to the right of this, then two spares with no MCBs in, these should have blank plates over normally supplied white, the picture is either shadowing there existence or they are not there. You should not be able to but your fingers in to this area.Picture with CU visor down showing MCBs, are the spares blanked or exposed?
Sorry you lost me there. How would I be able to tell?
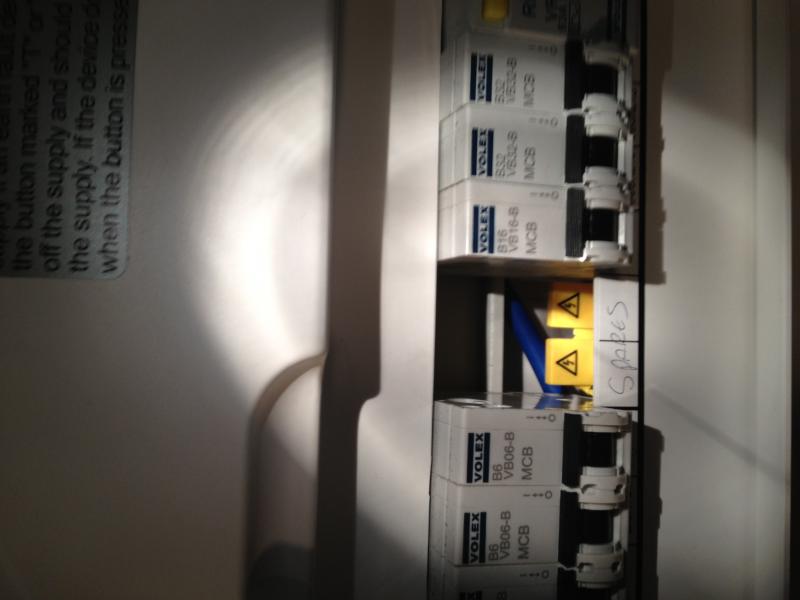
You have RCD on left with yellow test button, then three MCBs going to the right of this, then two spares with no MCBs in, these should have blank plates over normally supplied white, the picture is either shadowing there existence or they are not there. You should not be able to but your fingers in to this area.
You have RCD on left with yellow test button, then three MCBs going to the right of this, then two spares with no MCBs in, these should have blank plates over normally supplied white, the picture is either shadowing there existence or they are not there. You should not be able to but your fingers in to this area.Picture with CU visor down showing MCBs, are the spares blanked or exposed?
Sorry you lost me there. How would I be able to tell?

There is a hole there, here's an image showing what I can see inside...
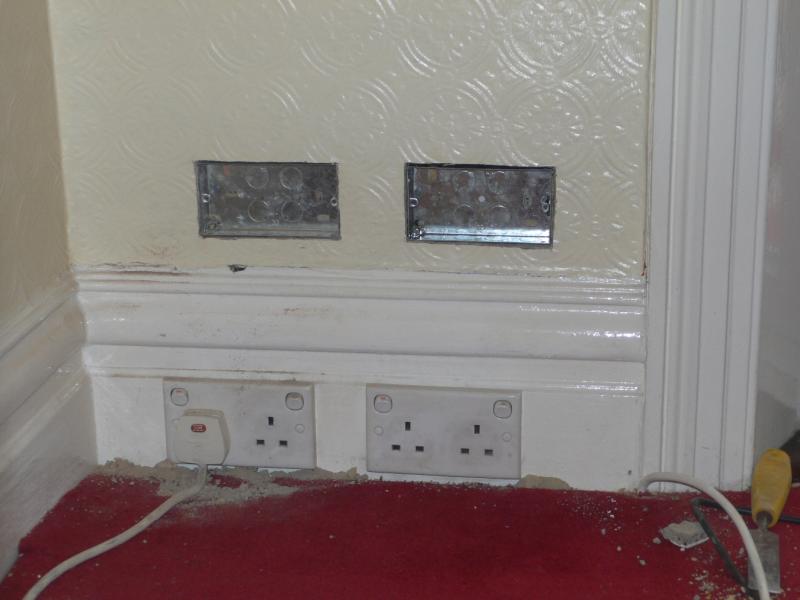
They are not getting worse, they were already like that before you showed us!By the sound of it, things are getting worse and worse the more I show you.
He may try but he would be telling you untruths, as there is evidence of non-compliances and likely lied on the inspection schedule.If I get this bloke back, couldn't he just turn around and tell me what he's done is fine and be able to talk his way out of it?
Well he's either had a bad day, or those trade/builder sites are unreliable.I found him through the 'mybuilder' website, he had lots of positive reviews, was covered with NICEIC(?) and I double checked he was on the 'competent person' website.
It's a low standard but get him back to sort it out.Or, would you say that what he's done is to a very low standard and I would be better trying to get somebody else to come and fix the work?
I found him through the 'mybuilder' website, he had lots of positive reviews,
I found him through the 'mybuilder' website
If you need to find a tradesperson to get your job done, please try our local search below, or if you are doing it yourself you can find suppliers local to you.
Select the supplier or trade you require, enter your location to begin your search.
Are you a trade or supplier? You can create your listing free at DIYnot Local