
- Joined
- 4 Nov 2020
- Messages
- 11
- Reaction score
- 0
- Country

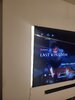
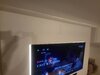
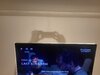
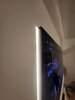
Hi All,
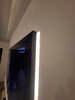
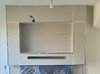
Took on my latest DIY project to build a TV featurewall, but unfortunately due to not allowing any allowance for errors in my measurements it seems the TV won't fit into the opening. On one side it's got enough of an opening, but the other side is too small - by about 0.7cm...
My question is what would be the best way to rectify it? It's all plasterboard, so I was thinking of using a Stanley knife to cut off the excesss from the top left and then use something to smooth it out? Do you think it will work?
I've attached photos as well as one before I plastered it.
Cheers
 (and could I use my block plane, or does it need a power planer?) I know that you can shave 5mm off most doors all round...
 ")
