Hive Gen 3 - Lost power to boiler

Joined
8 Jan 2019
Messages
4
Reaction score
0
Country
United Kingdom
Hi,

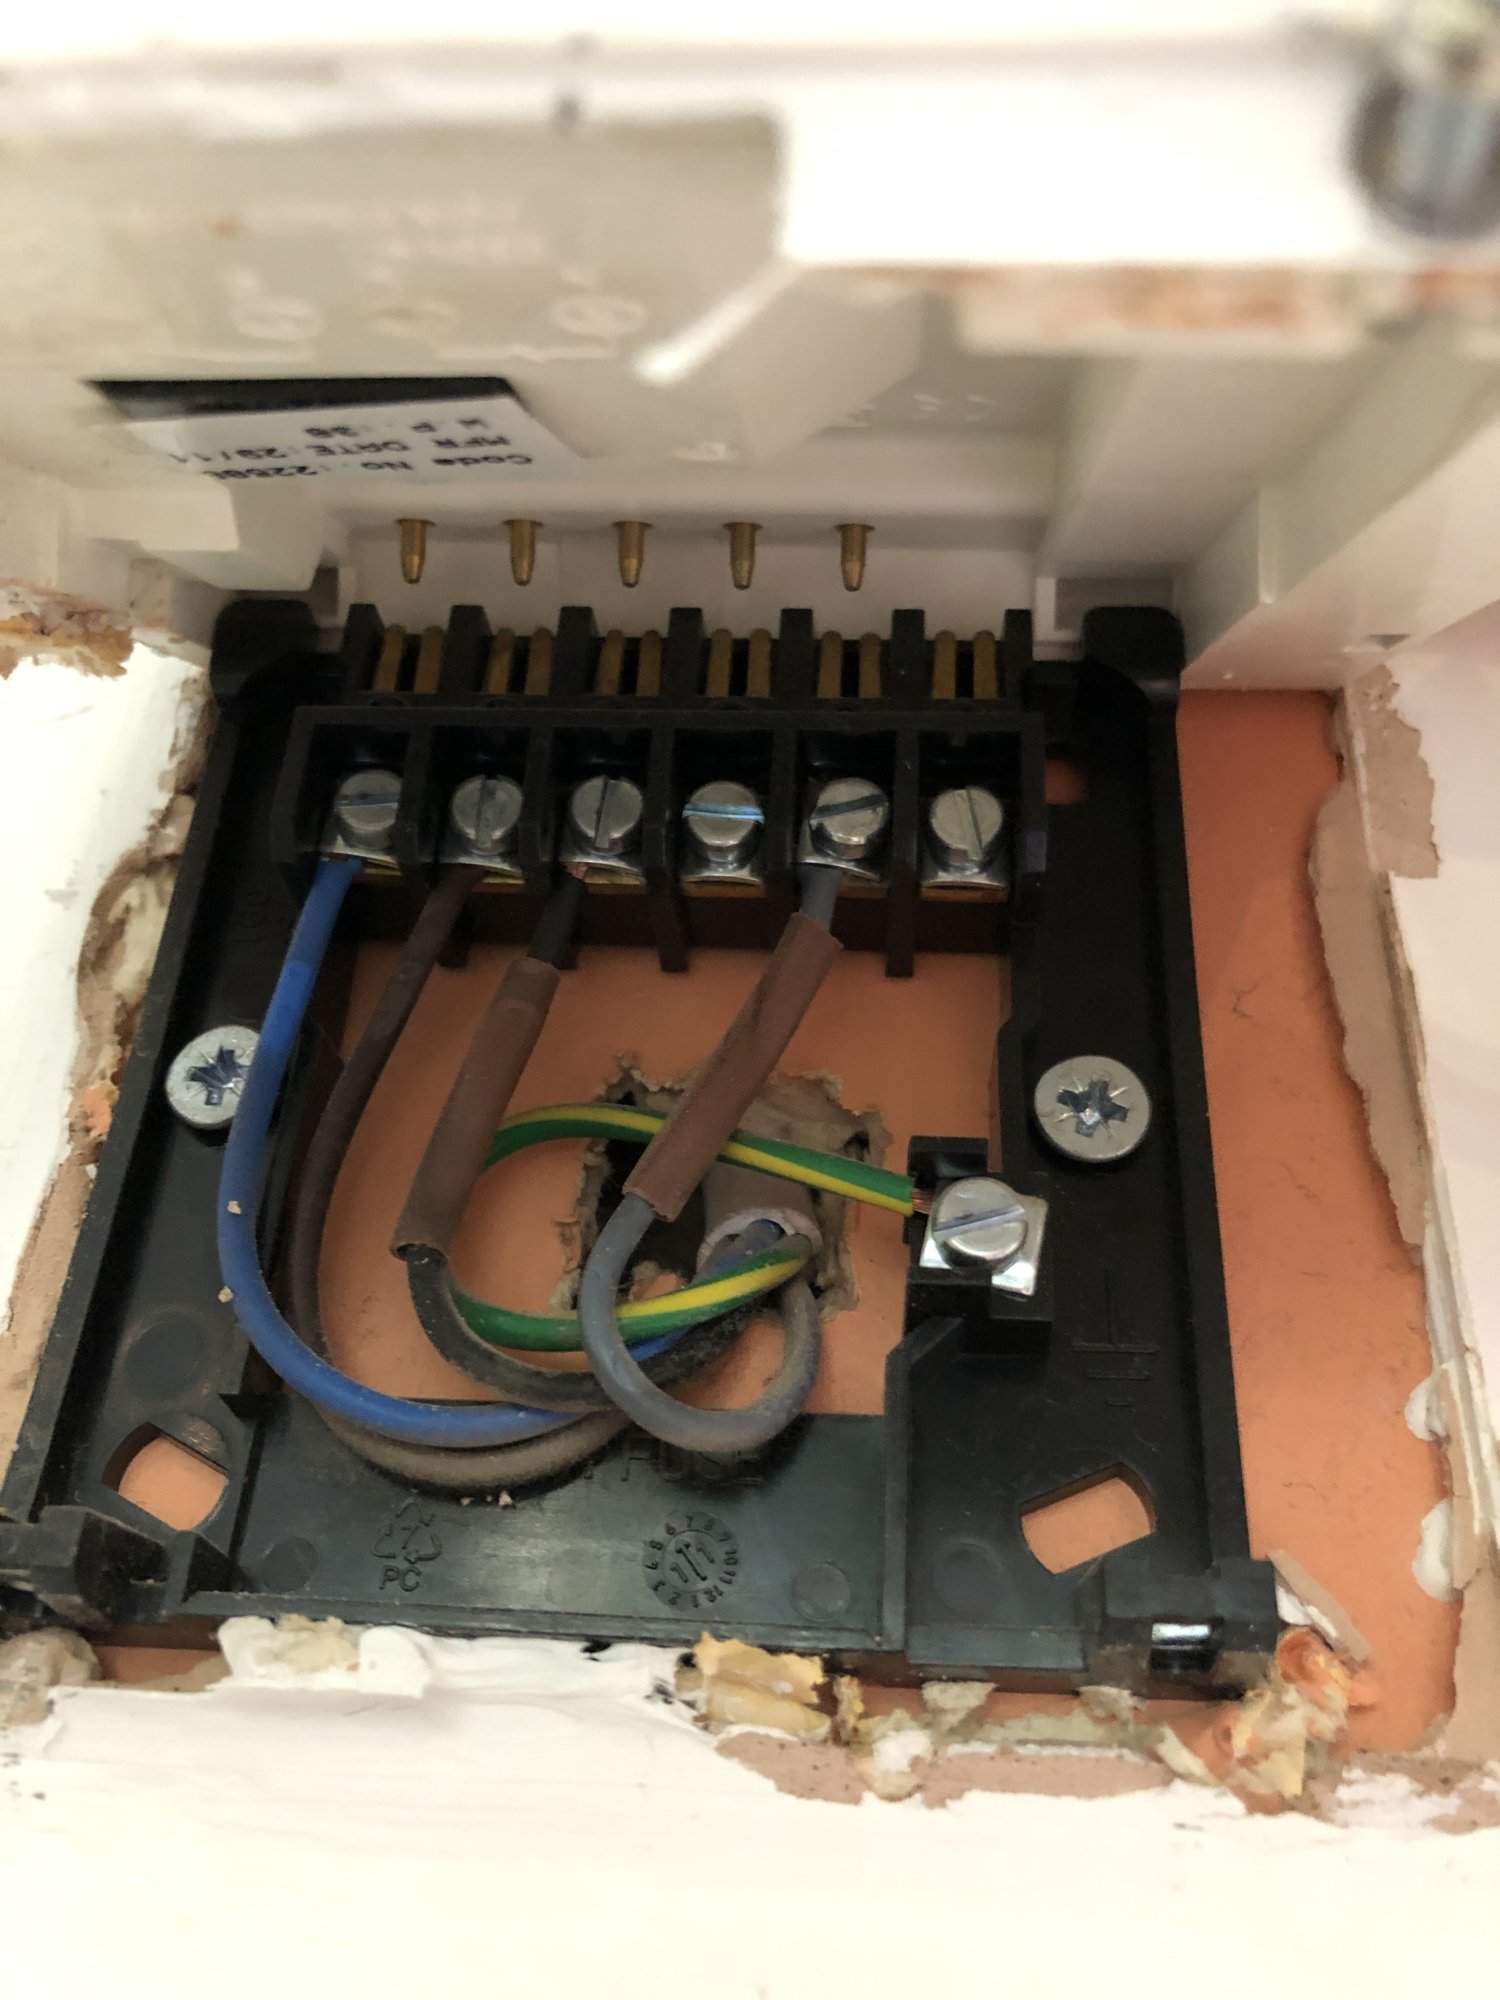
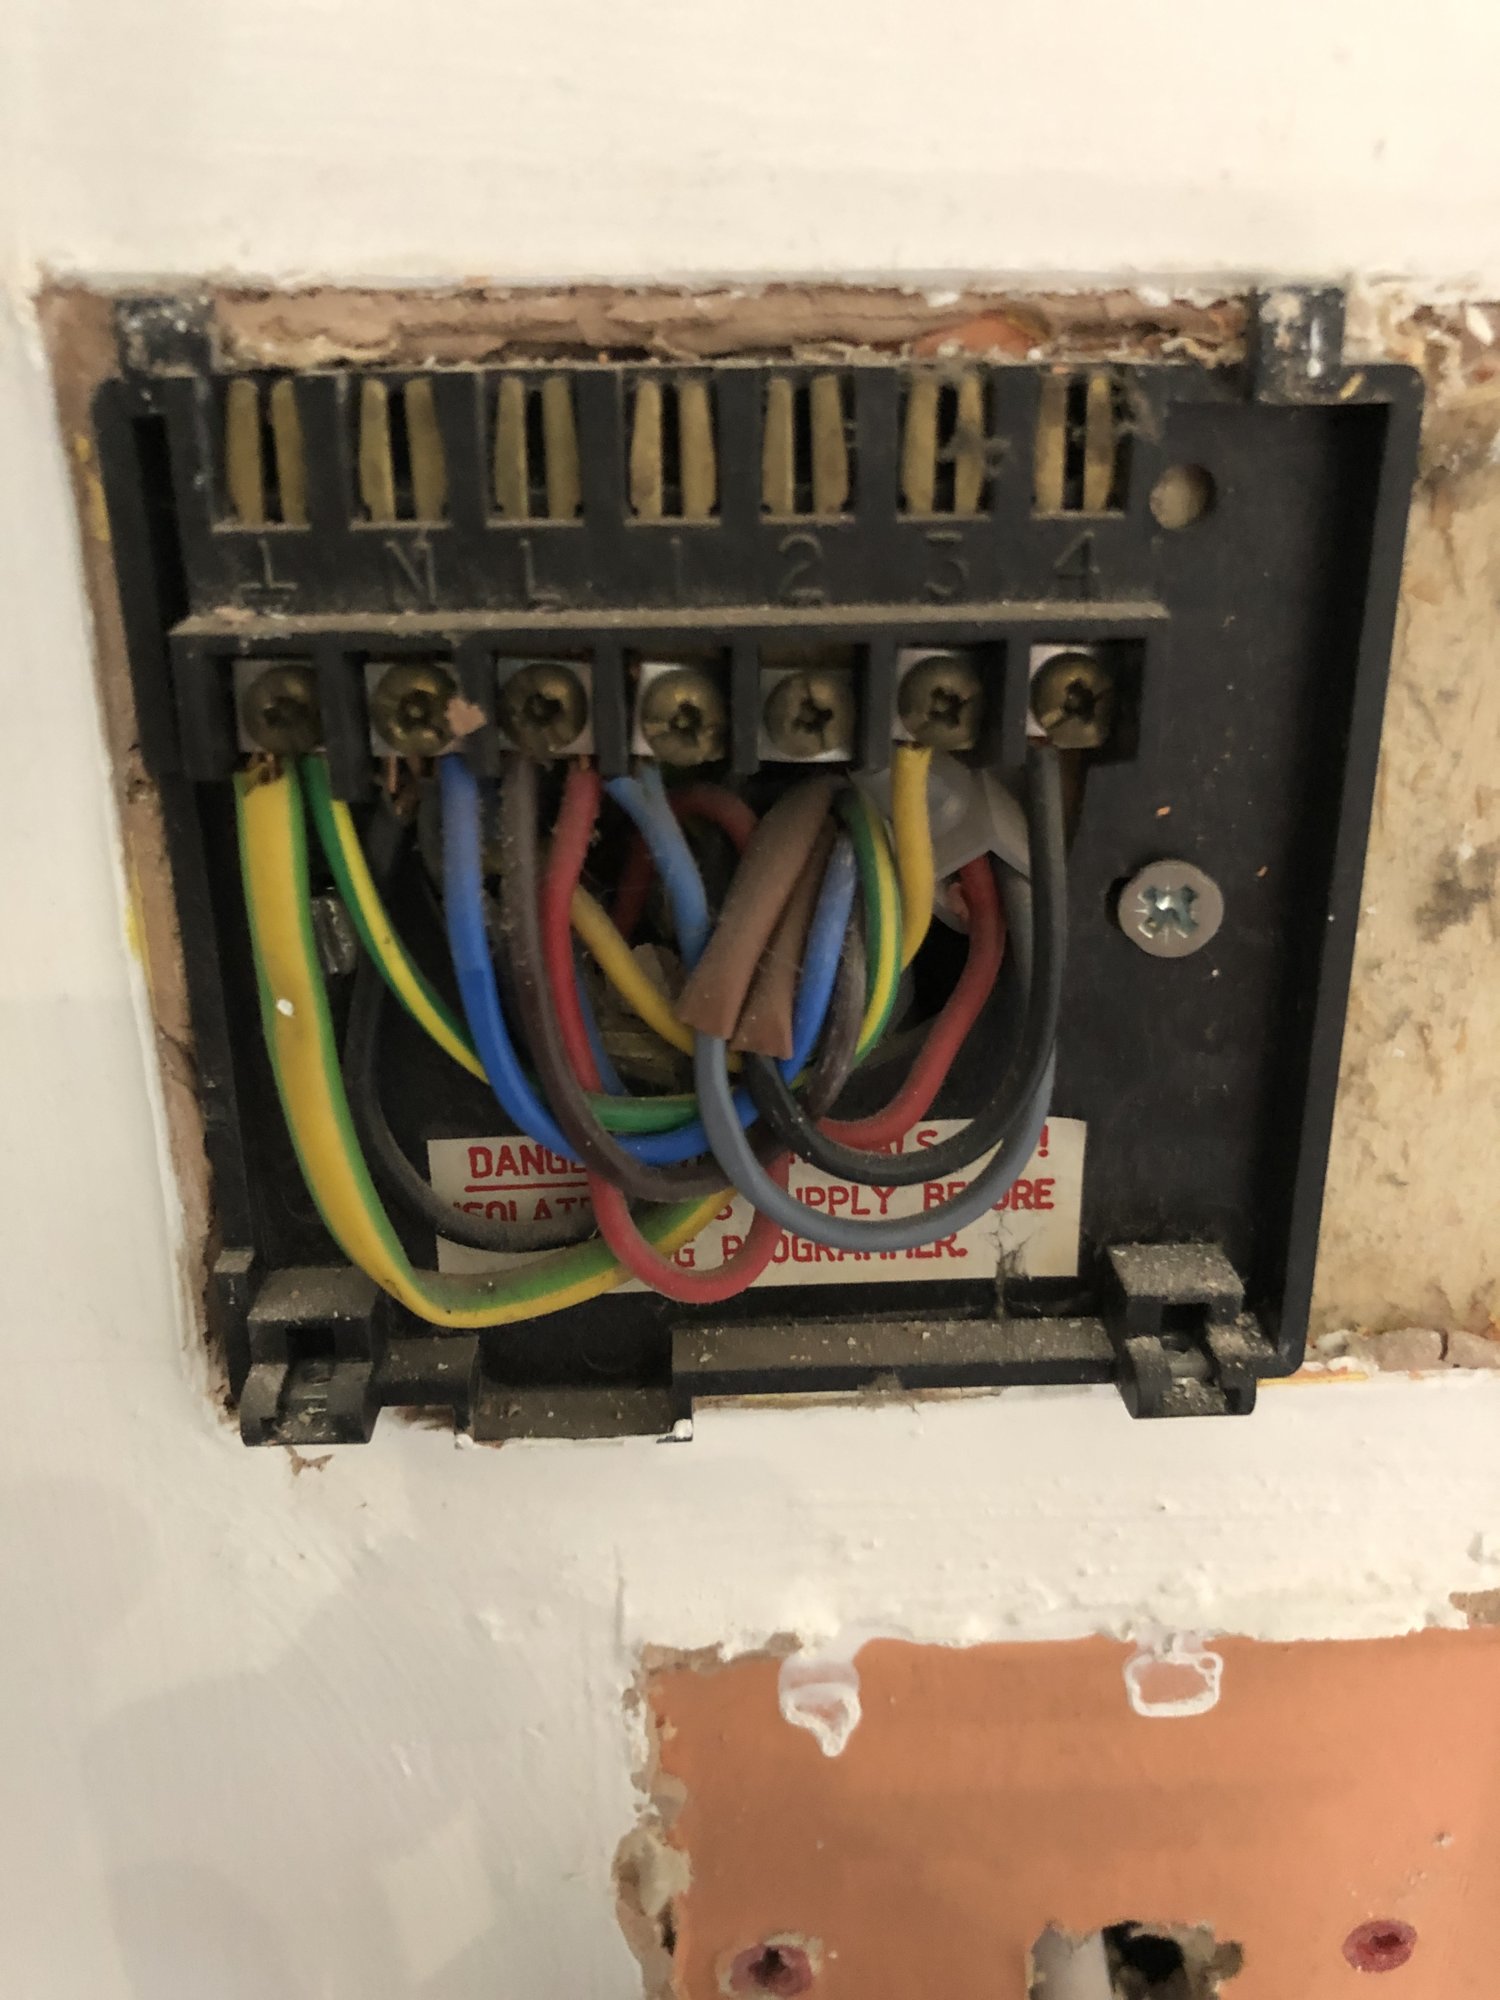
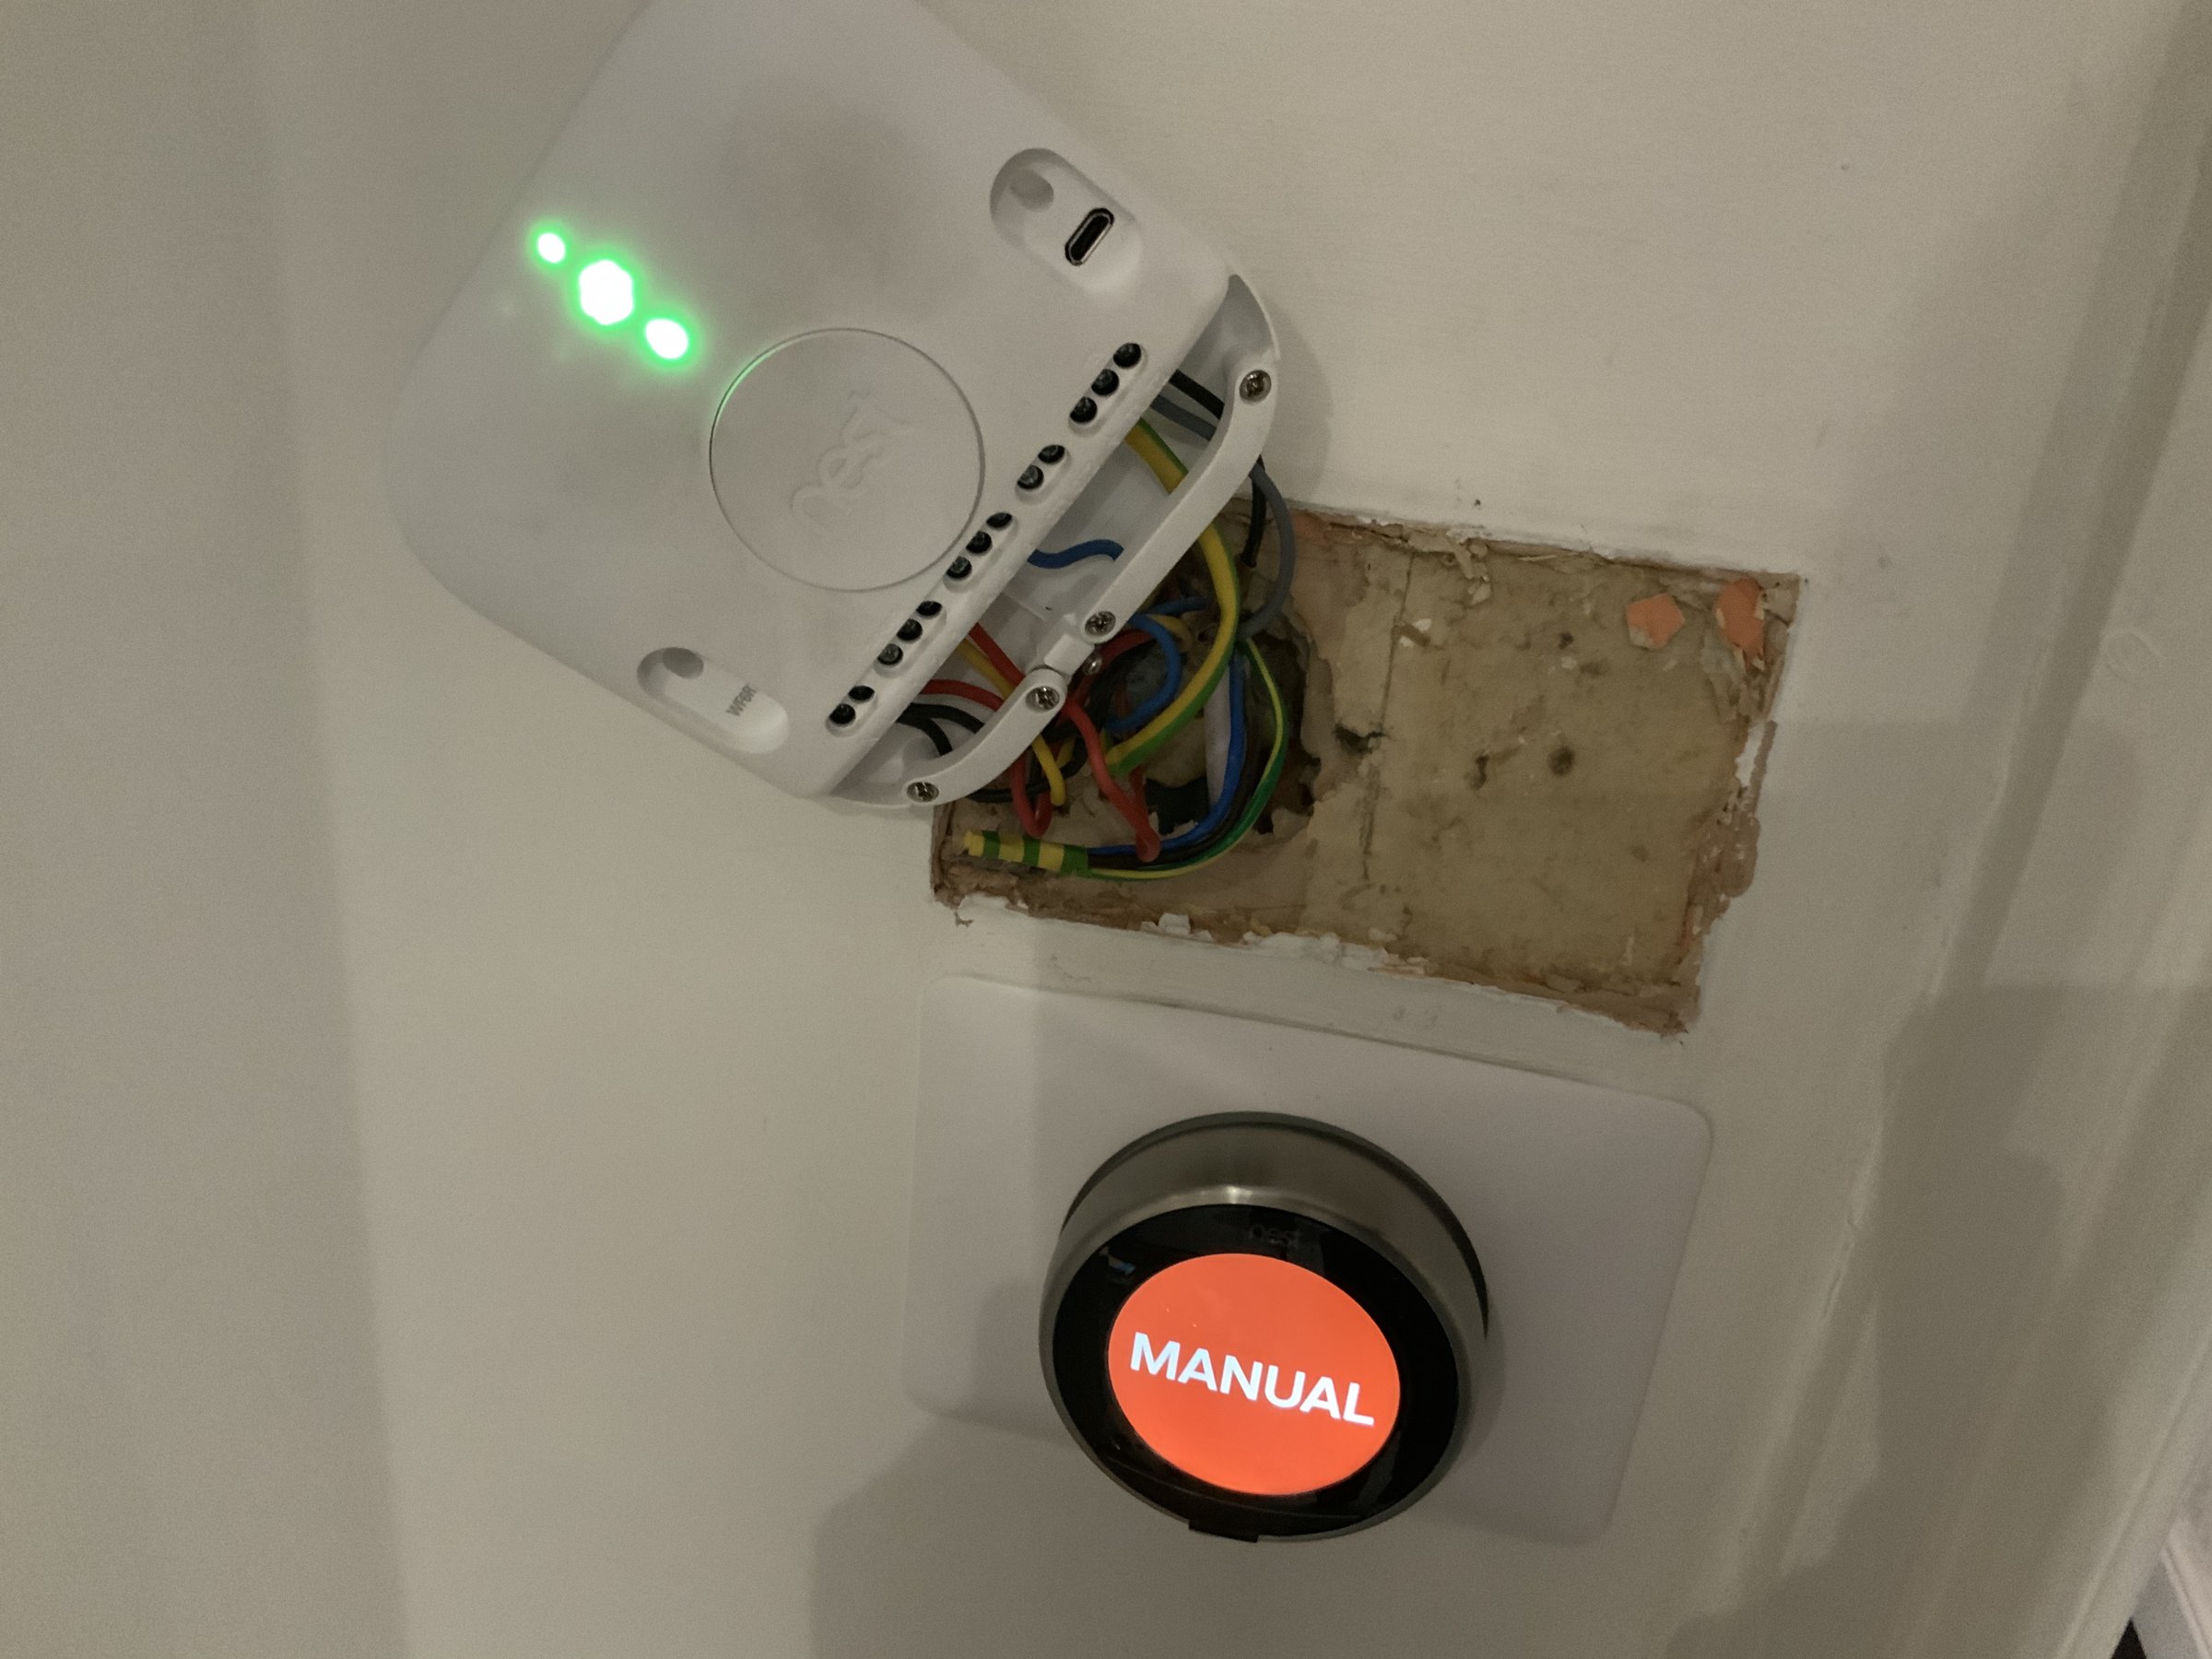
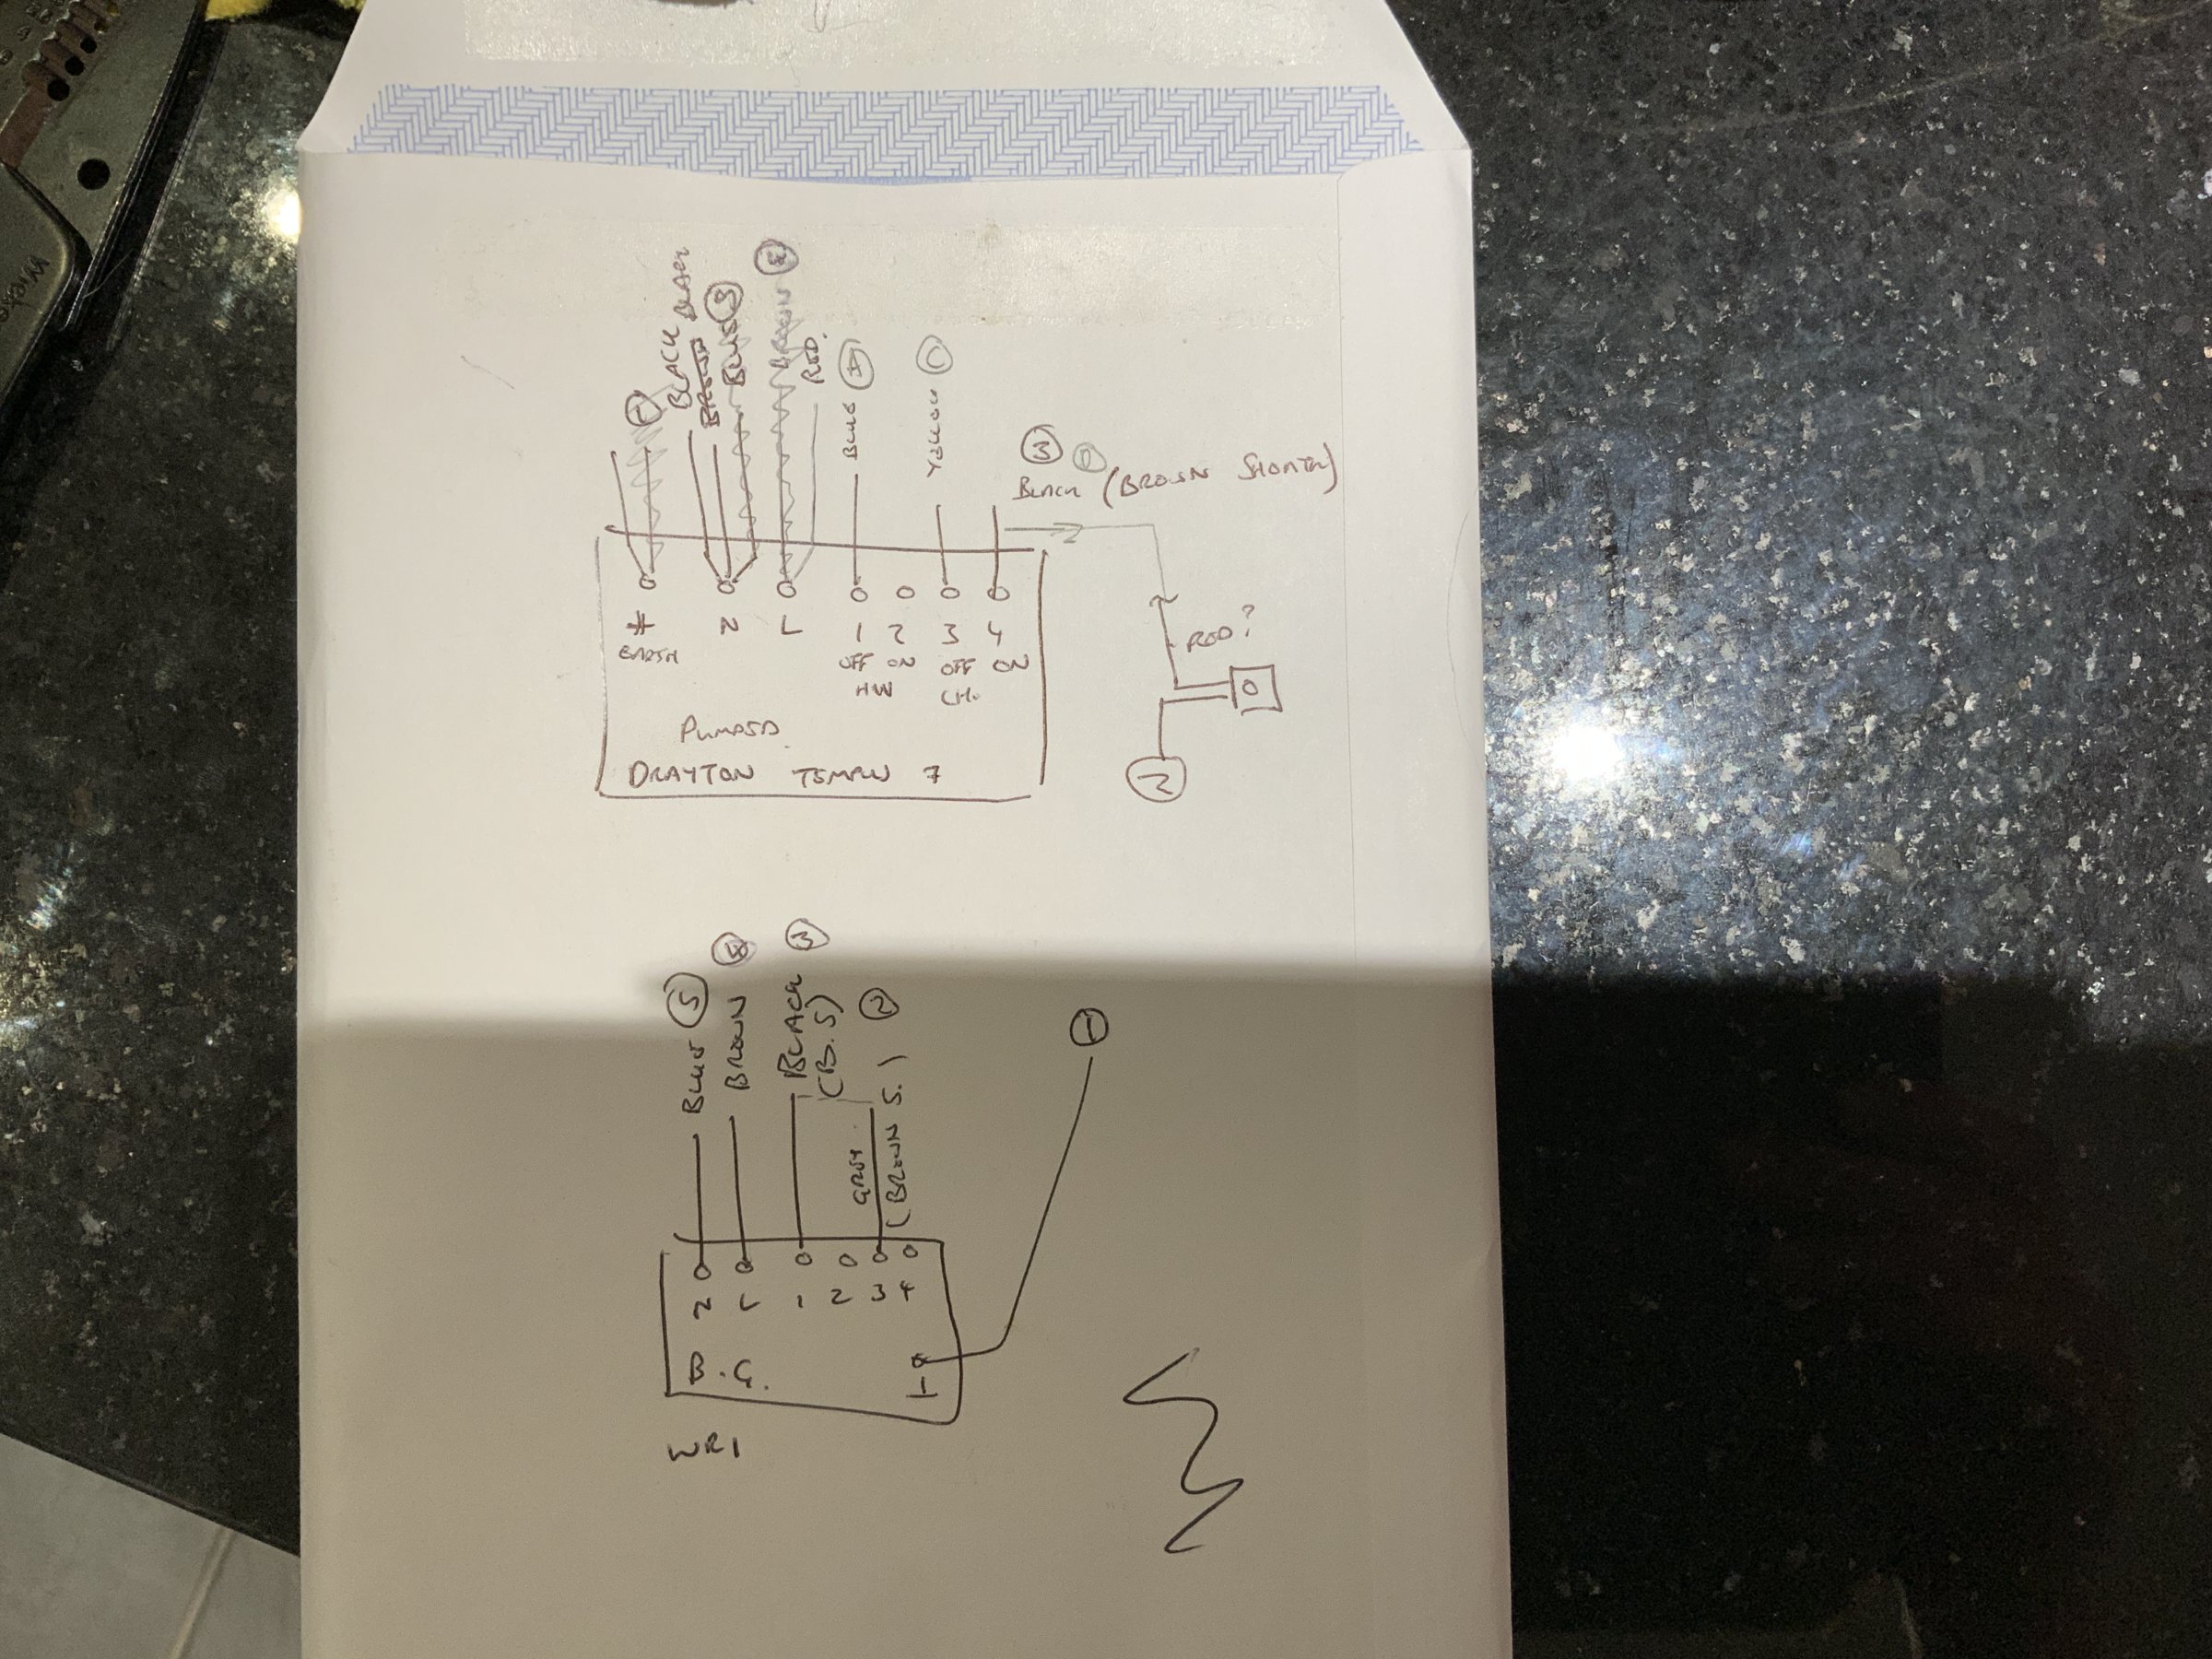
I have purchased and attempted to install a Hive Gen 3. The existing set up was a thermostat (Drayton Tempus 7) and a WR 1 thermometer. Looking at the existing install and the wiring diagrams with the hive booklet I have assessed that I have an S-Plan configuration.

So I have powered everything back up. The hive unit has come on-line without issue. However, now my boiler (Baxi Solo 15 HE) shows no lights and I assume that I have no power. I suspect that there is something incorrect with the wiring. Can anyone help point me in the right direction?

Thank you,

David
 
Sponsored Links
Here are some photos of the before and after install...
 
In your photo of the wired up Heat Link, it looks like you have (difficult to be sure though because of the angle) a wire connected to the Heat Link terminal 1 why? There isn't a wire shown going to terminal 1 in the Nest manual.

term 1.JPG


Also, there is no connection to 5 which will definitively be required, and is shown in the manual connected to L and 2.

The terminals of the Tempus are as below.

tempus.JPG


The existing wires should simply be moved from the Tempus terminals to the Heat Link terminals that have exactly the same function, not the same terminal number. Not all of terminals will have wires connected, only those that were there originally, need to be re-connected to the Heat Link.

N & L are self explanatory.
For the others, the terminology is slightly different, but the meaning & function is the same. So:
Tempus 1. HW off = Nest 4. Hot water satisfied
Tempus 2. CH off = Nest 1. Heating satisfied (this terminal won't be used though)
Tempus 3. HW on = Nest 6. Hot water call for heat
Tempus 4. CH on = Nest 3. Heating call for heat

The Heat Link L terminal will also need linking to the two Heat link common terminals 2 & 5

Nest.jpeg


The existing room thermostat must be decommissioned properly. It cannot just be disconnected, otherwise the the heating wiring will be 'open circuit' and will not come on. If the existing thermostat is still wired in, as a temporary measure, simply turn it to its maximum setting and the Nest will take over control. If you have removed it, or plan to do so, the terminals where its switching wires were connected to, need to be joined together.

So assuming this is the original WR1 thermostat receiver:

exist stat.JPG


Trace the cable back to its origin and disconnect all 4 wires and the earth. Then insert a wire link between the terminals where the grey wire with brown sleeve and the black wire with the brown sleeve (from thermostat terminals 1 & 3) have just been removed from so that they are joined together, this will complete the circuit. The original thermostat and its cable can now be removed.
 
Last edited:
Thanks for the reply!

There’s no cable going to terminal 1 - I think it’s just the angle off the photo. The red cable is actually going to the L terminal.

I have my connections incorrect, and have since modified as per the Tempus diagram which you attached. I have powered back up and the boiler is still without power, but I still have to link L and terminals 2 & 5...
 
Sponsored Links
Well done! glad it's working. Sorry I couldn't quite see clearly which terminals the wires were connected to.

Omitting the link between L, 2 & 5 is quite common. The Nest has voltage free terminals so that it can be used with combi's that have 24v control, so when 230V is used a link to the L has to be made. Most programmers like the Tempus aren't designed for use with combi boilers, so the link to 230V is already made internally.

EDIT:
I have purchased and attempted to install a Hive Gen 3.
BTW, I've just noticed the original post is entitled Hive Gen 3. Which It's actually a Nest Gen 3 not a Hive. ;)
 
Last edited:

DIYnot Local

Staff member

If you need to find a tradesperson to get your job done, please try our local search below, or if you are doing it yourself you can find suppliers local to you.

Select the supplier or trade you require, enter your location to begin your search.


Are you a trade or supplier? You can create your listing free at DIYnot Local

 
Back
Top