

I would really appreciate some advice on how to install a floor standing bath tap I have just purchased. It is the Nuie Bailey BAI321 and although there is a data sheet for the tap, there are no installation instructions and this is my first free standing tap install.
Although their awful website suggests there are downloadable instructions here, it actually downloads the Datasheet. Looks like their website was designed and built by one of their employees during their lunch break
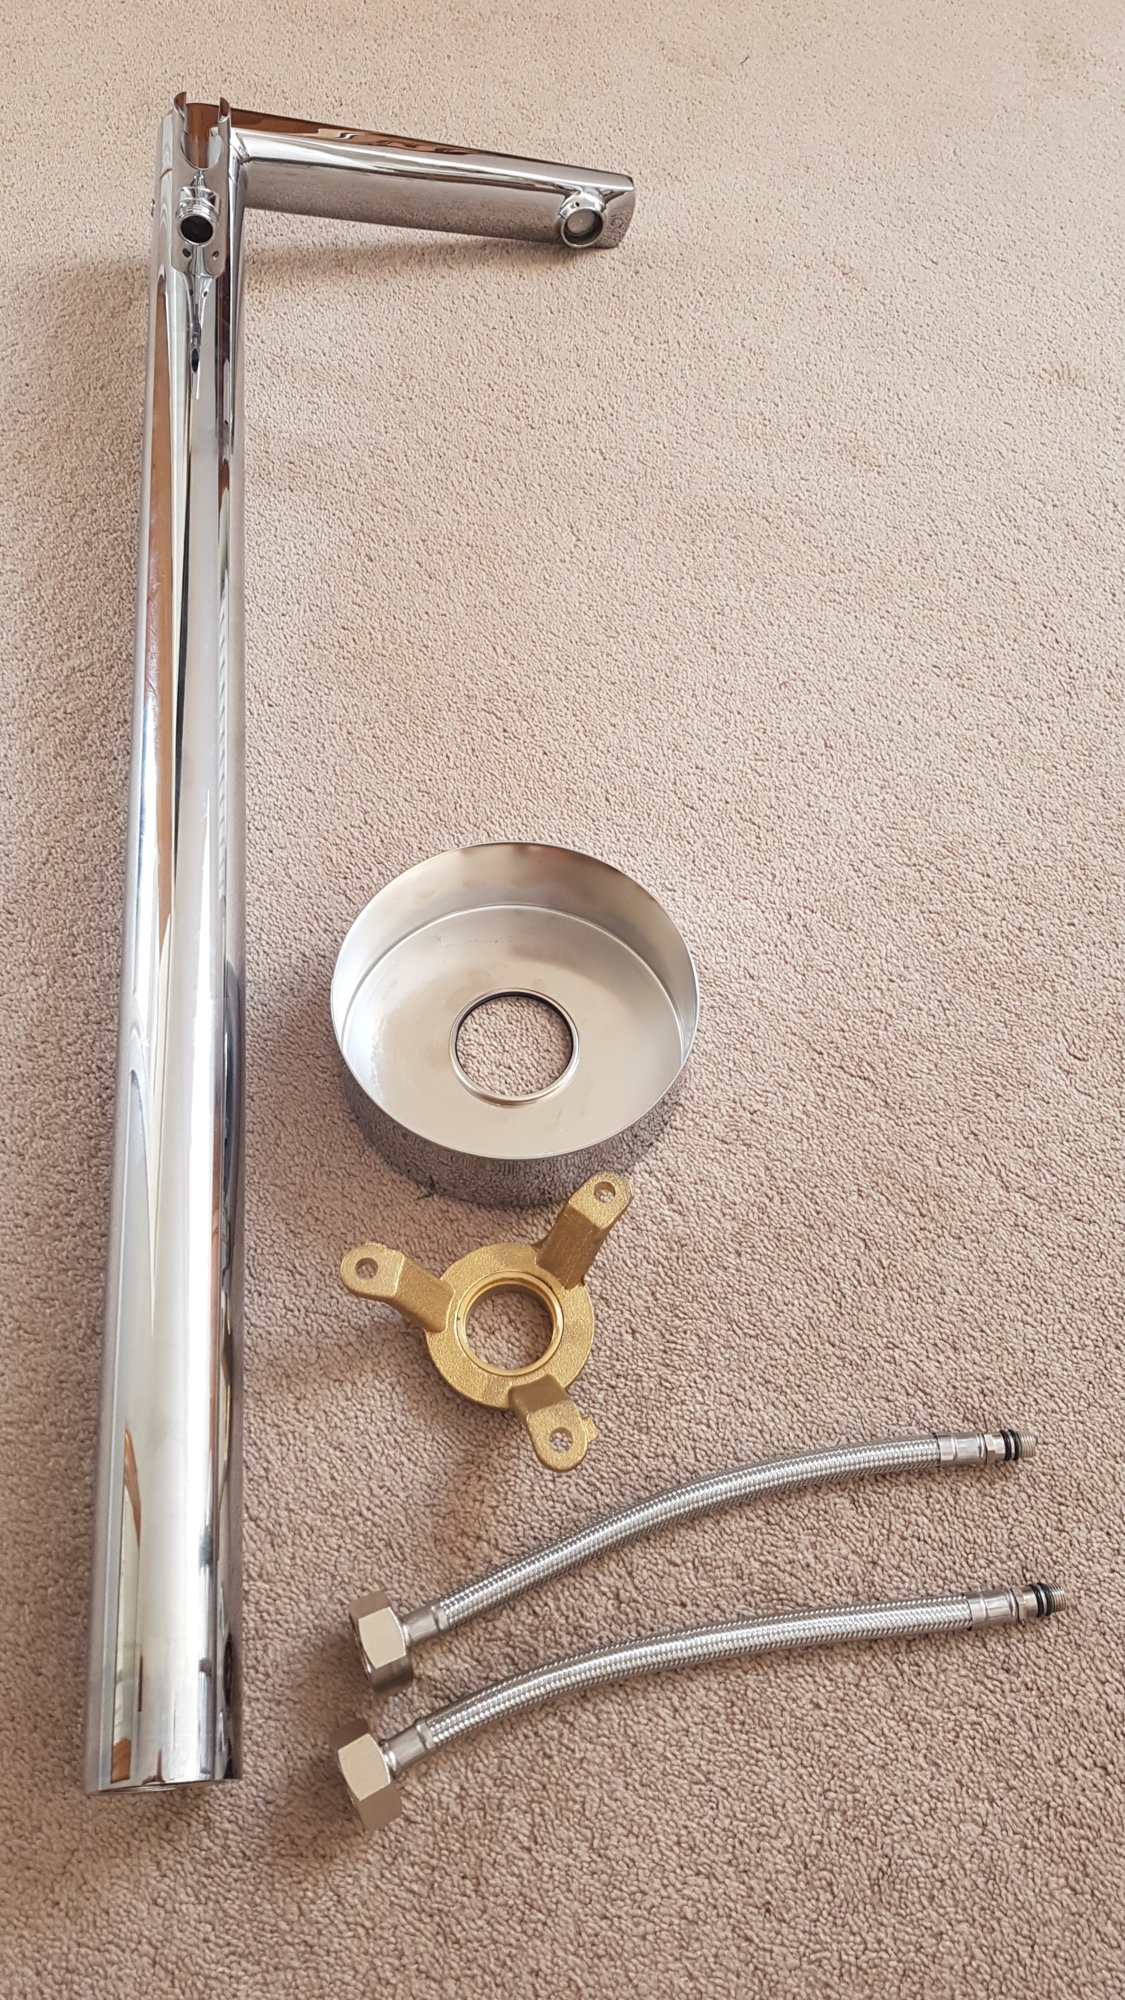
So, here's what is provided to fix the tap to the floor:
And this is how they fit together:
What I've determined is that the chrome cover and brass fixing must be screwed on to the bottom of the tap column before the two tails can be screwed in as the nuts on the tail are "huge"!
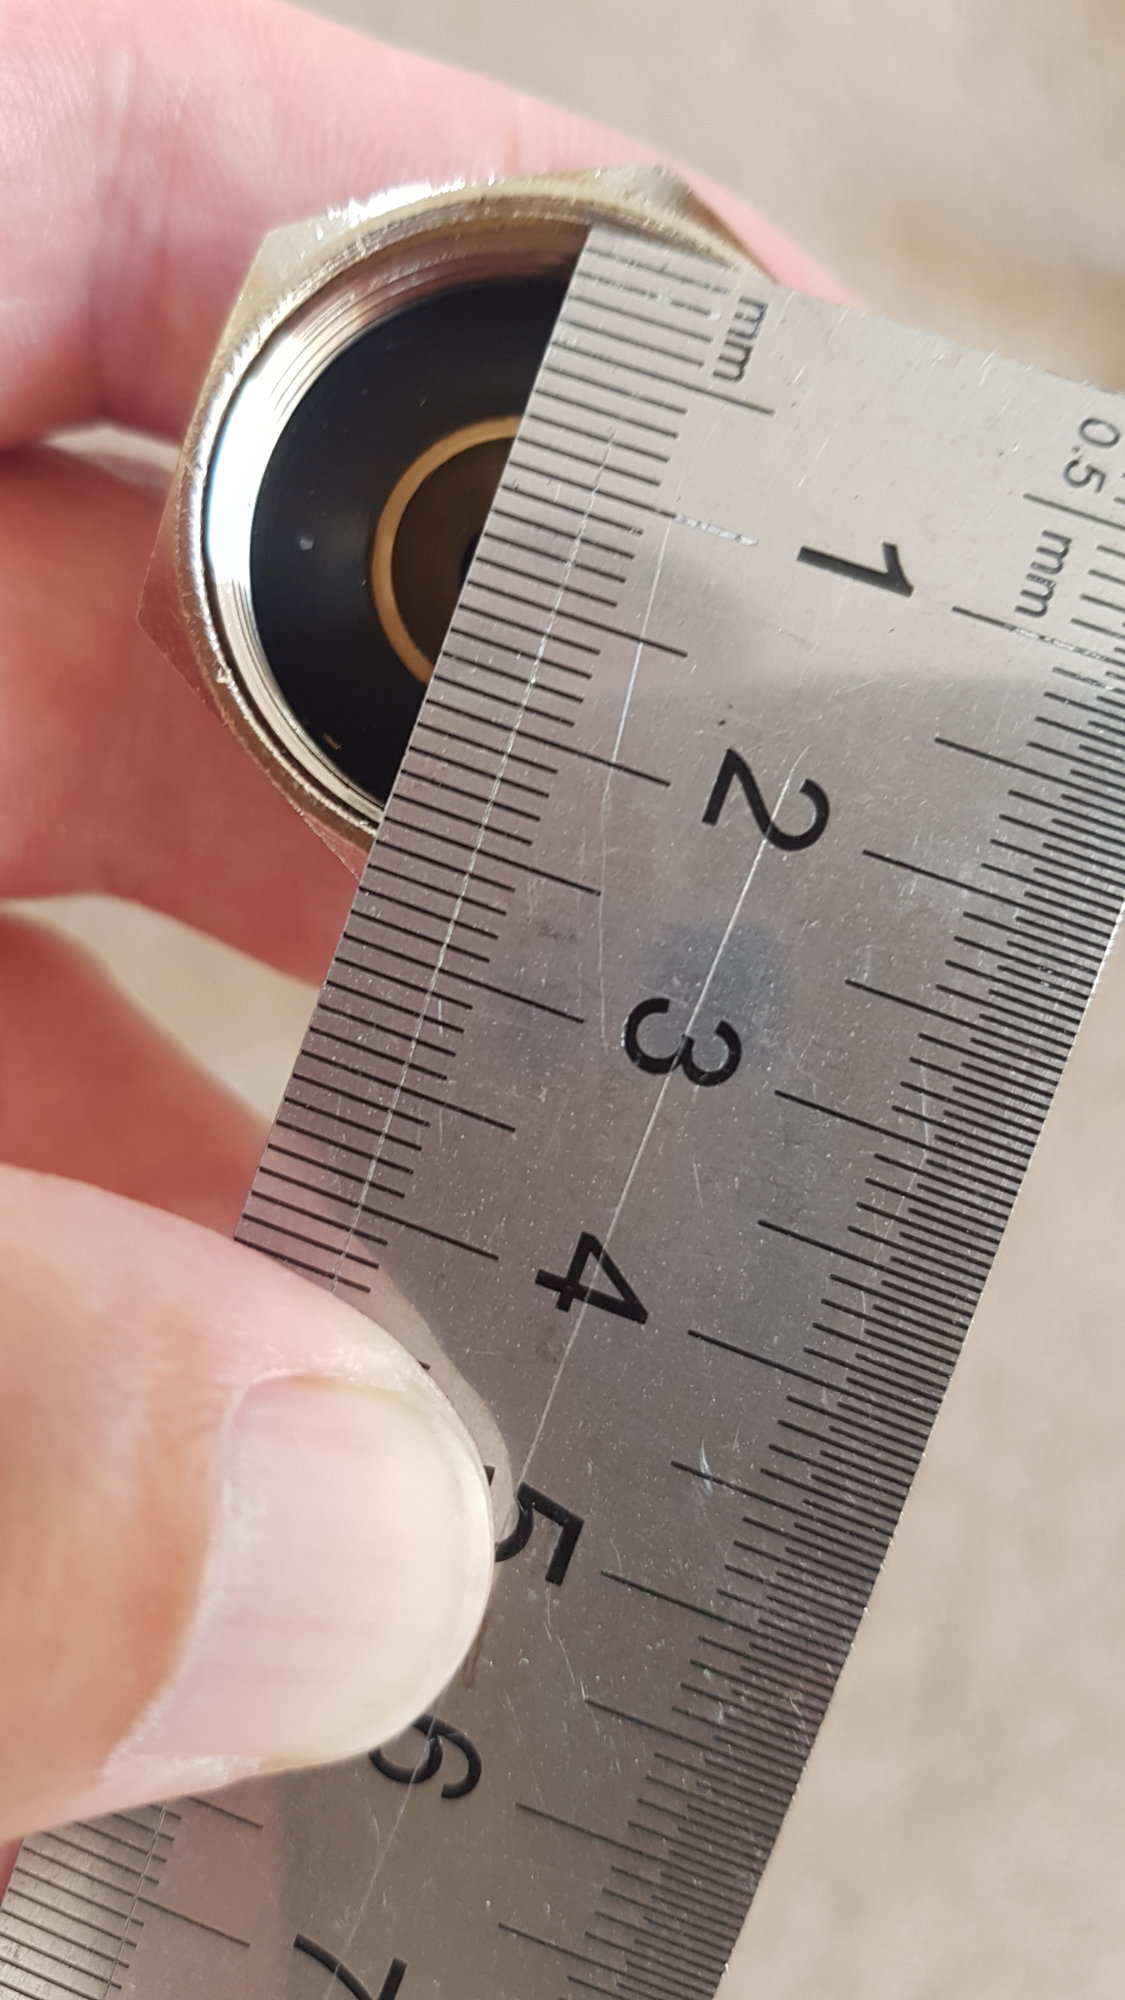
Looking at the tails, they appear to be 9mm at one end and 1" at the other, but I think this translates to a 3/4" male screw?:
I appreciate that 3/4" fittings are usually used to attach to bath taps, but in this case, that end of the tail needs to attach to the pipes or possibly an isolation valve, so why on earth supply such a large fitting, especially when the bore of the tails is so small!
I believe a Compression Adapting Maile Coupler 15mm x 3/4" can be used to attach the tail to 15mm pipe (assuming I've got the size of the nut right).
I was wondering if I should replace the tails with some that had a smaller nut i.e. 1/2", possibly these (although they have an m10 fitting - not sure if it is the same size). Despite the size of the nut on the tails, they do seem to be reasonably good quality and I like the fact they have two rubber seals, rather than the one on all the tails sold by Screwfix. I'm assuming they are compatible.
In terms of installing the floor standing tap, is there a standard way of doing this? I had assumed I would position the supply hot and cold pipes up through the floor, then after tiling is complete, attach the tails to the pipes. However, there isn't any room in the bottom of the tap fitting (above the floor) to accommodate the tail ends, given they protrude a lot beyond the bottom of the fitting.
Alternatively, I could drill a large hole in the tiles/floor to allow the tails to attach to the pipes "below" the floor, but the 3 legs of the brass fitting are close together so this wouldn't allow the hole to be large enough.
I guess I could allow the brass fitting to fix to a small "platform" below the level of the floor. The chrome collar slides up and down the tap, so would cover the large hole, however, doing this would loose some of the height of the tap.
Another possibility might be to buy some "really long tails" and run these under the floor to the pipes which could be positioned underneath the freestanding bath as this has a "void" that would hide the connections.
I would appreciate your thoughts.
Although their awful website suggests there are downloadable instructions here, it actually downloads the Datasheet. Looks like their website was designed and built by one of their employees during their lunch break
So, here's what is provided to fix the tap to the floor:
And this is how they fit together:
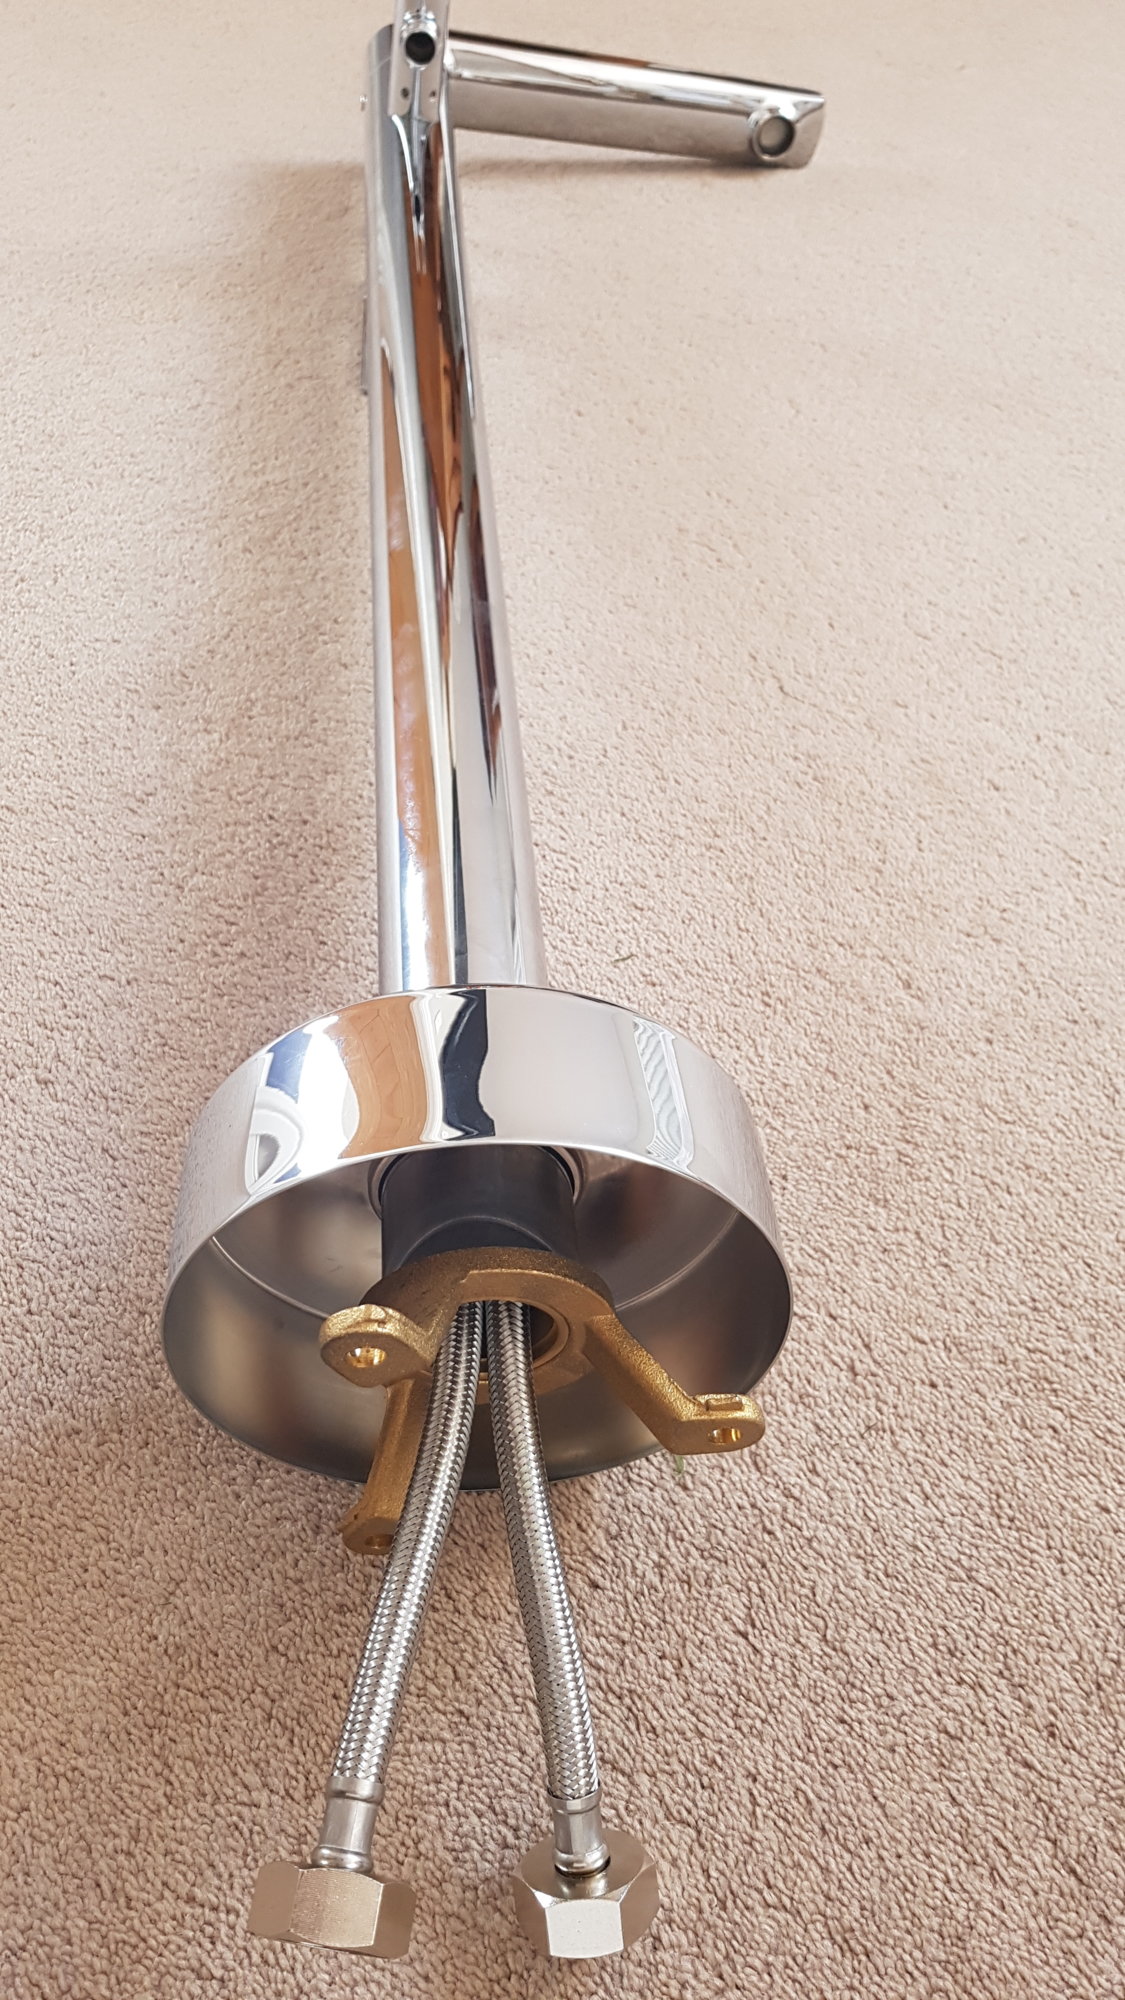
What I've determined is that the chrome cover and brass fixing must be screwed on to the bottom of the tap column before the two tails can be screwed in as the nuts on the tail are "huge"!
Looking at the tails, they appear to be 9mm at one end and 1" at the other, but I think this translates to a 3/4" male screw?:

I appreciate that 3/4" fittings are usually used to attach to bath taps, but in this case, that end of the tail needs to attach to the pipes or possibly an isolation valve, so why on earth supply such a large fitting, especially when the bore of the tails is so small!
I believe a Compression Adapting Maile Coupler 15mm x 3/4" can be used to attach the tail to 15mm pipe (assuming I've got the size of the nut right).
I was wondering if I should replace the tails with some that had a smaller nut i.e. 1/2", possibly these (although they have an m10 fitting - not sure if it is the same size). Despite the size of the nut on the tails, they do seem to be reasonably good quality and I like the fact they have two rubber seals, rather than the one on all the tails sold by Screwfix. I'm assuming they are compatible.
In terms of installing the floor standing tap, is there a standard way of doing this? I had assumed I would position the supply hot and cold pipes up through the floor, then after tiling is complete, attach the tails to the pipes. However, there isn't any room in the bottom of the tap fitting (above the floor) to accommodate the tail ends, given they protrude a lot beyond the bottom of the fitting.
Alternatively, I could drill a large hole in the tiles/floor to allow the tails to attach to the pipes "below" the floor, but the 3 legs of the brass fitting are close together so this wouldn't allow the hole to be large enough.
I guess I could allow the brass fitting to fix to a small "platform" below the level of the floor. The chrome collar slides up and down the tap, so would cover the large hole, however, doing this would loose some of the height of the tap.
Another possibility might be to buy some "really long tails" and run these under the floor to the pipes which could be positioned underneath the freestanding bath as this has a "void" that would hide the connections.
I would appreciate your thoughts.
